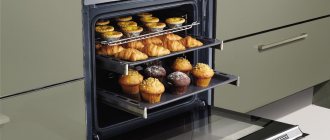
Connecting the oven to the electrical network involves calculating the wiring parameters and automatic protective shutdown, which is due to the significant power of the device. The location of the outlet should be chosen correctly for ease of connection and safety. It is important to correctly place the built-in electric oven and take into account the presence of a hob.
Features of electric ovens and the process of connecting them
There are two types of electric ovens:
- dependent - in the same housing with the hob or complete with it. The entire structure has one control unit and is connected as a single device. Disadvantage: you need to think about the location taking into account the top plate. That is, the installation of the oven is limited in placement options - its top must be open. At the same time, connecting to the wiring is simpler, since such a device has one power cord;
- independent - separate self-sufficient products. You can purchase an additional hob for the device, but the devices will have separate control units and the same connection. This oven can be placed at a height to make it easier to observe cooking, or mounted in a cabinet with a closed top.
Construction of electric ovens
The main functional elements that determine the high power and complexity of connecting the oven to the network are heaters. Heating elements are used - metal tubes in the form of a coil, inside - filaments (spirals). Usually there are two heating elements in the inner chamber - at the bottom and at the top; some models also have additional elements on the sides.
For electric cooking surfaces, a different principle is often used - induction heating. High-frequency current is supplied to a coil of wire turns. Vortex processes are generated that convert energy into heat, heating a special surface.
The convection of air inside the oven chamber and the uniform distribution of heat flows is ensured by the impeller. Most models are additionally equipped with a tangential fan (casing with a wheel with blades), which simultaneously prevents heat leakage and overheating of the case.
Connecting an oven to electricity largely depends on the power, which is always significant, on average from 3.5 to 7 kW. If there is a hob, then you need to add the same amount.
What to consider when connecting the oven to the electrical network
Parameters that must be taken into account and assessed before installing the oven and connecting it to the network:
- ratio of power and wiring: two- or three-phase (for a 220 or 380 V network), cross-section of conductors, whether there is grounding;
- automatic protective shutdown parameters (circuit breakers, RCDs or automatic circuit breakers);
- location and parameters of sockets: they must be at a safe distance, suitable for the current value;
- size of the electric oven, whether a hob will be installed.
Operational safety
Connecting an RCD for an oven
For safe operation of an oven that has been built into kitchen furniture or placed separately, it will be necessary to protect the user from accidental contact with dangerous potential on its body. For this purpose, switching products are equipped with a special terminal that has an electrical connection to the protective grounding system.
Some experts recommend including a residual current device in the power circuit that is triggered by the slightest leakage current. The protection option with an RCD makes sense in cases where a two-wire power cable is installed in the apartment, that is, there is no reliable and complete grounding in it.
Wiring
In old buildings (Soviet period), if the wiring has not been changed, then it is aluminum, with a core cross-section of 1.5 mm², without a grounding wire. According to some tables of ratios, it is believed that this is enough for 4.4–5 kW, but in practice for such powerful appliances as an oven this is enough for 3.5 kW and no more. You will have to either change the line or select a device with a lower capacity (up to 3.5 kW and 16 A), otherwise there is a risk of overheating of the wires and fire.
Often the rules are violated and, for example, 5 kW devices are “hung” on an aluminum line of 1.5 mm², and they work for years without negative consequences, but this is a risk and there is no guarantee against overheating of the cores. Before installing a built-in oven, it is advisable to study several options for tables of power ratios and wiring cross-sections. Select the average value (in most cases this is enough) or with a margin.
You must connect the oven to the power supply taking into account the wiring rules:
- The power of the consumers is summed up, so it is advisable to allocate a separate line with one socket for the electric oven. However, if the cross-section of the cores allows, then more consumers are allowed, but it must be taken into account that in the event of an overload, short circuit, or breakdown, all devices will be de-energized. And also the differential current values for shutdown are different for individual devices, so incorrect operation of the protection is possible;
- automatic protective shutdown - RCD, difavtomat - highly desirable. But if there is no grounding (two-wire wiring), then it is mandatory. Without protection in the event of a breakdown or insulation failure, the user risks receiving an electric shock with fatal consequences, and in the event of a voltage surge, the risk of device failure is increased;
- It is necessary to select not only the cross-section of the conductors, but also the parameters of the sockets according to the current value, otherwise they will heat up and there will be a risk of fire.
Wiring, its cross-section and machines
Connecting an oven with your own hands requires knowing some rules - we’ll tell you everything step by step. When thinking through the nuances, the first thing to do is to assess the condition of the existing wiring and find out its cross-section.
If the wiring has been laid recently, done according to all the rules, a 2.5 mm cable goes to the socket group and there is a 16 A (or more) machine, you can connect any oven using a power cord, plug and socket. Everything is really simple, but there are disadvantages:
While the oven is operating, it is impossible to turn on any powerful equipment in the same socket group - the machine will knock out. From time to time you will have to replace melted sockets, since they are not designed to carry significant currents for a long time.
If you agree with this, connecting the oven is really very simple: install, secure, turn on.
It is not advisable to connect a large load to old wires, but if the wiring is in good condition, it is three-wire with a normally functioning grounding, this is possible. To check the condition of the insulation, we measure the insulation resistance of the cores.
This is done using a megohmmeter. If the standards are met (at least 0.5 MOhm), the oven can be connected. One important point: the wire cross-section must be at least 2.5 mm2 (copper), and a machine of a suitable rating (16 A) must be installed.
Wire size for oven
If you have to draw a new line, first you need to decide on the cross-section of the cable cores. On average, the maximum power consumption of ovens is 3-3.8 kW. But these are peak loads in which the equipment operates very rarely. In normal mode, consumption is rarely more than 2 kW.
However, it is correct to calculate the wiring specifically for maximum consumption. For cables with copper conductors, the recommended cross-section is 2.5 mm2, automatic - 16 A.
This is with a significant power reserve (recommended load up to 5.9 kW), but these are the recommendations of almost all manufacturers and only under such conditions do they retain their warranty obligations.
Table of power and current values from the cross-section for hidden wiring with a single-phase 220 V connection diagram
| Wire core cross-section, mm2 | Conductor core diameter, mm | Copper conductors | Aluminum conductors | ||
| Current, A | Power, W | Current, A | Power, W | ||
| 0.5 | 0.8 | 6 | 1300 | ||
| 0.75 | 0.98 | 10 | 2200 | ||
| 1 | 1.13 | 14 | 3100 | ||
| 1.5 | 1.38 | 15 | 3300 | 10 | 2200 |
| 2 | 1.6 | 19 | 4200 | 14 | 3100 |
| 2.5 | 1.78 | 21 | 4600 | 16 | 3500 |
| 4 | 2.26 | 27 | 5900 | 21 | 4600 |
| 6 | 2.76 | 34 | 7500 | 26 | 5700 |
| 10 | 3.57 | 50 | 11000 | 38 | 8400 |
| 16 | 4.51 | 80 | 17600 | 55 | 12100 |
| 25 | 5.64 | 100 | 22000 | 65 | 14300 |
Another nuance: all modern household appliances are designed to be grounded.
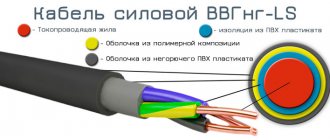
That's why the cables use three-core cables. For installation in a house or apartment, you can use VVGng, VVGngLs and its other non-flammable varieties. NYM is also suitable. These cables have an optimal price/quality ratio. You will need three-core ones - 3*2.5. Just when choosing, measure the diameter of the wire and calculate the cross-section. Too many manufacturers began to make the cores thinner than stated to save money. Therefore, control is mandatory.
When installing more powerful ovens - with built-in steam generators - it is recommended to use cables with a wire cross-section of 4 mm2. A 25 A machine is installed on the line.
In general, connecting the oven to electricity with recommendations for the cable used and ratings of protective equipment (automatic devices) is described in detail in the product data sheet. And it’s better to listen to the manufacturer’s recommendations. They are not interested in breakdowns of their own products and issue recommendations with a margin of safety.
RCD - necessary or not
In addition to the automatic safety switch, it is recommended to install an RCD on the oven. The machine protects the line from overheating and short circuit currents. At the same time, it is not able to protect against breakdown of the body, and this is a real danger.
That is why it is recommended to install a combination of RCD + AB or a difavtomat (a device that combines all functions). Then, if the insulation breaks down on the housing or if a phase is accidentally touched, no one will get hurt.
The choice of RCD rating is simple: one step higher than the machine. If there is a 16 A circuit breaker on the line, the RCD should be 25 A. You also need to select the leakage current. For leased lines this is 10 mA.
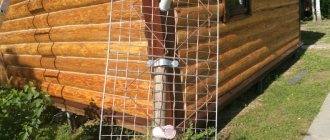
Wiring methods
In general, it is customary to lay wiring hidden - in plaster or grooves. But it is dusty and destructive work that leaves noticeable marks. It’s good if everything can be easily fixed by re-pasting the wallpaper or repainting the walls. If not, you will have to use other cable routing methods.
The first way is to lay it in cable channels. These are plastic or metal boxes in which cables are laid. They are screwed to the walls and have removable covers. The aesthetics of such a solution is debatable.
In some cases, simply running a cable attracts less attention. Another thing is that on flammable bases (wooden walls or ceilings) it must be pulled in a corrugated manner and this is definitely noticeable. In general, the option is possible, but not very beautiful.
The second way is to stretch the line in special skirting boards. They are taller and wider than usual, but the wire can be reached covertly, it is protected from mechanical damage, and the aesthetics of this solution are excellent. In addition, it is easy to do, without dust and any special problems.
Sockets
The socket must be designed for the power of the devices and network parameters. They select according to the current value - for example, if the wiring cross-section is for 16 A, which is suitable for an electric oven with 3.5 kW, then you need a model specifically for this or a larger characteristic. In this case, if you take such a product for 16 A, then it will be enough, so you can put it at 20 or 32 A.
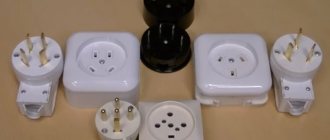
Sockets for high currents may differ in shape and holes; often the plug of the electric oven cord has a geometry for them, for example, for 32 A - three flat terminals. If the network is three-phase, then a product with 4 or 5 wires will be required. If the calculations are incorrect, the outlet will heat up and burn out may occur. Old Soviet models will not definitely fit - they are 6 A. You need to choose starting from type F and 10 A. For greater safety, you can choose a waterproof size with a lid (for example, IP 44 from splashes).
Socket placement
It is recommended to install the socket at a height of 30 cm from the floor for safety in case of flooding. Usually it is placed no higher than 1 m (SP 31-110-2003 clause 14.35). It is not advisable to install it under or above heating devices and boilers.
Approximate recommendations for distances: to window openings - at least 10 cm, door openings - 60, from the boiler tank, oven heating chamber - 60.
All advice on how to properly install an outlet is not specific and of a recommendation nature, but it is important to at least approximately take into account the rules and the appropriateness of the placement option. For example, it is reasonable to provide a gap of 10–30 cm from the floor for safety in case of flooding.
The optimal height of sockets under normal circumstances is not lower than 90 cm (eye level), according to the European standard - 30 cm. In conditions of limited space and technical features of the kitchen, the rules may not be followed. But it is always important that the socket is not directly under or above the devices, but on the side, behind, in areas that are as protected as possible from heat flows and splashes. Often kitchen furniture does not have a back wall, so the socket is hidden there.
Choosing a location for installation
As for preparing the installation site, you need to think in advance where to place the oven. The classic location of the device is often used, when the oven is under the stove. But in our time, you can break the standards and use a rule based on the ergonomic arrangement of furniture and ease of use of appliances. Based on this, the oven can be placed higher than the countertop. As a result, the kitchen will correspond to the new popular trend, and control of the food preparation process will become much easier.
Having determined the space, you need to think about preparing a niche for kitchen appliances. This must be done before purchasing a built-in oven. All the usual sizes of stoves allow you to easily install them in the kitchen. It is important to accurately determine the dimensions of the niche. Even the slightest misalignment can cause damage to electronic parts and improper thermal distribution.
There must be gaps between the stove and the niche to prevent the furniture from overheating, which can cause a fire. They will help create good ventilation. You need to leave a gap of 5 cm at the back of the device, 4 cm at the sides, and 9 cm at the bottom.
In the cabinet under the tabletop
To build in an oven with your own hands, you need to prepare the space where the oven will be installed.
When the device is installed under the countertop, the procedure is as follows:
- in accordance with the dimensions of the selected model, a hole is cut out in the surface;
- to eliminate chips, the edges when cutting are processed using a jigsaw, protective tape is glued to the outside;
- the docked edge of the hole is treated with a sealant that prevents swelling and delamination when water gets on it;
- Install the oven in the prepared hole.
Column cabinets
It is worth breaking accepted standards in furniture arrangement and giving preference to the ease of use of equipment. Based on this, you can place the oven higher than the countertop itself, for example, in a column cabinet. As a result, the kitchen will become modern, it will be easier to monitor the preparation of food, and it will also make it easier to care for the equipment.
This option is not bad for spacious rooms. You can place the oven niche at eye level, making cooking easier and keeping hot surfaces away from children.
Cable
If, when purchasing an oven, a cable with a plug is included, then it is already designed for the power of the device. But often there is no power cord, and this situation is standard, since different connection options are used and the cable that will be included may turn out to be unnecessary.
Cable selection:
- for low-moving wiring from the panel (open or in a groove) to the socket hole or outlet - monolithic cable VVGng (NYMng);
- The oven may be portable, meaning movable segments of the power cord (from the outlet or wiring) may be required. For such areas you need a multi-core cable. Although monolithic can also be used: it is usually copper, has a certain degree of flexibility and is less prone to fractures, unlike aluminum. Here the user must evaluate the frequency of movement of the electric oven. PVA is suitable for the role of stranded wire.
It is also important to know 3 nuances about connection
- Just in case, you will have to make sure that the cabinet can be turned off without hindrance. That is, access to the outlet must be free.
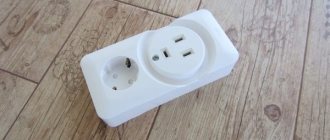
- Do not use various extension cords - they will not cope with the load. As a result, overheating will occur. Apartment owners are wondering whether it is possible to connect the hob and oven to the same outlet. The answer here is only negative.
- After connecting, set the maximum heating power and put the cabinet into operation. Check that the wires are not sparking. Then open the door and turn on the hood. We are waiting for the smell of burnt factory grease to disappear from the room.
Electrical connection
Connecting an electric oven can be done in two ways:
- directly to the wiring from the panel;
- power cord with plug to the socket installed on the line.
The two methods are equally effective, but with nuances that affect the comfort and maintenance of the oven. With direct installation, installing the network connection of a built-in oven with your own hands is done using mechanical methods: twisting, bolted and terminal structures.
The disadvantage is that it is difficult to disconnect the device, for example, if you need to move it during maintenance or cleaning. Direct connection is used, for example, for aesthetic or technical reasons.
Connection through an outlet is used more often; the option is more convenient. Even if there is no suitable outlet, buying one with the required current parameters (for example, 10, 16, 32 A) and connecting it to the wiring will not be difficult.
Electric oven with hob or other consumers
Electric ovens are powerful (3.5–5 kW), but hobs are even more power-hungry (5–7 kW), so when connecting these two separate appliances, significant adjustments must be made when assessing wiring capabilities. This also applies to situations when other devices are simultaneously powered through one line - lighting, boilers, kettles, etc.
In most cases, the current consumption of the oven is up to 16 A, and if it is powered through the same machine with other devices, then an overload and a shutdown may occur. For example, if you simultaneously connect an electric kettle with 6.5 A, which gives a total of 22.5 A, the automatic protection system will turn off two devices.
It makes more sense to connect an electric oven by extending a power line (for an average appliance, a cross-section of 2.5 mm² is sufficient) only for it with an individual protective automatic shutdown from the input switchboard. You can also use an existing line if it fits the parameters, but do not “hang” other consumers on it. The same applies to the standard size cabinet + hob in the format of a solid appliance with one power cord.
It is not necessary to make grooves for a separate line - it can be done openly, hiding the cores in plastic boxes.
Ovens of a dependent type (the hob is built-in) or separate such devices on the same line (this is not desirable, but is allowed if the wiring is suitable) will together consume a lot of electricity - from 7 kW. You will need at least conductors with a cross section of 4 mm², if the wires are aluminum - then from 6 mm².
Features of connecting a separate electric oven and hob
The cross-section of the supply wires for devices purchased separately and not as a whole device may be different. For a cabinet, a smaller value is usually required - 2.5 mm², for a stove - 4 mm². For a hob, you will need an AB with a rating of 25–32 A under 4 mm²; for a cabinet, 16 A is enough. A higher value is always selected. Accordingly, if the oven malfunctions, the AB will not work; shutdown will occur only when all the insulation burns out and a short circuit occurs.
How to connect an electric stove to a 220 V network
All the above diagrams were specifically for a single-phase 220 V network. To connect, you will need a three-wire cable, a three-pin power socket and a plug with a rated current of at least 32 A. Let’s say right away that connecting equipment from different brands is fundamentally no different
It doesn’t matter which stove you purchased - Electrolux, Gorenje, Bosh, Beko. Doesn't matter
The only difference is the different design of the covers that cover the terminal box on the housing and different methods of fastening it. Everything else is the same.
Connecting the cable to the electric stove
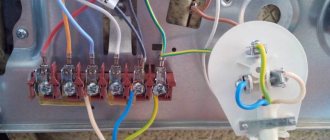
First, the cable selected for connection must be connected to the electric stove. On the rear panel, usually at the bottom left there is a terminal block to which the conductors are routed.
The terminal block to which the electrical cord must be connected
Nearby are connection diagrams for different networks.
Schematic illustration of connections for different networks
With a 220 V network, the diagram is on the far right. On the plate, contacts 1,2,3 should be connected by one jumper - this will be the phase (red or brown conductors), the second - contacts 4 and 5 - this is neutral or zero (blue or blue), the sixth contact is ground (green or yellow -green). Electrical plates usually come from the store with jumpers already installed, but it doesn’t hurt to check.
Connecting the cable to the electric stove
It is more correct and reliable to crimp the conductors with contact plates, and then connect them. This connection is more reliable, but often the conductors are simply twisted around the clamping screw and then tightened. In any case, it is better to follow the color coding - this way there is less chance of making a mistake.
It is better to terminate the conductors with contact plates
Plug installation
Next, a plug is connected to the cable. The power plug is collapsible. Unscrew the two mounting screws and remove the cover with contacts. The fixing bar holding the cable is also removed. The protective insulation is removed from the edge of the flexible cable (about 5-6 cm), the conductors are straightened, their ends are also stripped of insulation by about 1.5-2 cm. The cut end of the cable is inserted into the plug body.
Related article: How to choose a technical hair dryer?
This is what the plug for connecting an electric stove looks like
The clamping screws on the contacts are loosened, the conductors, if they are multi-core, are twisted into a bundle. These flagella are twisted around the contacts and tightened with clamping screws.
The distribution of conductors matters and they must be connected carefully. The top contact of the plug is usually labeled - the “ground” wire (green) is connected here. When connecting a socket, you need to apply ground to a similar connector.
Connecting the wire to the electric stove
The other two contacts are “phase” and “zero”
Where to apply which one is not important, but when connecting the socket, the “phase” must fall on the “phase”, the “zero” must fall on the “zero”. Otherwise there will be a short circuit
So before turning it on, be sure to double-check that the wires (phase and neutral) are screwed in correctly.
How to determine the phase in an installed socket
If you already had an electric stove before, and there is a socket, you need to find in it where the grounding, phase and neutral are located and connect the wires in the plug accordingly. The easiest way to determine this is to use a voltage indicator in the form of a screwdriver. It works simply - install the indicator in the place of the expected phase, and look at the LED mounted in the housing. If it lights up, then there is voltage and this is a phase. If there is no voltage, the LED does not light up, and this is zero.
The ground is even easier to determine: is the contact at the top or bottom.
Connecting wires
All manipulations when connecting wires, installing automation, sockets, wiring are carried out with the circuit breaker turned off (in the switchboard it must be clicked into the off position).
An example of creating a power cord. If there is an outlet and the electric oven has a power of up to 3.5 kW (can be marked P = 3.5 kW), then it is enough to buy a piece of PVA 3 × 2.5 and a collapsible plug for it for 16 A. The length can be selected according to needs, the main thing is that there is no tension.
In the plug, the yellow (yellow-green) wire goes to the ground connector, brown (phase) and blue (zero) are connected to the rest. At the same time, for household appliances, polarity does not matter, but it must be taken into account when connecting wiring to the switchboard, automation (L - phase, N - working zero). "Earth" (PE) must always correspond to its place in the plug and terminals.
Step-by-step installation instructions
We found out what cable, socket and machine are needed. It remains to consider the process of installing the socket on the wall. This is a question that presents the greatest practical challenge, since the aesthetic component is important here. The wires must be hidden in the wall, the sockets must be installed firmly and as carefully as possible.
There are 2 installation options:
External socket (the housing is located outside, protruding from the wall)
Internal socket (all elements and connections are located in the wall niche, only a small part protrudes)
Connection instructions step by step
The procedure for connecting an electric built-in oven to electricity by creating a separate line:
- The input AV switches off in the switchboard.
- Automatic protection is connected.
- The line cable is pulled to the panel, it should be connected there to the RCD or RCBO.
- Next, observing the polarity, connect the wires to the outlet box, if the oven has a cord with a plug, or directly to the power cable of the electric oven, to its terminals.
Installing the Terminal Block
Connecting the oven through the terminal block is considered the most correct. Contact with the network in this case is ensured by clamping screws, which is more reliable than when connected via a plug and socket.
The disadvantage of this connection is that it is difficult to open the circuit (remove the cover, unscrew the bolts, pull out the wires). Therefore, this method is used provided that the machine is installed, and it is desirable that it be bipolar and immediately break both “phase” and “zero”.
In old-style terminal blocks - carbolite - the contacts are open. This block is installed in a special box and a standard junction box.
A three-pin block fits perfectly into a square box. If the oven is connected to a three-phase network, then an oblong model of the box is placed under the five-pin block. The box is mounted on the wall surface or recessed into the wall along with the cable itself.
When connecting, the wires stripped of insulation are inserted under the metal plates and the contact is tightened with clamping bolts (screwdriver). At the same time, good force is applied to ensure reliable contact. The wire cores are connected in strict accordance with the markings. The phase wire from the oven is opposite the phase wire from the shield, the “neutral” (“zero”) is opposite the zero, the “earth” is opposite the ground wire.
Where can I buy
You can purchase equipment as quickly as possible at your nearest specialized store. The optimal option, in terms of price-quality ratio, remains purchasing from the AliExpress online store. Mandatory long waits for parcels from China are a thing of the past, because now many goods are in intermediate warehouses in destination countries: for example, when ordering, you can select the “Delivery from the Russian Federation” option:
| Electric convection oven AVEX, display, 7 functions | Electric oven HIBERG | Electric fish smoker BEIJAMEI |
| Air convection oven CalmDo 1800W | DKX60-01 built-in electric oven with Smart Touch\ | ITOP Double Layer Baking Oven |