Modern technical innovations open up new opportunities for creating interesting design solutions in your own home, in stores, in enterprises, etc. A new milestone in enhancing contour lines is LED strips, which are installed to illuminate ceilings, signs, furniture and other elements. In comparison with the classic white LED strip, installing a multi-colored one seems to be a relatively complicated process for many ordinary people. Therefore, now we will analyze the features of connecting an RGB strip and choosing components for its full operation.
What is RGB LED strip
RGB (Red, Green, Blue - red, green, blue) is an LED strip that can change its color during operation. Each LED module contains three LEDs - red, blue and green. By changing the brightness of each crystal separately, you get any color in the visible spectrum.
What is rgb led
Externally, RGB LED differs from monocolor only in the number of pins. There are 4 of them - three of them for powering each individual crystal and one common plus.
There are special LED strips with five terminals. They are marked as LED RGB W (W – white). The fifth pin is responsible for white light. The fact is that in a three-color diode, white color is obtained by mixing all three colors in equal proportions. This “white” is different from pure mono light. Therefore, the led type appeared with a fourth white crystal.
These tapes (like monocolor ones) have several classes of dust and moisture protection:
- IP20 – without protection, afraid of moisture and dust;
- IP67-69 – not afraid of dust, can be used in a damp environment (bath, aquarium).
How to choose a controller
The first thing you need to pay attention to is what tape the controller is intended for. If you are going to install a single-color one, then you need to buy the same device. The box says “for single-color ribbons.” The packaging with the controller for RGB strips also indicates the purpose. If the manufacturer did not indicate this important information, you need to open the box and look at the findings. The controller for the monochrome LED strip has two wires marked “Led+” and “Led-”, or simply “+” and “-”. The color tape control device has four pins, three of which are marked with color, and the fourth with the sign “V+”.
What you need to connect an RGB strip
Let's figure out how to properly connect an RGB LED strip. For a complete lighting scheme we will need:
- LED Strip Light;
- power unit;
- RGB controller with remote control;
- RGB amplifier (optional).
power unit
The power supply for the LED strip must be selected taking into account the expected load and its future location. Let's look at the example of SMD5050 60 led. Power consumption – 14.4 W/m.
With a length of 5 meters, the required power of the power supply will be:
5m * 14.4W * 1.25 (safety factor) = 90W
Types of power supplies for LED
If the length is 15 meters, then the power supply is accordingly needed 3 times more powerful - 270W. If the length of the tape is 20, 25 or more meters, it is advisable to install several power supplies of lower power.
The degree of protection depends on the location of the power supply. If located in a dry, closed room, IP20 is sufficient. If in a bathroom or other aggressive conditions, then no lower than IP67.
Read more about calculating the power supply for an LED strip.
RGB controller
Light control is carried out through a special controller. It connects between the power supply and the LEDs, and is equipped with a wired or wireless remote control.
RGB controller
The controller, like the power supply, is selected depending on the total power of the tape. With the difference that 25-30% of the reserve is added to the required power of the power supply, and the controller is selected closely according to power.
For example . You need to connect 10 meters of SMD5050 60 led. The power of 1 meter is 14.4 W, so we need a 144 W controller.
According to the control principle, they are distinguished: wired - often mounted on the wall; wireless controlled via:
- Infrared port (IR) – the remote control must be in line of sight;
- radio channel - allows you to use it within the home;
- Wi-Fi – allows you to control both from the remote control and from an application on your smartphone.
Lighting control from your smartphone
After installation and connection, you will be able to:
- Set color manually. Both pure colors and mixed shades are available.
- Adjusting brightness is similar to a regular dimmer (more about dimmers).
- Automatic modes. These include color switching, fast flickering, smooth changing, smooth fading and other algorithms.
What if the power of the RGB controller is not enough to connect all the lighting (more than 20 meters)? You can install 2 controllers, but you will have to control the light in one room from two remote controls, which is inconvenient and expensive. The second (correct) option is to use an RGB amplifier.
RGB amplifier (led amplifier)
This device allows you to amplify and transmit the signal from the controller further along the circuit. Thus, by using several amplifiers, you can assemble a lighting circuit of any length.
RGB amplifier (led amplifier)
The amplifier is installed in the gap of the tape and has a separate connection to the power supply (about connection below). We select the power based on the remainder of the tape, which does not have enough controller power.
Some people think that an amplifier is needed to increase brightness and should be used even for a distance of up to 5 meters. This is fundamentally wrong.
A good example . You need to connect 20m SMD 3528 (14.4 W/m), with a total power of 288 W. We only have a controller with a power of 216 W and a power supply of 300 W. Accordingly, you need an amplifier:
288 W - 216 W = 72 W
The power supply is 300 W, which is enough to power the controller and amplifier. If the power supply is not enough (for example, 250W), you need a separate power supply for the amplifier.
Power
The parameter is no less important than the supply voltage. If the controller power is less than the calculated one, then controlling the LED strip will become impossible. Involuntary blinking will begin, slowdown with start, drop in brightness, and the controller itself may fail in the first minutes of operation. If you buy an adaptive controller, then there are two numbers indicating the power, for example, 360/720 W. The first number indicates the power of the tape when operating from 12 V, the second - from 24 V.
Installing an LED strip with too much power overloads the controller and dramatically reduces the resource. Calculating the power of the control unit is not difficult - you need to determine from the table, or find out from the instructions for the tape, the power consumption of a particular tape, usually it is indicated in terms of 1 meter of length, and multiply it by the length of the lighting line. Add 5–10 percent to the resulting number to eliminate any surprises.
When choosing a controller based on power, focus only on digital indicators. It is not recommended to buy a unit based on size; a large and heavy controller is not always more powerful. It all depends on the internal layout and materials used in production.
Connecting RGB LED strip
The correct order of connecting the circuit elements is as follows:
Correct connection order
Remember. Sections of tape longer than 5 meters must only be connected in parallel.
What happens if you connect it in series?
Firstly, you will noticeably lose brightness at the end of the section. Although LEDs have very low resistance, there are losses. With such a length, the voltage at the end will be about 10V. Reduced voltage will result in reduced brightness, already noticeable to the eye.
Incorrect connection
Correct connection
Secondly, the conductive tracks of the tape are designed for a maximum length of 5 m. By connecting 5 more in series, the tracks will overheat and the lighting will most likely burn out at the very beginning of the section.
RGB connector
The tapes can be connected to each other using soldering or terminals. For single-color options, two-pin terminals (connectors) are sold, for RGB - four or five. Please check this point when purchasing.
Learn more about how to connect rgb tape to each other.
The power supply is connected to a 220V network (AC terminals, polarity is not important), converts alternating voltage to direct 12V (terminals V+, V-). When connecting the following circuit elements, it is important to observe polarity.
Connection terminals on the power supply
The RGB controller is connected after the power supply (maintaining polarity), and the RGB strip is connected to it. Each pin on the case is designed for a specific LED output. If you mix them up, nothing bad will happen, just the colors will be mixed up.
Terminals for connecting the controller to the LEDs
As a result, the finished circuit assembly should look like:
Complete circuit
The amplifier is similar in appearance to the controller, it is connected separately to the power supply, only it has not one die with terminals, but two. Most often labeled as Led Amplifier, it is installed in the tape gap. Connects according to the diagram:
The procedure for connecting an RGB amplifier to a circuit. Purpose of the led amplifier terminals
Let us now analyze the connection diagrams for tapes of different lengths with and without an amplifier, with one or more power supplies.
Connection diagram for RGB LED strip without amplifier
This is the simplest scheme for switching on an RGB LED strip up to 5 meters long through a controller with a remote control.
Electrical connection diagram for RGB lighting
To connect an RGB LED strip 10 or 15 meters long, make sure that the controller and power supply have enough power (with a reserve), and connect according to the following diagram:
Connection diagram 10 or 15
Connection diagram for strip with RGB amplifier
We use an amplifier if the controller power is not enough. If the power of the power supply allows you to connect the controller and amplifier, we use the following circuit:
When the total power of the controller and amplifier is higher than the power of the power supply unit or it is irrational to use a block of such power (large, very hot or noisy), then we connect the led amplifier to a separate power supply according to the following diagram:
Connection diagram for amplifier with 2 power supplies
Using this scheme, you can increase the total length of the tape as much as you like. All of it will be controlled from one remote control.
In addition to serial connection, as in the examples above, amplifiers can be connected in parallel.
Diagram of parallel connection of several RGB amplifiers with one power supply.
Scheme: one power supply several amplifiers
Circuit with several parallel amplifiers with separate power supply.
Scheme: several parallel amplifiers with separate power supplies
If there are no terminals, use a soldering iron and mounting wire, BUT do not overheat the contact pads. Learn more about how to connect the tape.
The correct connection diagram for 20 meters of RGB tape is shown in the video.
Types of devices for dimming 220V LED lamps
Lighting devices using light diodes are dimmable by various devices, which can be divided:
- according to the control principle;
- according to the location and method of installation.
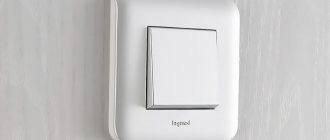
Separation by location and method of installation is not important, because there is no difference in the design of the devices: everyone will choose the option that is convenient in a given situation. If the ceiling in an apartment or private house is suspended, then it makes sense to purchase a dimmer that will be located directly next to the lamp on the ceiling panel. If the ceiling is ordinary, you will have to make a niche next to the distribution box or switch, where a hidden dimmer will subsequently be installed. Today they also produce devices that are mounted in plain sight without spoiling the interior.
The control unit must fit into the interior and not spoil it
Based on the control principle, the following devices can be distinguished:
- with mechanical control (rotary knob or keys);
- touch switches with dimmer;
- controlled by remote control;
- with Wi-Fi control.
It is certainly clear that the former are a budget option, while dimmers controlled via Wi-Fi are the most expensive. Mechanical devices most often perform only on/off and dimming functions. Additional options, such as a timer, are already present on some touch models. More expensive devices provide the ability to connect to the Smart Home system.
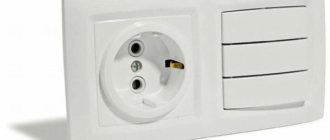
The touch control panel is quite easy to use, but does not tolerate dirt and greasy hands
Typical connection errors
Serial connection of more than 5 meters of tape. This cannot be done.
Twisting instead of soldering wires (or connectors). If you don't want to solder, use connectors, they're cheap.
Failure to follow the connection order: power supply ⇒ controller ⇒ tape ⇒ amplifier ⇒ tape.
Save on the power supply by buying “back to back” in terms of power. Unfortunately, LEDs are both plus and minus in terms of watts consumed. If you buy a power supply without a 20-25% reserve, it will wear out and in a year you will buy a new one, but with a reserve.
Buying a controller with excess power. It won't get any worse, but you'll overpay. Correctly select the power 1 to 1.
Selection of very powerful tapes and installation without heat sink. For example, SMD5050 120 led/m consumes 28.8 W/m. With such power, the LEDs heat up quite strongly and the structure must be mounted on a heat sink - an aluminum profile. Otherwise, the diodes begin to degrade, lose power and burn out.
Which dimmer is better to buy for 220V LED lamps
So how do you choose a dimmer? To ensure that your purchase does not disappoint you, you should adhere to some rules:
- Preference should be given to well-known brands with a good reputation. Even though the dimmer will cost a little more, you will have peace of mind and confidence in its performance. One of these, in addition to what we mentioned above, is “Legrand”.
- Pay attention to the appearance (if you plan to install it in a visible place). The device must be in harmony with the interior and not spoil it.
- Check protocols for compatibility.
- Check with your sales consultant for the availability of documentation and product certificates.
- Inspect the product carefully. The soldering seams must be smooth, the logo and technical information, if printed on the case, must be clear, unblurred, and easy to read.
Such a control panel will be perfectly visible in the dark
By following these simple rules, you will purchase a high-quality device that will serve you for many years.
Before purchasing a dimmer, calculate what load will be placed on it by electricity consumers during operation. To do this, add up the power of all consumers that you plan to connect through a dimmer, and add 20% for possible overloads. The resulting number will be the minimum power limit of the dimmer.
Ready-made RGB light bulbs for base with remote control
It is worth mentioning separately about ready-made RGB products for the E14 or E27 base.
These paws come in a variety of designs and designs. Inside the lamp contains a compact driver for power supply from a 220V network, a controller and three-color LEDs.
It is not suitable for complete lighting of the room, because... It will not be possible to synchronize several lamps into one system. Used as a night light or decor. Consumption 1-3 W/h. The cost starts from $3 for China.
Please rate the article. We tried our best:)
Did you like the article? Tell us about her! You will help us a lot :)
Do-it-yourself dimmer - is it possible?
It is quite possible to make such a device with your own hands. However, this will require some skills and knowledge of radio engineering and electronics. If a home craftsman doesn’t have them, then it’s unlikely that anything worthwhile will come out. If there are any, we suggest that you familiarize yourself with some diagrams that will help you complete this work.
Dimmer circuit for an LED lamp: the simplest option
The simplest dimmer using triacs is not difficult to make
Dimmer on the N555 chip - there shouldn’t be any problems here either
And this is a dimmer on thyristors and dinistors - there is no need to explain to a knowledgeable person what and how
If a person knows how to read schematics, making such a dimmer will not be difficult for him.
Handmade dimmer for LED strips
To make a dimmer for an LED strip, we need an integral stabilizer of the KREN series. The classic connection diagram for a stabilizer implies that a resistor connected to the control input sets the stabilization value. By adding capacitor C2 and a variable resistor, we get something like a comparator. It will look like this:
DIY LED strip dimmer circuit
Advantages and disadvantages
Advantages of dimmers:
- Setting the required level of illumination in the room depending on the requirements of the situation.
- Ability to regulate the amount of electricity consumed by the lighting system.
Disadvantages of dimmers:
- Dimmers are extremely “gentle” in terms of overheating. They have this property because they are based on a microcircuit. Before purchasing, you need to know how much power the dimmer should control.
- The dimmer is also demanding on the minimum load value. If the values indicated on the case are lower, the device will fail very soon.
- Many people still use and are unlikely to part with fluorescent and energy-saving lamps soon. And they, as their manufacturers warn, either cannot be adjusted at all, or they can be adjusted, but this significantly reduces their service life.
Brief review and testing of popular LED lamps
Although the principles of constructing driver circuits for various lighting devices are similar, there are differences between them both in the sequence of connecting the elements and in their choice.
Let's look at the circuits of 4 lamps that are sold in the public domain. If desired, you can repair them yourself.
Image gallery
Photo from
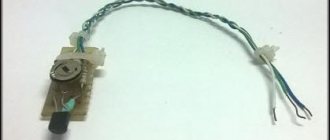
Driver for disassembled lamp BBK P653F
Compact lamp Ecola 7w
Collapsible analogue of Ecola GU5.3
Jazzway 7.5w GU10 – suitable for repair
If you have experience working with controllers, you can replace the elements of the circuit, resolder it, and slightly improve it.
However, meticulous work and efforts to find elements are not always justified - it is easier to buy a new lighting fixture.
Option #1 – LED lamp BBK P653F
The BBK brand has two very similar modifications: the P653F lamp differs from the P654F model only in the design of the emitting unit. Accordingly, both the driver circuit and the design of the device as a whole in the second model are built according to the design principles of the first.
The board has compact dimensions and a well-thought-out arrangement of elements, for the fastening of which both planes are used. The presence of ripples is explained by the absence of a filter capacitor, which should be at the output
It's easy to spot flaws in the design. For example, the installation location of the controller: partly in the radiator, if there is no insulation, partly in the base. The assembly on the SM7525 chip produces an output of 49.3 V.
Option #2 – Ecola 7w LED lamp
The radiator is made of aluminum, the base is made of heat-resistant gray polymer. On a half-millimeter thick printed circuit board there are 14 diodes connected in series.
Between the heatsink and the board there is a layer of heat-conducting paste. The base is fixed with self-tapping screws.
The controller circuit is simple, implemented on a compact board. The LEDs heat the base board to +55 ºС. There is practically no pulsation, radio interference is also excluded
The board is completely placed inside the base and connected with shortened wires. The occurrence of short circuits is impossible, since there is plastic around - insulating material. The result at the controller output is 81 V.
Option #3 – collapsible lamp Ecola 6w GU5.3
Thanks to the collapsible design, you can independently carry out repairs or improve the device driver.
However, the unsightly appearance and design of the device spoils the impression. An oversized radiator increases the weight, so additional fixation is recommended when attaching the lamp to the socket.
The board has compact dimensions and a well-thought-out arrangement of elements, for the fastening of which both planes are used. The presence of ripples is explained by the absence of a filter capacitor, which should be at the output
The disadvantage of the circuit is the presence of noticeable pulsations of the light flux and a high degree of radio interference, which will certainly affect the service life. The controller is based on a BP3122 microcircuit, the output value is 9.6 V.
We discussed more information about Ecola brand LED light bulbs in our other article.
Option #4 – Jazzway 7.5w GU10 lamp
The external elements of the lamp are easily detached, so you can get to the controller quickly enough by unscrewing two pairs of screws. The protective glass is held in place by latches. The board contains 17 diodes with serial communication.
However, the controller itself, located in the base, is generously filled with compound, and the wires are pressed into the terminals. To free them, you need to use a drill or use desoldering.
The disadvantage of the circuit is that the function of a current limiter is performed by a conventional capacitor. When the lamp is turned on, current surges occur, resulting in either burnout of the LEDs or failure of the LED bridge
There is no radio interference - all thanks to the absence of a pulse controller, but at a frequency of 100 Hz there are noticeable light pulsations, reaching up to 80% of the maximum value.
The result of the controller is 100 V output, but according to the general assessment, the lamp is more likely to be a weak device. Its cost is clearly overestimated and is equal to the cost of brands that are distinguished by stable product quality.
We presented other features and characteristics of lamps from this manufacturer in the next article.
Rules for choosing the optimal option
Buyers can purchase two types of LED strips, the so-called monochrome, that is, one-color, or three-color RGB. In the latter case, all colors can be connected separately, mixed, and obtained different effects.
Dimmers can be of different sizes and power, which allows the interested person to choose the right product for any LED strip
And the future owner should know that to control a multicolor ribbon you will need to purchase a special RGB controller. Since the controller’s capabilities are not enough to fully control such a light source.
In addition, you need to carefully consider the technical parameters of the device. Since the power of any control device must exceed that of the LED strip itself, it is necessary to take this feature into account before purchasing.
Moreover, the options may be as follows:
- If the owner of the premises does not plan to further increase the length of the LED strip, and, consequently, its power, then this characteristic of the dimmer should be higher by 20-30% and this is at least, and best of all, half. This will help extend the life of the regulator, eliminating the possibility of rapid wear and subsequent breakdown.
- If you plan to increase the power of the LED strip, then the device must be purchased with this in mind. Or later you will have to spend money on purchasing a new regulator again. Moreover, the power reserve should be calculated taking into account the required 20-50% for the reserve.
When a potential buyer incorrectly calculates the power, the device will not be able to perform its functions, so it simply will not turn on. And this is with the most favorable outcome, since it often happens that overload leads to instant failure.
Installation of any type of regulator is simple, so in some cases the user will be able to perform this procedure independently
In addition, it is important to decide on the type of control. Any of them (mechanical, electronic, remote) is reliable and will allow a person to effectively manipulate the brightness of the LED strip.
Therefore, everything will depend on how much a person is willing to pay. If he decides to save money, then the most affordable model with a mechanical control type will be the optimal solution.
When the future user has more funds at his disposal, then preference should be given to a device with an attached remote control. Because it increases comfort, which is a significant advantage.
In addition, when choosing, you should not skimp on the quality of the dimmer; it should only be from a well-known manufacturer. Which are the companies Osram, Gauss, Philips, and a number of others.
If you still want to reduce costs and purchase a Chinese product, then it is worth remembering that such a purchase can result in headaches, loss of some ability to work, and a number of other health problems. The remaining features when choosing are not so important and everything depends only on personal preferences.
Those who want to assemble a dimmer with their own hands will receive detailed instructions on our website. We recommend that you read this very useful article.