Today it is popular to decorate houses, shops, and industrial facilities using garlands. This decorative element has long been known in the domestic market as an integral attribute of the New Year holidays. And with the development of technical means, the New Year’s garland has become accessible to other areas of human activity. But due to the low quality of Chinese garlands that have flooded the market, and simply out of curiosity, many ordinary people are wondering how to make a garland from light bulbs and LEDs with their own hands.
What do you need to know about the garland?
Factory models are presented in a wide range, but the quality of many garlands leaves much to be desired. By making it yourself, you can choose all the component materials, in addition to saving on manufacturing and delivery costs.
Before making a Christmas tree garland or other lighting decoration, you need to decide on the following parameters:
- Type of light bulbs - there are LED, incandescent, fluorescent, and halogen bulbs.
- The method of connecting light bulbs is through parallel or serial connection in a circuit.
- Supply voltage - depending on the type of lighting fixture, a voltage of 220V, 24V, 12V, 3V or other ratings can be used for the garland.
- Current collection method - depending on the design of the light bulb, it can be done through a base, plug, soldering or connector.
In view of the fact that all points determine the operating parameters of the finished garland, they need to be thought through at the stage of purchasing or procuring materials. Let's look at these points in more detail.
Bulb type
Incandescent light bulbs are a fairly common type for creating lighting effects, but this characteristic is due to their relative cheapness and unpretentiousness. Incandescent light bulbs have a relatively low ratio of the luminous flux produced to the power consumed from the network. The design itself is quite fragile and is susceptible to mechanical stress; due to depressurization of the bulb, the light bulb immediately fails.
LED light bulbs - such lighting elements are the most modern and are increasingly crowding out all other types of equipment from the market. Such popularity of LED lamps is due to their significantly greater reliability and benefits for the garland. The glow of the LEDs in the light bulb produces the most favorable luminous flux in relation to the power consumed in comparison with other types of lamps, but they significantly react to the mains voltage parameters. Along with light bulbs for LED garlands, separately installed LEDs or strips with already assembled elements are used.
Fluorescent light bulbs are much more efficient in terms of the ratio of the generated luminous flux to the power consumption; they are superior to the glow of incandescent lamps, but are significantly inferior to LED lamps. But their operation is ensured by vapors of mercury and other gases, which, when depressurized, evaporate from the flask and can be harmful to health. In addition, such light bulbs require a certain time to warm up and fail at low temperatures, so they are not used for outdoor garlands operating in winter.
Halogen light bulbs are a convenient low-power option for making garlands. But, they have a relatively low ratio of lamp glow to power consumed from the network. But, unlike all the above-mentioned light bulbs, they are afraid of touching with hands; this model of garland can only be taken through a special glove or must be placed in a tube.
The most popular options for garlands are incandescent and LED bulbs. The element parameters are selected in accordance with the connection method.
Connection method
According to the method of connecting light bulbs, there are serial and parallel connections. Each of the schemes has its own characteristics in the power supply, which must be taken into account at the stage of designing the garland.
The serial connection of light bulbs in an electric garland is a connection in which the end of one element is connected to the beginning of the next. In this case, the current flowing through the garland will be the same for all light bulbs.
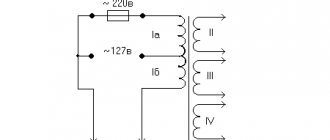
An example of a diagram of such a garland is shown in the figure below:
Rice. 1. Series connection of light bulbs
Here, mains voltage is applied to the garland, but each individual bulb experiences a voltage drop proportional to its resistance. Accordingly, it is necessary to calculate the voltage value for each element. If the applied voltage exceeds the rated voltage, a resistor is soldered into the circuit. If the voltage is less than the rated voltage, less current will flow through the network, resulting in a decrease in the glow intensity.
A parallel connection is the connection of the same terminals of LEDs or light bulbs to one point.
Rice. 2. parallel connection of light bulbs
Look at Figure 2 for an example of a parallel circuit. A feature of this connection option is the application of input voltage to each element, but the current flowing through the light bulb will depend on its resistance.
For both connection schemes, the power of the power source plays a role. For example, a garland for a New Year tree, powered from an electrical network, is limited only by the rating of the machine at the input. And the power supply that receives from the power supply will be limited by its factory capacity.
It should be noted that when connecting the legs of diodes or light bulbs in series, the burnout of one of the elements will lead to failure of the entire garland. But in a parallel circuit there is no such problem; if one light bulb burns out, the rest in the garland will continue to light.
Soviet style garlands
Garlands produced in Soviet times are reliable. Another feature is that they can be repaired, while not all Chinese-made products can be repaired. Modern devices and tools make it possible to identify faults and carry out repair work.
Required set of tools and materials:
- soldering iron;
- indicator screwdriver;
- insulating material;
- pliers.
The garland uses a serial connection circuit. In other words, if one light bulb burns out, the entire system stops functioning.
We check the lamps for integrity. If the light sources are not damaged, check how they are screwed into the sockets. If necessary, screw the lamp into the socket until the end.
Advice! If you need to replace a colored light bulb, but a replacement is not available, it is recommended to paint the light source with tsapon varnish.
If the steps described above do not give a positive result, take an indicator screwdriver and look for the area where the contact is interrupted in the conductor. The broken contact is not necessarily located in the wire, so we also check the cartridge. If the problem is a broken contact, we restore its functionality using a soldering iron. If necessary, we connect the conductors directly.
Electrical circuit calculation
For example, you use a pair of AA batteries to connect, which supply 3 V to the electrical circuit of the garland. For such a voltage, it is advantageous to use a parallel connection of LEDs. For example, a model will be installed that consumes 0.02 A, with a current supplied from the source of 1 A. To calculate the maximum allowable quantity for the load, you need: 1/0.02 = 50 pcs.
Based on this, you can install no more than 50 LEDs in a garland; if the distance between them is 5 cm, then the total length will be: 50 * 5 = 250 cm.
If you need to make it longer or install more bulbs to increase power, you must use a different power supply. For a series electrical circuit, the calculation is made according to the same principle, only based on the magnitude of the applied voltage.
Connecting a garland in the forest
If you need to connect a garland in the forest, when choosing a product, the same principle is used as discussed above. The main difficulty is finding a suitable power source. If you are far from electrical outlets, it is better to use a rechargeable battery or AA batteries. We will look at how to connect a garland using them below.
Another option that is suitable not only for forests is shown below.
Idea N1. The simplest DIY garland
The simplest option for a garland is lighting made from LED strips. They are suitable both as New Year's decorations and for highlighting the outline of a showcase or interior elements. Their advantage is their flexible design, so you don’t need to solder anything, just glue them to a supporting surface or structure. But moving it like the classic option won’t work.
The simplest models are 220 V - for them you need to solder an electrical plug and install it in the right place. Most often they are used for outdoor installation.
To illuminate Christmas tree decorations indoors, 12 V LED strips are used. These are safer models, but a power supply must be used to connect them.
It is much more difficult to make a garland from RGB tape, since connecting it requires the use of a large number of mechanisms.
The process will include the following steps:
- Calculate the total length of the garland, since the length of the ribbon cannot exceed 5 m. Everything above 5m must be connected from a separate power supply system.
- Install the power supply - it is necessary to lower the voltage to 12V.
- Connect the controller for the RGB strip to the power supply - this device will allow you to select the color of the glow and operating mode.
- If the length is more than 5 m, install the amplifier on the next tape or supply power from another power supply / controller set.
- Attach the RGB strip to the surface and connect to the controller.
You can find out more about the principles of connecting an RGB strip in the corresponding article -
LED damage
If the wire contacts are fine and you missed one of the diodes, how can you check if it is working? And most importantly, how to find it among the entire series of light bulbs?
First of all, unplug the garland from the outlet. Let's start with the last diode. The power cable comes directly from the control unit.
The outgoing conductor is soldered to the same leg. Let's move on to the next branch of the light channel. It is also necessary to check the diode between its two power wires (input-output).
You will need a multimeter and its probes, somewhat modernized.
Place thin needles tightly onto the tips of the tester probes so that their tip protrudes a maximum of 5-8 mm.
Wrap everything on top with a thick layer of electrical tape.
Since the LEDs are soldered, it is not possible to simply pull them out of the bulb, as in conventional garlands.
Therefore, you will need to pierce the wire insulation to get to the copper wires of the wires. Switch the multimeter to diode continuity test mode.
And you begin to sequentially punch the power wires near each suspicious diode.
If you have a garland not 220V, but 12V or 24V, which is connected with the following power supply:
then the LED of the multimeter's good battery should light up.
If it is a 220V backlight, check the multimeter readings.
On the working elements they will be approximately the same, but the faulty one will show an open circuit.
The method, of course, is barbaric and harmful to isolation, but it works quite well. True, it is better not to use street garlands on the street after such punctures.
Idea N2. Flashing LED strip garland
Direct connection of a white LED strip is a little-used garland option, since there is only one glow mode. But with a certain addition, it can be significantly upgraded by changing the mode from the usual light bulb to flashing. To do this, you will need an LED strip, an RGB controller, a remote control for the controller, and a power supply.
- Divide the LED strip into three sections (they will blink in different sequences). The minimum area is the distance between the markings for the cut. Separation of sections is carried out along the negative bus in specially designated areas, as shown in the figure:
Rice. 3: Cut out the pad - Repeat the same procedure with the remaining two sections. In this example, each section includes three LEDs. When cutting out the pad, it is important to break the electrical connection between the LED legs. Rice. 4: tape divided into three sections
- Take four different colored wires, strip the ends and tin them. Rice. 5: Tin the ends of the wires
- Apply tin to the contacts of the tape as shown in the picture.
Rice. 6: apply tin to the contacts of the tape - Using a soldering iron, solder wires to the contacts of the tape.
Rice. 7. Solder the wires to the contacts on the tape - Tie the wires from the contact pads and from the edge behind the tape; in addition, they can be organized with tape or adhesive tape.
Rice. 8: Organize your wires - Strip the wires and connect the tape leads to the RGB controller using a terminal block.
Rice. 9: Connect the ribbon to the controller
The garland is ready, connect it to the network via the power supply and you can enjoy the flashing lights. Using the controller's remote control, you can switch the garland to different modes (blinking, alternating blinking of sections and other options).
Ready-made LED strip with running lights
Replacing the Chinese garland control unit
Instructions
Stock up on several garlands equipped with light bulbs with the same parameters. One of them will be a “donor” of lamps to repair the others.
After disconnecting from the network, open the controller. Check to see if any wires have come loose from the board. On one of its sides there are two contact points for connecting the power cord, on the other there are five pads for connecting color channels. One of these sites is located away from the remaining four - the common wire of the channels is connected to it. Often, repairs are completed when the conductors that have been unsoldered from them are soldered to these pads. When you are finished using the controller, close it.
Some garlands are equipped with lamps that self-short-circuit when they burn out. The light bulb in which the short-circuiting device has been activated has less resistance than the working one, which is why the remaining lamps in the channel operate in forced mode. Therefore, burnt-out lamps in such a garland must be replaced with serviceable ones as soon as possible. They can be taken from the “donor” garland. Make the replacement by de-energizing the garland, carefully solder all connections and insulate them with several layers of electrical tape.
If there are no short-circuiting devices in the lamps, when one of them burns out, the entire channel goes out. It is clear that dialing each of them separately will take a lot of time, so you will have to use the iteration method. With the power turned off, cut the channel exactly in the middle. Ring sections of the canal from beginning to middle and from middle to end. Now it is clear which of them contains the burnt out lamp. This section can also be divided in half and both halves can be ringed, and so on until the burnt out lamp is found. Replace it by taking a serviceable one from the “donor” garland. After this, reconnect the wires in all the places where you cut them. Carefully solder and insulate connections.
Light bulbs pose a particular danger in a garland. When turned on, they instantly burn out, and the full network voltage begins to operate between the thread holders, which are not insulated in any way. Such lamps should be immediately replaced with working ones.
Never short-circuit a burnt-out lamp instead of replacing it with a new one, otherwise increased voltage will be applied to the remaining lamps in the channel and they will burn out faster.
LED garland repair has two features. The first of them is that the new LED must be turned on in the same polarity as the other diodes of the same channel (a rectifier is installed in the controller of any garland). The second feature is the need to connect a resistor in series with each LED. Its value should be the same as that of the resistors on the other diodes of the same garland. It is impossible to mix light bulbs and LEDs in the same garland, since the former have a rated current of usually 50 or 100 mA, and the latter - 20.
After completing the repair, before continuing to use the garland, be sure to carefully inspect it for the presence of uninsulated connections. Isolate them carefully.
Hello friends! Fabulous times are coming: children and adults have holidays, a Christmas tree on the balcony, vodka and sausage in the refrigerator. Have you brought the tree in yet? Are you dressing up? Clear. And they probably saved on the garlands; there was enough for sausage. Then take your time. Conduct an audit of the Chinese brothers' products before wrapping them on the holiday tree.
Chinese garlands are good at a low price. This is where the delights end, and the troubles begin: from dying out in the midst of fun to electric fireworks with a fire.
Idea N4. Garland of LEDs
To do this, you will need a soldering iron, solder, rosin, LEDs, connecting wires (even thin power cords will do), plug or battery, power supply, button or switch. In this example, we will consider making a battery-powered garland.
- Solder the power wires to the contacts in the power supply housing for the batteries.
- Solder the LEDs to the wires, but be sure to keep in mind that the voltage applied to one LED should not exceed its rated voltage, so when connecting diodes in series, a resistor must be included in the LED power circuit.
Figure 11: LED connection
The resistance of the resistor is calculated in such a way as to reduce the voltage drop across the LED to the nominal value.
- Repeat the same procedure with the remaining LEDs.
- Solder the switch to the battery power supply.
Rice. 12: Solder the switch - Connect the LEDs to the power supply and insert the batteries into the block. If they do not hold, you can wrap the battery with tape or secure it with an elastic band, the garland is ready.
Ready-made LED garland
Design and diagram of the garland
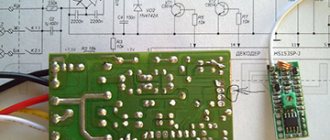
LED garland control unit board
Externally, an LED garland is no different from a regular one. It also contains wires, lamps and a control unit, which is the most important element.
The unit is a small plastic box with buttons that can be used to change the operating mode. Usually manufactured in a high-quality housing with IP44 protection level. The level of protection depends on the room in which the garland will be installed. Frost-resistant products will be required outdoors. There are soldered wires inside the block. There is also a board inside on which the controller, thyristors, resistors, capacitor and diode bridges are soldered. Expensive models may be equipped with a fuse.
LED garland diagram
LED Christmas tree garland circuit
The power supply receives mains voltage. It passes through a diode bridge and resistors, then it is smoothed by a capacitor, after which the voltage is supplied to the supply controller. When the button is closed, the modes switch. The controller controls thyristors, the number of which depends on the number of backlight channels. After passing through the thyristors, the voltage is supplied to the LEDs.
The variety of backlight colors depends on the number of outputs. If there are only 2 lines, the garlands will work in two modes - dim and light up in turn. More expensive products may have more channels.
Idea N5. Retro garland
Retro garlands are popular when decorating photo zones, terraces, gazebos, shop windows and other objects. And it is not at all necessary to purchase a finished product, since anyone can assemble it. To do this, you will need: a connecting wire (it’s a good idea to get wires in fabric insulation), sockets (the most convenient models with clamps for wires), the incandescent light bulbs themselves (you can also take LED ones), a plug and a switch. In this example, we will consider a series connection of light bulbs; we will use some sockets with a built-in switch.
- Cut the wires into pieces of the required length - they will determine the distance between the glow points.
Rice. 13: cut the wires into pieces - Strip the insulation of the wires at the ends; in these places they will be connected to the cartridge, so the length of the core must be appropriate.
Rice. 14: Strip the ends of the wires - If you are using a wire with fabric insulation, then its edge must be fixed with electrical tape so that the fabric does not fray further.
Rice. 15. Secure the insulation with electrical tape - Disassemble the cartridge itself and thread the wires into the cartridge cover.
Rice. 16: insert the wires into the socket cover - Connect the ends of the wires to the contacts of the socket Fig. 17: Connect the wires to the socket
- Assemble the cartridge body; the excess length of wires from under the cover should be carefully pulled out, avoiding excessive force, so as not to loosen the contact.
Rice. 18: Assemble the chuck body - Repeat the same procedure with the remaining sockets, after which you can fix the light bulbs in them.
- Cut the wire from the last light bulb; you will need one core from it, which you need to connect to the switch gap.
Rice. 19: Connect the switch - Connect the edges of the wire to the plug; to do this, they must be inserted into the groove of each contact and clamped with a screwdriver. Arrange the rest of the wire so that it does not protrude; the plug body should close normally.
Rice. 20: connect the edges of the wire to the plug
The retro garland is ready for use - plug in and enjoy. If you wish, you can complement the garland’s surroundings with a darkened wire or socket - they can be painted in the appropriate color. For greater gloss, the wires are painted with gold or bronze paint.
Ready-made retro-style garland of light bulbs
Problems and their solutions
Below are the most common breakdowns. You can actually repair the garland with your own hands: this will require attentiveness and accuracy.
Poor soldering quality
Poor soldering of supply and output conductors is the most common cause of backlight failure. In some cases, the contact is held solely by hot-melt adhesive, so its functionality is out of the question. It is enough to lightly touch the conductor, and the contact is completely broken.
Low-quality connections are especially common in Chinese-made garlands. Also, manufacturers from China, in order to save money, often use wires that are too thin, which easily break at the junction with the board.
Another way to avoid wire problems is to avoid stripping wires with a knife. It is easy to excessively thin the wire during this operation. It is better to clean the conductor by heat treatment with a lighter.
LED damage
To find the faulty diode, disconnect the garland from the power supply. We start the test with the last LED in the circuit (the conductor from the power supply goes directly to it). An outgoing wire is connected to the same leg, which goes further to the next branch of the light channel.
You will need to test the LED between a pair of power wires (input and output). As a test device we use a multimeter with slightly modified probes. To upgrade the probes, we attach thin needles to their ends using thread. The point of the needles should protrude just a little - 5-7 millimeters. Apply a layer of insulating tape on top.
Since all the diodes are connected to the circuit by soldering, simply removing them from the lamp (as is the case with a regular garland) will not work. We pierce the insulating layer of the cores to find the copper wires.
Switch the device to LED ringing mode. We begin to pierce the supply conductors near each diode over and over again.
Chaotic flickering
Another common problem is light bulbs flickering randomly. The diodes blink for no apparent reason, their brightness changes chaotically.
The cause of this malfunction is the incorrect operation of the electrolytic capacitor. This element is usually subject to deformation - it looks somewhat bloated.
The way out of this situation is to replace the capacitor. Its nominal value is always written on the body.
If after replacing the capacitor the situation does not improve, the problem may be a burnt-out resistor. Such a defect cannot be detected visually, so in this case you cannot do without a tester. We measure the resistance, not forgetting to find out the rating for the component in advance. If the result obtained does not correspond to the nominal value, change the resistor.
No light in one of the areas
If there is no light at all on any of the channels, this could be due to one of two factors:
- Breakdown on the thyristor or diode of this channel. To make sure that the cause of the malfunction is correctly determined, we unsolder the channel wire on the board and connect a new channel instead of the old one (which definitely works).
- If the above method does not bring a positive result, the problem lies not in the garland, but in one of the board elements - a diode or thyristor. Using a multimeter, we check these components and, if necessary, replace them with working ones.
Dim lighting
There are situations when there is lighting, but one of the channels provides too dim light. In this case, the controller circuit functions without problems, and when pressing the buttons, normal mode switching occurs.
Testing the diodes using a multitester also does not give any results. There is only one possible reason left - poor quality wires. If any part of the stranded conductor is torn, the total cross-section decreases, which is reflected in the dimness of the light. This happens due to the fact that the required amount of voltage is not supplied to the LEDs.
To find a break, you will need to manually check the entire wire line. You will have to be patient, since the defect on the line is quite possibly located on the last thread being tested.
When the problem area is found, we disassemble the conductors on the LED, clean them (preferably with a lighter) and solder them again. Next, we apply an insulating layer using heat shrink.
Broken lamps
If one or more lamps are broken and you decide to repair the garland, it is recommended to simply replace one LED with another. It is technically impractical to repair such light bulbs.
If there is no spare light bulb, remove the broken light source and connect the wires without its participation.
Typical frequently asked questions from readers
On the Chinese garland, two of the four channels stopped working. The lights rang, everything is normal. As I understand it, the fault is in the control board itself. Is there a way to repair it yourself or do you need to buy a new garland?
Everything the Chinese have done can, theoretically, be repaired. Most likely, the diagram of your garland control board is similar to the one shown in the figure.
Since two of the four lines are working, there is a high probability that two control thyristors (VS1-VS4) have failed. All you need to do is check the thyristors and replace the burned out ones. You can read about how thyristors are diagnosed in the article:
What will we get in the end?
The garland that we will make consists of addressable LEDs. These diodes differ from conventional ones by the presence of a logical contact, through which the color and brightness of the light are controlled.
Accordingly, to control such a garland you need “brains”. The control board will send different signals to each diode several times per second, which will allow you to get beautiful dynamic effects and animation.
If an ordinary garland simply turns on the diodes according to a schedule or can produce a snowfall effect at most, then we can make a running line with text and more than 20 effects. Each glow mode will be customizable with the ability to change most parameters.
The most common causes of breakdowns
For those of us who aren't as electrically savvy, here are some common problems with fairy lights and how to solve them.
- The simplest problem (believe it or not) is a light fixture that is not connected to an outlet or other wire, which may also not be connected to the network. Make sure the cable you are working with is actually connected! The best way to know for sure is to plug the cord into a working outlet. If there is no outlet nearby, simply run an extension cord temporarily to the lamps, wherever they hang.
- The fuse has blown. Almost all Christmas light sets have a fuse hidden in the plug. Open the hatch and look at the fuse as a first quick check. Extension cords often have these fuses as well, so check your extension cord.
- Burnt out lamp
- A lamp wire that is incorrectly wound around the base of the plastic sheath, resulting in the wire either intermittently touching the contacts in the socket or not touching the contacts at all.
- The wire came off the lamp base
- The light bulb is not inserted correctly into the socket - twisted, not inserted all the way, etc.
- A wire that has been pulled out of its proper location in the socket, preventing it from making contact with a properly inserted light bulb.
All the light bulbs have burned out
The only way to fix a cascading failure is to replace all the light bulbs. It seems like a huge task, but in reality, repairing outdoor garland is not that difficult.
Changing lamps in one string of 50 lights should not take more than ten or fifteen minutes. Spare bulbs for your garland are available in special departments of stores.
- Unplug the light from the power source (the wall outlet or the point on the tree where it connects to other lights).
- Identify the first light bulb in the chain by following the wire from the plug along the length of the string until you reach the first light bulb.
- It's easier to keep track of which bulbs to replace if you start at one end.
Remove the first bulb and replace it with a new one. Test each light bulb before inserting it into the socket to ensure that the wires coming out of the lamp base are properly wrapped around the base. Do this one at a time so you don't lose track of where you are and accidentally leave the socket without a bulb.
Replacing Bulbs: The bulb itself is simply a glass ball with a filament, enclosed and inserted into a shell (or lamp base).
- This base is inserted into the cartridge and removed from it as necessary. Be careful NOT to grab the bulb or pull.
- Instead, use your fingernails or a suitable tool to pry the edge of the lamp base away from the socket in which it was inserted.
- Pull the lamp base out of the socket and the light bulb will go with it.
- If you do it differently, you may pull the bulb out and leave the base stuck in the socket.
Work along the length of the garland until you have replaced all the lights. Plug the cord back into the outlet or extension cord and turn on the power. The garland should light up.