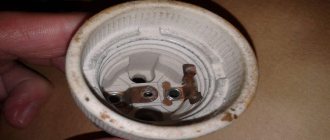
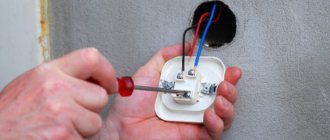
To change the light bulb in a spotlight on the ceiling, you need to perform a few simple steps: remove the retaining ring, pull the lamp out of the base, insert a new product into it, and then secure it with the same retainer. You should first turn off the electricity, or better yet, turn off the power to the entire apartment with the switch on the panel. This will prevent the risk of electric shock and allow you to complete the job calmly and quickly.
Spotlights in the interior Source design-homes.ru
Spot ceiling lights have become widespread due to their beauty and convenience - such lighting devices perform a decorative and practical function, helping to divide space into zones and emphasize the design of the room. The use of devices with suspended and suspended ceilings has become a common solution among consumers. You can find a large number of different types of light bulbs on sale; LED and halogen light sources are most often used for apartments and houses. Their advantages are low power consumption and bright lighting, as well as ease of installation and replacement. And although the procedure for working with LEDs is significantly different from installing incandescent lamps, in fact, there is nothing complicated in this process. It is not at all necessary to call an electrician for this task; everything can be easily done with your own hands. Next, we’ll figure out how to change a light bulb in a lamp yourself.
Safety rules and preparation for work
Before you begin replacing lighting fixtures, you must ensure that all safety precautions are followed. To do this you need:
- Turn off the lights, and also de-energize the apartment with the switch on the panel. This will prevent electric shock. Please note that you will have to work without lighting, so it is better to change the light bulb during the day. Otherwise, you can use a flashlight.
- Wait a few minutes after turning off the light to allow the appliance to cool down. This is especially true for halogen lamps, but LED lamps can also heat up in some cases.
- Use a convenient device that will allow you to reach the ceiling. You can use a stable stepladder, table or stool. Be careful when working to avoid falling. Do not hold on to the ceiling covering or the lamp itself, otherwise there is a risk of injury and damage to the canvas.
- If you need to remove a halogen lamp, use thin gloves to avoid leaving marks on its surface. Otherwise, the device may overheat.
Comparison of different lamps
The lowest efficiency is typical for incandescent lamps. Halogen lamps also have low efficiency. LED light sources consume a lot of electricity, but show good efficiency. In addition, LEDs are characterized by high durability.
The table shows the main characteristics of different types of lamps.
Types of lighting fixtures
The modern market for lighting devices offers a large number of types of light bulbs, among which the most famous and widespread are:
- Incandescent lamps are an outdated type and cannot be used for suspended ceilings due to the surface temperature being too high. In addition, this type consumes a large amount of electricity and has a short service life;
Light bulb with filament Source stroy-podskazka.ru
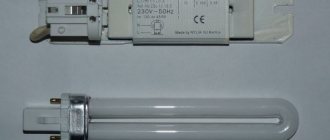
- Luminescent - popular “housekeepers”, so named because of their modest electricity consumption, give a good luminous flux, practically do not heat up during operation, but at the same time they flicker and pose a health hazard due to the mercury content in the bulb;
Housekeeper type light bulbs Source elektrik-a.su
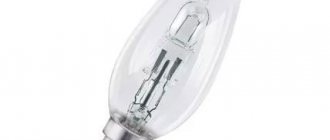
- Halogen lamps are an improved analogue of classic light bulbs, in which gas is added to increase the brightness of the lighting. The products are sold at reasonable prices and have an increased shelf life, while their disadvantages are largely the same as sources with filament;
Halogen light bulb Source strojdvor.ru
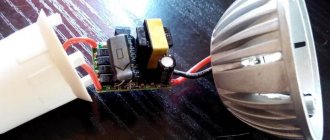
- Based on LEDs - the most economical and safe type, characterized by a long service life and good light characteristics. Such devices do not flicker and do not pose a threat to the environment. The only drawback of the devices is their high cost, although recently there has been a gradual decrease in cost.
Light bulb based on LEDs Source ledosvet.com
Replacing lamps type GX53 (tablet)
The easiest way to change them is:
- hold the lamp body with your left hand and turn the lamp very slightly (up to 20 degrees) counterclockwise until it clicks
- then pull it out by pulling it down
- installation and fixation in place of the new one occurs by aligning the contacts and turning clockwise. At the same time, a characteristic click should also be heard.
There is no need to pull out and dismantle the lamp itself.
Types of socles
Lamps for ceiling lamps differ from each other not only in the light source, but also in the type of base. The following variants of the latter are common:
- Screw - most often used in incandescent lamps, it is a thread for screwing in the device;
Lamp with screw base Source asutpp.ru
- Bayonet is a variation of the previous type, here protrusions are used on the base, which are placed in the corresponding grooves of the cartridge;
Bayonet type base and cartridge Source elektrik-a.su
- Pin is the most modern type, which is installed on halogen and LED devices. There are a large number of its forms and variations.
Light bulbs with a pin base Source oboiman.ru
Replacing light bulbs with E14, E27 sockets
Here the whole process is no different from the usual replacement of a standard chandelier or sconce socket.
Unscrew the old one counterclockwise and also screw in the new one. The main thing is not to confuse the size of the socles - E14 and E27.
When replacing lamps of any size and base, it is very important to consider their type.
For example, halogen lamps should not be touched with bare hands.
Since there may be traces of oily fingers on it. Firstly, this will cause dark spots to appear when illuminated. Well, secondly, this will lead to its burnout in the shortest possible time.
Most often these are models with a G4 or G9 base, but not only.
They (G4-G9) do not have any additional fasteners to the lamp body. To replace the light bulb, simply pull the bulb down.
When working with such products (halogen), be sure to use gloves or wipes.
You can also wrap part of the flask with paper tape.
How to replace a lamp in a ceiling light
The work of changing a lighting fixture in a suspended or suspended ceiling is practically the same. You need to follow a few simple steps:
- Find the latch, made in the form of a metal ring, and, pulling the ears, carefully remove it from the lamp. After this, the lamp will fall out of the base and hang on the socket.
- Disconnect the device from the base and carefully lift it out of the ceiling, being careful not to squeeze the bulb too hard. For halogen types, be sure to use gloves; you can also use adhesive tape.
- If the lamp does not provide for the possibility of replacing lamps, it must be completely dismantled and then a new one installed. To do this, gently pry the body of the device from the side, after which the springs that hold the device in the ring will appear. To avoid damaging the ceiling, they are slightly bent inward, which allows you to safely remove the lamp.
- Install the lamps in the reverse order - insert them into the base, lift them to the level of the base of the device, and then secure them in the ring with a metal spring.
- When replacing a lamp, it is mounted in the ceiling, tucking in the ears.
Replacing MR16, GU5.3 lamps
Suspended ceiling lamps have two main parts:
- functional
- decorative
By functional we mean the frame and clamps. The lamp replacement process itself takes 4 steps step by step:
- power cut
First of all, it is necessary to de-energize the room in which the replacement will be made. To do this, turn off the circuit breaker for the lighting circuit of the room in which the lamp is located.
You can, of course, simply turn off the light switch itself, but if you are far from electricity, you may not know that often (due to an error by installers), these same switches break not a phase, but a zero.
The phase wire continues to be energized on the wires and contacts, even after the lights are turned off. Therefore, in order not to take risks, it is better to do all disconnections in your electrical panel.
- dismantling an old lamp
Remove the main retaining ring, which acts as a retainer. To do this, squeeze two antennae
and the light bulb itself will fall out of the housing, hanging on the contact socket.
After which, you easily pull it out of the contacts by pulling it towards you (MR16) or turning it counterclockwise (GU10).
- installing a new lamp
Before installing a new one, be sure to check the power and voltage data on the old bulb. For example, for products of the same shape, the supply voltage may not be 220V, but 12V.
And the power should match or at least not exceed the previous one. Otherwise, the lamp may overheat or the power supply may overload (if provided).
If everything matches, plug the plug connectors of the new light bulb into the contact sockets of the socket.
- all that remains is to install it in the old place and fix it there
Fixation occurs using the same locking ring. To do this, squeeze its ears again, insert them into the grooves and release them.
The light bulb is fixed, you can turn on the light. There are models without locking rings. In this case, you will have to remove the entire lamp from the suspended ceiling.
How to do this will be discussed below.
Some people sometimes have problems with the fastening steel rim. For some reason he doesn’t want to hold on and constantly falls out.
This happens because the lamp does not sit in its place in the lamp. Accordingly, the grooves for the ring are closed by the body itself.
There may be several reasons:
- deformation of the lamp body by springs
- the springs are of the wrong size and rest heavily on the body
This often happens during a massive replacement of several light bulbs, when the rings get confused and then installed on non-original spots.
- the suspended ceiling is fixed at too short a distance from the main one and the lamp together with the socket rests against the plaster
How to remove a damaged lamp
The process of dismantling a lighting fixture becomes much more complicated if its integrity is compromised. This is especially true for broken light bulbs, which can cause injury when removed. To avoid injury and to avoid breaking the flask into many small fragments, it is recommended to cover it with adhesive tape, and only then can it be removed from the cartridge.
The thick glass of halogen devices is less likely to break. But in this case, the danger lies in the sharp edges, as well as the gas that is inside the device. Therefore, when dismantling this type, tape is useful to seal the damage site.
Replacing broken luminescent products is even more difficult. To safely remove a burst flask, it is advisable to put a bag of thick material on it, otherwise the fragments may scatter throughout the room. If this does happen, but the base remains in its place, you will have to disassemble the entire socket, having first removed the ceiling panel of the lamp.
How to change fiber optic light bulbs in a suspended ceiling
Today, fiber optic light sources are the most reliable; their service life can exceed 10 years. Due to their high level of strength, they can be used in any room, regardless of humidity levels and temperature conditions.
Since fiber optic lighting devices are small in size and, if necessary, they can change the color of the glow to any shade, they are most often used to create a starry sky in suspended ceilings.
Many experts consider such light bulbs to last forever, since they are less likely than other types to burn out. If one of the lamps burns out, it must be immediately removed through the existing hole in the suspended ceiling and a new one installed in its place.
Use in various furniture
Furniture lamps can be attached to any surface and any part - be it a cabinet door or a work surface. For a wardrobe, it is advisable to place lamps on the inner walls of the wardrobe or in its upper part to illuminate things hanging on hangers.
On a desk, it is best to install the lamp above the work surface so that the light does not create sharp shadows when writing, and it is comfortable for the eyes. You can also install an LED strip in the desk drawers, inside, so that if necessary, you can easily find any necessary item, be it a pen, stapler or paper clips.
Spotlights are most often used in the kitchen. They illuminate the kitchen work surface and illuminate the stove, usually located in the hood. It is very convenient to place a light bulb above the sink, installing it under the dish drainer. With such lighting it will be convenient to wash dishes and vegetables. Kitchen cabinets are illuminated from the outside or around the handles, but such devices serve more of a decorative function.
The uniqueness of furniture lamps is that you can install them on any surface. It all depends only on your imagination, capabilities and needs.
Types of luminaire design
Spotlights are divided by functionality, method of installation and adjustment. In the second case, they can be built-in, overhead and suspended. Overheads are most often installed on longboat foundations - brick walls or concrete ceilings. They are suitable if you need to emphasize individual elements of the interior without affecting the dimensions of the room.
The design of a surface-mounted lamp includes a mounting platform, a diffuser and a housing. A special feature of this type is the need to install a mounting plate above a hole smaller than the housing itself. If this is not taken into account, it will not be blocked by the lampshade. The housing should be fixed to the mounting platform. To do this, use side screws.
Built-in models are installed on frame bases, these can be:
- wall niches;
- plasterboard structures;
- furniture partitions;
- walls and slatted ceilings;
- stretch ceiling.
The lamp body has clamps and fastening elements. No third-party enhancements are required. To install in the ceiling, you must prepare a hole with wire inputs in advance.
Ceiling lamps are mounted at a certain distance from the mounting surface. The lamp itself is hung on a decorative power cable, which is fixed to the ceiling. There is no need to strengthen the structure with additional parts.
But if this is a massive lamp, it is recommended to additionally install mounting strips. They are usually made from metal or wood. Pendant lamps can be mounted on any base, but in most cases they are used as a separate decorative element.
Video: Why you can’t use spotlights
Advice from professionals
- If a spotlight is supposed to use a halogen light bulb, then its power should be no more than 30 W.
- Rule for placing a lamp with halogen incandescent lamps: the distance from the lamp body to the ceiling must not be less than ten centimeters.
- LED lamps are absolutely safe for suspended ceilings.
- Pay attention to the coating material. If the ceiling is strict, matte, then the lighting can be chosen in a traditional style. But if the ceiling is glossy, then you should remember that the lamps in it, like in a mirror, will be reflected, they will appear twice as large, and, accordingly, there will be more light.
- It is better not to use chandeliers with a large horizontal plane for suspended ceilings.
- It is better not to install a xenon bulb, however, options with a heating temperature of no more than 60 degrees are allowed.
- When installing the ceiling, you should immediately think about how many lamps you want to install, because then it will no longer be possible to do this. Opt for several lamps; this composition looks very beautiful on stretch ceilings, so feel free to embody all your most interesting ideas.
- It is undesirable to use chandeliers, the heat from which can greatly heat the ceiling. This applies primarily to incandescent lamps and halogen sources. Ceiling lights with metal housings can simply melt the ceiling if the mentioned lamps are installed in them. If you want to use them, then you should step back at least 10-15 cm from the ceiling. The best choice would be diode lamps or energy-saving ones, since they hardly heat up.
- It will not be possible to add lamps to an already finished ceiling, since each of them requires a special part - an embedded part, which is installed at the stage of ceiling installation.
- If the room is not light enough, you can review the power of the lamps used and replace them with stronger ones. Or use additional floor lamps and sconces.
- It can be very difficult to replace one lamp with another in an already installed ceiling. The lamp is attached using a mortgage, most likely wooden. It is made exactly in the sizes and shapes needed for a particular lamp. Next, where the chandelier is attached, the film is cut out to guide the wiring for the chandelier through this hole.
For each lamp there is a hole in the ceiling into which only a specific lamp can be installed, so changing the size of the lamps along the way will not work. You will have to either buy exactly the same or almost the same, so that it is attached in exactly the same way and is the same size. But it may well be of a different color or with other decorative elements.
- Also a good choice for a stretch ceiling is LED strip. It practically does not heat up and is very economical in terms of energy consumption. Has good performance. It looks very stylish, especially if you have a multi-level ceiling.
- With the help of light, the ceiling can be visually made higher or lower. If you place the lamps around the perimeter on the walls and point them at the ceiling, it will appear higher. If the lamps located on the ceiling are directed towards the walls, the ceiling will appear lower.
- To make the room seem longer, place the lamps one behind the other. Concentrating light on just one wall will make the room appear wider.
- Spot lighting and LED strips are very convenient for dividing a room into zones. This allows you to save a lot of energy, since you can turn on the lights only in the area in which you are currently located.
- To get a light bulb in a spot and change it, you must first unscrew the tablet. This way you can quickly remove the soffit.
To learn how to change a light bulb in a suspended ceiling, see the following video.
Step-by-step instructions on how to change a halogen light bulb:
In order to change a light bulb in a chandelier, you will definitely need a special fabric glove to prevent direct contact of your fingers with the surface of the lamp, as well as a new light bulb itself.
Before changing the light bulb, you need to let it cool. Halogen lamps become very hot during operation, and if you try to remove the lamp from the socket immediately after turning it off, the glove you are using will melt.
After cooling, carefully remove the old lamp from the mounts.
In some cases, after removing the lamp, the socket comes out of the mount. To properly change a light bulb after removing the old one, you need to make sure that the socket is recessed into the mount.
Before replacing the light bulb, you need to check the alignment of the contacts on the lamp and the holes in the chandelier socket. If the bulb is positioned correctly, it will be easier to fit into the socket holes.
We insert the lamp into the socket.
Be sure to push it all the way.
We turn on the chandelier and check the operation of the new light bulb. If it glows steadily, the replacement of the light bulb can be considered successfully completed.
Replacing halogen lamps with G9 base with LED lamps
When you complete a global apartment renovation with your own hands, you end up with a lot of free time. And so as not to waste it lying on the couch, I decided to conduct several experiments on replacing halogen lamps with a g9 base with LED ones . As it turned out, several interesting points emerged.
Replacing ordinary incandescent lamps with E27 and E14 sockets with energy-saving ones does not cause any difficulties. But with halogen lamps, direct replacement is not possible. Having a lamp with halogen lamps, we are dealing with miniature lamps, where G9 and G4 bases are already found. It is impossible to replace such a miniature lamp with a compact fluorescent analogue.
The only energy-saving light sources of comparable size are LEDs.
But, for some reason, you rarely hear positive feedback from using LEDs instead of halogens. There are opposing opinions ranging from complete delight to grandiose failure. Why is this happening? How to find a suitable analogue? And, in general, is it worth trying to replace halogen lamps with LED analogues?
Analogue lamp with G9 socket
First, let's look at lamps with a G9 base. Lamps with this base connect directly to a 220 V network and have a wide power range from 20 W to 75 W.
I suggest you carefully look at a sample of an LED lamp. We have before us a 2.5 W lamp, the luminous flux from such a lamp is stated to be 120 lumens, the manufacturer calls a 30 W halogen lamp a direct analogue. To be honest, there is complete confusion with the label: the luminous flux clearly does not correspond to the power, the indicated currents and voltages do not correspond to the declared power. But there is nothing to do - the purchase is made, we will move on to practical tests.
What immediately caught my eye when replacing the lamp was the different sizes of the lamps. It feels like the bulb of a regular halogen lamp is half the size of its LED counterpart. In addition, the shape of the contacts in the samples is different: on the glass bulb there is a wire type, and on the LED housing there are flat petals.
The first step is to test the kitchen chandelier. When installing a new lamp, funny complications arose - the lamp was not inserted into the socket. The body and base are ceramic, and it was somehow scary to make additional efforts. As a result, the lamp went into place, but the unpleasant aftertaste remained. To make the contact more confident, I had to bend the petals a little.
Despite the first concern, the lamp came to the right place. The illumination is sufficient, the lamp is well hidden inside the lampshade. The photographs clearly show the color temperature of different light sources. The halogen lamp is yellowish, while the LED lamp is noticeably cooler, almost white. The lampshade with a halogen lamp is completely filled with light, and the LED lamp only touches the lower edge of the lampshade.
This is not noticeable in the photo, but the brightness from the LED lamp seemed even a little greater than from the halogen lamp. But the increased brightness was observed only under the lamp. The lighting from the LED lamp is directional, hence the uneven illumination of the lampshade. The light spot from an LED lamp can be compared to the beam from a hand-held flashlight.
In general, we were satisfied with the LED lamp - there is enough illumination. The chandelier was designed for a power of 40 W per lamp for halogen lamps with a voltage of 220 V. The LED analogue looks in no way inferior in terms of illumination. True, instead of a uniformly sparkling lampshade, the maximum light has shifted outward. Despite the shift in light accent, the lamp looks just as attractive as before replacing halogens with LEDs, but slightly differently.
Replacing halogen lamps with LED lamps in spotlights
In our apartment, the chandelier in the kitchen is not the only lamp with a G9 base. Most of our spotlights have the same lamps.
This is what spotlights look like with a standard and LED lamp. As can be seen from the photographs, the temperature difference between the warm and cold glow is becoming more and more clearly visible. The pattern of light reflections is almost the same, despite the different installation depths of the lamps. As you remember, a halogen lamp is 3 cm high, and an LED lamp is 5 cm high. Thus, when turned off, the LED lamp becomes noticeable, which was not the case with a standard halogen lamp.
It is also worth noting the clearly expressed directional glow from the LED lamp and some apparent increase in brightness. This optical “deception” is caused, rather, by the design features of the LED lamp and its higher color temperature.
Continuing the series of tests, the turn came to the bedroom. In these lamps, a standard halogen lamp and even more so its LED analogue are already clearly visible. However, taking into account the artistic intent, the protruding lamp does not spoil the lamp in the least. Quite the contrary - of all the lamps in our apartment, this tandem is the most successful. The LED lamp snaps into place “like original” and also shows a more attractive reflection of light on the ceiling.
In our room, the spotlights and chandelier were chosen from the same collection. But the chandelier, unlike spotlights, uses halogen lamps with a G4 base, designed for 12 V. And if we have already begun research on replacing halogen lamps with LED lamps, then we will be consistent and continue testing to the end. Let us immediately note that while understanding 12V LED lamps, we came to very unexpected conclusions. But read a separate review about this - Features of replacing halogen lamps with a G4 base.
Design and style directions
Modern manufacturers offer a large number of different options for furniture lamps, which, with the right approach, will fit perfectly into any interior. An interesting device will highlight the most daring design. Italian lamps (spot light) are particularly diverse.
To create a unique interior, it is necessary to use light of different color spectrums (warmer, cooler).
For example, it will be more convenient to cook or clean in the kitchen if the light is cold, but it will be more pleasant to dine in a “warm” place. It's the same in the bedroom. It is more convenient to fold things or prepare your bed when the light is cold, and to read before bed when it is warm. When planning to install lamps, think about the purposes for which you need light in a particular place.
In the high-tech style, cool-colored lamps will highlight chrome and gray-steel interior elements. Warm light will fit better into the loft style. It is necessary to think in advance what kind of lamps you need - based not only on your needs, but also on your style.
With the help of lighting you can place accents in the interior. For example, you can highlight what you would like to highlight, what seems to be the most successful, and leave the less successful solutions in the dark.
Surface-mounted lights come in a variety of shapes and sizes: triangular, square or round. You can choose any options depending on your needs and style. In addition, metal fittings can be made in silver, bronze or gold. Therefore, any (even the most demanding) consumer can choose suitable lamps.
How to remove a halogen light bulb from a chandelier
Over time, the life of any light bulb ends and it becomes necessary to change it. The replacement procedure depends on the type of lighting fixture, the type of light source and, in this case, the type of ceiling.
Types of lamps used in luminaires
Lamps used in a suspended ceiling lamp can be:
- incandescent (not all types, as they heat up and can damage the coating);
- halogen;
- LED;
- luminescent.
Important! When installing a fabric stretch ceiling, it is recommended to install external lighting fixtures rather than built-in ones, since the fabric ceiling is very sensitive to fading and loss of color, although it is more resistant to heat.
When purchasing lamps, it is very important to consider the room in which they will be located. So, for the bathroom and kitchen, the light source must be protected from moisture. Here you need to pay attention to the IP icon - degree of protection.
Next, a two-digit code will be indicated, of which the second digit is of interest in this case - the degree of protection against water. It can be 0 (no protection), 1-3 – protection from drops, 4-5 – protection from splashes and jets of water, respectively.
For installation in a bathroom, protection degree 2 or higher is recommended.
An ideal option for use in spots on a suspended ceiling are LED lamps. They do not heat up, have a long service life and are the most environmentally friendly source of artificial lighting. And to create a unique interior, you can install diode strips, which will provide an interesting lighting effect with a variety of colors.
The design of the ceiling lamp consists of the following parts:
- housings,
- special clamps,
- glass or plastic lid,
- a clamp that secures the entire structure.
Types and methods of mounting lighting fixtures
According to the methods of mounting light sources on a suspended ceiling, there are:
- built-in, which are mounted in holes in the ceiling;
- overheads are mounted on the ceiling surface;
- hanging. These are small light sources with the function of changing its direction, similar to a chandelier.
There is another classification of light bulbs according to how they are attached to a suspended ceiling:
- standard – traditional carving;
- lamps with two special pins that fix it in a certain position;
- mount that fixes the lamp when it is rotated 90 degrees.
Procedure for replacing different types of lamps in different types of luminaires
If you need to replace a light bulb in a spotlight, you need to check the supply voltage, which can be 12, 24 or 220 V, the type of base - threaded (E14, E27, etc.) or pin (GU4; GU5.3; GU10; GX53, etc.) – depends on the luminaire and the type of lamp.
Replacing MR16, GU5.3 lamps
The light source in MR16 luminaires with a GU5.3 base is held in place by a locking bracket. The procedure is as follows. Turn off the power, remove the lampshade (if equipped), squeeze the locking bracket on both sides by the special antennae, unscrew the burnt out bulb and screw in a new one. Next, repeat all the steps described above in reverse order.
Replacing lamps type GX53 (tablet)
The name is given to the light source because of its round shape with white frosted glass, similar to a tablet.
Replacing it is very simple and consists of three steps:
- turn off the electricity
- holding the lamp frame with one hand, grab the lamp with the other and turn it counterclockwise until it stops (about 10-20 degrees),
- insert the new lamp and turn clockwise until it stops.
Replacing lamps with a threaded base in a spotlight depends on its design. Sometimes they have a retaining ring in their design, as in the above types of lamps.
If not, then the light source is removed entirely from the suspended ceiling.
For example, if the ceiling is plasterboard, then the lamp is fixed using spring-loaded legs located opposite each other and spread in different directions under the action of a spring.
Replacement is simple: the old one should be unscrewed counterclockwise, and the new one should be screwed in clockwise.
Replacing lamps with G4, G9 socket
The design of these bulbs is similar, the difference is in size. They do not have any additional fasteners, so replacement is very easy. As with all the above cases, you should first turn off the power. Then, having unscrewed the decorative light diffuser (if any), pull out the light bulb, holding onto its body and install a new one, inserting the pins into the socket.
In spot ceiling and furniture-mounted luminaires, halogen lamps with G4 and GU5.3 sockets are most widely used.
How to change a halogen light bulb with G4, GU5.3 bases depends on the type of lamp: light sources with an open bulb, with a reflector and protective glass.
In the first option, you need to remove the lampshade by prying it off with a screwdriver, remove the light bulb and insert a new one.
In the second, pull out the spacer spring that secures the lamp in the housing, separate it from the socket, carefully pulling and holding the lamp.
Rotating light sources may not have a spring. In this case, you should remove the entire decorative lampshade or lamp. The procedure is similar to the “tablet” lamp.
Attention! Work only with gloves, as any marks on the light bulb will lead to its rapid failure.
Replacing a halogen light bulb with an r7s base
Used in floor lamps and outdoor lighting.
Procedure for replacing a halogen bulb:
- turn off the electricity
- lightly press the lamp with one end of the base into the socket, and pull the other end towards you, holding the bulb with one hand,
- Insert the new lamp with either end into the socket, press it lightly and insert the other end of the light bulb into the opposite end of the socket.
It should not dangle in the cartridge, for which, if necessary, the clamping contacts should be adjusted.
How to remove a chandelier
The first step is to turn off the power. The chandelier can be attached to a suspended ceiling using a hook or a cross-shaped strip. In the first case, you should first remove the protective cap, stick your hand into the resulting gap and feel for the hook. Next, the wires are brought into view, and the chandelier is removed at the place where it is attached.
In the second case, the shades, decorative elements and lamps are removed from the chandelier. Then the cap, under which the fasteners are located, is unscrewed. Next, the screws are unscrewed and the chandelier is disconnected along with the mounting system.
Advice. If the chandelier is heavy, it is better to remove it together.
Light sources used
All types of light sources can be mounted on stretch and suspended ceilings made of PVC or fabric - suspended, overhead and spot.
Pendants (pendants) are made both in the form of voluminous chandeliers and in the form of laconic models. Chandeliers are well suited for lighting living rooms and halls. Simpler and smaller models are perfect for illuminating a mirror or children's play area. The hangers are attached to special hooks or mounting plates.
Overhead models can vary in size, number of lamps, design, etc. Installation is carried out on a frame located under the tension fabric. Light sources for such chandeliers should not heat up, and therefore LEDs are most often used.
Spot lights are small light sources with built-in LEDs or for use in one low-power lamp. The body of such models can be mounted flush with the ceiling or protrude slightly beyond it.
Replacement instructions
How to change light bulbs in a suspended ceiling - steps:
- power outage. If in doubt, it is better to turn off all electricity in the apartment;
- removing the decorative lampshade (if present);
- the locking bracket should be squeezed with two fingers by the antennae intended for this;
- it is necessary to carefully remove the stopper;
- remove the lamp from the socket. Do not pull the wire to avoid tearing it off;
- Reassemble in reverse order, replacing the retaining ring.
Some recommendations for preparation.
- In order not to damage the tension fabric, or the suspended slatted system with a mirror coating, it is better to use a ladder or a stable stool, rather than reaching for the lamp or, especially, leaning on the ceiling.
- The use of gloves is necessary when replacing a halogen lamp to avoid its failure.
- Replacement should be effortless. Removing the light bulb must be careful to avoid damaging the stretch ceiling or drywall.
- You should read the instructions for replacing light bulbs according to their type.
When using a regular incandescent lamp for lighting, replacing it is easy. You need to unscrew the old one and screw in the new one, first turning off the electricity.
How to unscrew a light bulb with your own hands
Each type of fixture and lamp has its own replacement instructions, but the first steps are the same for all cases.
- Completely de-energize your home at the panel or meter. In this case, there is no need to worry about electric shock.
- To access tall chandeliers and spot lights on a suspended ceiling, find a stable stepladder or stool. When working with such fragile parts, you need to be sure of where you stand.
- We carefully stand on a stool (or remain on the floor if the light bulb can be reached without effort), working only with the switch off with dry hands.
- Further steps to replace lamps depend on their type. If these are threaded sockets, then with one hand we grasp the light bulb itself (attention, it may still be hot), and with the other we hold on to the socket. Using gentle movements, we begin to unscrew it counterclockwise. Do not squeeze the glass too hard - remember, it is thin. When unscrewing a halogen lamp, remove it only with clean and soft gloves.
- If the light bulb cannot be unscrewed, you need to try to loosen it, then it will give in.
- If it burns out because it burst, then unscrewing it will be quite difficult. How to change a broken light bulb in this case? There is nothing to grab hold of - only sharp shards of glass stick out from the cartridge. A regular potato will help you. Cut it in half, carefully place the cut on the protruding fragments, and then unscrew the remaining light bulb with gentle counterclockwise movements.
Unscrewing a broken light bulb using a potato
- Even if the fragments do not stick out, but the base is firmly seated in the socket, it can be unscrewed using an ordinary plastic bottle. Using a match or lighter, melt the neck of the bottle a little, and while the plastic is hot, insert it into the empty base. Wait a minute for the plastic inside to harden, then unscrew the rest. The E14 base can be removed using a wine stopper. This method is not suitable for replacing light bulbs in a suspended ceiling lamp.
- Long tubular fluorescent lamps have their own fixation method. To remove, grasp the body of the lamp with both hands and carefully rotate it along its axis in any direction. During the process, several characteristic clicks will be heard along the edges of the lamp - this is how it should be, these are the fasteners clicking. After turning approximately 45 degrees, the lamp contacts will appear along the edges of the mount, and it can be easily pulled out of the grooves.
Mounting a tubular fluorescent lamp
- How to change a light bulb in a spotlight? With built-in lamps the situation is a little more complicated. The lamps are secured in them using special springs made of hardened metal. To interact with them, there are special levers on the body; by pressing them, you will release the light bulb from the mount, and it can be removed. The main thing is not to overdo it with pressing the levers - they are quite fragile, they are very easy to break. In addition, if you suddenly release the light bulb, it may slip out and fall to the floor, which will lead to the formation of a large number of dangerous fragments and damage to the floor covering - not the best way to replace a lamp in a suspended ceiling.
- If you can't find any levers, but you can grasp the device with your hands, try gently turning it 90 degrees counterclockwise. How to remove a spotlight? There are fasteners that, after turning the light bulb and making a quiet click, allow you to remove it. After removing the lamp, set it aside in a safe place.
Types of lamps with different mounts
