The main differences between halogen and LED
The first step is to figure out what differences they have.
This will allow you to make the most optimal decision for yourself and understand which lamps will be more effective in rain, wet weather, and whether it is worth installing LEDs on your car at all. Car enthusiasts prefer LED lamps
LED and halogen lamps are different types that are fundamentally different from each other. The key difference between semiconductors and gas-discharge light sources lies in the following indicators:
- higher light output;
- low energy consumption;
- increased service life in terms of duration;
- less load on the on-board power supply system.
Let’s compare: which lamps provide the most efficient and optimal lighting
As a result, drivers install LED lamps instead of halogen lamps in cars to improve the quality of light.
Advantages and disadvantages
If you compare these two radically different light sources, you can see that LEDs have numerous advantages:
- the ability to obtain an ultra bright beam of light;
- correct beam dispersion, which allows you to perfectly illuminate the road even in bad weather conditions;
- long service life, significantly exceeding any analogues.
LED lamps provide bright, correct and uniform lighting
Thanks to the reduced load on the on-board electrical network, we can talk about a slight reduction in consumption levels, which in the long term results in decent savings.
The energy consumption level of h4 LED lamps is 3-4 times lower than halogen lamps. Their installation will allow you to avoid voltage drops in the electrical network when a large number of energy-consuming devices are used, such as an interior heater, heated seats, mirrors, and rear window.
LED lamps have design differences. Removing the increased load on the battery and car generator extends their service life and eliminates premature failure.
Using LED h7, you can forget about the fact that some part of the road will be unlit. Also, thanks to the brightness of the headlights, it doesn't matter whether the road is illuminated by street lights or not, as the car's light will be sufficient. It is especially comfortable to drive with such headlights for long distances - your eyes will not get so tired on the road.
Replacing halogen lamps with LED lamps in a car can provide the driver with a number of positive aspects:
- The car's headlights will shine much brighter, which will increase the visibility of the vehicle on the road. Even from long distances, the car will be clearly visible to other road users.
- The appearance of the car will improve. Head optics, in which LED lamps are installed, transform the appearance of the car, making it more stylish and beautiful. The car will stand out among similar ones and become more noticeable.
LED lamps are undoubtedly the winner
The disadvantage of such replacement and installation is the fact that even with proper adjustment at close range they can blind oncoming cars.
Another disadvantage of semiconductor lighting sources is that they produce a beam of light that has a short range. This drawback is especially noticeable when driving at high speeds on the highway, which limits the driver's visibility.
The beam of light at high speed limits visibility
Halogen lamps have a longer illumination range. A bonus for other drivers - the lamps will not blind oncoming traffic.
Replacement process
Even if you do not have extensive experience, looking at the diagram, it will not be difficult to figure out the process yourself.
If you plan to connect a lamp with ballasts, then the sequence of your actions will be as follows:
- First of all, make sure that there is no electricity entering the circuit. To do this, you need to turn off the circuit breaker and check if there is voltage.
- Remove the cover and gain access to all elements of the circuit.
- Then you need to disconnect elements such as the starter, inductor and capacitor from the electrical circuit.
- The next step is to separate the wires that go to the terminals, after which they must be connected directly to the phase and neutral wires.
- The remaining wires must be removed or insulated.
- Next, you need to insert the T8 lamp into the G13 socket and try to turn it on.
It will be even easier to modify a fluorescent lamp with an electronic ballast. Your sequence of actions will be as follows:
- The wires that go to and from the ballast need to be unsoldered or cut with wire cutters.
- Connect the phase and neutral wires to the left and right wires of the lamp itself.
- Be sure to carefully insulate the joint.
- Insert the lamp and turn it on.
If you want to connect a T8 LED lamp to a branded Phillips lamp, then this procedure will be even easier, since the manufacturer has taken care of consumers, significantly simplifying their task.
Let's say you have an LED lamp 600 mm long (this method is the same for lamps 900 mm, 1200 mm, 1500 mm long). Your actions will be as follows: first of all, unscrew the starter and place a plug in its place. It comes included. In this case, the lamp body itself does not need to be disassembled, nor does the inductor need to be removed.
Quite often you can find comments from consumers who bought a T8 lamp that their service life is much less than stated. This happens when you purchase Chinese analogues of lamps from little-known manufacturers - low-quality LEDs and drivers will hardly give it the opportunity to serve you for even one year. We advise you to pay attention only to high-quality products from well-known manufacturers. Please note that there should always be a warranty available - not for six months, but for 1-3 years.
With dismantling the cartridges and installing jumpers
The other method is more scrupulous, but does not require any extra costs.
Remove the side covers from the lamp
This must be done carefully, because... in modern products, latches are made of brittle and breakable plastic
After which, you can dismantle the contact cartridges. Inside them there are two contacts that are isolated from each other.
Such cartridges can be of several varieties:
All of them are equally suitable for lamps with G13 socket. There may be springs inside them.
First of all, they are needed not for better contact, but to ensure that the lamp does not fall out of it. Plus, due to the springs, there is some compensation for the length. Since it is not always possible to produce identical lamps with millimeter accuracy.
Each cartridge has two power cables. Most often, they are attached by snapping into special contacts without screws.
You turn them clockwise and counterclockwise, and with some force, pull one of them out.
As mentioned above, the contacts inside the connector are isolated from each other. And by dismantling one of the wiring, you actually leave only one contact socket.
All current will now flow through the other contact. Of course, everything will work on one, but if you are making a lamp for yourself, it makes sense to improve the design a little by installing a jumper.
Thanks to it, you don’t have to make contact by turning the LED lamp from side to side. The double connector ensures a reliable connection.
The jumper can be made from the extra power wires of the lamp itself, which you will definitely have left over as a result of the rework.
Using a tester, you check that after installing the jumper, there is a circuit between the previously isolated connectors. Do the same with the second plug-in contact on the other side of the lamp.
The main thing is to make sure that the remaining power wire is no longer phase, but zero. You bite off the rest.
Types of lamps
Types of edges of LED lamps
Lighting devices distinguished by pin-shaped contacts are indicated by the symbol “G”. The numbers accompanying the symbol indicate the distance between the centers of the pins. If there are two numbers, the second indicates the diameter of the circle into which the pins must be connected.
The base type G13 (distance between pins is 13 mm) can be connected to lamps of the LPO, Armstrong, LVO and others classes. Sometimes G13 lamps are marked as T8; their mounting contact element is similar.
LED lamps with G13 sockets can be connected to a standard luminaire with a fluorescent type lamp.
Options for using backlights
As an example, let's look at options for using backlights in Legrand products.
The backlight mode in the illustration is indicated by a picture of the month, the installation of a switch with an operation indication is indicated by a picture of a light bulb.
A single-key switch with night illumination is connected according to the classical scheme: a light bulb on contacts L. To indicate operation, a working zero must be set to the backlight lamp.
Connecting a two-key switch is done in the same way. Each operating line has a separate indicator light. The circuit provides separate indication of the double switch, each backlight works for its own line.
The three-key switch works exactly the same way. There will only be three indicators. By the way, this is another argument for opponents of the backlight: a three-key switch in display mode spends 3 times more energy than a double switch.
The pass-through switch can also work with backlight. Only the switching diagram will be different. The indicator is connected to those contacts that will be open when the key is in the “down” position. As a result, if you turn on the light with one of the “pass-throughs”, the backlight on it goes out.
When using the backlight as an indication of lamp operation, the indicator is connected to the lamp side, and a separate working zero is connected to it. Regardless of the position of the “feeders”, when the lighting is turned on, the indicator will light up.
Legrand sells backlight lamps separately. In essence, it is an ordinary LED with a quenching resistor and a freewheeling diode, packaged in a heat-shrinkable tube.
If you don’t want to overpay for the logo on the price tag, you can make a spare indicator yourself. The circuit is simple: in order to prevent reverse current from flowing through the LED element (we have alternating voltage in the network, the polarity changes with a frequency of 50 Hz), a reverse diode (type D226) is installed. And since the voltage drop across the LED is 2–3 volts (depending on the color), a current-limiting resistor is installed in the circuit. Diagram and part values in the illustration:
Any switch can be equipped with such an indicator, the main thing is that the light breaks through the plastic.
We’ve figured out how to install a backlit switch, now we’ll deal with stray light. Cunning craftsmen are already offering for sale certain modules that are connected in parallel with housekeepers and LED lamps.
In fact, these are ordinary load resistors. They actually block unwanted light while using as much energy as a low-wattage incandescent lamp. That is, your lights are turned off, but the meter continues to wind.
To “make friends” between a backlit switch and LED (economical) lamps, you need a pass-through switch.
You connect a working lamp to one output, and an indicator with a separate working zero to the second. In this case, the phase works only for one consumer: either the main lamp or the indicator. In principle, there can be no parasitic glow.
Yes, the connection circuit is more complicated (you will have to draw the neutral wire). But you have to pay for the comfort of use. Electricity consumption is minimal, power no more than 1 watt.
What types of linear LED lamps are there?
All linear lamps have an elongated, regular shape and glow evenly along their entire length. The angle at which the flow is dissipated depends on the design features and ranges from 100-180 degrees.
According to the method of mounting, lamps are distinguished:
- Angular. These models are placed in niches, corners of rooms, under bedside tables or shelves. They are also used for interior decoration. They visually round corners and expand the space.
- Built-in. They are usually built into the ceiling or walls. The light-emitting glass remains visible to the eye. The lamp practically does not use the free volume of the premises, since it is completely recessed into the surface. It is not possible to integrate the device into all materials. For example, it is problematic to place it in concrete floors.
- Invoices. Such lamps are completely visible. They are attached to walls, ceilings or any other surface. The advantage of such models is simple installation.
- Hanging. They are mounted on hangers, the length of which varies. Thanks to this installation principle, it is possible not only to organize high-quality lighting taking into account the zoning of the room, but also to introduce an interesting detail into the interior.
Depending on the mounting location, models are distinguished:
- ceiling;
- façade;
- wall-mounted
There are models in which the lighting intensity is changed using a switch.
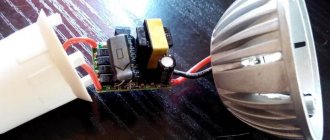
How does a 220 V LED lamp work?
This is a modern version of the LED lamp, which is produced using advanced technology. Here the LED is solid, there are several crystals, so there is no need to solder many contacts. As a rule, only two contacts are connected.
Table 1. Structure of a standard LED lamp
| Element | Description |
| Diffuser | An element in the form of a “skirt”, which contributes to the uniform distribution of the light flux emanating from the LED. Most often, this component is made of colorless plastic or matte polycarbonate. |
| LED chips | These are the main elements of modern light bulbs. They are often installed in large quantities (more than 10 pieces). However, the exact number will depend on the power of the light source, the dimensions and the design of the heat sink to absorb heat. |
| Dielectric plate | Manufactured from anodized aluminum alloys. After all, such material best performs the function of removing heat to the cooling system. All this allows you to create a normal temperature for the uninterrupted functioning of the chips. |
| Radiator (cooling system) | Helps remove heat from the dielectric plate where the LEDs are located. Aluminum alloys are also used to manufacture such elements. Only here they still pour it into special molds to get plates. This helps to increase the area for heat removal. |
| Capacitor | Reduces the pulse that occurs when voltage is applied from the driver to the crystals. |
| Driver | A device that helps normalize the input voltage of the electrical network. Without such a small detail it will not be possible to make a modern LED matrix. These elements can be remote or built-in. However, almost all lamps have built-in drivers that are located inside the device. |
| PVC base | This base is pressed against the base of the light bulb, thereby protecting electricians who are replacing the product from electric shock. |
| Base | Required in order to connect the lamp to the socket. Most often it is made of durable metal - brass with an additional coating. This allows you to increase the life of the product and protect it from rust. |
LED Bulb Driver
Another difference between LED lamps and other products is the location of the high heating zone. With other light sources, heat spreads throughout the entire external part, while the LED crystals only contribute to heating the internal board. This is why it becomes necessary to install a radiator to quickly remove heat.
If there is a need to repair a lighting device with a failed LED, then it is completely replaced. In appearance, these lamps can be either round or cylindrical. They are connected to the power supply through a socket (pin or threaded).
Is it necessary to change fluorescent light bulbs to LED lamps?
Today we can confidently say that LED light bulbs of any form factor are superior to their fluorescent counterparts in almost all respects. Moreover, LED technologies continue to progress, which means that products based on them will be even more advanced in the future. To confirm the above, a comparative description of two types of tubular lamps is given below.
T8 fluorescent lamps:
- MTBF is about 2000 hours and depends on the number of starts, but not more than 2000 cycles;
- light spreads in all directions, which is why they need a reflector;
- gradual increase in brightness at the moment of switching on;
- the ballast (ballast) serves as a source of network interference;
- degradation of the protective layer with a decrease in luminous flux by 30%;
- The glass flask and the mercury vapor inside it require careful handling and disposal.
T8 LED lamps:
- service life is at least 10 thousand hours and does not depend on the on/off frequency;
- have a directional luminous flux;
- instantly turns on at full brightness;
- the driver does not affect the power grid;
- loss of brightness does not exceed 10% over 10 thousand hours;
- have significantly lower power consumption;
- completely environmentally friendly.
In addition, T8 LED lamps have twice the light output with equal energy consumption, are less likely to fail and have a manufacturer’s warranty. The ability to place different numbers of LEDs inside the bulb allows you to achieve an optimal level of illumination. This means that instead of a T8-G13-600 mm 18 W fluorescent lamp, you can install a 9, 18 or 24 W LED lamp of the same length.
The abbreviation T8 indicates the diameter of the glass tube (8/8 inch or 2.54 cm), and G13 is the type of cap indicating the pin spacing in mm.
Having weighed all the pros and cons, we can conclude that converting a fluorescent lamp to an LED light bulb is completely justified, both from a technical and economic point of view.
Sequence of actions when replacing lamps
The replacement algorithm may depend not only on the type of base, but also on the design of the device.
Recessed luminaires
Recessed luminaires are often mounted in a suspended ceiling. They do not protrude above its surface and are easily and securely attached. Reflectors allow you to adjust the radiation spectrum. Fluorescent lamps are often used to illuminate plants in greenhouses, thereby stimulating their rapid growth and development.
Recessed luminaires most often use bulbs with type E sockets. To replace them, the luminaire itself must be dismantled. The algorithm is simple:
- Turn off the electricity.
- Carefully pry off the insulating ring with a screwdriver.
- Pull the lamp out.
- Remove the housing and replace the lamp.
The same algorithm also applies when replacing LEDs in spotlights.
Surface-mounted lamps
Overhead types can often be found in offices, warehouses, and large production facilities. As in other cases, safety rules require preliminary de-energization.
Then you will need to remove the diffuser and pull out the tubular flask, having first turned it 90°.
Working with the chuck
LED tube GO-LED T8-18AL 18w 4000K G13 with a rotating base
The sockets in the lamps can be installed in different ways: horizontally or vertically, in some models at an angle. Since fluorescent lamps illuminate 360 degrees, it does not matter how they are installed in the socket.
The luminous flux of LED lamps is directional, so here it is necessary to pay attention to the placement of the slot in the socket. It may happen that the luminous flux of the connected lamps will be directed not downwards, but to the side. In this case, the most universal are rotary type bases. They are suitable for any model of lamps and allow you to adjust the direction of light.
Types according to connection diagram
Installation and connections of T8 LED tubes
Let’s determine in advance that the ballast is a ballast, the same as the ignition unit for xenon. Electronic ballasts are an electronic version that performs the starting function.
According to the connection diagram, they are divided into 3 types:
- regular connection instead of standard luminescent ones, as a rule they are only compatible with old electromagnetic ballast and cannot be installed with electronic ones;
- The ballast is removed and the tube is connected directly to 220V;
- The ballast is dismantled, the new ice bulbs are powered by an additional 12V power supply.
In fact, the model with a built-in driver is a full-fledged lighting device that only requires a 220V socket and a wire. Therefore, they can be equipped with electrical wires with a special plug and switch.
All connection options with built-in driver
Wiring connections depend on the model, please check before purchasing:
- connection on the left side;
- from the right;
- at both sides.
How to convert base fluorescent lamps into LED lamps
There are two options for modifying such a light bulb into an LED one:
- use of diode strip segments;
- Compact lamp with bright LEDs.
Conversion for LED strip
Materials for conversion and connection diagram:
Detailed video instructions for the modification:
To power the structure, you can use any 12V 2A power supply if you connect all the LEDs in parallel, or a 5V 2A mobile phone charger when connected in three parallel lines.
Power drivers for energy-saving light bulbs are not suitable for LEDs, so we can safely unsolder the wires going to the base from them, and send the boards themselves for further processing.
Features of a switching power supply
A UPS is an inverter system in which the input voltage is rectified and then converted into pulses. The main feature of the UPS is a significant increase in the frequency of the current transmitted to the transformer. It is also worth noting the small dimensions of such a device. Another advantage is that the power supply does not have any energy losses during operation, unlike linear ones, which lose a significant part during conversion to the transformer.
The operating principle of a switching power supply from an energy-saving lamp is as follows:
- The input rectifier, consisting of a diode bridge and a capacitor, converts alternating current (input) into direct current.
- The inverter, in turn, transforms direct current into alternating current, but the frequency increases from 50 Hz to 10 kHz, which is 200 times higher.
- This current is transferred to the transformer. It will either increase or decrease the voltage.
- The output rectifier converts alternating current into direct current, but the frequency remains high.
As a rule, modern circuits use MOSFETs - transistors. Their main feature is their very fast switching speed. Accordingly, high-speed diodes should be used in such ballasts. They are located in the output rectifier.
If the output voltage is very low, then a transistor can perform the rectifier function. Alternatively, you can use a throttle instead. Such simple current converters are found in circuits of 20 W energy-saving lamps.
Advantages of LEDs
Fluorescent lamps consume more electricity due to losses associated with the operation of the ballast. And if an older model is installed, operating via electromagnetic ballast, energy consumption increases by another 20–25%.
The LED tube does not require a starter, ballast or electronic ballast. In addition, such a lighting device does not contain dangerous heavy metals (such as mercury), and therefore does not require special disposal, unlike fluorescent ones.
Also, lighting devices based on crystals do not have flickering or humming, which has a more positive effect on the state of the body, both physical and mental. And the service life of fluorescent lamps is only about 6,000 hours versus 50,000 for LED lamps.
What are the savings?
In order to calculate the savings from replacing fluorescent lamps with LEDs, you need to make an appropriate calculation; for this, you can take as a basis two lamps of the same power, one of which is equipped with a fluorescent lamp, and the second with LEDs.
For the calculation, we will take lamps with the same characteristics in terms of luminous flux, providing the required illumination at a given point in the room, and the indicator on which the calculation will be based will be the power of the light source.
Comparative power values of fluorescent and LED light sources are given in the table:
| Source type | Power, W | ||||||
| luminescent | 5,0 – 7,0 | 10,0 -13,0 | 15,0 – 16,0 | 18,0 – 20,0 | 25,0 – 30,0 | 40,0 – 50,0 | 60,0 – 80,0 |
| LED | 2,0 – 3,0 | 4,0 – 5,0 | 8,0 – 10,0 | 10,0 – 12,0 | 12,0 – 15,0 | 18,0 – 20,0 | 25,0 – 30,0 |
A single-lamp fluorescent lamp, model Camelion WL-3016 36W 2765, with a power of 36 W, will cost the buyer 820.0 rubles, plus the cost of the lamp itself and the starter - the total amount will be, on average, 900.00 rubles.
A built-in LED lamp, model Feron AL527 28542, 18 W, white light, will cost the buyer 840.00 rubles.
At the initial stage of comparison, the initial parameters are approximately the same, these are: the luminous flux, depending on the power of the installed light source and the cost of the lamp itself. For a comparative analysis, it is necessary to fill out a comparative table, compiled on the basis that the lamps operate 10 hours a day, 365 days a year.
| Index | Fluorescent lamp | LED lamp |
| Lamp power, kW | 0,036 | 0,018 |
| Electricity consumption per day, kW/hour | 0,36 | 0,18 |
| Electricity consumption per year, kW/hour | 131,4 | 65,7 |
| Cost of electricity for consumers in 2022, rubles/kWh | 2,97 | 2,97 |
| Costs of paying for consumed energy, rubles | 390,26 | 195,13 |
| Savings by year, rubles | – | 195,13 |
| Costs of maintaining lamps, rubles | 100,00 | – |
| Savings, total, rubles | – | 295,13 |
Notes:
As can be seen from the table, with the same initial indicators, the savings from the use of LED lamps, in terms of the cost of used electrical energy, in comparison with a fluorescent lamp, is 100%.
Of course, the resulting figure that determines the savings in using an LED light source is not great, because Only two lamps were compared, but even on the scale of a single apartment, when 5–10 fluorescent lamps are replaced, the savings will increase significantly, which will significantly affect the family budget. In the case when the replacement is carried out in an office building or production workshop, the savings from replacing lamps can be felt already in the first month after completion of the work.
Design
A linear LED lamp, like other lighting devices, consists of four main parts - a light-emitting element, a power supply and a cooling system, placed in a housing.
Light emitting element
The light source is super bright LEDs. In one device their number reaches tens. The luminous flux and dimensions of the lamp depend on how many diodes are installed on the module.
The sizes of LEDs range from fractions of a millimeter to several centimeters. They are attached to rectangular strips - modules. Instead of diodes, micro-matrices can be used, which contain many unpackaged LEDs - tens and even hundreds.
The use of matrices allows you to significantly increase the luminous flux without increasing the size of the lamp. The matrix, which contains about a hundred mini-diodes, having the size of a regular LED, exceeds it in power several times.
power unit
This node is also called the driver. It is a rather complex electronic device and provides the LED module with the required voltage level. LEDs are sensitive and vulnerable semiconductor elements. A small surge in the network is enough for them to fail.
What problems does the LED driver solve:
- Reduces the mains voltage (220 V) to the value required by the matrix.
- Converts alternating voltage to direct voltage. All diode elements, operating on alternating current, conduct only a half-cycle of the signal. This mode of operation is not suitable; it is necessary to power the diodes with direct current.
- Stabilizes the current at the level required for a specific matrix.
- Suppresses impulse noise and high-voltage surges that occur in the network.
Cooling system
There is an opinion that light sources operating on semiconductor elements do not heat up. But if you put your hand on the body of the lamp after it has been running for several minutes, you will be convinced that there is heating. To remove heat, radiators are installed in LED devices.
Heat dissipation elements have a ribbed surface and are made of metal. They are often located outside the device. Modules with diodes are mounted on radiators. If the case is made of metal, the radiator is often not installed, since its role is played by the casing itself.
Keep the outer surfaces of LED lamps clean by wiping off dust at least once a month. Otherwise, the dust layer interferes with the cooling of the LEDs, and they may burn out.
Frame
The mechanical strength of the device and the duration of its operation depend on the quality of this element. The body consists of two parts - the casing and the diffuser glass. For recessed luminaires, the body is hidden, so there are no special requirements for it.
For surface-mounted lamps, the body must match the interior of the room. Glass – white or transparent, polycarbonate or regular. The casing is made of metal or plastic. The best option is aluminum; it dissipates heat well, preventing the module from overheating.
Plastic cases have different designs. It is recommended to pay attention to the following points:
- there should be no backlash (free space between parts);
- the presence of even holes in the required quantity.
Removing unnecessary things
We immediately remove the old light bulbs. We take each one from both sides, turn it at a right angle, and take it out easily. Be careful not to damage the fluorescent lamps when dismantling them - because inside there is mercury, which is dangerous to our health.
In order for an LED linear lamp to work, you need to apply voltage from its opposite sides. To do this, one wire per base is enough. The rest must be turned off, or trimmed and isolated. It doesn’t matter which base will ultimately be connected to the minus.
Therefore, we do not need either a starter (a cylindrical part) or a choke (a rectangular box like a transformer). We remove the wires from them. It is also better to dismantle these parts themselves; they are no longer needed. How to remove the wires depends on the type of attachment. If this is a screwless method, gently twist the wire in different directions with little force. Repeat until it leaves the mount. In other cases, you can simply cut it off with wire cutters.
Let's sum it up
Converting a fluorescent lamp into an LED lamp is a profitable undertaking. In addition, even a beginner can cope with this process if he follows the instructions. However, you should not save money on purchasing light bulbs, because the above benefits only apply to premium quality options.
A failed LED leaves a very unpleasant aftertaste. And if this has happened more than once, then it becomes quite natural to want to understand the reasons - why do LED light bulbs burn out? Read in detail in a special article.
Operating principle
Operating principle of fluorescent lamps
Let us briefly describe the interaction diagram between the starter, ballast and lamp:
- When power is applied, the current, passing through the ballast, passes through the starter contacts along the tungsten spirals, heating them and then goes towards zero
- The starter is equipped with a pair of contacts: movable and fixed. When current flows, the movable contact (bimetallic), heating up, changes its shape and connects with the first
- In this case, the current immediately increases significantly to the limit limited by the inductor. The electrodes are heating up
- The starter plate, on the contrary, begins to cool and disconnects the contacts. At this moment, a sharp surge in voltage occurs and electrons break through the gas. When mercury turns into vapor, the light source switches to operating mode
- The starter is no longer involved in the process - its contacts are open.
Perennial flowers (TOP 50 species): garden catalog for the garden with photos and names | Video + Reviews
LED flashlight circuit
Portable flashlights based on LEDs have also become widespread these days. Small and headlamps can have from three to twenty-two chip elements in their circuitry. More powerful, using rechargeable batteries and the ability to recharge from a 220 V network - up to 64 LEDs. Their undoubted advantage over devices based on incandescent lamps is their brightness and, at the same time, efficiency. Battery consumption is 10–20 times slower. At the same time, the power of the light flux is many times stronger.
LED rechargeable flashlight circuit
The thing is that ordinary incandescent lamps scatter light around themselves, which means that half of the light flux goes back. Reflectors are installed in the lanterns to reduce losses and direct the beam in the desired direction. But the problem is that the light bulb is very close to the reflector, which means it blocks part of the reflected light flux.
Thus, the lamp loses about 30 percent of the light.
LEDs, unlike devices with incandescent filaments, initially shine forward, without wasting energy on illuminating the space around and behind them. Of course, a reflector is also present here, but it serves more to correct the light beam rather than to enhance it.
The circuit by which the LED flashlight is connected is extremely simple and quite viable if you assemble it yourself.
Benefits of remodeling
In this case you will receive:
True, more modern models already use electronic ballast. They have increased efficiency (90% or more), noise has disappeared, but energy consumption and luminous flux have remained at the same level.
For example, new models of such LPO and LVO are often used for Armstrong ceilings. Here is a rough comparison of their effectiveness:
Another advantage of LEDs is that there are models designed for supply voltages from 85V to 265V. For fluorescent you need 220V or close to it.
For such LEDs, even if your network voltage is low or too high, they will start and shine without any complaints.
Benefits of replacing with LED
Let's calculate how profitable it is to install new diodes instead of fluorescent ones. We take into account that they are placed on an Armstrong suspended ceiling and shine in all directions. Due to the limited dimensions of the body itself, the body of the tube obscures its reflected light. The calculation was made by an electrician, he has more extensive experience in this.
Let's carry out a simple calculation for gas-discharge systems, which will involve:
- Efficiency of all luminescent from 70%
- shading coefficient of light flux when reflected from a mirror reflector, 0.6-0.7;
- light source efficiency 50-60 Lm/W;
- service life no more than 18,000 hours.
For diodes, these values will be respectively:
- 90% efficiency depends on the power supply;
- 0.9 because it only shines down;
- 100-120 Lm/W for the middle price category;
- up to 50,000 hours, after this period the brightness will decrease to 70% of the original.
Using the above coefficients, you can make your own calculations. A diode light source is 2 times more efficient and economical only in terms of electrical parameters. If we take into account the service life, then in the end the superiority of new technologies will be 4 times.
How to connect an LED lamp to 220V
The main advantage of such lamps in comparison with those operating on 12 Volts is that they can be directly powered from a switch. As a result, no additional financial costs are required for the purchase of a power supply, and installation is also straightforward. There are several ways to install LED lamps:
- serial connection;
- parallel;
- radial
Each is used in different situations and has its own advantages and disadvantages.
Sequential
Serial connection is used when it is necessary to save cable footage, and there are no special requirements for the premises. The implementation will require several double or triple wires. No more than six LED bulbs can be installed in one circuit, otherwise the brightness will be low. If one lamp fails, you will have to check the functionality of each one in order to eliminate the breakdown.
The connection itself should not be difficult. A phase is drawn from the switch to the first lamp, then from the first switch the cable is pulled to the next device. A zero is laid to the last lamp, which comes from the distribution box.
If a mistake is made in the circuit and the power and zero are reversed, the lamps will be under constant voltage, which is unsafe.
Parallel
Parallel connection is more practical and is used more often. During the implementation process, each lamp will produce the brightness declared by the manufacturer. The only drawback that can be identified is the increased conductor consumption compared to a serial connection.
It is recommended to give preference to the VVG ng cable 2*1.5 or 3*1.5. The designation indicates the presence of a PVC shell - a high-quality insulating material. The marking indicates that the model is non-flammable. If there are special requirements for the room, sometimes wires with the additional marking “ls” are used, which means that a small amount of smoke is released when ignited.
To connect the lamp, a cable is pulled through the switch from the junction box. It is connected in turn to each lamp. After the first lamp, the cable is cut and fed to the next one until all devices are connected into one common system.
The advantage of the parallel connection method is that even if one lamp fails, the circuit will be fully operational.
Radial
By its nature, the beam circuit refers to a parallel connection, often used for chandeliers. The principle of implementation is to lay the cable to each lighting fixture individually. This method is the most labor-intensive and requires large financial costs due to the large amount of wire used. To save money, the cable from the distribution panel is routed to the center of the room and from there to each lamp. Next, single-core wires are connected to the phase and zero, which are laid to the lamps.
Even at the design stage, it is important to decide how the cores will be connected to a separate cable. If there are few lamps, twisting is enough
For safety reasons, it is securely crimped with pliers and welded together with a soldering iron.
There is an alternative to this method - to purchase terminals with a certain number of outputs. A connector is put on each wire and only after the wires are pulled to the lighting fixtures
For safety reasons, it is securely crimped with pliers and welded together with a soldering iron. There is an alternative to this method - to purchase terminals with a certain number of outputs. A connector is put on each wire and only after that the wires are pulled to the lighting fixtures.
The connection diagram for LED lamps in all cases has no fundamental differences.
How to choose an LED lamp?
When choosing linear LED lamps, be guided by their technical characteristics. The parameters of LED devices differ significantly from those of incandescent lamps, so they are not understandable to an untrained user.
Manufacturer
Today you can find lamps on sale from domestic, Chinese and Western manufacturers. The latter are more expensive, but promise greater quality.
When buying such a high-tech item as LED lamps, it is useful to first familiarize yourself with the manufacturing company.
Voltage
The supply voltage is usually specified as a range within which the manufacturer guarantees uninterrupted operation of the device. If the device says “from 176 to 264 V,” this means that it can cope with almost any changes when connected to a 220 V network, and does not lose brightness.
The wide range of input voltages is due to the presence of a driver. LED lamps can be powered from AC/DC 220 V/12 V.
Power
The power of LED lamps and luminaires is an order of magnitude lower than that of other types of lighting devices. There is a comparison table on the package from which the user can determine what incandescent lamp power the LED lamp corresponds to.
There are linear lamps on sale with a variety of powers: 4, 6, 8, 16, 18, etc. For example, an 8 W LED lamp corresponds to a regular 60 W incandescent lamp.
Colorful temperature
This indicator is also called the glow color and determines the shade of the backlight. Color temperature is measured in degrees Kelvin. It corresponds to the color of steel heated to certain temperatures. The higher the value, the bluer the glow.
For offices and public spaces, lamps with a higher color temperature are selected - from 4,500 K. They help mobilize a person’s attention and get him in the mood for work. For residential premises, models with lower values are taken - about 3,600 K. They give a soft yellowish tint.
Brightness
The amount of light on which the brightness of a lamp depends is called luminous flux. This indicator is measured in lumens (Lm). Selection is carried out individually, based on comparison with incandescent lamps.
For example, the luminous flux of a lamp of 220 lm corresponds to the luminous efficiency of a conventional 25 W incandescent light bulb. A light flux of 415 lm corresponds to a 40 W incandescent lamp, etc.
Protection degree IP
When choosing a device, take into account the technical characteristics of a particular device and the conditions under which it is intended to be used. The degree of protection of the device from moisture and foreign bodies is determined by the IP index. The higher it is, the more reliable the lamp.
For installation outdoors and in rooms with high humidity, models with a moisture protection coefficient IP of 65 or 67 are selected. Lamps with a lower IP are suitable for domestic and residential premises, offices and institutions.
Purpose
The purpose of linear luminaires is determined by the level of moisture and dust protection. All offered models are divided into two large groups - for outdoors and indoors. The former are characterized by increased IP.
All offered models are designed specifically for:
- administrative premises (offices, business centers, educational institutions);
- street lighting;
- shops and hypermarkets;
- residential premises.
Dimensions
There are no standards regarding dimensions for LED devices, so select the lamps in advance and prepare a place for them. This is especially important when installing built-in models.
Price
The price of a lamp is influenced by many factors - power, number of diodes, manufacturer (brand), degree of moisture protection, etc. Outdoor models are more expensive, on average they cost 1,100-1,800 rubles. Household and office lamps are cheaper; you can find models priced at 200-300 rubles. a piece.
Benefits of remodeling
This is due to the fact that in order to ignite mercury vapor at a low voltage in a fluorescent lamp, it is necessary to create clouds of electrons at its two ends using hot filaments. If everything is done correctly, it should immediately light up with a bright and uniform light without blinking. In order not to come under dangerous phase voltage, you need to turn off the voltage supply with the switch and check with the help of an indicator that there is no phase on the terminal block with which such lamps are usually connected to the mains.
LED lamps instead of fluorescent lamps When entering almost any office space, school, kindergarten or office of any enterprise, you can notice that the lighting almost everywhere consists of so-called fluorescent lamps, i.e.
LED tubes spread light around them in all directions, so it is not so important to maintain the correct position. There are external and built-in drivers
Although the same parameters of lighting and objects are used in calculating the illumination of LED lamps, with the same light fluxes in lumens as fluorescent lamps, an LED lamp illuminates a place or room much better than fluorescent lighting. The marking of the lamp socket or base indicates: G - pin connection system for the lamp, 13 - distance between the pins, expressed in millimeters. With this solution, you will not have to dismantle the cartridges. This ensures the lamp is pressed between the sockets and eliminates the influence of deviations in the geometric dimensions of the lamp fittings
There are external and built-in drivers. Although the same parameters of lighting and objects are used in calculating the illumination of LED lamps, with the same light fluxes in lumens as fluorescent lamps, an LED lamp illuminates a place or room much better than fluorescent lighting. The marking of the lamp socket or base indicates: G - pin connection system for the lamp, 13 - distance between the pins, expressed in millimeters. With this solution, you will not have to dismantle the cartridges. This ensures the lamp is pressed between the sockets and eliminates the influence of deviations in the geometric dimensions of the lamp fittings
As a result, less money and effort is spent on lamp installation. It is enough just to change the chandelier itself or simply select an LED that is identical in size and connection methods to a conventional fluorescent light source. You can connect both wires coming from the socket to it, which, firstly, increases the reliability of the connection, and secondly, eliminates the need to insulate the wires. It can have a rigid fixation with the body part or be movable and rotating. How to replace a fluorescent lamp in a lamp with an LED lamp without modification
With this solution, you will not have to dismantle the cartridges. This ensures that the lamp is pressed between the sockets and eliminates the influence of deviations in the geometric dimensions of the lamp fittings. As a result, less money and effort is spent on lamp installation. It is enough just to change the chandelier itself or simply select an LED that is identical in size and connection methods to a conventional fluorescent light source. You can connect both wires coming from the socket to it, which, firstly, increases the reliability of the connection, and secondly, eliminates the need to insulate the wires. It can have a rigid fixation with the body part or be movable and rotating. How to replace a fluorescent lamp in a lamp with an LED lamp without modification
Rework procedure
The order of connection depends on what needs to be redone. You can do the work yourself if you follow the plan - a detailed diagram of connecting an LED lamp instead of fluorescent lamps will help even an inexperienced electrician figure it out.
Connection algorithm:
- Disable automatic protection, remove the mains voltage, make sure there is none.
- Remove the protective cover to gain access to the working components of the circuit. Remove the capacitor, starter, and inductor from the circuit.
- Separate the wires next to the cartridge terminals, connect them to the phase and neutral wires directly, insulate or remove the rest.
- Insert the T8 G13 light bulb and perform a test run.
The procedure is not difficult. The contacts with pins on the sockets are marked with the letters “L” and “N”. Reconfiguring luminaires with electronic ballast is even simpler. How to remake a fluorescent lamp in this case:
- Solder or use wire cutters to separate the wires entering the ballast part and then leaving it.
- Connect the zero and phase wires to the wires of both cartridges.
- Insulate joints and connections, insert LEDs, turn on the network. If everything was done correctly, light will appear.
The final steps are to isolate the connection points, insert a new source, and apply voltage. Connecting LED lamps on average takes no more than 10 minutes.
How to find a faulty LED with a multimeter?
But what if all the LEDs are visually intact and there are no black dots on them? Here you will need a Chinese multimeter.
The ones that work best are those that run on 9V power and not on AA batteries.
Set the switch to diode testing mode and touch the LED legs on the platform with the probes. If it is working properly, it should light up.
A damaged LED will not light up.
When doing this, observe polarity. The LEDs light up only when the probes are in the correct position (“+” and “-”).
The faulty one will not light up, no matter how you change the polarity. After identifying a malfunction, carry out further repairs as shown above.
Advantages of LED lamps
The main advantages of the latest LED-based products are their good brightness and low power consumption. The design of the lamp includes a special driver that ensures the LEDs glow, so there is no need to manufacture or install anything additional.
It turns out that in order to convert an old fluorescent lamp into a modern LED one, it is quite enough to remove all excess ballast: the starter, the electric starting mechanism. For LED chandeliers, the power is connected directly to the contacts of the lighting equipment. The connection diagram for all lamps is approximately the same: all green conductors are connected to the neutral wire, and the red conductors are connected to the phase.
It is worth noting that, compared to fluorescent lamps, LED designs are of good quality and provide a brighter stream of light with minimal current consumption.
Offices have recently increasingly resorted to LED lighting systems, largely due to the fact that these products are more economical. Compared to fluorescent lamps, all work related to LED products will be safer, since they use a lower voltage with the same electric current. However, you still have to follow a number of rules:
- You should be extremely careful when replacing fluorescent devices. It is necessary to constantly remember that such products are very fragile and contain mercury vapor. If the integrity of the product is compromised, serious harm to health may occur. All manipulations are performed exclusively with the lamp turned off.
- Before directly installing the equipment, you will have to carefully read the instructions with operating conditions. In order for an LED lamp to last as long as possible, it is necessary to immediately prevent severe and regular power outages. Also, to extend its service life, it is desirable that it constantly operates at the same temperature.
- When it starts blinking for no reason or making any sounds, then the problem probably lies in its position in the holders. It is quite enough to unfold it. It turns out that if the left side of the lighting fixture was blinking, then you can try installing it in the right socket and, accordingly, vice versa. If you can’t deal with the defect in this way, you can try to re-solder the lamp itself or go through the electrical wiring going to it.
Features of the fluorescent lamp device
In order to more clearly understand society’s desire to replace fluorescent lamps with LED devices, it is logical to become more familiar with the gas design.
Indeed, a light device with a luminescent coating is a sealed glass tube, usually filled with mercury vapor.
Fluorescent lamps with lamps filled with a gaseous medium are “powered” by electricity through a choke element. More advanced designs are equipped with an electronic circuit without chokes and are considered somewhat improved in terms of operation
Two modifications of such devices are available:
- For outdoor installation (with high pressure flasks).
- For domestic installation (with low pressure flasks).
In fact, inside the cylinder of a fluorescent lamp there is a mixture of gases consisting of mercury vapor and argon. The inside walls of the glass flask are coated with a special composition - phosphor. When an electric discharge is formed in a gaseous medium, a gas glow is formed, and due to the phosphor, this glow is transformed into light in the visible range.
We wrote more about the design of luminescents in this article.
Advantages of fluorescent lamps
The development and production of lamps of this type, first of all, were the result of a constant request to save energy resources. We should pay tribute - fluorescent lamps allow significant savings.
An energy-saving light device and a traditional source with a direct filament. If we compare the energy parameters, the difference is significant in favor of the first device, where current consumption is reduced significantly
At the same time, you can save due to the higher light output of devices, placing a smaller number of devices per unit area compared to direct incandescent lamps.
The feasibility of using gas-discharge lamps is noted not so much for the domestic sphere, but for industrial and economic structures, that is, where it is necessary to illuminate large areas with minimal costs in terms of energy consumption.
Among the advantages of fluorescent lamps, a decent operating time stands out. The average operating time for gas structures is 10,000 hours.
Comparative cartography, which notes the electrical advantages of light devices of different periods of use. As can be seen from the comparative parameters, the traditional direct-heat lamp is the most “wasteful” light device
If fluorescent lamps are compared to direct filament analogues, where the maximum operating time is 1000 hours, the significant difference becomes more than obvious.
Disadvantages of light devices with phosphor coating
However, the existing advantages of fluorescent lamps, unfortunately, do not hide the obvious disadvantages of these same devices. And the main negative here is the increased chemical hazard.
Structure of the luminescent light source: 1 – sealed glass tube; 2 – phosphor layer; 3 – filament; 4 – luminous flux visible to people; 5 – mercury atom
The cylinder of each lamp contains at least 2 mg of mercury, and this chemical element is classified as extremely dangerous for a living organism. Of course, as long as the flask is sealed, the chemical hazard is reduced to zero.
However, cases of broken glass cylinders of fluorescent lamps are quite common practice. Therefore, it is important to immediately think about the proper disposal of fluorescent lamps.
Also among the disadvantages are the light and the “strobe” effect. Both effects have an adverse effect on vision. That is why fluorescent lamps have not found widespread use in the domestic sphere. In a word, there were every reason to raise the issue of replacing fluorescent lamps. A suitable alternative was quickly found.