Now the issue of saving occupies one of the first places for every owner or housewife. You can provide decent lighting for your home with little energy consumption by equipping the lamps in your home with LED bulbs. Moreover, due to certain circumstances, even such lamps can fail. That is why information on how to disassemble an LED lamp will be useful for those who want to repair the lamp themselves.
LED design Source z-led.ua
What is the design of LED light bulbs
An LED lamp can have a different structure. It must be studied before repairing it. Consider the design of a two hundred twenty-volt light bulb. It consists of several LEDs, semiconductor devices in which, when an electric current is passed, charge carriers move. These in LED devices are electrons and holes (negative and positive charge). Moving from one electronic level to another, they emit light in a narrow range. LED light bulbs burn out most often due to the breakdown of diodes or other elements included in their composition.
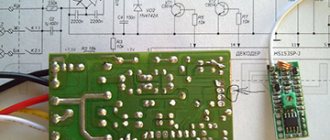
The current source for series-connected LEDs is the so-called driver (sometimes a power supply), a current converter. Between the LEDs and the driver there is a heat-conducting board with radio elements and an aluminum radiator (for some lamps the housing is made of plastic with ventilation holes, inside of which a radiator is placed to remove heat). The entire structure is housed in the housing, under a protective cap. At the bottom, the lamp is equipped with a base to which two wires are soldered; It is through them that the voltage is transmitted to the driver.
What the driver looks like Source hsto.org
The design of an LED lamp and its successful repair depend on which driver is installed in it. It can be without stabilization at all, or with current or voltage stabilization. In fact, only the first type of the three listed can be fully called drivers. Depending on the type of lamp assembly, the repair will be slightly different.
One of the types of LED lamps is filament lamps. This is a special type of LED device in which instead of a circuit board there are filament rods in a glass bulb. They are thin sapphire or glass tubes, each about 2 mm thick and about 3 cm long. The rods contain 28 miniature LEDs. This type of light bulb cannot be repaired.
Repair of driver (LED) lights
Repair of a portable light source depends on its circuit design. If the flashlight does not light or shines weakly, first check the batteries and change them if necessary.
After this, in drivers with batteries, the parts of the charging module are checked with a tester or multimeter: bridge diodes, input capacitor, resistor and button or switch. If everything is fine, check the LEDs. They are connected to any power source with a voltage of 2-3 V through a 30-100 Ohm resistor.
Let's look at four typical flashlight circuits and the faults that arise in them. The first two are powered by batteries; a charging module from a 220 V network is inserted into them.
Diagrams of a rechargeable flashlight with an inserted 220 V charging module.
In the first two options, LEDs often burn out both due to the fault of consumers and due to an incorrect circuit design. When removing the flashlight from the outlet after charging from the mains, your finger sometimes slips and presses the button. If the pins of the device have not yet been disconnected from 220 V, a voltage surge occurs and the LEDs burn out.
Video: How to make a powerful light driver.
In the second option, when you press a button, the battery is connected directly to the LEDs. This is unacceptable, as they may fail the first time they are turned on.
When checking, it turned out that the matrices were burnt out - they should be replaced, and the lights should be modified. In the first option, it is necessary to change the connection diagram of the LED indicating that the battery is charging.
Driver circuit for a battery-powered LED flashlight with a button.
In the second option, instead of a button, you should install a switch, and then solder one additional resistor in series with each light source. But this is not always possible, since often an LED matrix is installed in the lamps. In this case, one common resistor should be soldered to it, the power of which depends on the type of LED elements used.
Circuit of a battery-powered LED flashlight with a switch and a resistor added in series.
The remaining lights are powered by batteries. In the third option, the LEDs may burn out if the VD1 diode breaks down. If this happens, you need to replace all faulty parts and install an additional resistor.
Battery-powered flashlight circuit (without additional resistor).
Circuit of a battery-powered flashlight (with a resistor added to the circuit).
The main elements of the latest version of the flashlight (microcircuit, optocoupler and field-effect transistor) are difficult to check. For this you need special devices. Therefore, it is better not to repair it, but to insert another driver into the case.
Why LED lamps break
Before you start repairing a light bulb, it is worth understanding why LED lamps burn out. First of all, a malfunction in the operation of any lighting device should be looked for in voltage drops. If there is such a problem in your home, then you do not need to repair the light bulb, but install a stabilizer.
Unpleasant consequences of voltage surges Source electrik-domoy.ru
Important! If the voltage “jumps” very much, it can break through the diode bridge and damage the lamp.
When installing new LED bulbs, you need to remember to have good ventilation. If it is insufficient and the heat generated during operation of the device is not regularly removed, overheating may occur. In this case, you need to take a closer look at the lamp: if the design is too closed, ventilation will not be provided, then you will have to buy another lighting device.
Another common mistake when arranging electrical wiring in a room is incorrect placement of wires or incorrect calculation of their cross-section. If it is not possible to change the wiring, the right solution in this case would be to unload the lighting line by choosing another, less powerful light bulb.
Also, the failure of an LED light bulb is caused by the incorrect choice of IP degree, that is, protection from external influences. If the lamp is exposed to high humidity, dust, or its body experiences impacts, you need to think about choosing lighting fixtures that are appropriate to the environment. Now that you know why LED lamps burn out, you can start repairing them.
An LED lamp will work well if you choose it correctly Source multiwood.ru
In addition to the above options for incorrect operation, LED light bulbs may fail due to manufacturing defects. Another implicit reason for the combustion of an LED lamp is its connection to a backlit switch. There are two ways out of this situation: if the design of the lamp (for example, a chandelier) has more light bulbs, you need to change at least one of them to a regular one. The second solution to this problem is to replace the switch.
When a lamp breaks down, the capacitor located in the power supply along with resistors and a diode bridge, or one of the LEDs, is most often damaged. If cheap elements that do not correspond to the rated voltage are used in the production of the lamp, as well as with poor-quality solder connections, the entire structure may break after just a few on/off cycles.
The lamp does not turn on from the remote control: what to do?
If the chandelier stops turning on from the remote control:
- Check the voltage on the battery (video example here). If it is discharged, replace it with a new one. Check if the chandelier has started working;
- If the battery is fine and the remote control still does not give a command, check the buttons. Look at the remote control light through the phone's camera while pressing each button alternately. If the button is working, then you will see the light blinking on the phone display (you will not see anything with the naked eye). If there is no blinking when you press one or more buttons, they need to be repaired. You can buy a new remote control. But it is paired with a receiver, and replacing it is a troublesome task;
- If the battery and buttons are working properly, but the lamp still does not turn on from the remote control, then the failure lies in the radio signal receiver. Then you will have to replace it, and the remote control too.
The remote control buttons usually stop working when the contacts become clogged. There are two ways to fix this:
- Clean the contacts from dirt and factory grease. Apply a drop of superglue and apply graphite crushed with a file onto it. Assemble the remote control;
- Instead of graphite, try a piece of foil (without a paper backing, which will not transmit the electrical signal).
And to replace the receiver you need to buy a new control unit with a remote control. The devices must be set to the same frequency. Then:
- Turn off the power to the apartment;
- Remove the chandelier and open its box;
- Remove the old receiver by cutting the wires;
- Get a new power supply. Study it carefully. It has several multi-colored wires, exactly the same ones in the chandelier (you cut them);
- Now place the unit on double-sided tape in the box in the same place where the old receiver was located;
- Strip, connect and insulate wires of the same colors;
- Close the box and hang the chandelier in place.
There is another option for the development of events. Think about it, do you really need remote control of the chandelier? If not, then remove the broken receiver from the chandelier box by connecting the controller directly to the two-key switch. When switching, the first key will change the modes of bright, moderately bright and dim lighting, the second will switch the backlight operating modes.
Disassembling an LED lamp for repair
Before repairing an LED light bulb, study the instructions, as well as the design of the broken lamp. Due to the fact that there are no gases inside the LED lamp and the housing is not sealed, if it fails, you can try to repair the device yourself.
This is what a disassembled LED lamp looks like Source tauray.ru
See also: Catalog of companies that specialize in electrical work of any complexity
Step-by-step instructions on how to repair an LED lamp:
- Open the lamp to get to the internal structural elements.
To begin disassembling the light bulb, you must first open the clips holding the light-diffusing dome. If the matte top of the lamp is held in place by screws, you need to unscrew them; if the restraining factor is sealant, it needs to be carefully removed.
- Remove radiator.
After disconnecting the diffuser, take a screwdriver and carefully remove the heatsink (it will be located under the board with the LEDs).
- Separate matrix.
After removing the insides of the light bulb, the LED matrix must be separated from the entire structure. To do this, you need to unsolder it: warm up the contacts with a soldering iron, then carefully separate the part with tweezers. In this case, you need to start with the central board, which must be separated from the two contacts. You should also remove the sealant located around the perimeter of the lamp, or unscrew the retaining screws.
After nothing will interfere with the removal of the matrix with LEDs, you need to arm yourself with a thin metal tool like an awl or a needle. Carefully sliding it under the board, walk around in a circle so that you can pick it out.
Working with the LED lamp matrix Source masterpotoku.ru
By the way! Before you begin repairing a lamp, you should determine which LEDs are in the 220 bulb that needs to be repaired.
- Remove the matrix.
To remove the matrix with LEDs, which is no longer held in place, you will need to insert the central element into the slot. After this you can remove the matrix.
- Identify the broken link.
To identify a breakdown, in most cases you just need to look at each of the LEDs, which look like very small yellow squares. On one of them, upon closer inspection (you may need a magnifying glass), a small dark spot (black dot) will be noticeable.
- Remove the non-working element.
Now we’ll tell you how to repair an LED lamp after non-working diodes have already been detected. To remove all non-working LEDs from the matrix, you can heat it from below, then the process will be simplified (open flame cannot be used). Don’t forget to first fix the circle with diodes in the desired position above the work surface. After a good warm-up, the desired LED element can be simply removed with tweezers.
- Clean the contacts after removing the diode.
After cleaning the location of the burnt diode, you should also apply a special paste.
Another option for an LED lamp Source vodakanazer.ru
Remember! The ground corner of the diode indicates the location of the negative terminal.
- Change a non-working element.
In order for the lamp to work again, you need to replace the burnt out LED with a new one. As a last resort, you can install jumpers on the old one. To solder a working LED to the space vacated by the old element, you first need to look at what LEDs are used in 220 V lamps, and during operation, use a heating element.
- Allow the matrix to cool.
Important Notes
If the lamp is made using sealant, you will need an awl, a syringe and a solvent to remove the cap. It is necessary to run an awl along the edge (the connection between the cap and the lamp) so that a groove is formed. After this, you should fill the syringe with a needle with a solvent and inject it around the entire perimeter into the groove made. When half a minute has passed, you can unscrew the cap, because the sealant should have dissolved by this time.
At the fourth stage, when determining a non-working LED, in some cases you can use a multimeter.
A multimeter can be used to test some diodes Source mineavto.ru
LED lamp device
The design of the LED lamp is typical. Inside there is a driver, which is a kind of printed circuit board with various radio elements installed. The operation of the device involves power from the cartridge contact, which is transmitted to the terminals of the base. Two wires are required to be connected to the base, through which the process of supplying voltage to the driver is carried out. But the driver carries out the process of supplying direct current to the board on which the LEDs are located.
The driver itself is a specialized electronic unit, which can also be called a current generator. It is thanks to the driver that the process of converting the supply voltage into current is carried out, which is necessary for the stable glow of the diodes.
Video description
About how to disassemble an LED lamp with sealant (second part):
Some craftsmen try to do this by heating it with a hairdryer, but this method will not be successful, because at the bottom (under these LEDs) there is an aluminum radiator. To remove an unnecessary LED from the board, you first need to remove the yellow film from it. A small, thin screwdriver or needle is best for this. When the elastic filter is removed, under it you can see a metal surface with a crystal, which in a working lamp should give light.
On the metal surface of the damaged LED, you should put a little gel-like flux, solder or low-melting alloy (for example, Wood's alloy, which has a melting point of only 60-68.5 degrees Celsius, is suitable). You will also need a well-heated soldering iron with a power of about 60-80 W. The tool must be applied to the diode until it is unsoldered.
Important! When using Wood's alloy, be aware of its toxicity and do not touch it, and also do not inhale the fumes generated during operation.
Wood's alloy Source ozone.ru
Thanks to the use of the specified alloy, mixing with the main solder occurs and, as a result, the melting point of the latter decreases. Thus, the use of this method eliminates the possibility of overheating the printed circuit board.
Design and basic operation
LED lamp design
LED lamps are an electric arc ignited in a vacuum at the boundary of a pn junction. By controlling the voltage, you can regulate the arc light. The design of the chandelier includes a mounting unit with a control unit, a radio receiver, a lighting segment, a remote control, and decor. In addition, music systems with speakers and strip lighting are often built into the devices.
The fastening unit includes a bar with a cross, the control unit includes controllers with printed circuit boards and wires, and the lighting segment includes sockets with sockets for LEDs.
What else can be repaired?
Now you know how to fix an LED light bulb if one or more LEDs have burned out. When it turns out that the problem is in the driver or power supply, even in this case the lamp can also be fixed.
Device drivers
If your LED lamp has a current-stabilized driver, it has the following design. The mains current is supplied through the fuse and then passes to the LM7812 diode bridge. Next, the rectified mains voltage goes to smoothing capacitor C1; when it becomes constant, distribution occurs into ten LEDs connected in series (LED 1 to LED 10).
Driver for a ten-watt lamp with current stabilization Source uk-parkovaya.ru
Troubleshooting a remote controlled chandelier
Most often, the reason for the breakdown of a chandelier with a remote control is overheating of the matrix. In such a situation, repairs are performed as follows:
- Remove and disassemble the chandelier.
- Find out the cause of the breakdown - look for burnt out elements.
- If you need to replace components and perform soldering, be sure to study the device diagram attached to the warranty card.
The controller, antenna or control unit may burn out. In this case, a banal replacement of the failed product is required.
Safety precautions
When working with an LED lamp and its components, you should follow simple rules that will keep your health, as well as the things and tools around you, safe. Before repairing LED light bulbs, you should familiarize yourself with these simple but important rules:
- Any manipulations with the lamp (disassembly, soldering, desoldering) must be done only when the device is disconnected from the network.
- All capacitors must be manually discharged after turning on the lamp, even if they are bypassed. To do this, you need to briefly short-circuit the leads of the capacitors with a metal tool or a dielectric pen.
- After repair, when checking the functionality of the lamp, you need to protect your eyes: an explosion of one of the elements is possible. You can use special safety glasses or simply turn away with your eyes closed while you plug in the repaired lamp.
Reasons for failure of LED lighting devices
The main reasons for device failure:
- Poor quality assembly;
- Use of low-quality materials;
- Incorrect installation;
- Systematic voltage drops;
- Mechanical damage.
Example of LED light bulb repair
It should be taken into account that the driver of the LED lamp is connected to the phase of the electrical network, so you should carefully carry out the repair process, since touching this object with bare areas while the circuit is connected to the network can cause serious negative effects on health (there are situations with cardiac arrest).
Let's consider an example of repairing a powerful LED lamp, which is based on an SM2082 type chip. Reason for repair: the light bulb systematically goes out and comes on; when tapped, a response appears in the form of extinguishing or a bright glow. This sign determines that this is a bad contact, which can be eliminated through repair. Initially, we carry out the process of removing the diffuser glass using a knife. After removing the glass, access to the microcircuit and LEDs opens. Often, LED lamp circuits assume that part of the driver is mounted on an aluminum printed circuit board, and the second part on a separate board. If a visual inspection does not show any defects, then the board should be removed. To remove the board, cut off the silicone and pry it over the edge with a screwdriver (everything is done carefully). The driver will need to be unsoldered; to do this, two contacts that move to the right are heated with a soldering iron.
A contact is lost in some board, which provokes the need to connect them in compliance with polarity (two conductors are used for connection). After tapping the board with a (hand) screwdriver, it becomes clear which of them is the problem. If the solderings are in doubt, they need to be tinned with solder to eliminate the existing problem.
What do we need to repair lamps?
Repairing an LED lamp with your own hands will require certain, fairly accessible tools and materials:
- Soldering iron (it is advisable to use a tool with a thin tip);
- Solder or rosin (flux is often used, which contains solder);
- Tweezers (it’s better to have several);
- Knife with a thin blade;
- Holder (to hold the board in the desired position);
- Compact gas burner (to quickly warm up the board, by using it you can quickly unsolder the LED that has burned out and solder a new one in its place).
How to disassemble an LED lamp?
A prerequisite for repairs is access to all internal structural elements. LED lamps have the same type of device, so you should know that first of all you will have to remove the lampshade from the body. In order to perform such actions, you should use a not sharp, but thin and short knife (try not to use a knife that is too sharp, as it can leave a fairly significant number of cuts on the plastic). Using little effort, insert the tip of the knife into the gap between the body and the lampshade (be sure to observe the slope, which should be exclusively towards the lampshade). So you need to walk around the entire perimeter of the entire connection, and you must gradually go deeper. It is better to use special gloves with rubber inserts when removing the housing, which will provide you with comfort (no slipping of the lamp in your hands). Once the blade is deep enough into the gap, you will need to separate it from the base of the shade. An aluminum platform will open in front of you, which contains soldered wires and LEDs.
Troubleshooting
- The failure of a light bulb is often associated with a break that occurs in the general wiring;
- Malfunctions in the circuit breaker system;
- Lack of contract in the patron;
- LED burnt out, etc.
To understand the issue, a preliminary diagnosis is carried out. If the lamp does not turn on, you need to check the functionality of the base using another lamp; if the lamp does not light up, the problem is not in the lamp.
If the lamp does not light up, there may be a problem with the wiring. You can use a multimeter to find out if there is voltage in an electrical circuit. The device is leaned against the cartridge part, the indicators are checked (they should be at the level of 220V). If the numbers are completely different, then the problem is in the wiring.
If the voltage is supplied correctly, but the lamp still does not light up, check the contact between the socket (antennae) and the base. That is, the problem of current and voltage is considered first. Often the reason for the lack of combustion is carbon deposits on the antenna elements, which need to be cleaned. If there is no voltage on the contacts of the cartridge itself, it is necessary to ensure the presence of a phase (exclusively on the wiring). If a phase is missing, the entire cartridge must be replaced.
Operating principle, classic circuit and difference from the power supply
Even though a driver is often called a power supply, there is a difference between the two concepts. The driver is a source of current that maintains its constant value for passing through the LED, and the power supply maintains a stable voltage.
Let's look at how the power supply works using a specific example:
- Let's connect a resistance (R) of 40 Ohms to a 12 V source.
- Let a current (I) of 300 mA flow through the resistor. When installing two resistors, the current will double and become 600 mA. In this case, the voltage will not change, since it has a proportional relationship with current and resistance (Ohm's law I=U/R).
Now let's see how the driver works:
- Let a circuit with a 225 mA driver include a resistance (R) of 30 Ohms.
- If, at a voltage (U) of 12 V, two 30 Ohm resistors are connected in parallel, the current will remain the same - 225 mA, and the voltage will become half as much - 6 V.
The driver ultimately provides the load with the specified output current regardless of voltage surges. Therefore, LEDs supplied with a voltage of 6 V will shine as brightly as with a source of 10 V, if a given current level is supplied to it.
Driver circuit for LEDs:
The driver circuit consists of three interconnected nodes:
- capacitance for voltage separation;
- rectifier module;
- stabilizer.
The principle of operation of the circuit:
- When current passes, capacitor C charges until it is fully charged. The smaller its capacity, the faster it will charge.
- Alternating current is converted into pulsating current. The first part of the wave is smoothed when passing through capacitor C.
- The electrolytic capacitor that completes the circuit serves as a smoothing filter-stabilizer.
Possible malfunctions of LED lamps
Causes of blinking LED lamps and how to eliminate them?
An LED lamp can only be repaired after preliminary diagnostics. Blinking is the most common problem, which can be caused primarily by poor installation. You must be sure that the lamp is screwed in correctly. If this is not the problem, then you need to check the quality of the power supply (often the reason for the blinking is it).
Flashing after switching off:
- Illuminated switch. It is he who provokes the circuit to not open completely. That is, the main current is blocked, but the current used to illuminate the switch provokes the closure of the LED circuit. A small amount of current flows through the capacitor, which causes it to recharge. Therefore, a dim glow often occurs or the light blinks. To eliminate this problem, you will need to change the lamp or purchase special lamps with a pulsation coefficient of no more than five percent;
- Poor quality LED lamps. Typically, flickering can be caused by using a low-quality capacitor. To eliminate this problem, you need to stop using too cheap LED lamps.
Replacing LEDs
LEDs can burn out, which can cause the lamp to fail completely. After disassembly, you will immediately see which diodes have burned out and require replacement. But it also happens that it is extremely difficult to visually determine the cause of the problem. In such a situation, a multimeter is used, through which the process of ringing each element separately is carried out. If, as a result of the check, it becomes clear that only one diode has burned out, then you can simply carry out the process of washing out its outputs. With a chain connection, this repair format is normal.
You can simply unsolder the old diodes, turn the board over and solder the new chips to the contact tracks.
LEDs in an LED lamp burn out quite often; there are models in which the replacement process can be done without the need to use a soldering iron. To do this, the process of heating the board with a hair dryer is carried out. After which, the diode is removed by using tweezers, as the solder area becomes pliable and soft. It will be possible to install a new light source in the free space. After the board has cooled, the diode will be securely fixed.
How to check and replace the power supply of LED lamps?
The power supply of an LED lamp breaks down quite often, but visually identifying such problems will be extremely difficult. To find the problem:
- Open the block;
- Carry out an inspection by applying voltage to the capacitors (the presence of normal voltage will signal the serviceability of the mains filter and rectifier);
- Capacitors are tested at rated load;
- The circuit of LED lamps is checked with a voltage supplied to the power supply in the amount of 15V per output (this is a plus), and 7V per output (this is a minus);
- The output voltage is checked (corresponds to parameter 14V). The indicators must be stable; if the condition is not met, this means that the internal stabilizer has burned out, and the microcircuit completely needs to be replaced;
- By using an oscilloscope, a sawtooth voltage is applied; it should be at pin 5. If it is missing or has distorted values, this indicates damage to the timing elements. Or about damage to the built-in generator. In this situation, a complete replacement of the microcircuit is required;
- At outputs 11 and 8, pulses are checked; they should appear when the power supply is turned on; if they are present, the microcircuit is operational.
All work to replace the power supply must be carried out with the voltage removed. Please note that the technical documentation of the device includes documents on connecting the power supply, so replacing the device will not be difficult.
LED lamp driver repair
Problems with the driver are also a common problem with LED devices. Most often, the cause of failure is a problem with the capacitor or resistor. It will not be easy to determine the level of performance of this element without having a specialized device at hand. Therefore, many experts simply recommend replacing the driver with a similar device. The presence of voltage in the network can be checked using a multimeter, so you can determine the functionality of all parts of the circuit. If the driver problems are related specifically to breaks, then repairs are carried out using solder and a soldering device (all damaged elements must be securely soldered to the parts).