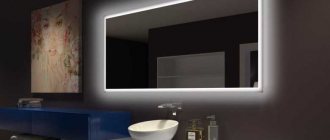
Touch button and light strips
The first thing you need is, of course, the mirror itself. Each one will have individual sizes and shapes.
If possible, order a mirror with a facet.
In addition to beauty and the play of light on the sides, this beveled edge will add safety.
At the bottom of the mirror you will need to visualize a button.
To do this, you will need to remove the amalgam or reflective layer from the back side.
Mistake #1
Without removing it, the touch button will not work.
Even if you know exactly where it is located and will point your finger at this area.
Choose the appropriate button shape yourself - a square or a circle.
How to make it on an initially solid mirror base? There are three ways.
Mistake #2
The simplest and cheapest is to carefully drill out the protective coating from the back side with a diamond core bit or grind it off with a diamond cutter for a Dremel.
Although the method is working, the result is a “collective farm”.
The most difficult method is sandblasting. This service is usually provided by those who professionally deal with mirrors (cutting, processing, drilling holes).
How to remove amalgam at home without resorting to outside help? Chemistry will help in this matter.
Operation and Precautions
When installing mirror lamps yourself, do not forget about simple installation rules:
- Before carrying out work, consider an option that allows you to hide the wiring of the lighting fixture;
- comply with fire and electrical safety standards;
- do not install lamps near water sources;
- use waterproof devices (with class IP44 and higher);
- the element must fit organically into the overall concept of the room.
Removing amalgam on a mirror without sandblasting
Look for a special gel in stores, such as Satinglass or Zenfi ZF-10S. These may be other brands.
To begin with, you create it in Photoshop or simply manually draw a stencil for the future button. The simpler the design, the easier it will be to cut with a blade.
Transfer the picture to tape and stick it at the bottom of the mirror with an indentation of at least 5 cm. It is better to take colored tape so that the outlines are clearly visible.
Mistake #3
You cannot place a button on the very edge of the mirror.
There will be a frame made of aluminum profile. Miss by a couple of centimeters and you will have to partially cut out this profile.
Otherwise, it will prevent the button from getting into place. The button is not that small!
Also cover the space around the button with protective tape. Only its contours should remain open.
After all the preparatory work, use a PLASTIC spatula to rub the gel over this area and wait a certain time according to the instructions (usually from 15 to 30 minutes).
Mistake #4
Do not smear anything with an iron spatula, otherwise you will leave scratches on the glass.
A plastic spatula can be taken from a set of children's plasticine.
Mistake #5
You cannot work with chemicals without protective rubber gloves and goggles.
This gel is a very aggressive material. After 20-30 minutes, the amalgam is easily removed along with the gel using the same spatula.
As a result, you will get a perfectly transparent outline of the touch button, clearly visible from the mirror side.
The touch switch, which will be hidden behind this button, has a light display. When turned off it lights up red, when turned on it lights up blue.
Very often, such chemicals are used to etch not only the button, but also the frame frame – the light strips.
Many masters prefer to make not a “floating mirror,” but a mirror that will shine, what is called “from the face.”
Floating Mirror
Backlight from the face
To do this, smooth strips of amalgam are removed along the perimeter, after which they are made translucently matte using stained glass paint or a special paste.
As a result, the LED strip does not shine from the back of the mirror, spreading light to the sides, creating a sort of floating effect, but comes directly from it. Just from these translucent strips.
Here the entire process of etching the mirror layer with subsequent matting of these strips is shown in detail.
Types of lamps
To illuminate mirrors, you can use different types of lamps:
- Wall sconces. This option is suitable for different rooms, designed in both classic and modern styles. They are installed in living rooms, corridors, hallways or bathrooms. There is a huge variety of products in shapes and sizes.
- Lamps built into the mirror. They look unobtrusive, but provide sufficient brightness for a high-quality reflection of the face. This option is used to highlight the mirror, but does not allow you to see finer details in the reflection.
- LED module or spotlight. Can be installed for mirrors in the bathroom or combined with lighting in the bedroom. LED products are considered universal, safe and practical.
- LED strip can be used to illuminate mirrors, stairs, paintings and other interior items. The product is quite simple to install: cut the tape in the indicated areas to divide it into pieces of the required length. An adhesive composition is applied to the back side. Simply remove the film and attach the device to the desired surface.
- A fluorescent lamp can be used almost anywhere. The light is diffused, which eliminates the formation of a blinding effect.
- Chandelier for mirrors. Usually two products are used, which are hung on either side of the item. In many situations, this option is more convenient and appropriate. The lamps look original, but are not suitable for every stylistic design.
When choosing lamps for illuminating mirrors, you should take into account the characteristics of different light sources. When creating a lighting system, three main types of lamps can be used:
- Energy-saving halogen lamp provides soft and diffused light, simultaneously illuminating the mirrors and the surrounding area of the room. Quite economical products. Avoid using them in children's rooms and bedrooms, as the gases inside the flask are toxic. If the seal is broken, the risk of harm to health increases.
- The energy-saving fluorescent lamp is equipped with a double spiral, which enhances the light output and allows you to consume a minimum of electricity. The glow is uniform, the light has white shades. For dispersion, you can use frosted glass and lampshades. Characterized by increased durability.
- An LED lamp is much more expensive than the previous two light sources, but has many advantages. It has minimal energy consumption, a longer service life, resistance to vibration and mechanical stress, and a wide spectrum of radiation (from “warm” yellow to “cool” white shades). LEDs are used for directional illumination of mirrors, so they do not illuminate the space around them.
How and from what to make a frame?
So, we’ve sorted out the surface preparation and contours, let’s move on to the frame.
In order for the mirror to have rigidity and be easy to wash, wipe, and hang on something, it is necessary to form a frame.
Mistake #6
Most often it is made from a profile, but not iron, but aluminum.
It is lighter, cools the tape better, and does not rust. This one is sold in construction stores, such as Leroy Merlin.
Some people use a single piece of chipboard. Then they sculpt an LED strip directly onto the end of this piece of wood.
Mistake #7
This way, of course, you will ensure the rigidity of the structure, but the cooling of the LED strip will not!
As a result, the LED strip will often fail and little depends on its quality.
And laminated chipboard can swell over time due to constant moisture, so an aluminum profile is the most successful solution for a bathroom.
For small mirror sizes, a 25mm*25mm profile is suitable.
Mistake #8
You shouldn’t take less, since this width provides the necessary gap between the wall and the mirror.
In this space you will have to hide both the touch button and the power supply, the minimum thickness of which is slightly more than 20mm.
If your block is much thicker or the mirror is larger, then accordingly choose a profile of a different width.
Backlight options
There are two classifications:
- type of lamps;
- design.
Typically fluorescent, halogen and LED lamps are used. Each of them has distinctive characteristics and properties:
- Led lighting is considered the most profitable and practical option for the bathroom. It has a lot of advantages, including up to 50 thousand hours of operation, consumption of a small amount of energy, high light output (up to 150 lm/W). Unlike fluorescent ones, they light up immediately after pressing the switch and do not irritate the eyes.
- Halogen lamps are known for their high level of light output and service life (3 times longer than conventional lamps). However, they are fragile and cannot withstand mechanical stress.
- Luminescent ones provide diffused, close to natural light. The service life reaches 20 thousand hours. The disadvantages are flicker, the presence of mercury, sensitivity to frequent switching on, and the need to install starters.
By design, lighting is divided into external and internal. In the first case, the lamps are installed on the wall near the mirror. These can be small sconces or spot spots. It is important that they illuminate not only the person, but also the room.
The interior lighting is equipped with an LED strip, which is built directly into the mirror. It is covered with frosted glass on top, providing soft dispersion. The modules are located along the perimeter, sides or top.
In some models, the built-in lighting is decorated with an aluminum profile coated with gold or silver. It covers the wiring and plays a protective role.
There is also decorative lighting. Her main task is to decorate the interior. In this case, a strip with low power LEDs is used. They come in different colors. However, care must be taken here as such lighting will distort the image.
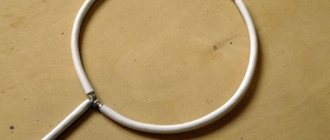
Diffuser for LED strip
In addition to the aluminum profile for the frame, it is advisable to purchase a special profile for the LED strip + a diffuser for it.
Mistake #9
Many people stick the tape directly onto the side edge of the frame without a diffuser.
However, without this matte cover, you will not get even light distribution. Bright dots from LEDs will be visible along the entire perimeter of the bathroom tiles.
With a matte diffuser cover, you get perfect illumination.
Also, the plastic diffuser can be glued directly on top of the LED strip directly onto the frame, without an additional special profile.
The only inconvenient point is that in this case it will not be removable.
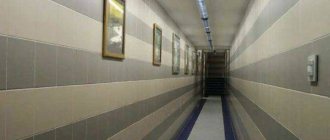
Light around the perimeter of the bathroom mirror
The best effect is achieved by illuminating the mirror around the perimeter. It looks simple and elegant. In this case, light sources can be overhead or built-in. Mainly used in high-tech style with cold light or colored neon lamps.
A very interesting solution is a thin strip of light along the perimeter of the mirror, shaped like a mobile phone. Or a luminous stripe on a round mirror, similar to a modern selfie frame.
Assembling the frame frame
So, let's move on to assembling the structure. First, measure and draw all the dimensions.
Step back 1.5-2cm from each edge of the mirror and draw straight lines with a pencil.
This is where the matte diffuser cover, screwed to the profile, will end. Using these dimensions, form a frame square.
Another U-shaped profile is screwed onto the inside of the frame in its upper part. It makes it easier to install and hang the mirror on the wall.
You can do without it by simply making furniture holes for the dowel heads in the frame itself.
The entire structure is assembled on furniture corners and self-tapping screws.
Pay special attention to the corners.
When making mirrors with floating lighting, it doesn’t matter how they are assembled - with or without a 45-degree cut (90 degrees).
But if you have lighting along the entire perimeter “from the face”, through luminous strips, then the corners already play a significant role.
Firstly, you need to collect them with a cut at 45 degrees. Secondly, cut off the corners themselves - like this.
Mistake #10
Without this cut, the corners in the light stripes on the mirror will be too dark.
Such uneven illumination immediately catches the eye. Even factory products from the store suffer from a similar defect.
When assembling at right angles, you simply will not have LEDs at these points.
What else needs to be taken into account
Whatever types of lamps we choose, their main function is to illuminate the face well. To ensure high-quality lighting, consider the following:
- the light above the mirror will not allow you to see your face in great detail;
- a lamp installed under the mirror will cast unnecessary shadows on the face;
- installing a lamp on only one side of the mirror will create a feeling of blurred facial contours;
- side lamps must be installed at a height of 1.5 meters from the floor;
- mirrors built into cabinets usually do not require additional lighting, because... equipped with built-in soffits;
- The white color and frosted glass of the lampshades will create a soft, diffused light that does not hit the eyes.
If your bathroom has a large mirror, then consider several lighting scenarios. This will give a lot of light and space to the private room.
Illumination from the face and reflective box
For the uninformed, it is worth knowing that making illumination “from the face” is much more expensive than making a “floating mirror”.
In addition to etching the strips, you will need a large plastic box made of PVC foam (3mm) that will completely cover the back.
The sides of the box are made of matte acrylic.
Thus, the light will not randomly go out, but will be evenly scattered through acrylic and light strips.
In this case, a diffuser with a special profile is not required; it is enough to stick the tape on the frame itself.
Here is a good video from a competent master in this matter. He explains in detail and shows what and how such boxes are made from.
There is a simpler method. This is when individual matte strips are closed from the inside with a plastic cable channel.
And the LED strip is mounted not in the center, but along the edge of this cover.
Mistake #11
But here again the acute issue of LED overheating and the need to periodically replace the strip arises.
The second method is a mini-box not covering the entire mirror, but directly under the translucent strips.
As you can see, a floating mirror with an LED profile and diffuser is an easier option to make yourself than one with face lighting.
Mistake #12
And mirrors with a matte finish (stripes treated with sandblasting) last much less in damp rooms than without a matte finish.
First of all, the edge that is located closer to the bathroom or shower begins to “bloom”.
Mistake #13
If your mirror is built into a niche and not hung on a tile, there is no need to make a light box to illuminate the face.
The niche itself plays the role of such a box.
Recommendations for self-installation
In order to mount an illuminated mirror in the bathroom, you must take into account that the process is carried out in a humid environment, so you need to take care of safety. It is important to ensure hidden installation and comply with operational safety requirements.
Important! The moisture protection class of any lighting fixture used in the bathroom must be at least IP67. This high level of safety is necessary because the mirror is often placed above the sink and there is a high risk of water getting into the lighting element.
- Use a pencil to mark the place where the mirror is attached to the wall, and mark the points for the holes.
- Make holes in the wall using suitable tools and tighten the screws.
- Hang the mirror on the mounts, check the levelness using a building level.
- Connect the backlight cable to the power supply and grounding.
- Check the functionality of the backlight.
- If the package includes shelves, they should be attached at the final stage of all work.
If you are installing a mirror cabinet, then the procedure is the same, only it is not the mirror that is attached to the wall, but the cabinet itself.
Useful tips Connection diagrams Principles of operation of devices Main concepts Meters from Energomer Precautions Incandescent lamps Video instructions for the master Testing with a multimeter
How to glue a mirror?
The formed frame is glued to the mirror using liquid nails.
You should only use glue specifically designed for working with mirrors (glass-metal).
Tytan 930 works well.
Mistake #14
The composition of regular glue or epoxy will eventually pull out the amalgam and dark spots will appear on the front side.
Mistake #15
Liquid nails must dry for at least 72 hours.
After this, a grip point of even 1 cm2 can withstand a weight of up to 30 kg! Despite the fact that a square meter of a mirror with a thickness of 4 mm weighs only 10 kg.
Using gentle hand pressure , glue the frame to the back.
Mistake #16
No need to put large weights on top of the frame or substrate!
There have often been cases when, due to uneven distribution of weight, the canvas was bent, followed by a distortion effect in the mirror.
This is especially critical for large sizes and thickness of mirrors up to 6mm.
Sizes and shapes
Bathroom mirrors are available in three versions:
- height 120 cm, reflection to the knees;
- 60 cm, shows a person from the waist up;
- 40 cm, displays half body.
The first size is, of course, practical. But most rooms have modest dimensions, which will only accommodate the second and third options.
As for appearance, there are no limits to your imagination. The most popular is a round or oval mirror. Many people prefer rectangular and even square ones. Asymmetrically shaped products are also in demand. However, they are not suitable for all styles and interiors.
Connection diagram for touch button and LED strip
Let's move on to the electrical part. The general connection diagram with the touch button shown below is as follows.
The 220V voltage from the cable laid in the wall first goes to this touch switch (it also has its own power supply).
More details
Next, the wires go to the 220V/12V step-down unit, and the LED strip is connected from it.
If you forget to bring out the cable directly behind the mirror, you will have to pull it to the nearest outlet and connect it through a plug. It doesn't look very nice, but what can you do?
By the way, connoisseurs of perfect cleanliness and fans of the touch button should know that after each press, ugly fingerprints remain in this place.
And there is no escape from them. You will have to constantly keep a cloth next to the mirror and use it after each time you turn the light on and off.
Another option is to install a mechanical button directly on the mirror frame instead of the sensor.
Well, or put a low-voltage non-contact hand wave sensor there, which is used to illuminate the work area in the kitchen.
More details
The backlight connection diagram will change a little.
In this case, you will have to rack your brains about where to put the power wires to the sensor so that they do not obscure the light or interfere with the LED strip.
The main advantage of this connection is that there is no need to remove the amalgam to create a visualization of the button.
The downside is that the power of such a sensor is only 40W. This is a little more than 2.5 m of not the brightest LED strip (SMD 5050/60 14.4 W/m).
All blocks and wires are hidden behind the mirror. To prevent the wires from dangling or hanging down, use self-adhesive pads.
The power supply and button are also glued on the back side.
Mistake #17
Before gluing the sensor to the area where the amalgam has been removed, check its functionality.
The sensor does not respond well to touch over its entire surface. Its sensor is not always centrally located.
It is quite possible that you will have to “play around” a little and move the button up and down, left and right, in order to find the best position.
What should all these devices be glued to - double-sided tape or the same liquid nails? The question is not entirely clear-cut.
The tape may fall off over time, because... The power supply will become hot during operation. Often, a trace of it clearly appears on a foggy bathroom mirror.
However, any blocks are consumables. Alas, they burn much more often than LED strips.
In a few years the block will have to be replaced anyway. If you have firmly glued it to the substrate, then you will not be able to tear off the body without breaking the amalgam.
Therefore, if an old unit burns out and there is free space, it is much easier to put another one next to it without dismantling the burnt one.
If you don’t have enough space and the mirror is small, initially place it on tape.
Installation and connection tips
If you have reasonable doubts about your own skills as an electrician, it is better not to take risks and resort to the help of professionals to install lighting in the bathroom. Although, in principle, the process is simple:
- Spotlights are installed by connecting a cable to their terminals. Then you need to press the metal “ears” to make it more convenient to place the device in the hole prepared for it. When it takes the correct position, it is fixed and the light bulb is screwed in.
- Lamps with halogen lamps are installed in the same way. But they have spring fastenings that make them easier to fix in the holes. And the lamp is secured with a special mounting yoke. It is necessary to work with it only with gloves.
- The LED strip is connected to the network adapter with correct polarity, securely fastening the wiring. Then it is simply glued to the desired places, having previously cleaned and degreased the surfaces. It is strongly not recommended to install a tape whose length exceeds 15 m.
- Before installing sconces and lamps with shades, mark the required places on the wall and drill holes. They are also connected using cables and terminals. For overhead lighting fixtures, you first need to use self-tapping screws to attach the strip on which they will be fixed to the wall.
Examples of the location of mirrors of different shapes in the hallway, tips for choosing
Independent connection and installation of any lighting devices requires compliance with safety measures:
- Before starting work, be sure to turn off the electricity.
- The distribution box is located only outside the bathroom. If this is not possible, use moisture-proof terminal blocks, reliably insulating all twists.
- Devices must be grounded. This even applies to LED strips.
- The presence of a residual current device (RCD) is required. It will de-energize the system in the event of a short circuit.
- If the overall bathroom lighting system is divided into several autonomous parts, each needs its own switch.
- All existing wires are reliably masked.
To illuminate the bathroom, a low current power supply system (12 V) is sufficient. This voltage is safe for humans even in conditions of high humidity.
Bathroom mirror lighting has a wide variety of options and performs not only a practical, but also a decorative function. When choosing specific models of lamps and types of lamps, it is necessary to take into account their safety and correctly position the devices. Of course, this element of furnishings must fit into the overall concept of the interior.
Gluing the LED strip
The LED strip is mounted on an aluminum profile around the entire perimeter.
Mistake #18
You cannot glue it directly onto the mirror itself.
The light should hit the sides, not the wall!
To bring out the wires, you will have to drill the frame in one place.
The tape is laid in such a way that its beginning and end converge at one point. Usually this is the bottom of the mirror near the touch button.
In this case, the power wires from the unit are connected to the contact pads on the tape both at the beginning and at the end, parallel to each other. Plus to plus, minus to minus.
To do this, you will need to solder two more wires to the end of the tape.
This is necessary to ensure that the illumination is uniform around the entire perimeter.
For long strips, the final diodes burn more dimly than the initial ones. On large mirrors this is immediately noticeable.
Power supplies are powered by 220V. And from the block to the tape there are already 12V wires.
There are two pins V+ and V-. The main thing is not to confuse the polarity.
Here, with all the pictures, the full cycle of connecting the LED strip . The algorithm is the same for any installation, be it a suspended ceiling, a mirror, or lighting a work area in the kitchen.
Important Details
To successfully illuminate bathroom mirrors, follow these tips:
- install a lamp above the mirror that will not hit your eyes;
- to avoid shadows on the face, it is better to install lighting on the sides of the mirror;
- when choosing sconces, choose shades made of frosted glass or plastic;
- For a large mirror there are never too many lamps, install several at once.