In order to use electrical appliances in the most convenient way, it is necessary that the correct height of switches and sockets from the floor according to European standards is maintained. For this purpose, standards for installing power points are used, and they may differ in different countries. This indicator depends on the frequency and number of devices used - in more developed countries, where people are accustomed to fully trusting electrical appliances, the time of use is longer than in other countries.
Although in fact, electricians do not separately mark the rules for installing the connector for the switch, because both standards can be used in any area depending on the desire of the person. If you turn to a specialist for help, he will definitely tell you at what level you should install switches and sockets.
Standards for installing connectors for sockets
In fact, there are no strict rules in construction regarding the number and location of sockets and switches, either in an apartment or in a private house. But there are two documents that say how and where it is better to place sockets and switches.
The first document is SP 31-110-2003, which states that switches should be placed on the side of the door handles, the distance from the floor to the switch is no more than one meter. Sockets can be placed anywhere, but also at a height of up to a meter.
The second document is the Rules for the Construction of Electrical Installations. It talks about safety rules when installing sockets and switches; the distance from sockets and switches to gas pipelines is standardized - it must be at least 50 cm.
In bathrooms, it is allowed to install sockets at a distance of 60 cm from sinks, bathtubs, showers, etc. Such sockets must be protected by an RCD with an operating current of up to 30 mA (residual current device).
Required height of sockets from the floor according to European standards
Currently, the European standard for installing sockets and switches has become firmly in fashion, according to which sockets are installed at a height of 30 cm from the floor, and switches at a height of 90 cm from the floor. This arrangement of sockets and switches is convenient for all family members. Since the child can turn on the light himself, and an adult does not even have to raise his hand to the switch because it is at arm’s height. Cords from electrical appliances plugged into sockets lie on the floor and do not interfere with the passage. Comfortable!
Soviet version
Previously, the Soviet Union used a standard for installing sockets and switches, according to which sockets were installed at a height of 90 cm from the floor, and switches were placed at a height of 1.6 m from the floor. This standard also has its advantages, and it is no worse than the European standard. Therefore, many people currently prefer this standard. For example, the switch is always in plain sight, and you can insert the plug into the socket without bending over. Which standard to install sockets and switches is up to you personally; both options have their pros and cons.
Standards for bedroom and living room
Modern needs and preferences of the owners dictate at what height to install sockets in the recreation area of the living space.
The number of sockets near the bed is usually two on both sides of the bed. The standard location assumes a height of 0.7 m. This ensures that the lamp is connected and installed on a nearby cabinet with the ability to adjust the lighting. It also participates in recharging existing gadgets. In a classic interior, the switch is installed at the entrance to the room.
The desk also needs additional sockets. The first block of sockets is installed for the computer behind the desktop at a level of 0.3 m from the floor. The second block is intended for a table lamp and is located 0.15 m from the workplace.
There are sockets behind the TV at a height of 1.3 m from the floor in the living room. There must be not only regular sockets, but also power points for the Internet. Other sockets are also provided for lighting, connecting musical instruments and other electrical appliances, taking into account the furniture and the functional division of the room into zones.
There are so-called backup sockets used to connect a vacuum cleaner or air conditioner.
The switch is traditionally installed at the front door. But the presence of multi-level ceilings with the use of special lighting requires the equipment of switches with several keys.
Correct height of switches from the floor according to European standards
There is no such thing as officially accepted standards. There are only recommendations and requirements on how to install sockets and switches regarding communications (gas, water, heating pipes). Otherwise, the main thing is that the operation of electrical equipment is comfortable and safe.
- Whether you install the switching devices yourself or seek help from a professional electrician, keep in mind that there are two most common options for how high from the floor they can be mounted:
- installation of sockets and switches according to the so-called “European standard”;
- "Soviet" installation system.
All these concepts are conditional; in fact, European standards and Soviet systems do not exist, it is simply more convenient to distinguish and determine what the installation height of sockets and switches should be. The first option became widespread relatively recently, when in the post-Soviet space it became fashionable to carry out repair work in homes and offices and call it “European-quality renovation”.
There are no differences between repairs in Europe, America or Russia; they can either be good and of high quality, or not so good. But it so happened that good and high-quality repairs were associated with punctual and neat Europeans and received the prefix “euro”. And the one that wasn’t very good was identified with everything Soviet and earned the corresponding name.
The “Euro” version assumes that the height of the socket from the floors is 0.3 m, and the switch is 0.9 m. According to Soviet standards, the switch was mounted at the level of the shoulders and head of an average person (1.6-1.7 m), and the sockets – 0.9-1 m from the floors.
It is impossible to say which of these two options is preferable; everything here is purely individual. In the “euro” version, to control the lighting there is no need to raise your hand up to turn on the switch; it is located at the comfortable level of the lowered human palm. In addition, such a switching device can be turned on and off by a child.
Placing the switch at a distance of 1.6-1.7 m is beneficial when it is necessary to install some furniture under it (wardrobe, bookcase, refrigerator). A “Euro” socket located almost right next to the floor is dangerous for a small child who has just learned to crawl and is interested in everything that catches his eye. In this case, of course, it is preferable to install sockets according to the Soviet version at a level of 1 m from the floor.
But as for sockets in which some kind of equipment is constantly plugged in, such as a TV, computer or stereo system, it is better to mount them as close to the floor as possible so that the wires do not stretch across the entire wall and spoil the appearance of the room.
Rules for installing switches
- Decide on the placement of furniture and electrical appliances in the rooms.
- Place all outlets (including TV, Internet, telephone, etc.) on the plan, for electronics, kitchen appliances, etc., plus backup ones.
To do this, draw up a diagram, preferably to scale, on which to mark the furniture, as well as household appliances and equipment that is connected to electrical or low-current networks, indicate the height to the floor.
- For stationary equipment (computer, TV, washing machine, air conditioner, etc.), place electrical outlets so that there is easy access to these places, but at the same time, so that they are hidden behind electrical appliances.
- Connection points located on open areas of walls that you plan to use periodically are best done at the same height - 30 cm (European standard). Provide a minimum amount so that the vacuum cleaner reaches all rooms.
- Above the desk, bedside tables, chest of drawers, they are placed at a height of 15-20 cm from the furniture surfaces.
- in a long corridor or on a staircase, it is more convenient to install at the beginning and at the end;
- in a bedroom or living room, the best option is when the switches are located at the entrance to the room, as well as at the bed or sofa, in order to control the lighting without getting up.
Select the installation height of the switches taking into account from what position they will be accessible, i.e. if it is at the entrance to the room, then choose a height of 80-100 cm, and if it is near a bed or sofa, then at the height where the switch can be reached with an outstretched hand.
Preparing to install an outlet
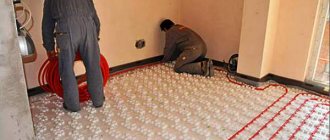
There are two main schemes for laying electrical communications - open, made on the surface of the wall, and hidden - when all the electrical wiring is located under the surface of the plaster or wall cladding. Depending on this, the stages of installing sockets also differ.
In the first case, their installation does not require labor-intensive preparation of a niche in the wall in which the socket box and the socket itself will be located.
Outdoor sockets (switches)
On the wall, at the location of the socket, using dowels (nails, screws), a wooden rectangular or round block (plywood 10 mm thick) measuring 20-30 mm is fixed. exceeding the size of the socket (switch).
For outdoor installation, only sockets and switches for outdoor installation are suitable.
Before installation, remove the decorative plastic box and break out the plastic plug on it, at the point where the electrical cord enters, using pliers or a round file.
The terminal block is screwed to a wooden (plywood) block using self-tapping screws or self-tapping screws. After this, the ends of the electrical wiring are connected.
The wires are pre-protected using an insulation stripper or a retractable construction knife with replaceable blades - in the absence of a stripper.
The wires are crimped around the terminal block in such a way that they can easily pass through the hole in the cover in place of the broken plug. After this, the socket cover is screwed over the terminal block.
Installation of hidden sockets (switches)
If the socket (switch) is installed in a standard socket in a brick (reinforced concrete) wall, then installation is not difficult.
The ends of the wires are pulled out of the niche and bent upward. The metal or plastic socket box is oriented so that one of the wire entry plugs is located opposite the wire exit. Using a construction knife or a flat-head screwdriver, remove one of the plugs.
The ends of the wires are passed through the hole.
The socket box is fixed in the niche using quick-hardening gypsum mortar or construction mastic.
After secure fixation, the cracks between the socket box and the niche opening are puttied. To prevent the solution from getting into the socket box, you can fill it with crumpled newspaper or seal it with tape during operation.
After the putty has dried, the wall surface is sanded with an abrasive mesh stretched over a sanding block.
It is necessary to deepen the socket so that it does not protrude above the plane of the wall. Otherwise, a gap will form between the outlet cover and the wall.
After completing this step, a terminal block or switch key is attached to the wires. Excess wires are recessed into the cavity of the socket box. The terminal block or key is secured in the socket box using sliding tabs located on the sides of the terminal block or using the screws included in the socket kit.
Lastly, the socket (switch) cover is mounted. A level is used to check the horizontality of the top edge of the cover. If necessary, adjust with a slight turn. Then the fixing screw is tightened.
Ergonomic recommendations for the arrangement of electrical appliances
For each room, before carrying out electrical work, it is necessary to draw up a sketch, a scale plan with the location of furniture and electrical appliances, mark on it the places of connection to the electrical network, including low-current circuits: telephone, television, alarm and other devices.
It is important to provide a small reserve of these places for future equipment. Practice shows that this is justified.
Location of sockets
For stationary appliances, such as a TV, computer, washing machine, freezer... they must be located with easy access to them, but it is advisable to hide them behind the appliances themselves. For design purposes, periodically used sockets are usually placed at the same height from the floor; usually this distance is about 30 cm. In this case, they are less noticeable.
It is recommended to choose such a quantity that it is convenient to use a vacuum cleaner and portable electrical appliances in all rooms. Electrical sockets above the desk and bedside tables are placed above the surface of the furniture at a height of 10÷20 cm.
Switch locations
It is recommended to mount them on the wall near the front door on the handle side at a distance of more than 10 cm from the opening and a height of about 90-100 cm. This location is convenient for adults: no need to raise your hand high. And children aged four years and older can already use the lighting themselves. Ceiling-mounted switch designs with a lowered cord for control are still used in room designs.
The type of room and its purpose must also be taken into account when installing switches. In a long corridor, two pass-through switches can be installed at its ends to control one lamp. At the entrance to nearby rooms, you can place a block of several switches to control the light in separate rooms from one place.
It is convenient to place switches in the bedroom so that you can turn off the lighting without getting out of bed, simply by raising your hand. The rule used in most cases for installing sockets 30 cm from the floor and switches 90 cm is considered universal. If you are not sure about the future arrangement of furniture or electrical appliances in the room, then feel free to use this method.
Features of installation of switches and sockets
The reason for long discussions is the height of the sockets from the floor. Since the exact definition is not written down anywhere, you can use concepts such as “European standard” or “Soviet standard”. When a “European-quality renovation” is planned in an apartment, most likely the sockets will be placed at a level of 300 mm from the floor, but the switches will be already at 900 mm.
According to the “Soviet standard”, the switch would be installed at shoulder level - this is approximately 1600 mm, and the socket would also be much higher - at 900 mm from the floor. Each method has its pros and cons. Let's look at them briefly.
Features of placement in the corridor
For a hallway, 1–2 sockets are enough. It is better to place them in a corner near the baseboard at about 15-20 cm from the floor. This will allow you to connect various household appliances, for example, a vacuum cleaner, an electric shoe dryer or a phone charger.
In addition, other devices will fit perfectly into the corridor.
- Among them:
- apartment distribution board with circuit breakers;
- Voltage regulator;
- an electric meter, although a separate place is provided for apartments on the staircase, it can also be installed in the corridor;
- switches for kitchen, bath and restroom;
- junction box for TV cable, Ethernet or landline phone.
In most cases, this is quite enough, but sometimes they also provide for the installation of a heated floor sensor in the corridor.
Number and height of sockets in the bathroom
Of course, the quantity will depend on the area and number of devices, but in 95% of cases, 1–2 sockets will be enough. It is advisable to place the first one close to the mirror at a level of 1000 mm from the floor. It will connect a hair dryer and an electric razor. The second, for example, is connected to a washing machine or heater. In this case, at least 600 mm from the floor for the machine, and 1500 mm for the boiler.
It goes without saying that mounting both sockets next to a water tap is strictly contraindicated, so there should be a distance from the bathtub and sink of more than 600 mm, and preferably 1000 mm. It is imperative to worry about protection from moisture and install a waterproof IP 44 socket. We must not forget that the products may be exposed to even greater danger.
Since the bathroom is at risk of flooding, fixing products below 150 mm from the floor is completely unsafe. If water gets into the socket, the threat to life is simply colossal. The reasons for this can be various situations, from a leaking faucet or pipe, to breakdown of household appliances or forgetfulness of the owners.
Specifics of installation in the living room
A home theater or simple TV box will require a minimum of two outlets. The first is for the TV receiver itself, and the second is for the satellite receiver. The height level should be determined based on the location of the TV itself. It can stand on a cabinet, be mounted into a wall, or fit into a special cell of a furniture wall.
The power cord must not dangle or be under tension. It should be completely hidden behind the screen. On each wall, you should additionally place 2 sockets at a level of 150–300 mm from the floor. They can be used to connect a floor lamp, a fan, chargers for gadgets, a game console, or a vacuum cleaner.
You should worry about the possibility of conveniently connecting the air conditioner. If there is a personal computer in the living room, at least six sockets must be provided to connect power to the screen, system unit, desk lamp, scanner, speakers for sound playback and Wi-FI router.
Rules for location in the kitchen
Every year, more and more intelligent technology is being developed to ensure human comfort and time. Naturally, the amount of equipment in the kitchen is simply overwhelming in some places. It is imperative to provide for the connection of a hood, possibly a washing machine, dishwasher, or electric stove. But the main thing is a refrigerator, a microwave oven or a slow cooker, sometimes both. Mixer, juicer, food processor, toaster, blender, coffee maker and TV - this list is probably endless.
An outlet is usually installed behind the refrigerator at a level of 600–800 mm. For the hood, it is advisable to increase the height three times – 1800–2000 mm from the floor. When connecting a washing machine or electric stove, the connector must be mounted 200–300 mm from the floor. Additionally, a hole is cut for it on the back wall of the kitchen furniture, if any.
Having estimated the location of the future working surface, it is necessary to provide connectors there as well. It is advisable to place at least three sockets 100–200 mm above the tabletop to connect small equipment. A TV in the kitchen is most often mounted on wall brackets; accordingly, the height of the socket for this household appliance can be from 1800 to 2000 mm from the floor.
The nuances of placement in the bedroom
Four products are sufficient in this room, with two sockets on each side of the bed. They will be intended for a bedside floor lamp, electronic clock or additional devices, such as an air conditioner, fan or vacuum cleaner. Near the chest of drawers with a mirror, it is also advisable to install one socket at a level of 600–700 mm from the floor to connect a hair dryer or hair straightener. If there is a TV or PC in the room, you should also think about where to hide the wires and how to place the electrical connectors.
Competent planning of power points in the nursery
A children's room is usually a combination of a bedroom and play space. This room also cannot do without electrical outlets. It is advisable to have at least 2-3 of them. You can put a lamp near the crib, and the rest for additional purposes.
Many experts warn that plug connectors should be mounted as high as possible away from small children. They were right about this a few years ago. Modern developments have made it possible to equip products with additional protective covers that prevent the child from coming into contact with the electrical network. These valves often require considerable effort to gain access to the plug holes. Spontaneous children's curiosity will be stopped.
Subtleties of installation in the office
This room is not much different from the living room in terms of the location of the connectors. A minimum of 5-6 devices will be required to connect a PC - a system unit, a screen, audio speakers, a scanner and a desk lamp. Near the shelves for books you need to provide a place for reading.
Installation of a lamp and a comfortable chair should be included in the project plan, and this is another auxiliary connector. The other two devices are placed on an unoccupied wall. Each connector is mounted at a height of 150–300 mm from the floor.
There are two options for connecting the air conditioner. Directly through the machine or through an outlet. In the first option there will be no hanging cords, but you must definitely choose a high-quality machine, on which the functioning of the device will depend. In the second case, the socket must be placed at a level of 300 mm from the ceiling.
The height of sockets and switches above the countertop in the kitchen
The modern kitchen is equipped with many electrical appliances: oven and hob, refrigerator, hood, dishwasher, coffee maker, electric kettle, meat grinder, toaster, etc. Electrical wiring design begins with the creation of a detailed diagram indicating the location of furniture and the placement of household appliances.
- Some recommendations for the location of outlets in the kitchen:
- For connecting a dishwasher, washing machine, refrigerator - 10-20 cm from the floor level. This is the best option regarding the length of the electrical cord of the equipment. Some models of household appliances have a short wire, which will not be enough if the socket is located at a height of 50 cm.
- To connect small-sized appliances (multi-cooker, microwave, toaster, etc.), the socket is installed at a distance of 20 cm from the countertop level, or 110 cm from the floor.
- A separate socket is installed under the hood at a distance of 2 m from the floor. There should be at least 20 cm from the middle of the hood to the socket so that the ventilation duct does not block the socket openings.
- “Power points” for built-in appliances are best located behind the walls of bedside tables and cabinets. For free access you will have to cut out their back walls. The recommended height for installing sockets in furniture is 30-60 cm from the floor. In this case, you need to check that the socket is not located directly behind the built-in electrical appliances.
- It is convenient to place sockets for lighting fixtures in wall cabinets at a height of about 5-10 cm above the furniture.
- the oven and hob are equipped with power sockets designed for a current of 32-40 A;
- for a heater with a power of more than 3.5 W, a separate power line is laid;
- 16 A sockets are suitable for installing a refrigerator, microwave oven, food processor, toaster, steamer and other electrical appliances.
The total power of the electrical lines supplied to the kitchen must be in reserve in order to be able to turn on all consumption points at the same time.
Preparation for installation, proper design
Installation and reinstallation begins with a detailed plan. It reflects the exact location of each device, dimensions and quantity. When developing a project, the location of power supply lines and distribution boxes should be taken into account. Select the correct height from the floor level. The more detailed the plan and the better it is tied to the “terrain”, the less costs will be required for its implementation. Practice has shown that a well-thought-out project saves up to 20% of money and up to 30% of time.
Video: sockets in the kitchen
In order for the project to fully correspond to the real picture, it must reflect:
- Door and window openings.
- Location of furniture, household appliances and computer network.
- High-risk areas: water supply and gas pipelines.
It is very important to choose the correct cross-section of current-carrying cables. The total power of consumers should not exceed the capacity of the conductor
Sockets and switches are selected to be factory-made and with nominal characteristics corresponding to the network parameters. (230 V and 6 A).
In children's rooms, it is advisable to install sockets with automatic closing curtains. In the bathrooms there are devices with an index of IP 66 (an indicator of maximum moisture resistance). Outside the house, it is recommended to use sockets equipped with a cover.
Sockets equipped with additional protective equipment are installed
You should also follow simple rules:
- The distance between switches and utility systems is at least 0.5 m.
- The distance from the kitchen sink is at least 0.8 m.
- The gap between the switch and the door (window) frame is from 0.1 m.
- For stationary electrical appliances (TV, washing machine, dishwasher, computer), separate sockets are installed, located in close proximity to them.
For outdoor location
External wiring has a number of undeniable advantages. First of all, this is the accessibility of the entire power line and the relative ease of installation. For this type of wiring, there is no need to ditch the walls and install socket boxes at each point. In case of reformatting of the wiring, all lines can be quickly and easily dismantled without disturbing the appearance. Also easy to reassemble. The use of cable channels allows you to mobilely add new lines if necessary.
Installation of external wiring using cable channels
Cable routing in the form of twisted pairs on insulators gives the interior an originality in a “retro” style.
Laying cables in the form of twisted pairs
However, some characteristics unfavorably distinguish external wiring from hidden wiring. This is a greater risk of mechanical damage and contact with conductive (or flammable) wall surfaces. Therefore, additional protective measures are provided during installation. For example, each point must be equipped with a substrate made of dielectric material. And the distance of the wire from the wall should not be less than 10 mm. When choosing switches and sockets, you should give preference to those devices that are made of high-quality plastic and have a thick-walled body.
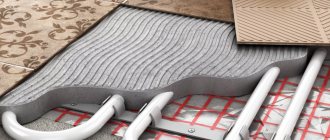
For hidden location
When installing hidden wiring, the risks of mechanical damage are much lower. The mechanisms are installed inside the wall, the cables are “hidden” in specially prepared channels - grooves. Such work, of course, is more expensive and time-consuming, but it more than pays off in reliability and compact appearance. A prerequisite for installing a modern switch or socket is a socket box, which is a round or rectangular plastic box.
Fixing the socket box with gypsum mortar
The socket box is fixed into the thickness of the wall using cement or gypsum mortar
When installing, you should pay attention to the correct fit of the box; the edges of the socket box should not rise above the plane of the wall. To prevent the solution from getting into the interior of the socket box during installation, it is recommended to seal the holes with tape
Height of TV sockets on the wall
In the hall or living room, TV is most often watched while sitting on the sofa or in an armchair. For the average person, about 175 cm tall, it is most convenient to place the TV at a height of 120 cm from the floor to the center of the screen. Sockets are made behind the TV, along its vertical axis, closer to its upper edge. The specific installation height of the socket depends on the diagonal of the TV. We also bring out the antenna cable here.
Rules for selecting power supply devices
First of all, you need to figure out what and where the furniture will be located, as well as electrical household appliances in the room; for clarity, it is optimal to draw a plan diagram in the correct proportions, on which to indicate all the pieces of furniture and electrical equipment that need to be connected to the electrical network.
Then indicate all the sockets (electrical, television, telephone and computer), it is advisable to make a small reserve. It is preferable to install sockets for devices that do not change their location (TV, system unit, etc.) so that they have constant access, but at the same time, it is better if they are hidden behind this equipment.
Sockets for non-permanent use, installed in open areas of wall structures, should be optimally placed at the same height - thirty centimeters from the floor surface; their number must be selected taking into account that a household vacuum cleaner can reach any room.
Sockets located above a computer desk, chest of drawers, bedside table, etc. are optimally installed at a height of 10-18 cm from the furniture surface. In order to correctly select the installation height of the switch, you first need to determine in which direction the door leaf will open in this room and install the switch on the edge of the door frame where the handle is located. At a height from the floor of approximately 75-95 cm, depending on your height, that is, this distance is determined in practice.
The position of the switches is strongly tied to the type of room, for example, in a narrow corridor or on a flight of stairs, they are usually installed at the start and finish, in the bedroom or living room; it is optimal to install switches near the entrance to the room, as well as at the bedroom places to control lighting while lying down.
Select the height of the switches according to the same rules, taking into account from what position they will be used more often, in other words, if it is at the exit from the room, then we take a height of 75-95 cm, taking into account your height, and if near the bed, then a switch is needed Place it at such a height that it can be easily reached with an outstretched arm.
In those areas where you do not yet know how furniture or electrical devices will be arranged, we recommend installing sockets at a height of thirty centimeters, and switches ninety centimeters from the floor surface; most often this is the most optimal height for switches and sockets.
By putting into practice these simple recommendations, common sense and not forgetting about basic safety, you can find the best location and height of sockets and switches in your apartment. Don’t forget a simple rule: it’s better to calculate and determine everything well in advance than to redo everything all over again later.
In the kitchen
There are requirements of PUE-7 that are relevant for this premises.
When installing electrical points, the minimum distance should be:
- from switches and sockets to the gas pipeline: 0.5 m;
- to the sink and water supply: 0.6 m.
This exhausts the requirements of regulatory documents regarding the kitchen. But there are other rules dictated by life experience and common sense.
The kitchen is divided vertically into three zones, this is due to two factors:
- there is a lot of furniture blocking access to the lower part of the walls;
- There are many electrical appliances installed: for ease of use they need to be separated.
These vertical zones are:
- lower: 10-15 cm above the floor. Sockets are installed here for constantly operating appliances - a refrigerator, an electric stove, a dishwasher. With this connection, the risk of getting caught on the wire is minimal, since almost all of it lies on the floor;
- average: 1-1.3 m above the floor. Install light switches and sockets for appliances standing on the tables - blender, coffee maker, toaster, electric meat grinder, etc. The indicated height is conditional. It depends on the height of tables and work surfaces: sockets and switches should be slightly higher;
- top: 2.0-2.5 m above the floor. Sockets are installed here to illuminate the work area, air conditioner, hood, etc. This placement is convenient for two reasons: you can use models with a short wire, and the sockets are hidden by furniture and therefore do not spoil the interior.
Built-in socket blocks mounted in a countertop or cabinet are very convenient. The unit connects to an outlet on the wall (in the lower zone) and works similar to an extension cord with several outlet sockets. When not needed, it slides under the countertop or into a cabinet, so that only the elegant lid remains on the surface.