Modern technologies for installing underfloor heating systems are now actively used in the housing and social sphere. Thanks to them, you can achieve the most comfortable indoor microclimate without spending unnecessary money on heating. They can use electricity or liquid as a coolant, and the design of the circuits can not only be designed during construction, but also make the old house warmer and more comfortable.
Connecting a heated floor
Connecting a heated floor is the topic of our publication today. We will talk about the two most popular ways of arranging them: water , operating from a gas boiler - this is an option for private houses, and electric cable , which is also suitable for an apartment.
Temperature requirements for heated floors
According to building codes and SNiP rules, the temperature of the floor surface should not exceed permissible values.
| Zone name | °C |
| Children's room | 24 |
| Living room, bedroom and kitchen | 26 |
| Parquet floors, carpeting | 27 |
| Corridor | 30 |
| Bath with toilet | 33 |
| Edge zones of premises | 35 |
Maximum floor temperatures cannot be exceeded for two reasons:
- Contact of the legs with a very heated surface causes venous dilatation of the veins.
- Overheating deteriorates the floor covering (the wood dries out).
The use of the HTP system in residential premises is allowed with a coolant temperature of no higher than 55 °C.
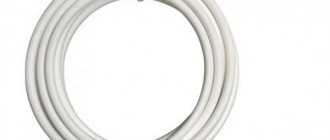
Water heated floor installation
The heated water floor has a multi-layer complex structure, each layer has its own function. Consists of: base, hydro and thermal layer, reinforcing product, heating element and concrete screed.
A substrate is placed on the screed on which the floor covering is mounted; it must have a special symbol indicating the possibility of laying it on warm systems.
The junction of the walls and the screed, as well as the boundaries of the water circuit, should be laid with damper tape, this will help compensate for the expansion of concrete with temperature changes.
More often, independent installation of this heating structure is carried out using the “wet” method, that is, by pouring a cement-concrete screed. But “dry” installation is possible; it is used in houses with wooden floors.
How to connect a heated floor to a heating system
The legislation of the Russian Federation does not allow the installation of high-voltage heating elements in apartment buildings. For the same purpose, you cannot use hot water.
Therefore, schemes for connecting heated floors to the heating system are successfully implemented in country houses. Which option to choose depends on the design specifics and configuration of the existing heating system.
Single-pipe scheme
The heated floor is connected behind the outermost radiator in the wiring. First, a circulation pump is installed, then the supply and return pipes are cut in.
Adjustment is carried out using a manifold. Heated water from the boiler flows sequentially through all radiators and only then enters the VTP pipeline.
The disadvantage of such a heating system is that the water temperature in the outer radiator is lower than in the first one. For this reason, those rooms that are farthest from the boiler are always cooler.
Two-pipe scheme
The VTP circuit is connected to the supply and return pipes of the radiator at the end of the wiring. The coolant circulates from the boiler and back in the same way as in a single-pipe heating system.
Adjustment in this scheme is carried out using two ball valves. Flaws:
- The flow of water follows the path of least resistance.
- In cold weather, when you have to heat it harder, the floor warms up so much that you can’t step on it.
Thermostatic kit
A simple and inexpensive option for connecting a “warm floor” system with one circuit. The installation kit consists of three elements:
- Temperature limiter for water.
- Valve for regulating the temperature in the house.
- Automatic air vents.
The circuit with the installation kit is suitable for two-pipe wiring. Hot coolant, heated in the boiler to 70–80 °C, fills the TVP loops. After which the thermal head closes access to the supply. When the water in the circuit cools down to the threshold temperature, the damper opens and a new portion is supplied.
Advantages and disadvantages of water heated floors
The main advantage of hydraulic floors is ensuring horizontal, uniform heating of the room. In this case, heat spreads vertically, which creates a healthy microclimate, unlike radiator devices. Installation of such a system is especially recommended for rooms with high ceilings.
If we consider water structures from an aesthetic point of view, they also benefit because they are not visible and do not take up useful space. In addition, as mentioned above, they are more economical to use.
The efficiency of water floors depends on good thermal insulation, because an increased level of heat loss reduces heat transfer. But installing such a system in a bathroom or toilet has its drawbacks - the possibility of overheating the surface, since more often the heating element is connected to a heated towel rail.
In addition, such floors have a negative impact on the height of the room, because the “pie” implies the presence of a thick layer of concrete screed. Also, pouring concrete significantly makes the structure heavier, so it is necessary to carry out work to strengthen the floors.
Thermostatic valve
The device regulates the temperature of the coolant in the “return”. In practice, two options are used for connecting an ETP through a thermostatic valve.
First scheme
Boiler → Circuit → Thermostatic valve → Boiler
In practice it looks like this:
| °C | |
| Coolant at the outlet of the boiler | 60 |
| Thermal head reading | 20 |
| Average temperature reached | 30–35 |
At the entrance to the circuit, the water is too hot, and at the exit it has cooled noticeably. Depending on the thickness of the screed, the type of floor covering and the pitch of the pipe, the floor surface warms up differently. The required parameters are achieved only in the center. It takes a long time for water to cool from 60 to 20 degrees because the water speed is low. Connection via a thermostatic valve is suitable only for small areas - a bathroom, a corridor.
Second scheme
Radiator → Circuit → Thermostatic valve → Boiler
| °C | |
| Coolant at the outlet of the radiator | 45 |
| Thermal head reading | 25 |
| Average temperature reached | 30–35 |
Advantages of connecting an ETP after the radiator:
- Smaller temperature difference between inlet and outlet.
- High speed of water movement.
- Uniform heating of the floor.
Regulatory restrictions and dependence on radiators remain. In the case of a bathroom, such heating can be connected through a heated towel rail.
Installation of a warm water floor on a concrete screed
Installing a warm water structure with a concrete screed yourself is a labor-intensive and time-consuming process, since it takes about a month for the concrete to harden.
The construction of the structure consists of several step-by-step actions, which we will discuss below.
WARM FLOOR IN A READY SCREED WITH YOUR OWN HANDS. SIMPLE OR EASY?
Layers of water heated floor
Before installing the floor with your own hands, you should familiarize yourself with both the installation technology and the layers of the floor “pie” that will be laid. Each layer is laid strictly in a certain sequence. The thickness of the structure is from 8 to 14 cm, and the load on the floors is about 300 kg/sq.m.
Let's look at what a heated floor consists of and its design:
- foundation - reliable and durable;
- vapor barrier layer - a polyethylene film with a thickness of at least 0.1 mm is used;
- insulation - extruded polystyrene foam is used;
- reinforcement - it gives strength to the structure;
- heating elements - pipes laid according to the diagram;
- concrete screed with plasticizer - its thickness is from 3 to 5 cm.
If the heated floor is placed on the ground, then the “pie” is as follows:
- bulk soil - 15 cm;
- crushed stone fractions - 10 cm;
- sand - 5 cm;
- rough screed;
- waterproofing material;
- damper tape;
- insulation - 5 cm;
- reinforcing mesh;
- heating elements;
- cement-concrete screed.
After the concrete has hardened, the flooring is installed on the surface and the finishing coating is laid.
Waterproofing
The waterproofing layer, as mentioned above, must be laid on a prepared subfloor; it must be smooth and clean.
An ordinary polyethylene film is used as a waterproofing material; it should be laid overlapping, one strip on top of the other and on the walls (20 mm). For tightness, the joints must be glued with tape.
Damper tape
The damper tape is designed to compensate for the expansion of the concrete screed when the system heats up. It protects the surface from cracking. The standard thickness of the mounting tape is 5 - 8 mm, and the height is from 10 to 15 cm.
When concrete is heated to 40°C, it expands at a rate of 0.5 mm per 1 meter.
It is glued along the perimeter of the heated room, at the junction of the walls and floor. The tape should be higher than the screed, and its excess, upon completion of installation, is cut off with a knife. In addition, if there are several contours, their boundaries are lined with it.
Laying insulation
When installing a warm floor with your own hands, it is important to choose the right type of insulation. The efficiency of the device depends on it, because it does not allow waste of heat.
There are many types of material for thermal insulation, but experts recommend two:
- Extruded polystyrene foam - low thermal conductivity and high mechanical strength. EPS is not exposed to moisture as it does not absorb it. In addition, it has an acceptable cost. This type of gasket is produced in slabs measuring 50 by 1000 mm or 600 by 1250 mm, and with a thickness of 20, 30, 50, 80 and 100 mm. The product is equipped with snap-on grooves, which allows for a strong connection.
Expanded polystyrene sheets are equipped with a foil layer, which leads to higher prices for products. But there is no significant benefit from it, since the reflective property does not work in an opaque environment. In addition, the cement mixture is alkaline and will corrode the foil.
- Profile polystyrene mats are highly plastic, equipped with special bosses, and pipes are laid between them. Also, the bosses serve as a retainer for the heating elements. In them, the contour is attached in increments of 50 mm. Using a mat greatly simplifies the installation process, but the cost is higher than polystyrene foam insulation. The thickness of the slabs is from 1 to 3 mm, and the sizes are 500 by 1000 or 600 by 1200 mm.
When installing a water-heated floor yourself, you need to choose the right insulation thickness. To do this, you must adhere to the following rules:
- when laying heating floors on the ground, the minimum thickness of the insulation should be 100 mm; it is recommended to install two layers of 50 mm each, located perpendicular to each other;
- when installing on the ground floor, 50 mm is sufficient;
- when carrying out thermal insulation in rooms above warm rooms - 30 mm.
Sheets of insulation are placed around the entire perimeter of the area and fixed to the base. If EPS boards are used, they are fastened with disc-shaped dowels at the joints and in the center.
Reinforcement
The need for reinforcement during self-installation of warm water floors is that the mesh gives strength to the structure, ensures uniform heat distribution and heating elements are fixed to it.
The standard diameter of reinforcing mesh rods ranges from 4 to 5 mm, and the cells come in different sizes; they must be selected depending on the laying step.
Experts advise laying two reinforcing layers. The first is on the insulation, and the second is on top of the heating elements (pipes). The grids are connected to each other using wire.
Advice! If you do not want to lay two layers of reinforcement, then before installing the mesh on the insulation, you should make supports under it so that when pouring the solution, it can flow under the reinforcement.
Laying and fastening of pipes
Laying heating elements is the most critical stage when installing warm water floors. In addition, it is good to have a device for unwinding pipes in coils, since removing them with rings is prohibited; a lot of tension is created, which interferes with installation.
It is unacceptable to remove the contour from a stationary bay; it must be rotated. You can go on a spree yourself, but it’s easier to do it with the help of a device.
If the insulation boards have markings, the installation process will be greatly simplified. If these are not available, they should be applied independently. It is necessary to make marks on the plates with a marker in accordance with the step of laying the heating element. Then, using a painting thread, mark a line and draw a route for the contours.
When installing water pipes yourself, you need to remember that you need to retreat 15 - 20 cm from the walls. Ideally, each contour will be single, without seams, and with a maximum size of 100 mm. Installation should be done according to the diagram, in accordance with the calculation. The permissible step near the walls is 10 cm, closer to the center - 15 cm.
The installation of the circuit must be done from the most remote areas from the collector. In addition, the transit sections of the product should be insulated with foamed polyethylene, this will save energy and prevent heat from being lost along the way. In this case, both ends should go to the place where the manifold cabinet will be installed.
To fix the circuit, fastening profiles are used, which must be screwed to the floor with dowels. After which, the pipes are pressed against the reinforcing mesh and secured with plastic fasteners. The pipe should not be pressed too hard; the loop should fit freely against it.
You need to bend the contour carefully, especially if it is made of polyethylene, because this material is subject to deformation. Polypropylene pipes are difficult to bend; they spring. Therefore, when installing heated floors, they are fixed directly to the grid with a large corner radius. If a white spot or streaks appear, the material is considered damaged and cannot be used.
If you are installing metal-plastic pipes with a diameter of 16 or 20 mm, then you can bend them with your own hands without using a special tool.
Advice! When the bending angle is of a small radius, so that it turns out smooth and the product does not burst, the bending process is carried out in several approaches (by intercepting the hands). To get an angle of 90°C, it will take 5 - 6 times.
Connecting and filling the circuit - hydraulic tests
After self-installation of heating pipes, the device should be connected and checked for functionality and integrity:
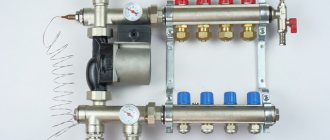
- Connection. The most common way to connect a water heated floor is a distribution unit. Its main purpose is to increase pressure, implement temperature regulation and uniformly supply coolant to several circuits. There are different devices - with manual or automatic adjustment.
Connecting the system involves connecting both ends of the pipe to the manifold distribution with clamp fittings. In addition, using a collector, the heated floor device is connected to the main heating system or to a specially equipped boiler.
When choosing a heating boiler, it is important to take into account its power; it should equal the power of all areas of the floor with a small margin.
The boilers have an inlet and outlet for water, which are equipped with shut-off valves.
Also, to circulate the coolant, it is necessary to install a pump. More often, it is included with the boiler, but if the heated area is large, you will need another one.
- Filling the system. Before pouring a concrete screed, the system should be filled and hydraulically tested. Since in case of malfunction, it will be difficult to repair a system filled with concrete. To do this, you need to connect a hose to the drain outlet of the collector and drain it into the sewer.
Advice! To make it easier to monitor the air coming out of the system, it is better to use a transparent hose.
The manifold, responsible for supplying the coolant, is equipped with a ball valve; tap water is connected to it. And a pressure testing pump is connected to one of the outputs connected to the heated floor circuit.
The system filling process is as follows:
- all underfloor heating channels close, with the exception of one, while all air vents open;
- water is supplied, and the degree of its purity and air exit from the system are monitored through the drain hose;
The inside of the pipes may be coated with technological lubricant; it must be washed off with water.
- when all the air has escaped and the water is completely clean, the drain valve is closed, after which the filled system is shut off;
- if there are several circuits, such actions must be done with each;
- After all circuits have been washed and filled, you should close the tap through which water is supplied.
Upon completion of the procedure, there should be no air left in the pipes, and the water should flow perfectly clean.
If a leak is detected during hydrofloor testing, it is repaired immediately, but first the pressure in the system must be relieved.
- Crimping. To carry out pressure testing, a special pump is required, which was already mentioned above; it must be connected to the output of the underfloor heating system.
Sequence of the crimping process:
- all circuits connected to the collector must be opened;
- fill the pump tank with water and open the supply tap;
- using a pump, you need to build up the pressure in the system, it must exceed the working pressure by 2 times (6 atm), it is monitored using pressure gauges located on the pump and manifold;
- after increasing the pressure, it is necessary to visually inspect the entire pipeline and its connections;
- after half an hour, raise the pressure again to 6 bar and carry out an inspection, repeat the action after another 30 minutes, if leaks are detected, the pressure is released and they are eliminated;
- if there are no leaks, the pressure should be raised again to 6 bar and left for a day;
- if, after this time, the pressure has dropped by no more than 1.5 Bar, it means that you have assembled the system correctly.
According to the law of physics, when pressure rises in pipes, they try to straighten out. If their fixation is not secure, then unpleasant surprises will arise during testing. In the future, when the contour is filled with concrete, there is no need to worry about this.
Installation of beacons
To make an even screed yourself, you need to pour it along the beacons. Experts recommend using a plasterboard profile as beacons when installing a warm water floor.
Installation of beacons is carried out in accordance with the level of the finished floor, minus the thickness of the floor covering. To secure the guide profile, mortar cushions are used, a plasterboard product is placed on them and leveled.
Although this method has a disadvantage - if the profile falls below the required level, you will need to take it out and add a solution under it. Therefore, a rigid support is recommended under the beacons; dowels can be used. The top of the cap should rise above the surface of the screed.
The standard installation of beacons is 30 cm from the walls, with a small distance between them, as the solution settles and dimples may appear on the surface. The recommended distances between beacons are 1.5 m, then the 2-meter rule for alignment is suitable.
The beacon installation process looks like this:
- A 30 cm indentation is made from the walls located on the right and left sides of the entrance and lines are drawn that will serve as a mark for placing the outer beacons.
- The space between the lines is divided into equal parts, their maximum size is 150 cm. One strip should be placed opposite the entrance.
- Parallel lines are drawn using the dividing marks made, the locations of the non-gels are marked on them, the installation step is 40 - 50 cm.
- A hammer drill makes holes into which they are installed.
To level the nongels, it is better to use a laser level. If you install beacons with your own hands and do not have such a level, you can rent one. Although, it is possible to do this work using a regular level, it will just take more time.
- A profile is placed on top of the screw heads. But in order for the beacons to be well fixed, before they are installed on the caps of the negels, mortar slides should be made in increments of 1 meter, slightly higher than the future screed. Then the profile is installed in place and pressed down, and the excess solution that protrudes is removed.
The evenness of the installed beacons is also checked by level.
Preparing the solution, pouring the screed
The concrete screed used to pour a heated water floor is subject not only to mechanical stress, but also to deformation under the influence of temperature, so the requirements for it are increased. And an ordinary concrete solution will not work here; you need to use a plasticizer or fiber as additives.
The use of a plasticizer reduces the ratio of water to cement in the solution, increases mobility and increases the strength of the screed. The degree of mobility is one of the most important indicators of a high-quality solution for pouring heated floors, since it must penetrate well under the pipes and release air easily. Based on consistency, additives are available in dry and liquid form.
Fiber significantly increases the strength of the structure and almost completely eliminates the risk of cracks. It comes in metal, polypropylene and basalt. Polypropylene and basalt fibers are intended for warm water floors. The standard fiber rate per 1 m3 is 500 grams.
There are a large number of mixtures available in stores; they already contain plasticizer and fiber. Of course, ready-made solutions are of high quality, and their use greatly simplifies the process of filling the floor, but they will cost more than those prepared by hand.
A mandatory condition that must be observed when making the mixture yourself is the mechanization of the process (using a concrete mixer or construction mixer), since it requires obtaining a high-quality solution.
When independently producing a cement-concrete composition for pouring water-heated floors, it is recommended to use a grade of Portland cement no lower than M-400. In addition, the date of its production should not exceed more than six months.
Sand, for use in the solution, must be sifted, washed and dried. River sand is not suitable for these purposes; it has the correct shape, which is not very good.
Sand and cement in the solution should be in proportions of 3 to 1. Water is needed approximately 1/3 of the amount of cement, 15 liters per bag (15 kg). But the use of additives reduces the ratio of water to cement, so you need to add water gradually.
According to the technology, the production of a solution for installing heated floors differs when using different devices. If a mixer is used, then first, the dry ingredients are mixed at low speeds - cement, sand and fluffed fiber. And only then water with a plasticizer is added. The mixture is prepared for about 7 minutes.
In a concrete mixer, the process looks exactly the opposite. Water with a plasticizer is poured into it, then cement is gradually added, then sand, then cement again and finally the rest of the water is poured in. Fiber is added little by little during the kneading process, always in fluffy form. The solution is prepared within 3 - 5 minutes.
The finished concrete solution has a uniform color and is plastic in consistency. If you squeeze it in your fist, no liquid should come out. You can put the solution in a pile; if it does not spread, but only settles slightly, then the quality is good.
Before you start pouring the water-heated floor, you need to vacuum the surface from dust. Also, it is necessary to close the windows in the room, since drafts and direct sun are contraindicated.
All work on the construction of the screed should be carried out at one time. Therefore, when carrying out self-filling, assistants are required. In addition, the device must have a working pressure of 2 atmospheres.
Laying the solution should begin from the far corner of the room, and fill in strips according to the beacons. The process must be completed with a strip at the exit. When leveling, you should not try to immediately create an ideal surface. It is important that there are no large holes. The minimum layer of solution above the heating elements should be 3 cm.
In this form, the screed is left for 1 - 2 days until it sets a little so that you can walk on it. After this, cleanup work begins. First, the damper tape, which rises above the surface, is removed using a construction knife.
Then, using a sharp edge, usually pressing it against the beacons, the concrete is cleaned away from you with short, sharp movements. This is done until the beacons are completely exposed. Any debris from the grout is removed, the surface is sprayed with water and covered with polyethylene.
After a day, the beacons are removed, and the furrows remaining from them are rubbed with a solution. The surface is wetted again and covered. The screed must be wetted daily for 10 days. Until the concrete surface has completely hardened, it must be kept for at least 28 days; until this time the system cannot be turned on.
Find out how to turn on a water heated floor correctly for the first time.
Expansion joints
If the temperature gaps are not positioned correctly or are missing, this can cause destruction of the screed. Therefore, there is a need to arrange shrinkage joints if:
- the area of the premises exceeds 30 square meters;
- wall size more than 8 m;
- the room has a significant difference in length and width, more than 2 times;
- curved room.
To do this, lay damper tape around the perimeter of the seams. It is necessary that the reinforcement in the seam areas is separated. And the gap intended for deformation at the base had a thickness of 10 mm.
Treat the upper part of the seam with sealant. If there is a non-standard room, it should be divided into parts, rectangular or square.
When heating elements pass through the seams, they are mounted in these areas in a corrugation; it should cover them 30 cm on each side. Seams should not be placed inside the outline.
If you want to lay tiles as flooring, then there is a high probability that they will come off in areas of expansion joints. Therefore, one part of the tile should be mounted with glue, and the second with sealant.
If it is necessary to make additional demarcation, the method of incomplete expansion joints can be used. They are made with a trowel, 1/3 thick. When the concrete hardens, they are also sealed with sealants.
Cracks in the screed
It is not uncommon that after the screed has hardened, cracks appear on it. Their formation is caused by the following reasons if:
- low density insulation;
- poor compaction of the solution;
- no plasticizer;
- screed too thick;
- no shrinkage seam;
- the concrete dried quickly;
- the ratio of components in the solution is incorrect.
Avoiding the formation of cracks in the screed is simple:
- use insulation with a density of at least 35-40 kg/m3, and preferably higher;
- make the filling solution plastic in consistency, with the addition of fiber and plasticizer;
- separate large rooms with shrink joints;
- prevent concrete from hardening quickly by covering it with plastic film the day after pouring.
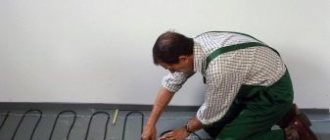
Laying the finishing coating
You only need to choose the finishing coating that is intended specifically for installation on heated floors. On the packaging of such products you can find a special icon that indicates this.
The ideal coating for self-installation on a hydrofloor is ceramic tiles or porcelain stoneware. The use of laminate, linoleum or carpet as finishing for heated floors is permissible, but only if there is a marking that allows installation on warm structures. The floor covering should only be laid on a well-dried concrete screed.
Anyone can install a warm water floor themselves in a private house or apartment. Despite the fact that a lot of time and labor will be required, but in the end, your home will become cozy and comfortable.
Pumping and mixing unit
The pump drives the coolant at high speed along the contour of the heated floor. This results in three benefits:
- Minimum difference between supply and return temperatures.
- Uniform heating of the floor.
- Independence of ETP parameters from the temperature in the boiler or radiators.
The thermostatic valve mixes in hot coolant from the boiler. And the cooled water returns back to the heating source.
System Features
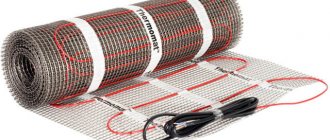
This type of underfloor heating (IR) is a film combined with carbon paste, which heats the floor and room using infrared radiation. And this type quickly gained popularity due to its advantages, including:
- Easy to install.
- Possibility of arrangement under any covering.
- Durability.
- Safety for humans.
- Fire safety.
And this is not all the advantages of the system. And among the disadvantages, I usually highlight only the relatively high cost, as well as minor harm from radiation (in case of incorrect selection).
Also, when purchasing, you should consider some nuances:
- Infrared film does not fit in areas where furniture or decorative elements are placed.
- The layout of the film and electrical wiring is outlined in advance.
- It is also taken into account that the location where the temperature sensor is supposed to be located should be free of drafts and other factors that locally change the temperature.
Balancing valve
Uniform heating of the floor surface is achieved by introducing additional devices into the design. This is the advantage of connecting the EHP to existing heating sources.
The balancing valve in the water heated floor connection diagram regulates the flow rate of the cooled coolant.
| Room area | Valve position |
| > 20 sq. m. | Open |
| < 20 sq. m. | Covered |
Three-way valve
The device is installed at the point with the highest temperature (on the supply pipe). The VTP connection diagram in practice looks like this:
Feed line
Boiler → 70 °C → Three-way mixer → Circulation pump → 45 °C → Warm floor
After the pump, a temperature sensor is installed on the supply pipe. It determines the degree of heating of the incoming water. Next comes the thermostatic valve.
Features of connecting electric heating
One of the main elements that ensures the optimal functioning of an electric heated floor is a thermostat, it can be:
- a mechanical device - in it the desired temperature is set using a rheostat;
- electronic device - the temperature regime is set on it through the use of a relay. In these underfloor heating controllers, in the presence of a microprocessor programmer, it is possible to provide automatic control of the process of functioning of the heating structure in accordance with the specified parameters.
Both mechanical and electronic thermostats have the ability to influence the operation of the following electrical elements of floor heating systems:
- heating cable in reliable insulation, having high resistance. It produces heat when electric current passes through it;
- thermal mat - in this case, the cable is placed on a thermal insulation film, having previously performed a calculation of the electric heated floor;
- a special thin film that emits thermal waves (infrared rays). Its thickness is no more than 0.5 millimeters. A flat semiconductor strip is mounted in the film layer, providing heating.
Return line
Warm floor → 35 °C → Check valve with outlet → 35 °C → Boiler
To install the circuit, use one of the types of three-way valves:
- With thermostat function. Adjustment of the pressure of mixed flows plus maintaining the set temperature.
- With remote sensor. Adjusting the intensity of hot water supply.
Automation controls the temperature of the water supply to the VTP. According to the specified parameters, the thermoelectric servo drive closes and opens the valves of the distribution manifold. It blocks the passage of hot coolant, and when the water in the system cools, it raises its rod, mixing the flows.
Water heated floors are suitable for connection to a heating system only in private housing. In city apartments or high-rise buildings, such installation is impossible for technical reasons.
The maximum effect from HTP is achieved with the help of autonomous heating sources. The best option is a gas boiler, which heats the circulating coolant to 45–50 °C.
If the system is correctly connected according to the most effective scheme for specific rooms, the heated floor will last for a long 30–50 years.
Water circuit installation diagrams
If the installation of warm water floors is carried out using a well-established, traditional technology in a clear sequence, then the installation of a heating pipe can be carried out in various variations. The main goal pursued when installing heated floors is to uniformly heat the entire area of the heated room. Laying a pipeline just the way you want means deliberately creating problem areas throughout the entire structure. The coolant tends to quickly lose temperature as it flows, so the pipes must be laid starting from the walls, then moving towards the entrance to the room or to its center. For this purpose, specially developed optimal schemes for laying the water circuit, each of which has its own characteristics.
The mixing unit and manifold are the beginning of the entire heating system. Water circuits are connected in a clear sequence. The beginning of the pipeline is to the inlet pipe, the end of the pipe is connected to the check valve.
You can install a warm water floor with your own hands, the contour of which will be laid as follows:
- pipe installation according to the snake pattern"
- laying the pipeline according to the snail pattern;
- combined scheme.
When installing heating in corner rooms, a pipe laying scheme is used for enhanced heating.
In each individual case, we can talk about the advantages of one or another scheme. For example: a snail is the simplest circuit. The bend of the pipe here reaches 900, while in a snake the heating pipe will be bent by 1800.
Note: the “snake” type water circuit can be powered by a low-power circulation pump. For a bathroom or children's room, this installation scheme looks preferable.
Where heated rooms have a linear slope, it is better to install the pipe according to the “snake” pattern. The pipeline is laid in the direction from the mixing unit towards the slope. Air pockets in this version can be easily removed, which cannot be said about a pipe laid in a snail pattern. In sloping rooms, removing air pockets can be problematic.
For large premises where it is necessary to use several water circuits of the same length for heating, the “snake” pipeline laying scheme is very convenient. Thanks to this installation method, it is possible to achieve balanced operation of the entire heating system.
Heating pipes laid on a prepared base are connected to a manifold that distributes the supply of coolant to the system. The distribution cabinet together with the mixing unit is installed either in the heated room or next to it, which significantly reduces the number of pipes and the consumption of other materials. The bends of the water pipe at the point of connection to the collector are sewn into a special protective box.
In each individual case, a certain order of laying the water pipe should be followed. When working with a snail circuit, the pipe is first laid along the perimeter of the walls, after which a turn follows from the farthest wall. In the opposite direction, the pipe is laid in a spiral, reaching the center of the heated room. For the snake circuit, the water circuit is laid out as follows. The pipe is laid along the perimeter of the walls, after which uniform bends are made in the opposite direction.
The combined installation schemes of heating pipes for heated floors, used in some cases, involve the simultaneous use of both options. One half of the room can be heated by a water circuit laid in a snake pattern, while the other part of the room will be heated by a pipe mounted in a snail pattern.