Warm floors are no longer a new thing. This technology is used for heating floors in apartments, private houses, offices and various other premises. Their operating principle is simple - they heat the base under your feet, as well as the air in the room, which allows you to warm up any room quite well. They are usually installed in addition to the main heating system. Installing them is not as complicated as it seems, but it is quite a troublesome task. How to make a heated floor correctly? This process will largely depend on what type of system has been chosen for installation.
How to make a heated floor correctly
Warmth in the house
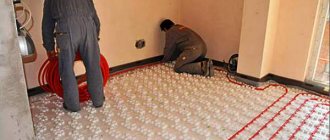
An electrically heated floor heating system consists of several pieces of equipment connected to an energy cable that is mounted into the ceiling structure. It is best to install a heating cable for a heated floor with the help of specialists, but with careful and precise work, you can do everything yourself.
Of course, electric floor heating is not a panacea, because to ensure that the room is always heated, it is impossible to do without insulated window and door units. As for the operation of such heating equipment, it can be used to heat rooms throughout the cold season. No matter how beautiful the house is, the owner will not look at photos of the existing rooms, but he will have to be in them every day, which is a reason to create comfortable living conditions in them.
The installation of a heated floor itself can be a creative process, since the high flexibility of the base on which the heating element is fixed allows it to be used in a variety of ways. The installation procedure is not simplified and requires careful selection of the materials used, measurements, preparatory stage, etc.
How to make a water heated floor
Let's start with the fact that there are two water floor heating systems:
- Traditional. The pipes are filled with concrete. Here it is better to immediately determine the required thickness of the screed. The minimum layer above the pipe is 3 cm + the diameter of the pipe itself (at least 18 mm). So the minimum is 5 cm. This is the screed itself in which the pipes are laid, but insulation is also needed. Its thickness depends on the selected material and region. For expanded polystyrene - 7-15 cm, for mineral wool two, two and a half times more. So the overall thickness is solid.
Water heating - traditional solution - Polystyrene or wood. A polystyrene water heated floor system was invented. In it, channels were formed in polystyrene slabs for laying pipes. They contained metal plates that were needed to reflect and redistribute heat. Pipes with coolant were placed on metal plates. Above is the flooring. There could be boards, sheet material like plywood, and then a floor covering on top of it. In the wooden system, everything remained the same, only the polystyrene boards were replaced with wooden slats. Wooden slats are laid on the flooring at a certain pitch. In the intervals and with the approach to the slats there are metal plates, on them there are pipes with coolant. Then everything is standard. Making a heated floor using this technology is not difficult, the load on the floors is small. So this is a solution for owners of wooden or frame houses.
Water heated floor for wooden floor without screed
The second option has a significant disadvantage - low efficiency. Although metal plates are laid, they transfer heat worse than a screed. Therefore, if possible, they try to make a warm floor with water heating in the screed. Yes, it is longer and more difficult, but more effective.
How to make a water heated floor on a concrete base
We will assume that there is a concrete base slab and its strength is sufficient for further use. Next, the sequence of layers will be as follows:
- A layer of water vapor barrier is laid on the concrete slab. Please note that the material should not allow moisture to pass through, either in liquid or gaseous form. This is especially important for floors on the ground. In such a cake, the possibility of capillary penetration of moisture through the base concrete cannot be ruled out. It is this type of moisture that we cut off using a vapor barrier. The material is laid on a concrete slab with an approach to the walls. The height of the climb to the wall is not lower than the waterproofing of the foundation (should be slightly higher). There we fix it on the wall and leave it.
- Thermal insulation. The best option is polystyrene foam. Yes, it is expensive, but it has already been tested how it behaves in a screed. Better than everyone else. The thickness depends on the region. It is better to take it with a reserve so as not to warm the earth. When laying, you need to join the slabs and carefully glue them. You will have to walk on them, and even wear materials that are not the lightest.
Warm floor in layers - Along the perimeter along the walls, we make a thermal expansion compensator. If the base is insulated above the floor level, a damper tape is laid. It serves both for thermal insulation and to preserve the expansion joint.
- If the base is not insulated at all or the level of insulation is below the level of the heated floor, we place polystyrene foam with a thickness of 15 mm around the perimeter. The thickness, again, depends on the region, on the thickness and material of the walls. The insulation is cut into strips of the required width. Width - above the level of the screed and the finishing floor covering.
Water heated concrete slab floors
By following this technology, you can properly make a heated floor with your own hands. There may be nuances, but the general sequence of work is as follows.
Waterproofing materials
We know how a warm water-heated floor works, a little more specifically about the materials. As already mentioned, the insulation layer on the concrete slab should cut off vapors and liquid moisture. The simplest and cheapest material is polyethylene film with a density of 150 g/m², but laid in two layers. It is still better to take more durable materials. The film breaks even if you work carefully. And a torn hydro-vapor barrier is as good as nothing. So it’s better to fuse roofing felt, but with well-soldered seams. Any other material with suitable properties is also possible. Be it mastics or other coating agents, but with obligatory vapor permeability.
Waterproofing material is important
A few words about the second layer of waterproofing. This is the one on top of the insulation. If the insulation is mineral wool, this layer is required. Mineral wool is afraid of moisture, so it must be protected from it in every possible way. For polystyrene boards, this layer is completely optional - they do not conduct moisture on their own. This layer is placed only to prevent mortar from flowing into the joints of the slabs. But usually insulation slabs are made either with a tenon joint or a quarter joint. That is, there are no continuous seams. But, of course, the solution that has flowed between the insulation is a bridge of cold. Heat can escape through it. That's why some people insure themselves by putting a film on it. Taping the joints with tape has the same effect. Whichever is easier, choose it. It is important that the heated floor is really warm.
Sometimes it is recommended to use foil materials as this layer. These are the ones that have a shiny surface on one side. This is motivated by the fact that the shiny layer will reduce heat loss due to reflected heat waves. This effect is present, but only if there is at least 3 cm of air gap to the reflective surface. Then reflection works. There is no gap in the screed, so there is no point in laying this expensive material.
Reinforcement of a warm water floor screed
When making a warm floor in a house or apartment, a reinforcing welded construction mesh is used. Not just any kind, but construction. It is also called masonry. It differs in that each joint is welded. Sold in pieces (cards) or rolls. The pieces are laid with an overlap of at least 10-15 cm. At the joints, the cards/pieces of the reinforcing mesh are tied together. For tying, you can use tie wire or plastic ties. They can be bought at any hardware store. After tightening the tie, cut off the long tail, leaving 2-3 cm.
Reinforcing mesh is also needed to secure the pipes
For private houses and apartments, the optimal cage size is 100*100 mm made from 3 mm rod. If the foundation is poured along the joists, the likelihood of sagging is higher. This means that the reinforcement must be more powerful. In this case, you need to either use thicker wire - 4-5 mm, or a smaller mesh pitch - 50*50 mm.
They also knit the reinforcement of the heated floor screed themselves from a steel bar - 3-4 mm. What you need is a reinforcing bar - with a groove, not a smooth one. Finding such a small diameter is very difficult. The rod is knitted in increments of 100-150 mm. For large screed thicknesses, two layers of reinforcement are made.
How to fill a heated floor
The heated floor is poured with either cement-sand mortar or concrete with fine crushed stone (fraction 5-20 mm). Strength is selected depending on the following layer:
- Under the leveling self-leveling screed, the strength of the mortar/concrete is M150-M200.
- For tile adhesive - M 100-150.
The principle for choosing strength is simple: the difference in strength should not be higher than 50 units. That is, under a leveling screed with a strength of M200 there can be a base with a strength of M150 to M250. Very high strength is an overexpenditure, so they usually take either the same strength or a little lower.
Proportions of components for different grades of concrete
What is better to fill the heated floor - DSP or concrete. DSP is cheaper, but the surface cracks more when it dries. Concrete is more expensive (crushed stone is more expensive), but less prone to cracking. On the other hand, if you make a semi-dry DSP screed, it can be leveled so that it does not require an additional leveling layer under the tiles. You can't do that with concrete. Although, a smooth surface can be obtained by using concrete vibration.
It is also worth considering that the DSP is a little lighter. When pouring a large thickness and a large area, this can be significant. In general, as usual, everyone decides for themselves what is more important. Both options are applicable, but the good thing about warm floors is that everyone chooses and chooses the solution themselves.
Advantages and disadvantages of heated floors
The positive aspects of electrically heated floors include the following features:
- heating a room with a similar heating system evenly and over the entire area;
- the ability to regulate the degree of heating and turn the system on/off at any time;
- Possibility of installation in any room.
Naturally, this heating method has certain disadvantages:
- it is necessary to constantly monitor the operation of the system;
- floors can be deformed in case of excessive heating during uncontrolled use;
- installation, maintenance and operation require excessive consumption of electrical energy;
- Furniture cannot be placed on top of electrically heated floors. Taking into account the fact that the mat or energy cable can have different sizes, you can first make a schematic diagram of the room and designate areas for installing furniture;
- It is important to understand what function this heating system performs, so as not to worry about every kilowatt of electrical energy spent and not to be afraid of stepping on the floor again with subsequent damage.
To ensure that electrical energy consumption does not exceed acceptable standards, it is recommended to install a full-fledged system with all possible regulators, sensors and controllers. Otherwise, the system will always work at full capacity and there can be no talk of its future payback from savings.
Classification of heating elements
Depending on the heating element, heated floors are divided into several types, each of which has its own installation features.
Table 1. Types of heated floors
| Properties | Water heated floor | Infrared heated floor | Cable heated floor |
| Heating element type | Hot water pipes | IR film, IR rods | Cable |
| Installation time | From 4-5 days | 1 day | 1 day |
| Application | Floor | Floor, ceiling, walls. | Floor |
| Repair | If a single section is damaged, the entire system fails. | Only defective segments can be repaired; the rest of the system works | If a single section is damaged, the entire system fails. |
| Maintenance | Required | Not required | Not required |
| Zoning | Impossible | Maybe | Maybe |
| Installation cost | High installation costs, low operating costs | High equipment costs, low operating costs | Relatively inexpensive installation, high energy costs |
| Possibility of use in multi-storey buildings | No | Yes | Yes |
| Life time | Up to 50 years | Up to 15 years | Up to 25 years |
Prices for heated floors Warmstad
warmstad floor heating
The simplest installation method
An electrically heated floor is only part of the ceiling, which consists of several layers of different materials with specific functionality.
Typically, connected electric floor heating under tiles or any other floor covering consists of the following components:
- thermal insulation layer laid on top of the waterproofing layer installed earlier;
- end coupling;
- special insulating tape for installation, used without any strict instructions, but in such a way that the fastening is reliable and durable;
- connecting tube for connecting sensors that control the operation of the system;
- coupling.
What consequences can result from errors during the installation of ETP?
A common mistake is laying ETP under massive furniture and household appliances. Insufficient cooling of the floor surface can cause the wire to overheat and fail.
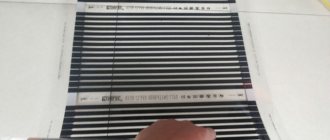
Film cutting options
Never turn on heating wires or mats until the screed is completely dry. Even short-term activation can damage the heater. Checking the integrity of the laid cable and correct connection is only possible by measuring the resistance. This does not apply to infrared film flooring; it can and should be connected to the network for testing.
Schemes for laying heated floors for different coatings
Do not bend the wire, do not step on it, and avoid pulling on the wire. All this can lead to damage to the conductor or insulation and breakdown of the entire system. Also avoid damaging the heating film if you are installing an infrared ETP.
Cable underfloor heating option
Do not forget to monitor the insulation resistance at all stages of work, especially before pouring the screed. The value should not differ from that declared by the manufacturer by more than 10%. If you see a large discrepancy in the values, stop work and locate the area of damaged insulation. If this rule is neglected, then after the screed has dried, a very unpleasant surprise may await you in the form of a non-working ETP.
Do not pour the temperature sensor directly into the screed. Place it in the corrugation, which will be filled with screed. Sensors often fail and if you pour it into the screed, replacing it will require considerable effort.
Route the wires in the corrugation
The wire passes through the corrugation
When installing an infrared ETP, do not forget to insulate the current-carrying parts at the places where the film is cut. Otherwise, the protective equipment will constantly detect the leakage current and turn off the power to your ETP.
Contacts are insulated with special tape
Types of electric heating
When it comes to electric floor heating under laminate or any other covering, you can consider two main options for creating such a system. Note that laying film heated floors under laminate flooring is more popular.
Each option involves the use of different heating materials:
- the thinnest heating mats;
- heating energy cable.
In the case of mats, the technology involves laying them when it is impossible to raise the floor level. The thickness of the mat is 3 millimeters, which is both an advantage and a disadvantage. The disadvantage is that the heating efficiency is much lower than that of an energy cable. This system can be used as an addition to standard heating. In this case, the room will not change its visual outline; no changes will be noticeable in the photo or upon inspection.
An energy cable is a heating element that requires raising the floor level by at least 3 centimeters. Its installation can be carried out both indoors and outdoors. There is particular interest in small systems that can be installed under a roof or façade to prevent icing.
Cable selection is carried out according to the formula: P=SxPp, where:
- P – cable power, which the buyer has to find out;
- S – area of the room subject to heating;
- Pp is the power required to heat a particular material.
The power for various materials is selected based on how the electrically heated floor is to be used. If the system is assumed to be additional, then the cable power relative to various materials will have the same values: tiles (130-150), porcelain tiles (150-170), laminate (120-150), parquet (120-150), etc. When equipping the main heating system with an area coverage of more than 70 percent: tiles (180-120), porcelain tiles (200-220), etc.
How to make an electric heated floor
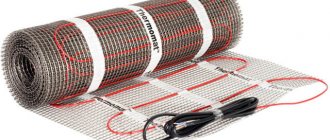
Electrically heated floors have more options. There are four types of heating elements:
- Heating cable: resistive;
- self-regulating.
Types of heating elements and their purpose
- based on resistive cable;
All heating elements are more economical when used with a thermostat and floor temperature sensors. They can be switched on directly, but heating costs will be significantly higher than the costs of additional equipment. We do not recommend using it without a thermostat - the bills will be too high.
Installation
If installation is carried out using mats, then installation is carried out as follows:
- First, a high-quality base is prepared and primed, if there are minor defects that can be eliminated in this way;
- the mat is laid;
- temperature sensors are connected;
- electrical cables are fixed;
- the leveling layer is poured. When laying tiles, you can even lay the mat in the adhesive layer used for installing tiles or under the laminate;
- a waterproofing coating is laid;
- finally, the floor is covered with the selected facing material;
- installs a thermostat.
In the case of an energy cable, there is a certain difference caused by the need to increase the thickness of the coating by 3 centimeters or more. It consists in the fact that a substrate is placed on top of the thermal insulation, reflecting thermal energy. Be sure to apply a screed of the required thickness. The cable itself is mounted under the screed, secured to the reinforced mesh using plastic fasteners.
There is another way to lay the cable, which involves gluing the cable to the mounting tape. In this case, reinforced mesh is not required.
Installation in an apartment
Probably, many residents have had the idea to independently connect water heated floors “for free” to a central heating or hot water system. And some even do this, but in most cases it is prohibited by local law.
For example, in Moscow there is government decree No. 73-PP dated February 8, 2005; Appendix No. 2 clearly states that it is prohibited to re-equip public water supply systems for floor heating.
If you break the rules, at best, you can get a fine on your first visit to the plumbers. And at worst, there is a risk of leaving your neighbors without heating.
In some regions the ban does not apply, but connection requires an examination so as not to disrupt the operation of the system.
In general, from a technical point of view, such options are possible, but only if a separate pumping and mixing unit is connected and the pressure in the system is maintained at the outlet.
Note! If there is a jet pump (elevator) in an apartment building, then metal-plastic and polypropylene pipes cannot be used.
Installation of electric heating
Maximum efficiency of the system can be achieved only if the work is carried out without deviations from the technology. It is very important to follow safety precautions when working with the electrical part, and then performing the actions will not cause difficulties. It is worth remembering that you can always turn to specialists for help, who will take responsibility for performing all stages of installation, starting with the purchase of the necessary materials.
Actually, the electrically heated floor itself is installed in 4 stages. When performing each of them, it is worth remembering the rules for working with electrical devices, wiring, etc.
The sequence of actions is as follows:
- First, a thermal insulation layer and foil are laid;
- Mounting tape is laid on top. You can use a hammer and do the work manually or use a special mounting gun;
- the cable is laid out taking into account that the cold ends should start from the electrical wiring of the thermostat;
- Then temperature sensors are installed in the corrugated tubes, and the screed begins to be poured.
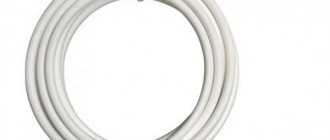
Selection of pipes and their installation
The following types of pipes are suitable for water heated floors:
- Copper;
- Polypropylene;
- Polyethylene PERT and PEX;
- Metal-plastic;
- Corrugated stainless steel.
They have their own strengths and weaknesses.
| Characteristic Material | Bend radius | Heat transfer | Elasticity | Electrical conductivity | Life time* | Price for 1 m.** | Comments |
| Polypropylene | Ø 8 | Low | High | No | 20 years | 22 RUR | They bend only with heat. Frost-resistant. |
| Polyethylene PERT/PEX | Ø 5 | Low | High | No | 20/25 years | 36/55 RUR | Can't withstand overheating. |
| Metal-plastic | Ø 8 | Below the average | No | No | 25 years | 60 RUR | Bending only with special equipment. Not frost-resistant. |
| Copper | Ø3 | High | No | Yes, requires grounding | 50 years | 240 RUR | Good electrical conductivity may cause corrosion. Grounding required. |
| Corrugated stainless steel | Ø 2.5-3 | High | No | Yes, requires grounding | 30 years | 92 RUR |
Note:
* pipe characteristics are considered when operating in water-heated floors.
** Prices are taken from Yandex.market.
The choice is very difficult if you try to save on yourself. Of course, you don’t have to consider copper ones - they’re very expensive. But corrugated stainless steel, at a higher price, has exceptionally good heat transfer. The difference in temperature in the return and supply is the largest. This means that they give off heat better than their competitors. Considering the small bending radius, ease of operation and high performance characteristics, this is the most worthy choice.
Pipe laying is possible in a spiral and snake. Each option has pros and cons:
- Snake - simple installation, almost always a “zebra effect” is observed.
- Snail – uniform heating, material consumption increases by 20%, installation is more labor-intensive and painstaking.
But these methods can be combined within one circuit. For example, along the walls “facing” the street, the pipe is laid in a snake pattern, and in the rest of the area in a snail pattern. You can also change the frequency of turns.
There are generally accepted standards that professionals are guided by:
- Step – 20 cm;
- The length of the pipe in one circuit is no more than 120 m;
- If there are several contours, then their length should be the same.
It is better not to install pipes under stationary and large-sized interior items. For example, under a gas stove.
IMPORTANT: be sure to draw the installation diagram to scale.
Laying begins from the collector. Unwinding the coil, fix the pipe according to the diagram. It is convenient to use plastic clamps for fastening.
Corrugated stainless steel is produced in coils of 50 m. To connect it, proprietary couplings are used.
The last element laid between the turns of pipes is a temperature sensor. It is pushed into a corrugated pipe, the end of which is capped and tied to a mesh. The distance from the wall is at least 0.5 m. Don’t forget: 1 circuit – 1 temperature sensor. The other end of the corrugated pipe is led out to the wall and then along the shortest path is brought to the thermostat.
Safety precautions when working with electricity
It is worth understanding that the voltage used to work with heated floors is dangerous, and each worker must take care of their own safety and comply with all rules for working with wiring.
Before starting installation, it is recommended that you familiarize yourself with the following recommendations:
- installation instructions and the necessary assistance are best obtained from specialists or people who have already had experience in such work;
- Any actions related to deformation of the purchased cable or mats are unacceptable. You cannot cut the mats to make installation in hard-to-reach places easier, or extend the cable. Heating elements must be solid;
- work is carried out only at temperatures above -5 degrees Celsius;
- You can test and operate the installed heated floor only after the period allotted for drying of the adhesive mixture, screed, etc. has expired. It is advisable to wait at least 1 month to avoid any problems associated with high humidity in the ceiling;
- Installation cannot be carried out under furniture that does not have legs at least 5 centimeters high.
Bottom line
Lack of heat in the house is a big problem that affects the comfort of living. You should not spare money on equipping the premises in such a way that they are always comfortable. In this case, electrically heated floors are a universal solution that will help solve any problem with heating a room. By following the instructions and strictly following all steps, you can create a high-quality, efficient and durable home heating system.
Infrared carbon floors
Infrared floors consist of heating elements filled with a carbon mixture and fixed to a polypropylene base. When exposed to current, carbon emits heat waves with a length of 8–14 microns; the waves pass through the floor covering and warm up the objects in the room (the air only slightly). A room heated by an infrared carbon floor is always very comfortable - there is no dry air, which is why we suffer so much in winter.
RavaFORUMHOUSE Member
It heats up objects: tables, stairs, walls, that’s the whole point. You open the windows wide, ventilate, and when you close everything, it’s warm again. Because not only the air is warm, but everything around it.
Infrared floors are not afraid of frost: you can come to a cold country house in winter for the weekend after a week of hellish minuses, turn on the system and it will work normally, and a comfortable temperature will be established very quickly (the system enters operating mode in 5-7 minutes, but it also cools down such a floor immediately).
Film and rod floors have their own characteristics.
| Film floor | Rod floor |
| Installed without wet processes, on a dry, flat surface under the finishing coat. Installation is quick, with the ability to dismantle the system and use it again. | Laying is carried out in a screed or a layer of tile adhesive (2 cm) with mandatory thermal insulation of the rough base. Foil materials are not allowed for the coating substrate. |
| It is not recommended under carpet, carpet tiles, linoleum on felt - these coatings reduce the heating efficiency several times. Parquet and solid boards are possible if the operating temperature of the system is not higher than 28 degrees. | Self-regulating system: if the floor temperature rises in the area under the furniture, the power consumption of the heating elements decreases. And vice versa. |
| It can be cut into pieces and placed arbitrarily - this allows you to heat only some local areas of the room: passages, places where children play, etc. | A core floor can be installed in any room; large furniture and equipment can be placed on top. |
| If any section breaks, the floor will work as before - you won’t even notice it. | Thanks to the parallel connection scheme, the system will operate stably even if several heating elements fail. |
Heating coatings of this type are used to heat stairs and porches in private homes, to prevent the formation of ice.
Preparatory work
Before laying all three types of electric floors, preparatory work is carried out, and they are the same.
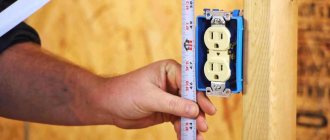
The first thing to do is select the location of the thermostat.
It can be located on any of the walls. The only thing is that its location should have good access to control the system and be as close as possible to the electric meter.
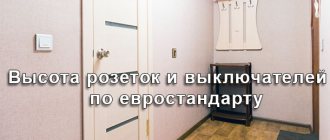
It is not recommended to install the regulator below 30 cm from the floor surface.
After determining the location of the regulator, a perforator with a special attachment is used to make a seat in the wall.
You will also need to make grooves for laying the mounting ends of the system with which it will be connected to the regulator.
In this case, it is better to lay these ends not in one groove, but to make two of them at a short distance from each other.
One of the grooves will be used to install the temperature sensor.
After this work, the floor surface on which the system will be laid is prepared.
If there is a floor covering, it is better to dismantle it and place the system itself on the main floor screed.
In this case, the screed needs to be prepared. All surface irregularities must be removed.
Then the floor must be cleared of debris and the surface treated with a primer that provides better adhesion of the surface to other materials.
Next, proceed directly to installing the system on the floor.
At this stage, the order of work differs depending on the type of heated floor chosen.