Recently, more and more apartment and house owners are switching to LED light sources. To correctly place all the components, you need to select a cable channel for the LED strip. An additional device will hold the lamp on the ceiling or wall. Double tape may be the best option, but it is not able to hold the tape on plaster and similar surfaces.
Varieties and how to choose?
The box can be of this format:
— Angular – mounted on perpendicular surfaces. This could be the ceiling, walls or furniture; — Mortise - allows you to bury the tape into the wall, while creating an aesthetic appearance; — Overhead – a classic option, placed around the perimeter of the room or to create simple lighting
The cost of the aluminum structure may exceed the price of the tape itself. There are options for a transparent cable channel for LED strip. We use this option to distribute bright light. The advantages of using and purchasing are:
— Effective heat dissipation. Helps prevent overheating of the light source; — Protection from mechanical damage, as well as wires coming from it; — Uniform distribution of light flux; — Easy installation system that allows you to attach it to almost any type of coating
Aluminum structures remain the most popular, they do not darken over time and provide sufficient strength. The most reliable option is considered to be mortise profiles, which additionally create a lighting effect. You can choose any profile options in the LedFlux online store.
How to install correctly
It all depends on the type of profile. At the same time, the first stages are the same for everyone.
- A lighting plan is created.
- The surface is marked;
- The LED strip and box are cut to the required size.
If you have a corner or overhead type, then installation is carried out using self-tapping screws. magnet, mounting plate. Mortise boxes are inserted into specially prepared fasteners. Fixation can be done using special glue. After installation, the lamp should be covered using a screen. Plugs are placed at the ends.
Profile Features
The U-shaped overhead profile is attached to the base using self-tapping screws. During assembly, the diffuser is inserted additionally or secured using latches along its entire length. You can choose the width and size yourself by looking at various options from manufacturers. Corner ones are designed for installation between the ceiling and the wall. The outer walls are located at an angle of 90°, where there are grooves along the edges for attaching the diffusers. Inside there is a special shelf that evenly illuminates the entire room. They are used for retail displays and do not take up extra space during installation. The built-in ones are located in a special recess and have an edge along the entire length on both sides. Fastening is ensured using furniture glue or self-tapping screws. An aesthetic appearance is created using end caps.
Prices and manufacturers
There are many varieties of special profiles on the market that are made for LED strips. However, such a component often costs the same as the strip itself, which makes the purchase quite significant in terms of financial costs. This is precisely what became an obstacle to the widespread distribution of specialized products. However, there is a demand for it too.
The Polish company Klus boasts a huge assortment , which is expanding in color variety:
- The PDS4-K mortise box can be purchased in silver, black or gold. Its cost is approximately 400 rubles per linear meter.
- The finely planted OPAC-30 series is available in brown upon request. It costs more than the basic one (580 rubles/m).
- Several tapes are freely placed in a special box with a corrugated surface. You can buy it for 600 rubles.
- Aluminum corner profile with a finned radiator for effective heat dissipation KOPRO 30 is sold at a price of 650 rubles/linear. m.
- Three paired tape guides distinguish the TRIADA overhead or hanging pattern. It allows you to combine colors at the owner’s request. Such a product costs 1300 rubles/m.
It should be noted that the diffusers are sold separately at a price of 110-140 rubles. There are also accessories in stores - simple and conductor plugs, which simplify the installation process and wiring of the power cable. If you add up the costs, the total will be impressive. But you need to take into account that everything can be purchased at once in one place, and if necessary, you can purchase the necessary components.
Products from China will be a little cheaper. The international company Arlight produces its parts and equipment there. Its products are 10-20 percent cheaper than their Polish counterparts. Most models are compatible with two types of diffusers, rectangular or round in shape with a transparent or matte surface.
In numerous retail outlets you can find an inexpensive profile without the manufacturer’s logo. It is marked only with a set of numbers and letters. In this case, a careful visual inspection of the sample should be performed.
The aluminum profile must be anodized. Otherwise, it will remain unprotected from atmospheric influences, scratches, and its external attractiveness will be replaced by tarnishing. The scattering screen must be checked for clearance. It should have a homogeneous structure, without cracks or tides of plastic.
You might be interested in this Technical characteristics of the AAShv cable
What to replace and how to make it yourself?
You can make a profile for an LED strip yourself from metal or plastic. The first can be created from a construction material that does not have any relief or perforation. Its appearance is not as aesthetic as that of aluminum, but it saves money several times. The advantages of iron are that it does not rust and is additionally galvanized. Perfect for various rooms where appearance is not important. The iron profile can be used as a built-in one. Despite the low thermal conductivity, it guarantees strong attachment to the surface and durability of the structure.
Variety of lighting appearance
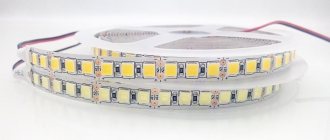
We immediately draw your attention to the fact that the types of LED strips are determined based on the material that was used in production.
There are these types of boxes:
- Polycarbonate box. This type is not used often enough, but it has several trump cards. This plastic is easy to bend, so it can be attached to semicircular interior elements.
- Metal box. It is widely used in any premises because it is very durable and does not rust.
In addition to the material, the box is chosen based on one more design feature. The property of scattering light. Unit of measurement – W/m. This indicator correlates with the size of the room and the area of the tape itself.
You can install the LED strip in several ways at once. There are such as:
- Box for tapering openings. It assumes that the LED is fixed in some narrow place, or in a corner. This is very convenient, since it is necessary to illuminate hard-to-reach places, but this is not always possible. Due to the fact that the LED strip is very powerful, the box uses a muting layer that will help the light disperse. The lighting will become more comfortable.
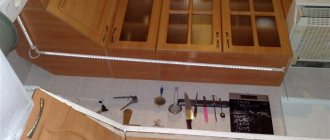
- A box that is mounted into a surface. Many designers use this option in their projects. Recessed lighting can connect two surfaces of different materials, such as concrete and drywall. Due to the fact that this model has a smooth edge, it hides the uneven transition of one partition to another. This LED lighting can be used in the kitchen to illuminate the work area. The light source will be invisible. In addition, if you run the tape under or above the cabinets in the kitchen, the entire backsplash will feel light. Take a look at the photo below.
- Overlay model. Like the previous type of ribbon, this model is quite famous and desirable. The high demand is explained by the simplicity of installation work. Using screws or liquid nails, this type of lighting can easily be installed on any flat surface. Of course, the main advantage of this model is its ease of installation. If you use a polycarbonate box, you can illuminate arches, the bottom of a round bed or table top. In the interior it looks quite unusual.
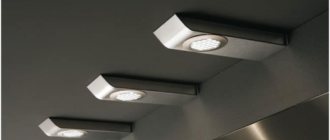
- Model in the shape of a circle. This option is used for the most original interiors. The round shape of such a lamp most often acts as the main light.
- Model on suspensions. If the area that needs to be illuminated is larger than 100, pay attention to LED strips on pendants. Due to the fact that the tape is fixed in the box and does not reach the ceiling, the light will diffuse very softly, without leaving dark spots.
- You should also know that there are many more tapes of different shapes and configurations on the market. These can be parallelepipeds, tetrahedrons, spheres and others.
Each manufacturer offers LED strips of different diameters, lengths and widths. Thanks to such a huge range, you can definitely choose the right lighting.
This applies not only to the interior of residential premises. Various original shapes are used for cafes and restaurants, shopping centers and advertising banners.
In addition to the standard variations of mounting LED boxes, there are some original, but at the same time simple ideas. For example, if you need to illuminate a display window or a desk, you can install LEDs around the perimeter of the object.
Absolutely every box has in its standard set upon purchase the following components: plugs, screws, clamps and an additional protective shield. Light passes through it and is scattered. It can be coated or without.
I would also like to say about another type of lighting. The LED strip is placed in an impenetrable box and can be used in swimming pools, baths, aquariums and other “wet” rooms. Water and moisture will not penetrate the frame.
Profiles of LED strips can be of different colors. All this depends on the overall color scheme of the room or the entire room. The luminous strip itself can also change color. Some models have almost all the colors of the rainbow.
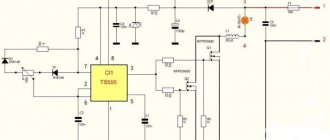
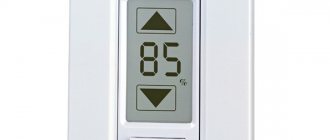
In such cases, for convenience, dimmers are installed for more convenient color adjustment. For greater clarity, we leave for you a short video in which experts talk about an iron box for LEDs.
Plastic box
Plastic cable duct is used when laying wires. The lid closes tightly so it provides a durable mounting surface. Liquid nails or polyurethane are used. It bends well and is installed on curved planes. The only drawback of plastic is that high temperatures from LEDs can melt it. To install a plastic box you will need:
— Level and drill; — A screwdriver and a package of screws of the required size; - Ruler and pencil
You can choose any standard sizes that are presented in modern construction stores. The dimensions and dimensions of the profile should be larger than the LED strip. To install a mortise structure, it is necessary to prepare the surface by making a small channel. After creating the recess, you need to measure the dimensions of the box. The holes into which the screws will be screwed are prepared in advance. The optimal distance for attaching the LED strip with screws is 40-50 cm. When installing in drywall and furniture boards, ordinary wood screws are used.
Illuminated plinth
In order to combine a regular ceiling plinth with lighting elements, it was necessary to make some changes to the design of the ceiling plinth for hidden lighting. An addition to the standard form is a channel into which neon tubes and LED strip can be placed. This design makes electrical work more convenient and faster.
The result is a high-tech and multifunctional product. Now the baseboard for lighting has a special design that allows you to install lighting sources.
However, in some cases, skirting boards that resemble a metal profile can be used; different types of lighting devices can be installed in such elements. In construction stores, such consumables are presented in two-meter products. To calculate the required number of cornices, you need to measure the perimeter of the room and divide the resulting value by the length of one baseboard. In addition, it is recommended to purchase an additional 1-2 items in stock.
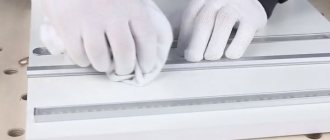
How to properly place a ribbon on a profile?
When working with LED strip, you must follow safety rules and carefully connect all components. The lighting fixture is placed directly in the box itself using glue or an adhesive surface. If the profile dimensions were chosen incorrectly, then the tape simply will not pass and will not lie flat. If the dimensions of the LED source are 10 mm, then the profile is 12 mm. Additionally, you can cover it with a silicone layer or purchase a special transparent overlay. In this case, the lighting device will not fall out and even when exposed to moisture will not lose its characteristics. A homemade diffuser will complement the overall appearance of the structure.
Dimensions of cable channel for LED strip
LED strips are unified and have the following standard sizes:
- length - up to 5 m;
- thickness - 2.2-5.5 mm;
- width 8-10 mm.
The dimensions of the boxes correspond to the standard parameters of LED strips:
- length - standard 2 m, but there are samples from 1.5 to 5.5 m;
- thickness - 5-50 mm;
- width - 10-100 mm.
The choice of the most suitable box is determined by the parameters of the LED strip, installation conditions, size and shape of the niche, and other factors.
Recommendations and wiring
The tapes are always connected to the source in parallel, so it is necessary to provide for the laying of wires through which power will be supplied to the individual components. It is best to lay the power wires on both sides to avoid reverse polarity. To prevent any dangerous situations from occurring during operation, the user must remember:
— Carefully inspect all components of the product. If at least one element is broken or damaged, it must be replaced. This will subsequently affect the display of light and the quality of lighting; — Strictly observe polarity when connecting the source to the power supply. Incorrect connection causes premature failure, as well as the possibility of a short circuit; — The tape is connected in parallel to reduce the load during operation
A profile can be created without the involvement of specialists, but it is important to follow safety rules and use only high-quality materials.
The basics of LED ceiling lighting
The plinth is needed to hide the LEDs from view and use only their reflected light. This will improve the effect of your lighting and the appearance of the lighting.
The LED strip emits light in rather sharp beams. In the image below it is obvious how the light from the tape changes under and without a polyurethane skirting board for the ceiling. Compare the lighting on the left edge of the frame and on the right, where she is not hidden.
Therefore, it is imperative to hide the LED strip under the ceiling plinth. LEDs, in direct light, look like luminous points, and reflected light gives a uniform glow.
What are the advantages of using plinths for ceiling lighting?
- Light weight allows you to attach it only to the wall, away from the ceiling;
- the ability to make lighting WITHOUT suspended or suspended ceilings;
- distance for air convection and cooling of LEDs, which will ensure their long operation;
- a wide variety of shapes will allow use in both high-tech and baroque interiors.
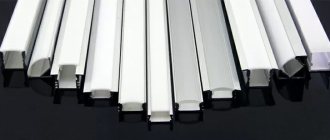
Take a look at the range of different models, they vary in width and design, ranging from minimalist to Renaissance palace interiors.
All skirting boards have one thing in common - the presence of two mounting planes - to the wall and to the ceiling.