18.07.2019
| (Votes: 1, Rating: 1) |
Issues discussed in the material:
- How are current consumers connected to the vehicle's on-board system?
- What can cause current leakage in a car?
- How to detect a current leak in a car yourself
- How to eliminate current leaks in a car
- What are the dangers of current leaks in a car?
In the evening you left the car with a charged battery, but the next day you discovered that it was dead. What could be the problem? How to check for current leakage in a car? Is it possible to eliminate a possible breakdown? Let's figure it out.
The principle of connecting current consumers to the on-board network
Electric current will flow through the conductor only if the electrical circuit is closed. Electricity consumption should be normal - battery terminal “plus” - consumer - terminal “minus”, and the circuit should not be broken. As an example, we gave the simplest scheme. In your car, consumers are connected to a circuit whose complexity is several times higher. Therefore, it will be difficult for a non-professional auto electrician to understand all the nuances.
How to check for current leakage in a car? Refer to the image above. On it you can see that there is a single “minus” between the lamp and terminal 85 of the relay; it is usually connected to ground (body).
In this case, a switch is installed on the positive wire, breaking the circuit. When the switch contacts close, electricity flows through the relay coil, which is connected to pins 85 and 86. Due to the electromagnetic field, the coil begins to close the 87th and 30th contacts, and the electric current flows through the lamps.
The described scheme is standard for most vehicles. However, usually the circuit is opened by an additional switch - the ignition switch, and the fuse is embedded in the positive wire. To make it more convenient, one or two mounting blocks combine relays with fuses. Knowing this, you won't be shocked when you see a lot of wiring harnesses. You can also, by dividing a huge number of connected circuits into mini-circuits, check for current leakage in a car using clamps.
Some car devices are combined into common networks. Imagine that this is one consumer, but simply expanded in space. Is a current leak detected in the car after checking? The reason is that different circuits are connected to each other or to the “ground” of the machine due to the fact that the wiring insulation has become unusable. Leakage can also occur due to electric current “bridges” that appear due to dirt.
We recommend
“Checking the brake fluid: a guarantee of road safety” Read more
Current testing
To begin with, we determine what kind of current flows in the circuit - alternating or direct. The choice of the socket for the black probe, from the “10 A” or “VΩmA” options, is made after specifying the approximate parameters in Amperes. The procedure is largely identical to the one discussed above. If, after connecting to the connector with the maximum current value, the display shows a significantly lower value, place the plug in another socket. When re-displaying smaller parameters, we stop at the range with a lower amperage.
It is important to remember that the connection of the device in the circuit in this case is also carried out exclusively in parallel.
Why is a current leak in a car dangerous?
Checking the current leakage of a car battery is important because one of the unpleasant consequences can be that the battery is completely discharged. Of course, the battery can be recharged, but this will not solve the problem.
An acid-type battery is made of plates that are in an electrolyte (mixed sulfuric acid and distilled water). When it discharges, acid in the form of salts accumulates on the plates. Consequently, the working surface of the battery becomes smaller. Then the salts turn into crystals; the electrolyte is not able to dissolve them. As a result, the battery becomes less capacious and deteriorates quickly.
If you find a problem while checking a current leak in your car, you should have the electrical repaired as quickly as possible. Otherwise, the battery will have to be replaced with a new one.
We recommend
“11 reasons why the front brakes stick” Read more
Other reasons for battery discharge
What to do if the driver measures the current consumption and it does not exceed the norm? As mentioned above, difficult starting after a long period of parking may not be caused by leakage currents. Some of the most common causes of this problem may include:
- High battery self-discharge.
- Generator malfunction.
Testing the battery for self-discharge
To determine the condition of the battery, you need to remove it from the car and wipe it clean with a rag soaked first in a solution of baking soda, then in water.
If the battery is serviceable, you need to check the density and electrolyte level in each section (there are only 6 of them). The battery is then fully charged by the mains charger to normal voltage (12.7 V without load). We recommend: Mutlu batteries: features and model range
All that remains is to leave the unconnected battery for several days and then measure the voltage at the terminals again. If the voltage loss is more than 0.2 V, then the problem is in the battery. You will have to buy a new battery or try to restore the damaged one, at least temporarily, by contacting the appropriate specialists. If the battery “holds”, then either the problem has been eliminated (for example, water was added to semi-dry jars), or the problem is different.
Causes of current leakage in a car
In order for the car to always be on the move, the battery must be in good condition. Only a charged battery allows the engine and all car devices to operate normally. Often, due to the carelessness of the car owner, an electrical leak occurs. For example, when the car sits all night with the headlights on. Or when the car owner saves on purchasing a battery by using an old one. But leakage can also occur due to faulty wiring.
When checking current leakage in a car, you can detect the following problems:
- old battery is used;
- you forgot to turn off the side lights, headlights, car radio;
- the wiring insulation has deteriorated;
- there is a thick layer of dust on the connection sockets of car devices, on the contacts of terminal blocks, as a result they have oxidized;
- the installation of additional devices was carried out negligently, resulting in a wiring short circuit;
- metal fasteners damaged the wiring;
- wires placed close to the motor melted.
If the leak is not caused by the headlights (or car stereo) being turned on, then there is a more serious problem.
For example, on a chain with a thick starter wire, dust, water and salt deposits constantly accumulate. The same thing happens with the generator wiring. Problems can arise directly with the generator itself, which looks like a sieve that allows sand and salt to pass through, because these are the reagents that are sprinkled on the road surface.
The top of the battery also becomes dirty, so when checking the current leakage in the car, you can find out that the pendants “run away” along these areas with increased electrical conductivity.
Important!
If the insulating layer of the electrical wiring becomes unusable, a fire may occur.
We recommend
“Consequences of water hammer: slight fear or major repairs” Read more
Current consumption rate in a car battery
Some car appliances are constantly running on electric current. Let's list them:
- watch;
- memory of the electronic control unit;
- standard anti-theft system;
- signaling.
These devices continuously consume electricity. The ECU memory, after it is rebooted, begins to function and remembers the current installation functions. The alarm starts working as soon as you leave the car in the parking lot. The listed car appliances depend on electric current, so they continuously consume a small amount of electricity.
Since electric current is used by many automobile appliances, a standard for current leakage has been established. This indicator is constant; it can be determined by adding up the amount of electricity used by each device. For example, when a car clock, alarm system, and multimedia continuously consume current, the total amount of current consumed will be 24 mA (1 mA + 20 mA + 3 mA). However, if we add up the volume of electrical current consumed by all devices that operate continuously, we get a value from 50 to 80 mA.
For reference, a turned-on headlight consumes 500 mA, so a small electrical leak in the car equal to 50 mA will not cause the battery to run out.
Is it possible to check the current leakage in a car and find out the norm? To do this, it will have to be diagnosed by measuring current consumption. If it turns out that the amount of current consumed exceeds the standard indicators, you will have to find and eliminate the electrical malfunction.
We recommend
“Is it necessary to do a wheel alignment after replacing silent blocks” Read more
How to check current consumption with a multimeter
Recently I encountered problems with the battery - the car will not start. I bought a new battery, but still wanted to check the car to see if there was a leak somewhere. I wanted to, I wanted to, but how to do it? I found information on the Internet and decided to share it with everyone. For this we need a multimeter
. The most common and inexpensive looks something like this:
For clarity, I found a picture where all the values of the multimeter are written
So let's get started. 1) Battery voltage measurement
To measure voltage with a multimeter, you need to turn it on in the constant voltage measurement mode, and set the range above the maximum voltage value on a charged battery; a charged battery has about 12.7 volts, so choose DCV, 20 volts. Next, you need to connect the black probe of the multimeter to the minus of the battery, the red probe to the plus of the battery and take readings from the multimeter display.
Now let's move on to current leakage. Any car has a minimum leakage current (about 50-80 mA.) The security alarm usually consumes about 20–25 mA, the memory of the injection system controller - 5 mA, the memory of the radio - 3 mA, and the tidy and central locking unit also consume current. The result is about 60mA. With such current consumption, the battery will last for several years without letting the owner down. But if the current leakage is more than 60-80mA, then the battery will drain quickly.
2) Current leakage measurement
First you need to set the Multimeter to current measurement mode at 10 or 20 Amps.
How to determine current leakage into a ground
: Remove the “-” terminal from the battery. Connect one of the ammeter wires to the “-” battery. The other is connected to the removed wire (the polarity on the digital multimeter does not matter)
How to determine current leakage into the positive
: Disconnect the positive terminal from the battery. Connect the ammeter with the negative terminal - to the contact terminal of the car. The positive terminal - to the battery.
Leakage current detection technology
: Prepare the car for testing (turn off the radio, dimensions, interior lighting, etc.) After a minute, connect the ammeter to the open circuit and take readings (the peculiarity of car alarms is that they become armed no earlier than after a minute) As seen on the ammeter leakage current, then we begin to pull out and put back the fuses and relays in order - it will become clear which circuit is leaking when the current returns to normal.
I hope my post will help someone and save them from having to scroll through the Internet looking for information. Here we consider only the main points of working with a multimeter and a car battery. And the capabilities of the multimeter are very extensive, it’s not for nothing that it was called MULTI, which means a lot.
THIS ARTICLE IS MORE FOR MYSELF, I WANT TO CHECK MY OPEL ASTRA GTC AT MY LEISURE.
If the car is parked for a very long time and is not used, then after the driver turns the key in the ignition, nothing will happen. In the process, the relay may click, perhaps even the starter will come to life. But even if it rotates the crankshaft, it is not enough. All of these are symptoms of the battery being discharged while the car was parked. There is a standard for current leakage in a car. But when the battery is discharged, these indicators are significantly higher than these normal values. Let's look at how you can detect current leakage and fix this fault.
WHY DOES THE BATTERY GO DOWN? During long-term parking, the charge should not go away, but leakage currents must also be taken into account. The battery discharges especially quickly in modern cars. Here, a considerable number of different electronic devices and gadgets are included in the network.
Often in such cases, the rate of current leakage in the car is much higher than permissible. Typical causes include old and poor-quality wiring, as well as wire insulation. Another common cause is improperly connected electronic equipment. This could be an audio system, multimedia, navigator, and so on. The causes of current leakage in a car may be dirty or oxidized contacts. All this significantly drains the battery.
ALLOWABLE STANDARDS FOR CURRENT CONSUMPTION OF THE BATTERY. Modern machines have a certain number of consumers of electrical energy on an ongoing basis. This could be a clock, ECU memory, immobilizers, alarms and other similar equipment. They are connected to the network and consume electricity. And all the time. For example, let's take the volatile memory of an ECU. If you erase it, the unit will begin the relearning process and will again remember all current settings. Security systems only start working when the car is parked. From this we can conclude that low electrical energy consumption is a normal situation. But there is a norm for current leakage in a car. This norm is a certain constant value - it can be calculated. It is necessary to sum up the consumption of each consumer in the on-board network. For example, alarms require no more than 20 mA. The clock requires 1 mA to operate. The audio system consumes about 3 mA and so on. In total, the total figure will be in the range from 10 to 80 mA (0.01-0.08A). It's quite a bit. Even one lamp in the headlight, which they forgot to turn off, consumes 500 mA. And the current leakage rate in a car of 50 mA (0.05A) cannot cause a complete discharge of the battery even in winter. You can determine how much consumption there is using a multimeter. And if during the measurement process the consumption level is higher than permissible, that means. There is a problem in the on-board network. It needs to be found and eliminated.
Read also: Liquid moth oil optimal
WE DETERMINE WHERE THE CURRENT GOES INDEPENDENTLY. As you know, there are only two main reasons why batteries are severely discharged. These are additional consumers or a short circuit in the network. So, let's see how to measure current leakage in a car with a multimeter.
Using this operation, you can find and detect a thin spot in the on-board network. To search for leaks, the measuring device should be turned on in current measurement mode. Do not forget that there is direct current in the automotive network. As for the measurement range, 10 Amps will be sufficient.
HOW TO CONNECT A MULTIMETER. Before you start searching for a current leak in your car, you need to correctly connect the device to the on-board network. As for consumers of electricity from the battery, it is better to turn them off if possible. To carry out measurements, an ammeter is connected to the open circuit. To get such a gap, remove the wire from the positive terminal (you can also use the negative terminal) of the battery. Then connect one contact of the ammeter to the plus (or minus) of the battery. And the second - to the wire that was just removed.
Never connect measuring instruments to the positive and negative points on the battery. The result will be a short circuit. Nothing will happen to the machine, but the fuse in the multimeter will blow. If everything is connected correctly, then a number will appear on the device screen that corresponds to the current consumed by constantly switched on electrical appliances. If the permissible current leakage in the car is lower than the measurement result, you need to look for the cause further.
HOW TO FIND A LEAK. As we know, one of the main reasons why this problem occurs is some kind of electronic device from additional or non-standard equipment. There are more and more such components in modern cars every year. It is necessary to start your search with those instruments and devices that are installed independently, that is, non-standard. These could be various fans, alarms, whatever.
Factory wiring in cars is reliably protected. And short circuits in it occur only in case of any significant damage. For example, as a result of an accident, the protective casing may be damaged. But the wires laid by the car owner themselves are often laid out carelessly. They are placed in the first place available, which upon a quick inspection seems to be the most suitable. It is in these wires that the cause of short circuits is hidden. A short circuit leads to current leakage. The wires laid by the car owner may be dangerously close to the engine block. The engine, as you know, heats up during operation. So, the insulation of the wires can simply melt. The cords also rub against the edges of metal parts (especially where the car doors touch). They fray - as a result, the integrity of the insulation is compromised and a short circuit appears. Auto electricians recommend that immediately after measurements (if the current leakage rate in the car does not correspond to the multimeter readings) proceed to a visual inspection of everything that is installed abnormally. It is also necessary to examine individual parts and elements of instruments and devices that are subject to mechanical stress. If we are talking about signaling, then these could be limit switches. If there are no signs of damage, burning, or corrosion, then you should move on to more complex troubleshooting methods. Using this diagnostic, you can significantly narrow the range of possible faults.
HOW TO PERFORM IN-DEPTH DIAGNOSTICS. So, we already know how to measure current leakage in a car with a multimeter. In this case, the device is connected in the same way as in the previous case. But here each fuse is removed in turn and the relay is turned off.
This is done to open the circuit in the on-board network of the machine. When the leakage rate becomes close to normal, it means that a circuit with a problematic consumer has been detected. Next, you should replace or repair the malfunctioning equipment.
ADDITIONAL DIAGNOSTICS. Sometimes there are difficult situations in which even after checking the leak by removing the fuses, there is no positive result and the source of the problem has not been found. In this case, there is nothing left but to check the current leakage in the car circuits. They are not protected by fuses in any way. This is the generator and starter. Very often the battery bursts due to improper operation of the generator. The element simply does not charge the battery.
To check the generator, a multimeter is connected to the battery terminals. The device is switched to voltage measurement mode. Next, the voltage is measured. If the battery is completely discharged, the device will show from 12.6 to 12.9 V. Then you need to start the engine, turn on the low beam, heater, rear window heating system and measure the voltage again - ideal values are from 12.8 to 13.4 V. Maximum – 14.3 V. If the voltage is in this range when the engine is running, then the working element is in good condition. If it is less, then the problem is with the generator, which is not charging the battery.
LEAK REPAIR. Before eliminating a current leak in a car, you need to find the source.
It can be anything. And to fix the problem, you need to repair or replace the malfunctioning electronic device. Also, to eliminate it, it is enough to remove the short circuit.
CONCLUSION. If you feel that the battery is discharging faster, then you should start looking for a short circuit or a “wedge to ground”. Now we know how to check for current leakage in a car and how to fix the problem.
Read also: How to flash a sheriff keychain
I HOPE THE ARTICLE WAS USEFUL FOR YOU. THANK YOU ALL AND GOOD LUCK ON THE ROAD!
Attention! Lots of text.
When preparing the car for winter, I asked myself the question of checking the battery for the upcoming cold weather and, if necessary, the possibility of charging.
And in particular, charging a maintenance-free battery, because... This is exactly what our cars come from the factory. Since I am a complete layman in this matter, I began to study the Internet. I bought a multimeter and have a charger. And after the manipulations I carried out according to the manuals that I dug up, I decided to duplicate them in my blog so that they would not get lost, forgotten or deleted by the authors. I will leave links to articles below. This presentation is not a guide to action; I do not impose these measures on anyone, and I do not bear responsibility for the accuracy and quality of what is stated.
You do everything below at your own peril and risk. I urge you to filter all the information available here. To check the battery voltage we need a multimeter. The most common and inexpensive looks something like this:
For clarity, I found a picture where all the values of the multimeter are written
1) Battery voltage measurement
To measure voltage with a multimeter, you need to turn it on in the constant voltage measurement mode, and set the range above the maximum voltage value on a charged battery; a charged battery has about 12.7 volts, so choose DCV, 20 volts. Next, you need to connect the black probe of the multimeter to the minus of the battery, the red probe to the plus of the battery and take readings from the multimeter display.
2) Current leakage measurement
First you need to set the Multimeter to current measurement mode at 10 or 20 Amps.
How to determine current leakage into the positive gap: Disconnect the positive terminal from the battery. Connect the ammeter with the negative terminal - to the contact terminal of the car. The positive terminal - to the battery.
I hope my post will help someone and save them from having to scroll through the Internet looking for information. Here we consider only the main points of working with a multimeter and a car battery. And the capabilities of the multimeter are very extensive, it’s not for nothing that it was called MULTI, which means a lot.
ABOUT CHARGING THE BATTERY
Preface.
It is worth noting that old batteries (5 years old) should not be charged or reanimated using any old-fashioned methods. Firstly, it is useless or will only give a short-term effect, secondly, it is unsafe. Its life is coming to an end, and it would be wiser to recycle it. Charger requirements. Batteries that do not need to be topped up with water should be charged only with devices that automatically maintain the charging voltage, and preferably automatically limit the charging current. Naturally, OBSERVE THE POLARITY OF CONNECTING THE CHARGER AND BATTERY! THAT IS “PLUS” to “PLUS”, “MINUS” to “MINUS”! (after all, not every charger has “foolproof protection”) DON’T FORGET THAT THE ROOM SHOULD BE VENTILATED, because the gases released in this case are harmful to health, and arsine, sulfur dioxide, hydrogen chloride are also released, which when mixed with oxygen in a certain proportion it forms an explosive mixture (well, if suddenly you want to set up a battery charging station at home, and simultaneously charge a dozen batteries :)))) The costs of purchasing an automatic charger are not justified, so it is better to look for WHERE you can use it once. A good device will determine the condition of the battery and select the required charging current. An excellent charger on the Internet will cost around 6-8 kilo rubles. And don't forget to clean the battery from dirt before experimenting with it. Dirt on the battery will conduct current (bypass the charging circuit), which is not good at all. And also, the battery begins to more or less accept a charge only after the electrolyte has warmed up to a positive temperature, so when you bring the battery home from the cold, let it “settle” or warm up, as you understand better. Peculiarities.
The difference between serviced and non-serviceable is the availability of plugs for filling electrolyte.
The developers made sure that this was not necessary. However, in a non-serviced one, it is possible to remove the cover and get to the plugs. But, as a rule, there is no point. It lasts for a lifetime. Yes, any maintenance-free battery should have holes on the sides to vent gases and normalize pressure. When charging a maintenance-free battery, DO NOT allow the voltage at its terminals to rise to more than 15.5 volts. The point here is in the physics of the process. The battery itself will take as much current as it requires to charge. Just for charging. What you push into it beyond that, by increasing the voltage, it will send mostly for electrolysis of the water that is in the electrolyte, and a little more for heating. That is, it will simply decompose water into oxygen and hydrogen at your expense. Distilled water is not in short supply. But you cannot add it to a maintenance-free battery. The amount of electrolyte will decrease irreversibly, and its density will also increase irreversibly (the water is gone, but the acid remains!) There is another danger - if your battery is heavily discharged (the so-called “deep discharge”) and all the acid has gone into the plates, then It is IMPOSSIBLE to start charging it immediately with the rated charging current. There is water between the plates and you will simply electrolysis it. Therefore, if the battery is charged with a current of tens of amperes, in a short time, the charge will “stick” to its surface and will not allow the electrolyte to penetrate into the thickness of the plates. And in the case of charging with a low current - a few amperes - it will restore the charge throughout the entire thickness of the plate. The term "charge" - here somewhat formal - is the nature of the distribution of lead sulfate throughout the thickness of the plate. How to charge.
1) Determination of charging current.
The charging current should not exceed 1/10 of the battery capacity. For example, if you are interested in how to charge a 12 V 55 A/h car battery, then be sure to keep in mind that the charging current should not exceed 5.5 A. If the battery is deeply discharged, you need to charge it with a small current (1.5 - 2 ,0 A). If you are sure that the battery has not been deeply discharged, connect it to the charger, observing the polarity (see above). The charger (charger) must be in the off position. If the device has a voltage regulator, set it to the minimum voltage. Turn on the charger. Set the charging voltage to 14.4V. The process has begun. 2) During the charging process, the current will decrease. The process will end when the voltage at the terminals is 14.4V and the current drops to 200mA (i.e. 0.2A). It is impossible to overcharge or damage the battery with this voltage. The charging current will simply drop to the value of the self-discharge current of the battery. IMPORTANT: A current that can be considered safe for a battery is numerically equal in Amperes to about 1/20 of its capacity in Amperes/Hours, that is, for a 55 Ah battery this is a current of 2.75A. A current exceeding 1/5 of its capacity in Ampere/hour can be considered dangerous, that is, for a 55 Ah battery this is a current of 11A. Strictly speaking, when she can, she herself will “eat” even more - but only in certain modes and from the same 14.4V at her terminals. But if you use the handle of the charger to increase this voltage and overclock it so that 11A comes through the battery - it will most likely be far from 14.4V... PROHIBITED! The rated charging current has traditionally been considered for half a century to be a current equal to 1/10 of the battery capacity in Ampere/hours, that is, for a 55 Ah battery this is a current of 5.5A. For maintenance-free batteries, the main charging characteristic should be considered not current, but VOLTAGE. The current helps evaluate the process occurring in the battery. 3) In the case of a deep discharge, in this case it is necessary to charge the battery with a reduced voltage (12V.13V), and at the same time it is necessary to ensure that the current at the beginning of the charge does not exceed that same 1/20 of its capacity in Ampere/hours (in principle, this should happen automatically, unlike the situation when 14.4 V is immediately supplied to the terminals). If there is more, reduce the tension even more. The current will gradually increase - this is normal. This acid comes out from the depths of the plates, lead sulfate gives an influx of acid, the density of the electrolyte increases, and the battery is charged. When the current rises to 1/10 of the battery capacity, or even more, and it’s very good - when after this rise it even begins to decrease - then you can switch to the charging process described above, i.e. set the voltage to 14.4V. Now additional information
for those who doubt it, such as “why should batteries that do not require topping up water be charged only by devices with automatic maintenance of charging voltage?”
When charging using this method (charging at a constant voltage), the degree of charge of the battery at the end of charging directly depends on the magnitude of the charging voltage that the charger provides. So, for example, in 24 hours of continuous charging at a voltage of 14.4 V, a 12-volt battery will be charged by 75-85%, at a voltage of 15 V - by 85-90%, and at a voltage of 16 V - by 95-97%. The battery can be fully charged within 20-24 hours with a charger voltage of 16.3-16.4 V. Therefore, in OUR case (maintenance-free battery) for a satisfactory (90-95%) charge of modern maintenance-free batteries using commercially available chargers devices with a maximum charging voltage of 14.4-14.5 V will require more than a day. And to fully charge a battery of this type will take longer than to charge a low-maintenance or regular one. At the beginning of the charging process, the current sometimes reaches 40-50A, and therefore all chargers must be equipped with circuits that limit the charging current within 20-25A. The charging time depends on the level of discharge and can take up to THREE days. How to determine the state of charge of a non-maintained battery and its density.
This is most likely impossible to determine 100% accurately.
It is possible only with some degree of probability, or approximately. The method for determining the degree of charge by voltage is valid only for batteries that have been in a stationary state for at least 8 hours. The measurement must be made no earlier than 8 hours after turning off the engine. For a fully charged battery, the value is 12.7 - 12.9 Volts at a temperature of +20...+25 °C. Read also: VAZ windshield washer check valve
Self-checking current leakage in a car with a multimeter
Checking current leakage in a car with a multimeter is as follows: in the gap of the mass or positive section, we determine the amount of electric current consumed. Moreover, the least dangerous scheme is considered to be the determination of the mass gap. To carry out such a check, follow the following instructions:
- set up the multimeter - current readings from 10 to 20 amperes;
- disconnect the negative terminal from the battery;
- connect the multimeter cord to the battery terminal;
- the second cord of the multimeter is on the removed wire.
It is not necessary to adhere to polarity when checking for current leakage in a car with a multimeter. Before starting testing, you should turn off the car and remove the ignition key.
To check for current leakage in a car at a positive break, follow these steps:
- indicate amperes on the multimeter;
- disconnect the plus from the battery;
- connect the minus of the multimeter to the battery terminal that was disconnected;
- Connect the positive of the multimeter to the negative of the battery.
If you did everything correctly, the multimeter will show the amount of electrical current consumed. If the resulting value exceeds 15–80 mA, then there is a current leak in the car. Therefore, you will have to find the faulty circuit.
For greater clarity, watch the video on how to use a multimeter:
Normal battery leakage current
Current leakage refers to the presence of current flowing from the power bus to ground or to a common wire. It is known that the starting circuit of the ignition switch is powered by bus 15. Bus 30 powers the entire vehicle network from the positive terminal of the battery. Switching off the ignition does not interfere with the energy consumption of other devices. Checking the battery for current leakage is carried out by measuring with a multimeter and visually examining the condition of the wires.
Therefore, with a large leakage current, consumers from bus 30 are examined one by one:
- Car radio – on a working radio the leakage is 10 mA.
- Car alarm - the security device consumes up to 200 mA of current, depending on the brand. There is feedback, a transceiver, GSM, but modern systems minimize the permissible battery leakage current.
- The engine control unit is powered by bus 30, its leakage is a few milliamps.
- Climate control, ABS, body control and other control systems together allow a leakage current of 10 mA.
- A faulty generator will completely discharge the battery in 30 minutes; in a normal situation, the leakage is a few mA.
- Wet and dirty contacts create electrolysis currents and parasitic currents. With normal maintenance of wires and contacts, the leakage current is about 5 mA.
- Self-discharge of a battery is also a leakage current. Internal self-discharge is caused by the quality of the electrolyte, sulfation, destruction of the plates, and it can exceed all other losses.
The leakage current rate is calculated taking into account all consumers, depending on the type of car brand.
Checking current leakage in a car with an ammeter
If the machine is operating normally, the on-board network will consume no more than 70 mA. But this indicator is not achieved instantly. At the very beginning (when the circuit consisting of an ammeter and the on-board network is connected), the electric current consumption will be 120–130 mA. However, if the multimeter reading is higher, then there is a malfunction. The first thing you need to do is inspect the fuse box. When checking for current leakage in a car with a multimeter, the fuses should be removed one by one.
Disconnect the wire from the negative terminal of the battery and connect the multimeter. Don't forget to turn off the car. The multimeter at this moment will determine the amount of electric current that the car consumes when it is off.
When checking the current leakage in a car with a multimeter, we remove the fuse and, using a test lamp, determine whether current flows to the fuse when the car is not started.
When the car is not equipped with an alarm system, players and the like, the amount of electricity consumed will be no more than 70–80 mA.
We recommend
“Normal car battery voltage: numbers you need to memorize” Read more
Checking current leakage in a car with a light bulb
It's okay if you don't have a multimeter on hand. Use a twelve-volt light bulb and screw a couple of turns of wire onto it. To check the current leakage in a car with a light bulb, you will have to make this measuring device yourself. It is made with 2 or 3 terminals. You should bend the wire on the side (minus), connect the plus to the second part. We choose wires no more than 100 cm, otherwise it will be inconvenient for you to check for current leakage in the car.
The plus and minus on the light bulb should not touch, so you will have to insulate the leads. Then you need to disconnect the terminal, checking it in the same way, but changing the polarity. We insert the wire into the gap between the battery and the positive. Is the light on? Unfortunately, the test showed a current leak in the car.
Please note: the light bulb should not be more powerful than 5 watts.
The ideal option is a headlight lamp. However, you should not use a diode light bulb. It will not survive the sudden voltage drop and will burn out. The most unpleasant thing is that you cannot determine it just by looking at it.
We recommend
“Computer diagnostics of a car engine: when is it needed and how is it carried out” Read more
How to identify the cause of current leakage in a car
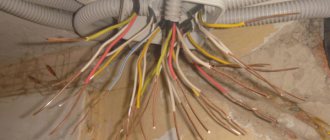
The cause of current leakage in a car may be a short circuit or unexpected energy consumption. You should start by checking additionally installed car devices, as well as electrical components. Compared to standard wiring, additional devices are usually connected with wires that are located where necessary. The auto electrician is in a hurry and does not take into account that the wires may be near the engine. This means that the insulating layer of the wiring may melt, because the switched on engine heats up.
If the wires are located next to metal units, the contacting areas will chafe. Over time, they will break, and a short circuit will occur again.
Once you check the current leakage in the car with a multimeter, look at the devices installed additionally after purchasing the car. Typically, signal switches are mounted in car doors. You may see burnt wiring, exposed wires, or corrosion. Didn't find anything? Let's proceed to a deep check of current leakage in the car.
Causes and consequences
First you need to understand what a car battery is. Like any other battery, it is a chemical current source that has an electrical capacity, the value of which is usually printed on the battery label. It is measured in ampere hours (Ah).
Battery capacity is measured in ampere-hours and shows how much current the car battery will be discharged with.
In fact, capacity determines the amount of electrical energy that a fully charged battery can deliver. Leakage current represents the current drawn from the battery. Let's say we have a serious short circuit in the car wiring, and the leakage current is 1 A. Then the 77 Ah battery given as an example will be discharged in 77 hours. During use, the battery life and its effective capacity decrease, so the starter may not have enough starting current even when the battery is half discharged (in cold weather up to 75%). With such a leak, it can be assumed that in a day it will become almost impossible to start the car with the key.
The main problem is that the battery is deeply discharged. When receiving energy from the battery, the sulfuric acid included in the electrolyte is gradually converted into lead salts. Up to a certain point, this process is reversible, since a similar thing happens when the battery is charged. But if the voltage in the cells drops below a certain level, the electrolyte forms insoluble compounds that settle on the plates in the form of crystals. These crystals will never recover, but will reduce the working surface of the plates, leading to an increase in the internal resistance of the battery, and, therefore, a decrease in its capacity. In the end, you will have to buy a new battery. A dangerous discharge is considered to be a voltage below 10.5 V at the battery terminals. If you bring your car battery home to charge and notice lower voltage, it's time to sound the alarm and deal with the leak immediately!
In addition, leaks caused by short circuits or melted wiring insulation at sufficiently high currents can lead not only to battery damage, but also to fire. Indeed, a new car battery is capable of delivering hundreds of amperes over a short period of time, which, according to the laws of physics, can lead to melting and ignition in a few minutes. Old batteries can boil or explode under constant increased load. Even worse, all this can happen completely by accident at any time, for example, at night in a parking lot.
The electrical system of a car is a complex of complex electronic systems interconnected
After considering all the unpleasant consequences of leakage current, it is worth understanding its causes. Previously, in the days of carburetor cars with a minimum of electronics, the normal leakage current was considered to be its complete absence. In those cars there was simply nothing to draw current from the battery when the ignition was turned off. Today everything has changed: any car is simply crammed with various electronics. These can be either standard devices or installed later by the driver. And although all modern electronics, accompanied by a friendly march of environmentalists with slogans about energy saving, support special “sleep” or standby modes with very low energy consumption, a certain amount of current is consumed by duty circuits. Therefore, small leakage current values (up to 70 mA) are the norm.
From the factory equipment in a car, the following devices normally constantly consume a certain amount of energy:
- Diodes in the generator rectifier (20-45 mA);
- Radio tape recorder (up to 5 mA);
- Alarm (10-50 mA);
- Various switching devices based on relays or semiconductors, on-board engine computer (up to 10 mA).
The maximum permissible current values for serviceable equipment are indicated in parentheses. Faulty components can dramatically increase their consumption. We will talk about identifying and eliminating such components in the last part, but for now here is a list of additional devices installed by drivers, which can often add another hundred milliamps to the leak:
- Non-standard radio;
- Additional amplifiers and active subwoofers;
- Anti-theft or second alarm;
- DVR or radar detector;
- GPS navigator;
- Any USB powered equipment connected to the cigarette lighter.
How to carry out in-depth diagnostics
It is worth starting a deep check of current leakage in the car after you inspect the wires. The essence of testing: we disconnect the car device, and then measure the electric current using a multimeter. The sequence of actions is as follows:
- disconnect the negative terminal from the battery to place the multimeter;
- connect the multimeter to the disconnected battery cable and the negative terminal;
- pull out the fuses to open the circuit;
- If surges in electric current are observed, we determine which device the fuse belongs to.
You can check for current leakage in a car by making an adapter, which can be used as a blown fuse. We connect the multimeter probes to the homemade adapter. Next, the steps are repeated: we check the circuits separately.
If you have identified a faulty location, you need to find out whether there will be a short circuit. To do this, you need to ring the wires using a multimeter, having previously set the resistance measurement mode.
Important!
Not every device operates with a fuse. Therefore, this method of checking current leakage in a car is not always suitable.
It happens that there is no leak, but the battery dies overnight. This happens due to a negative charge/discharge balance. The battery may simply not be fully charged if you are constantly stuck in traffic jams, trips are always short distances, the car often has to be started and turned off, and the car is used in winter. As a result, the battery fails.
Additional installed music consumes a huge amount of energy. However, this is no longer a current leak in the car.
We recommend
“How often to change filters in a car: we give deadlines and tell you tricks” Read more
Eliminating current leakage in a car
Did the check show that there is a current leak in the car? It is important to eliminate the malfunction that led to this problem. Before starting repairs, remove the battery terminals. What steps can be taken to resolve the problem:
- If dirt has accumulated at the joints, it must be removed by wiping the joint with alcohol.
- When the insulating layer has become unusable, the cores should be insulated, and damage should be prevented by installing a protective hose so that the insulation does not overheat or fray.
- If you find moisture in your car appliances and they are fogging up, you need to dry them. When there is moisture inside the “signaling” block, you will have to open the module. We moisten it with an alcohol solution, wait until the dirt and water drain. When the device dries, we make a special casing that will prevent water from getting inside.
- The electrical appliance is not functioning properly. The solution is to install a new one or repair it.
After the problem is resolved, we again check the current leakage in the car to make sure that the consumption is normal.
High battery leakage current - problems
A large leakage current, at which it is imperative to find the problem point, is considered to be 0.5 A. A loss of half an ampere in ten hours will absorb 5 A/h, and a car left for 4 days will be discharged to zero. Therefore, when parked for a long time, the car is left with an open circuit.
If there is a problem unit in the car in which a leakage current is created, heating will definitely begin in the transistor or microcircuit. The block will fail. If current leaks through the conductor, a fire will not occur, but the insulation may be damaged. This will lead to a short circuit, intense heating at the contact point and a fire.
How to find current leakage on a battery without a device? In the dark, stop the car, open the hood, close the door, but do not activate the security system. Remove the wire from the positive terminal and wait 5 minutes. Reconnect the battery terminal. If there is a strong spark, there is a leak. A small spark is a natural process. Next, you should measure the indicators and determine the problem area.
An absolutely accurate sign of current leakage without measurement - after a week of parking, a fresh battery is completely discharged.
Battery leakage current