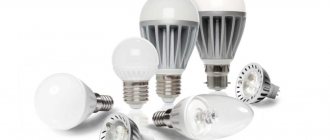
The wide variety of electronics on the market today creates high power requirements. There is a huge number of ready-made modules and electronic components. Special stabilizers are often used for LEDs. This technology is used in almost every modern LED spotlight, lamp or lamp.
Among users who want to make a current stabilizer for LEDs with their own hands, the most popular is the LM317 microcircuit (including its analogues), which belongs to the subclass of linear stabilizers.
Such devices are divided into several types:
- Linear current stabilizer for LEDs, the input voltage of which does not exceed 40 V at a current of 10 A.
- Pulse devices that have a low input voltage (for example, a pulse PWM controller);
- Switching current stabilizer, which is characterized by a high input voltage.
The choice of the most suitable stabilizer depends on the efficiency and cooling system of the device.
Step-up and step-down stabilizers
A boost regulator converts a low input voltage to a higher output voltage. This option is used for LEDs with a low-volt power supply (for example, in a car, you may need to increase the 12 volts for LEDs to 19 V or 45 V). Buck stabilizers, on the contrary, reduce high voltage to the desired level. All modules are divided into universal and specialized. Universal ones are usually equipped with two variable resistances - to obtain the required current and voltage parameters at the output. For specialized devices, the output values are most often fixed.
A special current stabilizer is used as a stabilizer for LEDs, circuit diagrams of which can be found in large quantities on the Internet. A popular model here is the Lm2596. LEDs are often connected to the car's power supply or battery via a resistor. In this case, the voltage can fluctuate in pulses up to 30 volts, which is why low-quality LEDs can fail (flashing running lights with partially inoperative LEDs). Current stabilization in this case can be carried out using a miniature converter.
Design and operating principle
The stabilizer ensures constant current when it deviates. The stabilizer ensures constant operating current of LED diodes when it deviates from the norm. It prevents overheating and burnout of LEDs, maintains constant flow during voltage surges or battery discharge.
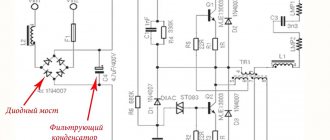
The simplest device consists of a transformer, a rectifier bridge connected to resistors and capacitors. The action of the stabilizer is based on the following principles:
- supplying current to the transformer and changing its limiting frequency to the mains frequency - 50 Hz;
- voltage adjustment to increase and decrease with subsequent frequency equalization to 30 Hz.
The conversion process also uses high-voltage rectifiers. They determine the polarity. Stabilization of the electric current is carried out using capacitors. Resistors are used to reduce interference.
Simple current converter
Assembling a miniature current converter with your own hands is considered quite simple. Such voltage stabilizers are usually manufactured in current stabilizing mode. However, do not confuse the maximum voltage for the entire block and the maximum load on the PWM controller. A system of low-voltage capacitors of 20 V can be installed on the block, and a pulse microcircuit can have an input of up to 35 V. The simplest DIY LED current stabilizer is the LM317 version. You only need to calculate the resistor for the LED using an online calculator.
For the LM317, you can use available power (for example, a 19 V power supply from a laptop, a 24 V or 32 V power supply from a printer, or a 9 or 12 V power supply from consumer electronics). The advantages of such a converter include its low price, minimal number of parts, high reliability, and availability in stores. It is not rational to assemble a more complex current stabilizer circuit with your own hands. Therefore, if you are not an experienced radio amateur, then a pulse current stabilizer will be much easier and faster to buy ready-made. If necessary, it can be modified to the required parameters.
Note! The modules do not have protection against high voltage, which can damage the device. Therefore, modification of the module must be done as carefully as possible.
To assemble the LM317, no special knowledge or skills in electronics are required (the number of external elements in the circuits is minimal). Such a simple current stabilizer is very cheap, and its capabilities have been tested many times in practice.
The only downside is that the LM317 may require additional cooling. You should also be wary of Chinese LM317 microcircuits with lower parameters. In any case, the cost is more than affordable, and delivery is included in the price. Chinese manufacturers perform rather labor-intensive work at a product price of 30-50 rubles per piece. Unneeded spare parts can be sold on Avito or forums on the Internet.
Assembling a simple stabilizer with your own hands
An LED is a semiconductor device that requires current to operate. Turning on LEDs through a stabilizer is considered the most correct. The duration of operation of the LED without loss of brightness depends on its operating mode. The main advantage of the simplest stabilizers (drivers), such as the LM317 stabilizer chip, is that they are quite difficult to burn. The LM317 connection diagram requires only two parts: the microcircuit itself, which is included in the stabilization mode, and a resistor.
- You will need to buy a variable resistor with a resistance of 0.5 kOhm (it has three terminals and an adjustment knob). You can order it online or buy it at Radio Amateur.
- The wires are soldered to the middle terminal, as well as to one of the extreme ones.
- Using a multimeter turned on in resistance measurement mode, the resistance of the resistor is measured. It is necessary to achieve a maximum reading of 500 Ohms (so that the LED does not burn out when the resistor resistance is low). How to check the LED itself with a multimeter is written here.
- After carefully checking the correct connections before connecting, the circuit is assembled.
The maximum power of LM317 is 1.5 Amperes. If you want to increase the current, you can add a field-effect or regular transistor to the circuit. As a result, for a transistor-based device, a supply of 10 A can be achieved at the output (set by low-resistance resistance). For these purposes, you can use the KT825 transistor or install an analogue with better technical characteristics and a cooling system.
In any case, the range of modules and blocks sold is quite wide, so a device with the required parameters can be assembled in a minimum amount of time. The efficiency depends on the difference between the input and output voltages, as well as on the operating mode.
Popular models
Lm2596
The LM2596 has become popular among pulsed ones, but by modern standards it has low efficiency. If more than 1 amp, then a radiator is required. A small list of similar ones:
I’ll add a modern Chinese assortment, which has good characteristics, but is much less common. On Aliexpress, searching by marking helps. The list is compiled by online stores:
Also suitable for Chinese daytime running lights DRL. Due to their low cost, LEDs are connected through a resistor to a car battery or car network. But the voltage jumps up to 30 volts in pulses. Low-quality LEDs cannot withstand such surges and begin to die. Most likely, you have seen flashing DRLs or running lights where some of the LEDs do not work.
Miniature current converter
Assembling a circuit with your own hands using these elements will be simple. These are mainly voltage stabilizers, which are switched on in current stabilization mode.
Do not confuse the maximum voltage of the entire block and the maximum voltage of the PWM controller. Low-voltage 20V capacitors can be installed on the block when the pulse microcircuit has an input of up to 35V.
Medium complexity devices
Drivers for 220V LEDs are of average complexity to manufacture. Setting them up can take a lot of time, requiring setup experience. Such a driver can be extracted from LED lamps, spotlights and lamps with a faulty LED circuit. Most drivers can also be modified by recognizing the model of the converter's PWM controller. The output parameters are usually set by one or more resistors. The datasheet indicates the resistance level required to obtain the desired current. If you install an adjustable resistor, then the number of Amperes at the output will be adjustable (but without exceeding the specified rated power).
The universal module XL4015 was highly popular on Chinese websites in 2016 . According to its characteristics, it is suitable for connecting high power LEDs (up to 100 Watt). The standard version of the housing of this module is soldered to a board that acts as a radiator. To improve the cooling of the XL4015, the current stabilizer circuit must be modified to install a heatsink on the device body.
Many users simply place the radiator on top, but the efficiency of this installation is quite low. The cooling system is best located at the bottom of the board, opposite the chip solder. For optimal quality, it can be unsoldered and installed on a full-fledged radiator using thermal paste. The wires will need to be lengthened. Additional cooling can also be installed for the diodes, which will significantly increase the efficiency of the entire circuit.
Among the drivers, the adjustable driver is considered the most versatile. In this case, a variable resistor is installed in the circuit, which sets the number of amperes at the output. These characteristics are usually specified in the following documents:
- in the specification for the microcircuit;
- in datasheet;
- in a typical connection diagram.
Without additional cooling of the microcircuit, such devices can withstand 1-3 A (in accordance with the PWM controller model). The weak point of such drivers is the heating of the diode and inductor. Above 3 A, cooling of the powerful diode and PWM controller will be required. In this case, the choke is replaced with a more suitable one or rewound with a thick wire.
What is the problem?
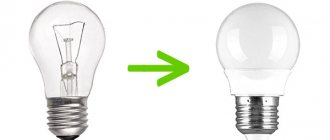
Typically, LED lamps are used in the side lights of our cars, less often in the backlight or instrument panel. And it seems that their service life should be many times longer than incandescent lamps, but everything turns out quite the opposite. Cheap options begin to blink after a couple of months, and after 3-4 they can completely burn out (probably, all this was observed on city roads, when there were “foglights” or dimensions, just light music).
So why does this happen? All trivial and simple car options work normally at 12V, and even a small difference in the larger direction begins to wear them out (as I wrote above, they warm up and quickly degrade).
And if you remember the on-board network of the car, then there is almost never exactly 12V, even if the engine is not running; a working battery gives 12.7V (this is its normal voltage ). But after the car starts, the generator supplies 13.8 - 14.2V to the on-board network (and in some modern cars, where electronics are in bulk, it can reach up to 14.5V).
Here is your answer: at such VOLTAGES, the LED will not work for a long time in any case, as practice shows, a maximum of six months and that’s it
Of course, there are normal EXPENSIVE companies that produce high-quality options, for example PHILIPS, OSRAM, etc. BUT the cost of lamps, say in dimensions, can reach up to 1500 rubles per pair, not cheap! But they will burn for a long time.
Where can I order parts?
To search for high-quality and at the same time affordable modules, you can use the Aliexpress website. The cost will be 2-3 times cheaper compared to other stores. Therefore, for testing, it is better to order 2-3 pieces at once (for example, 12 volts) at the lowest price. On the site you can find any current stabilizer for free sale, including highly specialized ones. If you have the appropriate experience, you can make a spectrometer worth 100,000 rubles for just 10,000 rubles. The difference of 90% is, as a rule, a markup for the brand (plus slightly redesigned Chinese software).
Chinese online stores took the leading positions in the range of current converters, power supplies and drivers. Orders arrive in 98% of cases. Prices for a DC-DC converter start at 35 rubles. More expensive versions may differ in the presence of two or three trimming resistors, instead of one. It is better to place an order in advance.
So what do stabilizers do, why are they needed?
As you probably already guessed, they simply stabilize the voltage and prevent it from exceeding the threshold you set. Now there are two options:
- Not adjustable, which simply stabilizes at 12V
- With adjustment, here you can manually set the desired voltage from 0.8 to 20V
Thus, we simply set the upper threshold to 12, and I advise you to 11.8V and the LEDs will be protected from changes in the on-board network. The service life increases significantly (because there is no premature “degradation”), that is, wear is minimal.
Of course, now there are many different methods of limiting with your own hands, many put resistors and other things in the gap, but often this does not work so effectively, and it’s “collective farm-collective farm”!
Again, for people who are not familiar with electronics and a soldering iron, store-bought stabilizers will be simple and straightforward.
Number of phases
Voltage stabilizers are single-phase or three-phase. The first are installed in rooms equipped with a single-phase network, the second - when connecting the house to an electrical network with a voltage of 380 V. A single-phase device is also suitable for a three-phase network, if you comply with the condition of installing a separate device for each phase.
When choosing a stabilizer separately for a chandelier, you can choose a single-phase one. In this case, it is enough to know the network connection diagram and power indicators: peak and nominal (data is available in the device passport).
My experience
My friend has a VAZ PRIORA, and he is a fan of putting LED lamps in the dimensions, headlights, etc. They really didn’t walk for a long time without such stabilizing elements (a couple of months, that’s all). Now one set of cheap options has been running for three years, and all thanks to stabilization!
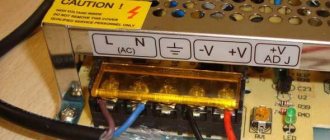
There are also disadvantages: such elements are placed in the break of the wire that goes to the source; “IN” and “OUT” are even indicated there where the wire should be connected and where to output it. The cost for 5 pieces is approximately 160 rubles, that is, each one is about 30. A friend set it to 11.8V, connected the wires to the boards and filled them with a glue gun, now they are not afraid of moisture.
Personally, I myself bought such boards and experimented with them, I have a power supply that produces from 15 to 24V. From it I powered two wires and connected them to the module, and from there to the LED, I set it to about 11.9. And you know, no matter how I switched the voltage in the power supply, behind the board it remained stable at 11.9V without any jumps (the whole experiment will be on video).
So the conclusion is that you can buy stabilizers (about 30 rubles apiece), the light bulbs themselves (about 50 rubles apiece) and in TOTAL you get an option for 80 - 100 rubles that will work for a very long time (3 years for sure).
Now we are watching the video version
Here is the material, I think it was useful to you, subscribe to the site and the channel will have many more interesting videos. Sincerely yours, AUTOBLOGGER.
Similar news
- Why does the alternator belt whistle? When cold or under load. ...
- How to install xenon. Is it possible to do this in the headlights of a regular car...
- How to check a fuse in a car. We use a multimeter (test...