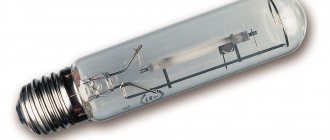
Lack of light negatively affects the development of seedlings. Photosynthesis in plants is inhibited, leaves and stems begin to fade. Vegetable growers solve the problem by installing artificial lighting from lamps. Yellow or white glow has a positive effect on the process of photosynthesis, but does not bring any other benefits. The entire necessary spectrum contains sunlight, which promotes the development of cells, leaf plates, and the formation of inflorescences. Illuminating seedlings with LED strips of different luminescence allows you to get as close to this indicator as possible.
Which spectrum is better for backlighting?
We all know that natural light has many different rays: red, blue, orange. When creating artificial light, you need to get as close to natural light as possible. Many modern development technologies in the field of lighting have allowed LED strip to become the most suitable option. And here's why: during plant photosynthesis, not the entire spectrum of light is active, but only waves with a length of 380–710 nm. All rays are responsible for a separate process in the life of plants, and accordingly the intensity of their absorption is different. Of the entire emitted spectrum, three colors are especially useful for seedlings:
- blue – stimulates growth;
- red – accelerates the process of formation of inflorescences;
- pink – combines the useful functions of blue and red.
Note that a specific type of plant requires an individual set of light rays. If you choose them correctly, you are guaranteed to get not only growth, but also excellent flowering and fruit ripening. With the right selection, only LED strip can absolutely replace sunlight.
Advantages of using LED strips
LEDs have the main advantage - they emit the spectrum of light necessary for seedlings, but there are a number of other important advantages:
- the tape consumes little electricity;
- LEDs emit light waves of different lengths, which are better absorbed by plants;
- the tape is designed for a long service life;
- low voltage operation makes the LED strip fire and electrical safe;
- LEDs have minimal flickering and no UV or IR radiation;
- LEDs are environmentally friendly due to the absence of harmful substances, such as mercury.
The downside is the cost. The price of a good LED strip with a power supply is 7–10 times more compared to a cheap LED light bulb, but the backlight will pay for itself in a couple of years.
Selecting a backlight strip
Many vegetable growers are frightened not by the cost of the LED strip, but by the lack of experience in choosing and connecting it. There is nothing complicated about this. When purchasing an LED strip, look at the following characteristics:
- Brightness of the glow. LEDs are identified by a four-digit number. The higher the value, the brighter the light the tape emits.
- Volume of light. A certain number of LEDs are soldered onto 1 m of the base: 30, 60 or more pieces. As the number of bulbs increases, the LED strip emits a larger volume of light.
- LEDs differ in their beam angle. Bulbs come with an indicator of 80 or 120⁰. When using one strip to illuminate a large area, it is better to choose a product with a luminous angle of 120⁰.
- In order not to get confused in the four-digit designation of LEDs and their quantity, you can simply read the luminous flux value marking on the product packaging, indicated by Lumens (Lm).
- The cost of a strip with the same number of LEDs and their quantity varies. As an example, the photo shows a comparison of two products, where LEDs with number 5630 are used in the amount of 60 pcs/1 m, but the power and volume of light differ.
- It is optimal for illuminating seedlings to choose a product with LED number 5630, power 20 W/m and luminous angle 120⁰.
Important! There is an IP designation on the product packaging. This indicates the degree of protection. When determining which LED strip is best for illuminating seedlings, preference is given to a product with a high IP value. LEDs have a silicone coating that protects from moisture and mechanical damage.
LED spectrum length for plants
It has been established that biological processes occurring in plants require a certain length of light waves. Figure 1 provides a graph demonstrating this relationship.
Dependence of plant sensitivity on a specific spectrum
Designations:
- A – graph of the dependence of chlorophyll synthesis;
- B – photosynthesis;
- C – photomorphogenesis.
We see that plants absorb light waves with a length of 445 nM and 660 nM most intensely, falling in the blue and red parts of the spectrum. This is why conventional sources are not suitable for artificial lighting; you will need a phytolamp or phytolape. The most effective backlight, in which the ratio of blue and red light is 1 to 4-6.
LED application areas
Due to its many advantages, LED strips today are very often used to illuminate not only plants, but also residential and non-residential premises. They are used to illuminate the following rooms:
- winter gardens and greenhouses;
LED greenhouse lighting
- greenhouses and insulated balconies or loggias;
- as an alternative replacement for obsolete light sources (for example, incandescent lamps);
- storage rooms and other types of rooms.
As you can see, the scope of LEDs today is quite extensive.
Advantages of phytolents over other sources
Here are several factors that speak in favor of LED backlighting:
- lower consumption compared to halogen, mercury and luminescent phytosources;
- narrow spectral range guarantees maximum efficiency;
- low supply voltage increases the level of safety;
- high efficiency;
- less susceptible to heating than light bulbs, therefore, they can be placed closer to the plants, which allows the use of a source of lower intensity;
- do not contain substances that pose a health hazard.
Phyto-tape with a ratio of blue and red light of 1:5
Unfortunately, such a source has one significant drawback that limits its widespread use - high cost, so we will consider alternative options.
Advantages and disadvantages
Unlike energy-saving (ESL) analogues of phyto lamps, LEDs have really important advantages:
- Safety (no toxic elements inside the flask, including mercury vapor).
- Frequent switching on and off does not affect the service life (incandescent and ESL lamps wear out faster due to this).
- Diodes are compact, much smaller than all other types of lamps (and do not require bulky control devices; only a small power supply called a driver).
- High vibration resistance and mechanical strength.
- They save even more energy than energy-saving lamps.
True, they also have one big drawback - high cost. This is partly due to the fact that diodes are relatively new to the market. Maybe with the development of technology the cost will decrease.
The second drawback is that the light is less familiar to a person’s eyes and “hurts the eyes.” But for plants there is no difference. Also, LEDs get very hot due to poor heat dissipation. But with proper cooling, diodes can last for more than one year.
In fact, diodes have only one significant drawback - high cost.
We recommend watching a video on the topic “Assembling a rack with a phytolamp.”
Full Spectrum LED Plant Growth Strip
Sometimes RGB sources are called this, which is not correct, since installing full-spectrum LEDs on a strip is technologically impossible.
The USKI source is a blue spectrum LED coated with a special luminescent layer. This design allows luminous flux to be emitted in the range of 400-800 nM, with the peak intensity occurring at 630-640 nM (spectrogram shown in Figure 3).
Figure 3. Spectrogram of USKI LED
Some unscrupulous manufacturers indicate a peak intensity of 660 nM in their products; this, to put it mildly, does not correspond to reality, since the technology used does not allow obtaining a source with such a characteristic. This limitation can be circumvented when making matrices; for this purpose, I install several crystals of the red spectrum in them.
LED and LED matrix manufactured using USKI technology (proportions not respected)
The cost of this type of LED source is not much less than phyto tape, which makes it not an entirely acceptable alternative.
The benefits of artificial lighting for plants
For active growth, seedlings need long daylight hours, which cannot be provided in early spring. Without sufficient lighting, photosynthesis processes slow down and the stem and foliage begin to wither.
LED strip for plant lighting
Artificial lighting helps to cope with the problem, but difficulties arise with the selection of lamps, because not any light will do, but only the one whose spectrum and intensity are closest to that of the sun. For example, yellow or white light stimulates photosynthesis, but this is where their benefits are limited. Help is also required with the formation of cells, the development of leaf plates, and the formation of inflorescences.
The best way is to organize lighting using a set of LED strips with different emission spectra, supplementing them with reflectors. In this case, diffused light is obtained, as is the case with sunlight in nature.
The three colors that are most useful are:
- blue – for accelerated root growth;
- red – for the formation of inflorescences;
- pink - complements the properties of the first two, helping the growth of foliage and flowering.
Using blue and red LED strips
As an economical option for illuminating indoor plants, red (630nM) and blue (465nM) LED strip can be used. Their peak intensity is somewhat shifted from the phytospectrum, but this is not critical; the effectiveness of such lighting will decrease, but only slightly.
LED strips of red and blue spectrum
Instead of two strips of different colors, you can use one RGB, but to control its operation, in addition to the power supply, you will need a special controller, which makes the design more expensive.
https://www.youtube.com/watch?v=WD_dRwpvje8&feature=youtu.be
DIY LED phytolamp
Sometimes factory-made phytolamps are too expensive and it is much cheaper to make them yourself. For an experienced radio amateur, if the necessary material is available, this is a matter of two to three hours (not counting the fact that the glue on which the LEDs or tape are glued must dry).
The work takes place in several stages:
- Calculation of the required light of a phytolamp.
- Preparation of materials (LEDs or LED strip, power supply (driver), connector, aluminum profile, thermally conductive glue).
- Preparing tools (screwdrivers, soldering iron, electric thermometer or non-contact temperature meter to check the normal heating of the driver (however, the latter is not necessary if you are confident in the correct assembly)).
- Actually, assembly.
- Checking the heating temperature of the power supply.
- Equipping a place for plants and a phytolamp. Typically, plants and a phytolamp are placed on a windowsill or in a rack.
We recommend watching a video on the topic “Do-it-yourself phytolamp.”
Calculation of backlight power and tape length
To illuminate indoor plants or seedlings, the lamp power is selected at the rate of 30-50 W per square meter (in the presence of natural light). Knowing the characteristics of the LED strip and the area of the indoor greenhouse, it is easy to make the necessary calculations.
Let's say we need to organize lighting for a seedling box with an area of 0.2 m2 (20x100) cm, therefore the power of the lighting source should be 8 W (40 * 0.2). If you choose tape 3528-60 (4.8 W/m), then you will need two meters of it.
Don’t forget about the ratio between red and blue LEDs, which means we take 0.5 m of blue tape and 1.5 m of red, that is, 1 to 3. As a result, there will be 30 blue LEDs and 90 red LEDs in the backlight.
You should pay attention to the peculiarity of the tapes, it consists of segments, each with three LEDs, this is an indivisible part that determines the cutting frequency. For 3528-60 this parameter is 5 cm, and for 3528-120 it is 2.5 cm. In Figure 6, the red circle marks the place where cutting can be done.
Fig.6. The tape can only be cut in the indicated places
To illuminate house plants, it makes no sense to use a silicone-coated tape, especially since it reduces the intensity of the light flux.
Types of LED light sources
Currently, a large number of different types of LED lamps (luminaires) are produced, which can be classified as:
- In the form of a pipe - convenient to use when growing plants at home;
- Single spotlight - there are various designs, used for individual use;
- LED panel - used to illuminate a large number of plants, they come in rectangular shape;
- LED strip is universal in use and easy to install. When making LED strips used to illuminate plants, the number of blue LEDs to red ones is 10/3, 15/5, 5/1, respectively. In LED phyto lamps, the proportion of red color is 60-80%, and blue – 40-20%. ;
- LED floodlight is a device for industrial use. It is possible to illuminate large areas from a remote distance.
LEDs are narrowly focused light sources, which determines the conditions for their installation. When installing luminaires, you should consider:
- Plant height;
- Arrangement of plants (distance between them).
Power supply for backlight
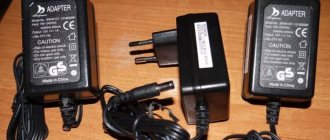
Having decided on the power of the tape, we select a power supply for it. Here it is necessary to take into account the characteristic features of LEDs; they require current stabilization, not voltage. Ohm's law will help you calculate the current consumed by the tape: I=U/P, where U is the supply voltage of the tape, P is its power. For example, for a lamp consuming 9.6 W, you will need a power supply (12 V) of at least 0.8 A (12/9.6 = 0.8). The cost of such devices is about 100-120 rubles.
Inexpensive 12 V and 1 A power supply
Considering the low cost of power supplies of this class, it makes no sense to make them yourself; for the “ham radio itch” it is better to find a more worthy use.
Making a more powerful current stabilizer with your own hands is also pointless; on the well-known website of Chinese manufacturers, you can purchase such a product, as shown in Figure 8, for only 50 rubles (with free delivery).
Figure 8. 3 A current stabilizer (China)
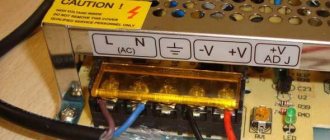
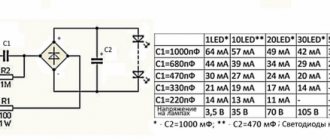
Please note that the device shown in the figure is a current stabilizer, designed for an input voltage from 3.5 to 35 V (DC), accordingly, it cannot be connected directly to a 220 V outlet. It is first necessary to lower the voltage and convert it from AC to DC, that is, assemble a simple circuit based on a transformer, a diode bridge and a polar capacitor (see Fig. 9).
Figure 9. Schematic of a basic power supply
Working with lighting products
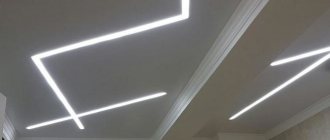
LED strips, when used correctly, allow you to quickly and with your own hands create the optimal type of illumination for your home garden or vegetable crops in pots and achieve the desired result - obtaining tasty and large fruits or flowering.
Option for LED lighting of home “beds”
But to do this, you will need to either assemble the lamp yourself, which will take quite a lot of time, or simply attach the purchased model yourself. The second option is more rational, since when using moisture-proof tapes, even abundant watering of the home garden or vegetable garden will not negatively affect the performance of the lighting product. Therefore, there is no need to hide the LED strip behind the lamp body.
Note! When installing an LED strip to illuminate plants with your own hands, you will not need to drill a bunch of holes, drive nails or screw in self-tapping screws.
The installation of the tape itself is a clear and simple process that boils down to performing the following manipulations:
- The place (bottom of shelves, window sill, etc.) where the LED strip will be attached must be free of grease and dirt. To do this, you need to wash it with a damp cloth and soap;
- after the surface has been washed well, wipe it dry with a clean, dry cloth;
- then from the bottom side of the tape we remove the protective coating that the manufacturer pasted on top of the self-adhesive base;
Note! If the piece of LED strip is long, then the protective film must be removed carefully and partially so that at the time of installation you do not get tangled in it or attach it crookedly.
Self-adhesive base of the product
- Next, without pressing hard on the tape, you need to place it along the surface. If there are distortions in the course of the rubberized base of LED products, you need to carefully correct it;
- When you are satisfied with the result, carefully press the product to the surface.
Tape applied to the surface
Another advantage in this situation is that such products are sold in reels of five meters. Therefore, by purchasing one coil, you can illuminate several shelves. LED strip can be cut into pieces of any length. But at the same time, you must remember that you need to cut only in places specially designated for this.
Place of cut on tape
After the tape has been installed or cut into pieces, we connect the power supply to it by soldering the wires.
Note! For the LED strip to be powered from a standard 220 V network, it requires the connection of a special converter - a power supply because LED products are low-voltage, designed for 12 or 24 volts.
Power supply for tape
It is attached by soldering wires to the tape at the location of its contact pads. They are available on both sides of the cut line. After this, all you have to do is check the functionality of your homemade lighting and place vegetation under it.
Basic methods of illuminating seedlings at home
Among the currently presented options for organizing lighting, the following methods are distinguished:
Each method has its own advantages and disadvantages, which largely determine the scope of application of a particular lighting option.
Illumination without lamps
To organize lighting on the windowsill, a simple structure made of a cardboard box is often used. The top and side of the box are removed, leaving small sides. This entire structure is covered with foil and installed behind the plants. Sunlight, entering through the window, falls on the foil and is reflected on the plants, providing comprehensive illumination of the crop.
This method is accessible and economical, but at the same time quite effective. However, a significant drawback does not allow using this technique for large plantings - in cloudy weather or on the north side of the house there is not enough light and the foil will not be able to compensate for the darkening. In such cases, it is impossible to do without lamps.
Making lighting for seedlings with your own hands is not difficult. For this it is enough:
- organize the space - free up the window sill, arrange tables in the room, build a shelving unit;
- provide mounts for lamps - various hooks, homemade “ears”;
- pull the wire from a stationary electrical network or generator set.
The most important process in arranging lighting is the selection of suitable lamps. Gardeners use in their experiments:
Advantages of LED lighting for seedlings
Illuminating seedlings with LED lamps gives the gardener and plants a number of undeniable advantages that are worth mentioning:
- when creating a lamp, you can combine the two most important spectra - blue and red - and create an ideal lamp for seedlings;
- LEDs are quite affordable, and their low cost quickly pays off;
- LED lamps consume a minimal amount of electricity, but produce a sufficient amount of light - up to the 6000 lux required for normal plant development;
- ease of installation and ease of operation have won the love of millions of gardeners.
LEDs are modern materials that are actively used in everyday life and in production. It is quite effective to use LED lamps on racks for seedlings - they illuminate the area well and do not heat up the air.
To make an LED lamp you do not need to have special skills or special knowledge.
To create an LED strip light you will need:
- red and blue LEDs;
- thermal paste, it can be replaced with hot glue, but it is more expensive;
- base - a piece of aluminum, a profile from furniture, any available material up to an old ruler;
- driver or power supply - it ensures current stability and the required voltage;
- cord and plug.
For optimal illumination of seedlings, it is recommended to alternate the LEDs on the strip in the sequence of 2 red and 1 blue elements.
They are connected to each other by soldering and output to the driver, which is respectively connected to the switch and plug. The tape is attached using bolts, double tape or rivets to the prepared surface. After this, it is assembled into a single circuit with a driver, cord, switch and plug.
Seedling rack with lighting
Building a rack will not take you much time, but it will allow you to significantly save on space for seedlings by placing containers with soil and seedlings in several tiers.
To make a rack, either a metal corner or a wooden beam treated with stain or etched against parasites can be used. Self-tapping screws or bolts are used to fasten materials together.
The design is extremely simple - shelves with hollow compartments for drawers. The length and width of the rack directly depends on the size of the seedling boxes. It is recommended to install no more than 3 rows in height. Each row is illuminated by its own lamp, attached to the bottom of the upper seedling box.
Each gardener decides for himself which lamps are best to illuminate seedlings. Some people prefer fluorescent lamps, while others consider LED bulbs to be the best. Conduct experiments and watch your pets, find a comfortable way for yourself to grow seedlings. After all, gardening is, first and foremost, fun!
Video: advantages of LED lamps for seedlings
In this video, experienced gardener Valery Medvedev conducts an experiment with seedlings and proves that LED lamps for seedlings are the best choice!
The advantages of such lighting
LED lighting is considered the most suitable because it has a number of positive properties:
- Their wavelength is much longer than that of conventional incandescent lamps. This creates favorable conditions for photosynthesis;
- They produce light of the required brightness, which is their feature;
- Such lamps consume much less energy than conventional lamps, which allows you to save a significant amount of money;
- They are characterized by a low supply voltage, which allows them to be installed close to a water source. In this case, they do not pose any threat to others;
- The plants do not dry out because they are practically not heated;
- Do not have a stroboscopic effect;
- These lamps do not generate ultraviolet or infrared radiation, thus creating safe conditions for the development of some seedlings;
- Made from environmentally friendly materials;
- They are completely fireproof;
- They have a long shelf life (on average this figure is 50 thousand hours), the light bulbs almost never burn out.
A large list of advantages explains the high popularity of this type of lighting.
Why LEDs?
It's no secret that plants need light for optimal growth and development. It can be created by a variety of light sources and lighting devices. But in this situation, it is necessary to remember that light is characterized by wavelength and spectrum. Incorrect selection of each of these two parameters can lead to the death of the flora due to disruption of the photosynthesis process and stimulation of other pathogenic mechanisms inside plant cells. Today, the most optimal type of lighting for flora grown in home and industrial conditions is LEDs, namely LED strips.
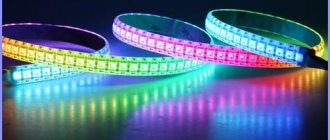
LED Strip Light
LED products have a lot of positive aspects, among which it is worth highlighting the following:
- low power consumption;
- beautiful and aesthetic light;
- the opportunity to make a lamp with your own hands;
- high-quality luminous flux;
- the ability to install the product on any surface, be it a glass shelf, a balcony window sill or a wooden shelf;
- the ability to select diodes according to the emission spectrum;
- simple installation, which is carried out due to the presence of a self-adhesive base on the tape;
- long service life;
- LED strips can produce light of different colors.
Externally, the LED strip resembles a rubberized narrow base, on which light sources - LEDs - are mounted on one side. They are located from each other at the most optimal distance so that the illumination they create gives a bright and uniform light. All electrical components of the tape are insulated, and some models have a protective layer that prevents moisture from penetrating inside the product. Waterproof LED strips will be the optimal solution for illuminating any plants.
LED flower lighting
But here it should be remembered that when choosing an artificial type of illumination of flora, you need to pay special attention to the spectrum of the light source
How to make a phytolamp and what you need for it
You will need to be patient here. To avoid mistakes, take your time and carefully follow step by step.
Preparation of materials
To make a phytolamp with your own hands, prepare in advance:
- LEDs or LED strips of the required quantity and required colors.
- The power supply (driver) is 12 volts, with the required power, which we have already calculated (the power of all lamps).
- Connecting wire and connector. You can use a block from an old mobile phone charger. Check that it is working. There should be no difficulties with soldering the wires to the driver and charger unit; there are two ends here and there. To check, you can temporarily wrap the charger body with electrical tape, then tighten it with glue.
- You will also need an aluminum profile or PVC sheet 20 by 20 cm and 2 mm thick. Sold in construction stores. Aluminum profile is better. We will tell you how to make a body from such a profile with your own hands in the next chapter.
In addition to PVC or aluminum sheets, regular plastic or polycarbonate is also used. But the last two materials are the most unreliable; the diodes will quickly burn out.
How to make an aluminum case
Experienced gardeners recommend using aluminum when assembling a phytolamp with your own hands. The lamp should ideally operate 12 hours a day. More often during those hours when there is no sun. Then the seedlings will grow stronger and bloom. But if the LEDs do not have adequate cooling, they will burn out and you will have to waste time on repairs.
Choose an aluminum profile depending on the area of the illuminated surface and the location of the internal electrical parts (number of LED contacts, driver size, etc.). For convenience, we recommend a U-shaped profile.
We drill holes for the diodes and insert them.
Or we glue the LED strip and make two holes for the network power wires.
We choose a special thermally conductive glue. There are a lot of them now.
We recommend using two brands.
- Kafuter K-5204K. Attaches in 10 minutes, completely hardens within 24 hours. A tube of 80 grams costs from 400 to 700 rubles.
- Fujik Heatsilk Compound. Its main advantage is that it sets in half an hour, and completely hardens in an hour. A tube of 20 grams costs from 100 to 200 rubles.
They have high thermal conductivity, hold glued parts tightly and do not dry out in a tube or syringe, unlike many analogues. You can also use automotive sealant if it is not possible to purchase glue. Judging by reviews on the Internet, it holds LEDs no less well.
LED connection
Now we connect the circuit. We chose the so-called serial connection. It allows you to connect a large number of diodes at the same time because the current remains constant. A parallel connection is worse in many ways.
For such a connection, we need to determine the plus and minus of the diode. Take it in your hand and take a closer look at the contacts inside the cone: the small one is the positive contact, the large one is the negative one.
For clarity, we recommend watching the video:
The electrical part of the phytolamp is assembled according to the following diagram:
We connect the first contact of the driver to the plus of the diode, the minus of the diode to the plus of the next one, and so on until the circuit returns back to the driver
In this case, it does not matter which of the two driver contacts to connect the diodes to
The connection inside the case will look like this:
Now let’s check if our phytolamp is working. If all is well, all that remains is to install the lamp in the place you need.
Installation of phytolamp
There are a lot of options for installing a phytolamp; on the Internet you can find instructions for every taste. We will give two examples: how to fix it above a window sill and how to assemble a rack with your own hands.
To hang the lamp over your seedlings or flowers, attach two loops along the edges of the body. You can purchase, for example, cable clamps:
Now we hang it above the windowsill. For suspension, you can choose small cables:
More details in the video:
If you want to make shelves for seedlings with your own hands, there are dozens of versions on the Internet. Shelves can occupy the entire room:
Or a modest corner:
There are creative ideas:
Assembling any of these racks is usually not very difficult.
If you are not confident in your abilities, check out these two instructions:
LED bulbs
Lighting seedlings and seedlings with LED lamps is considered an ideal supplementary lighting option. The spectral range of such lamps has all the necessary colors, unlike fluorescent and sodium lamps. LEDs do not get hot and will not burn leaves like incandescent bulbs.
For seedlings, it is best to take light bulbs marked LED grow or phytolamps. They are optimal for supplementary lighting of seedlings. The design of LED devices is convenient to use. There are tapes that are easy to stretch at the desired distance from the plant.
LED characteristics:
- The efficiency of assimilated radiation is 99%;
- amount of light output - 100 Lm/W;
- operating life - 100,000 hours;
- electricity consumption - 1 W/hour per 1 diode.
Lamp frame design
The location of the LEDs depends on the width of the surface on which the seedlings will stand. If this is a window sill less than 25 cm wide, they can be mounted on one ruler, if larger - on two or even three.
ElevatorForumHouse Member
The ruler is a piece of aluminum profile 100 mm shorter than the window sill.
It is important to position the LEDs evenly, and given that each emits a light cone with an angle of 70-120 degrees, so that the projections of these cones slightly overlap each other, as in this diagram by our user with the nickname Liftanuty.
The profile width is calculated based on the fact that for high-quality heat removal from one one-watt LED, 25 sq. cm of surface area is needed.
A symmetrical U-shaped symmetrical profile is best suited for LED strips. Along its edges you need to make stops with a height of 1 mm.
The rulers must be secured in the frame with screws or blind rivets.
Plant lighting placement options
To increase productivity and save space for seedlings, multi-tiered racks are built. A regular frame with shelves is made, a screen or fence is made of foil to ensure round-the-clock operation without disturbing the people in the room.
Another option is sets of miniature LEDs that are powerful enough to provide individual lighting for each pot of crops. Such point devices can simultaneously serve as decorative night lights.
What are the requirements for the backlight mode?
The additional lighting mode determines the following characteristics:
• duration of additional illumination;
• lighting intensity.
Backlight sources are not turned on all day, most often 5-6 hours a day. To increase daylight hours for seedlings, 2-2.5 hours in the morning before sunrise and the same amount in the evening after sunset are enough. In cloudy weather, additional lighting may be required throughout the day. It must be taken into account that the favorable length of daylight hours is different for each crop. Tomato seedlings are the most light-loving; they need 15-17 hours of light; peppers and eggplants need 11-13 hours.
At the beginning of growing seedlings, the lamp is placed at a distance of 12-14 cm. As the seedlings grow, it is brought to 25 cm. The illumination level of the seedlings should be 6 thousand lux or differ slightly. It is measured with a special device, a luxmeter.
Checking LEDs with a tester
Checking the LED with a multimeter
You can determine the performance of LEDs for phytolamps using a tester. The verification algorithm is as follows:
- Setting the tester to the “breakage test” position.
- Touch the terminals with the probe. Red is placed on the anode, black - on the cathode.
- When checking, the diodes should light up. Defective ones will not light up.
- When changing the polarity, the screen should remain one.
Also, testing on a multitester can be carried out through the transistor sockets. The holes on the left of the anode are placed in sockets E, the cathodes - in C. For the holes on the right - vice versa.