Preventive measures for long-term performance of the hood
In order for the air filtration structure to serve as long as possible and without major breakdowns, it is necessary, first of all, to follow the operating instructions, treat household appliances with care and care for their components.
- Avoid heating the empty stove under the hood, especially an open fire; these experiments can end sadly.
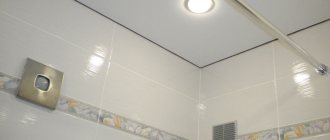
- The system should be mounted above a gas stove at a height of 70-80 cm, and above an electric stove - at 60-70 cm. If installed lower, deformation of the elements is possible, and when suspended above this range, the efficiency will be weak.
- Turn on the device a few minutes in advance before heating the burner and turn it off a quarter of an hour after cooking, then the elimination of odors and fumes will be especially effective.
- Clean and rinse the metal grease trap every 3-4 weeks. Change disposable filters every six months or more often, depending on the intensity of use of the hood. Failure to comply with this condition will result in oil particles penetrating inside the engine and settling on structural elements, leading to overheating and engine failure.
- Start the speed mode from the first stage, gradually increasing. Use the maximum speed to a minimum to prevent premature engine wear.
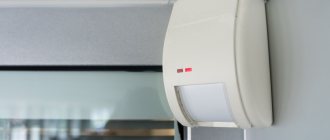
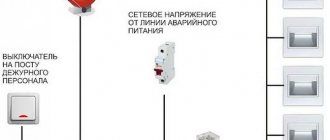
- Provide additional protection against voltage surges in the electrical network. Of course, the design of the hood includes a fuse, but it cannot always cope with network instability. An additional relay will help solve this issue, which will turn off the power supply during voltage surges.
Voltage relay
As you can see, a kitchen hood is not the most complex electrical appliance, and minor repairs can be done at home, with basic knowledge of electrical engineering and the necessary tools. Most problems do not require serious intervention, but if the cause of the malfunction could not be determined on the spot and you cannot repair the hood yourself, then you should resort to the services of craftsmen and service centers.
Fan installation
Before you start installing a fan in a bathroom or toilet, we consider it necessary to convey to you one fact.
In fact, fines for unauthorized installation of a fan are issued extremely rarely, so when choosing between the aroma of a neighbor's sewer and installing a fan in the toilet (bathroom), most people prefer the latter option.
Installation of an axial fan according to the “light bulb-fan” scheme
This scheme will be of interest to those who want to know how to make ventilation in the toilet quickly and without unnecessary bells and whistles.
- Remove the ventilation grille.
- Clean the exhaust duct of debris and dust. If the hood is installed after finishing work, on a tiled wall, we recommend that you do not screw the installed fan with self-tapping screws, but glue it using polymer glue or plumbing silicone. It is best to buy a fan with a decorative grille with latches - this way you will not have visible holes for fasteners.
- Apply glue to the flange and connect the surface of the fan and the tile for a few seconds. We tear it off, wait about a minute, and then finally glue it.
- It is impossible to do open wiring in rooms with high levels of humidity, so before connecting the wire you need to hide it in a corrugated sleeve or box.
- We connect the fan according to the simplest scheme, which involves turning on the light and the fan simultaneously. To do this: — turn off the power supply; — remove the lampshade from the lamp, disconnect the light bulb. We clean the leads of the wires going to the light bulb and fan. We connect the wiring through the terminal block. Twists are not recommended. — connect the wires to the fan terminals. Directly, if your equipment is powered from 220V or through a power supply if you bought a model with a low-voltage electric motor.
- We cover the wires with a decorative grille. If you did everything correctly, then when you press the switch key the light and fan will turn on.
Before you make a hood in the toilet according to this scheme, you need to know about its “weak points”. Since the connection is made through a light bulb, you will have to use a two-core cable (phase-zero). You can ground the equipment only if you run a separate wire between the “ground” of the fan and the “ground” of the outlet or switch.
Installation of an axial fan with built-in delay timer
For those who want to make ventilation in the bathroom, we recommend purchasing a model with a built-in timer. The scheme of its operation is as follows: when the light is turned on, the hood starts working. When a person leaves and turns off the light, the delay timer starts (from 2 to 30 minutes) and the fan continues to extract moist air.
Below is the installation procedure, for those who do not know how to install a hood in the bathroom according to this scheme.
- We make grooves or, if the bathroom is already finished, we lay plastic boxes for open wiring.
- Remove the decorative (front) cover of the device. We pass the wires (neutral and phase) through the fan housing and the holes of the built-in terminal block, but do not secure it yet.
- Set the delay time. There are models where the settings are made from the remote control, but in inexpensive models this parameter is set using a slotted screwdriver on the TIME regulator.
- We screw the case to the wall with self-tapping screws or sit it on silicone sealant.
- We clamp the wires in the fan terminals. We connect the stripped leads of the wires from the fan and the light bulb through the terminal block. We pull the wiring from the light bulb to the switch. Before making a hood in the bathroom, decide where the switch will be located. For reasons of convenience, we recommend moving it to the inner wall of the bathroom, but the degree of protection of the shell must be at least IP44.
- We lay the cable in the box.
- Close and secure the decorative fan cover.
Reasons why the light went out in the apartment
And then check the voltage supply directly with an indicator or light bulb. How to do it?
6.
We completely de-energize, strip the wires near the chandelier, and touch one wire with the threaded connection of the lamp, and the other wire with the central contact of the lamp itself. This must be done extremely carefully so as not to short the wires and you will not get an electric shock.
You only need to hold it by the glass!
Turn on the power at the plug and at the switch. And again we look to see if the light has appeared.
Instead of a light bulb, you can use some kind of device with a plug (hair dryer, table lamp, iron), and touch the ends of the wire with the pins of the plug. The diagram shows in large numbers the order of checking for finding a light fault.
7. If there is still no light, then the problem is either a broken wire under the ceiling, or in the electrical box, or a damaged wire in the ceiling itself or under the plaster, and here you can’t do without an electrician with a special device.
advocatus54.ru
Business card.
You can call the management company at the numbers indicated on the receipt: Emergency phone numbers on the receipt, example If you are in another city, you need to act in the same way - look for a specialist through the Internet, newspapers, call an emergency response.
Attention However, the emergency service will help only if the problem occurs before entering the apartment.
The rest is for an additional fee.
If it is in the OFF position, it means that the electricity consumption has reached the threshold value and the machine has turned off the power.
Where to call if the lights in the apartment are turned off - service numbers and possible reasons
What to do if the power is turned off due to long-term non-payment? It is required not only to quickly process it, taking into account the accrued penalty, but also to submit a receipt to the settlement center.
A power outage is possible when energy is used without installing a meter. Or when connecting special devices that interfere with the correct operation of the meter, which distorts its readings to a lesser extent. In both the first and second cases, such actions are considered theft.
When disconnecting for economic reasons, the supplier must warn the consumer in writing 1 month before the expected event.
Turning off the lights without notification is possible only when the tenant is caught stealing “red-handed”, there are witnesses, and a report has been drawn up. A power surge often occurs due to the operation of a large number of household appliances, when a refrigerator, washing machine, vacuum cleaner, electric kettle and microwave are turned on at the same time.
Can the electricity go out in one apartment?
Homes may also lose power without warning. The light should turn on after the disaster ends.
Electrical wiring faults. If the condition of the electrical network is unsatisfactory, the consumer has the right to turn off the electricity. The decision is made by Rostechnadzor or the housing inspection.
The consumer must be notified. One of the reasons for the lack of light is a short circuit. Problems with the machine.
It can cut out plugs if the device is incorrectly selected.
Short circuit. It can short-circuit both a section of electrical wiring and some device.
How to find damage, malfunction: lights go out (disappear) or sockets are knocked out
The contacts may also break when coming out of the box where the switch is.
5. The light still doesn’t turn on, but the bulb, plugs, and switch are intact.
Then you need to remove the cap under the chandelier, or the entire lamp, leaving the wires under the ceiling. And then check the voltage supply directly with an indicator or light bulb. How to do it? 6. Completely de-energize, strip the wires near the chandelier, and touch one wire with the threaded connection of the lamp, and the other wire with the central contact of the lamp itself.
This must be done extremely carefully so as not to short the wires and you will not get an electric shock.
You only need to hold it by the glass! Turn on the power at the plug and at the switch. And again we look to see if the light has appeared.
Instead of a light bulb, you can use some kind of device with a plug (hair dryer, table lamp, iron), and touch the ends of the wire with the pins of the plug. 7.
If there is still no light, then the problem is either a broken wire under the ceiling, or in the electrical box, or a damaged wire in the ceiling itself or under the plaster, and here you can’t do without an electrician with a special device.
What to do if the lights go out and the apartment loses power?
significantly higher than between phase and neutral (zero) 220 V introduced into apartments. Never insert screwdrivers, nails or other metal objects into fuses, even momentarily. If there is a short circuit in the network, then in the best case, such tests will blow the following fuses and instead of one group (apartment), the lights will go out in all groups (apartments).
But it could end worse - the blinding light of the electric arc will burn your eyes.
For safe wiring repairs, contact a professional technician.
To order or place an order, please contact our operator immediately as soon as the power goes out. If so, call us, we will arrive within an hour. When performing any electrical work, ensure that the screws and nuts are tightened tightly to correct contacts in screw connections.
If there are no washers, you need to add them. If the contact is poor because the wire is oxidized, dirty, or the insulation has not been thoroughly removed from it, you need to strip the wire.
What to do if there is no electricity in the apartment
Unscrew the lamp and replace it with a new one.
Turn on the lamp: if all lamps are on, the repair is complete. If the lights have gone out in several rooms, look in the switchboard.
Everyone is familiar with the expression “blown plugs,” as fuses were often used in twentieth-century construction. Determine what position the circuit breakers are in. If one of them is disconnected, in the room where the electricity is lost, unplug all devices from the sockets, and then turn on the machines.
If it doesn’t turn on or only with a slight bang, you urgently need an electrician.
If you have lost electricity, the listed measures do not help, and you do not know what to do, call the specialists of our company.
We will help every resident of Moscow and the region and guarantee: High
The light is gone! What to do?
Here you can easily calculate your machine in the dashboard.
Carefully, with one hand, without touching other wires and parts of the electrical panel, turn on the machine. Everything is fine? You don’t have to read any further and like and repost the article. How to turn on machines correctly.
You need to turn off all the machines (don’t touch the neighbors’ ones), and turn them on one by one, starting with the most important one, in this way you can calculate the problem line, leaving the problem machine turned off until the causes are eliminated.
Leaving light on other lines. Option #2: You have old black machines, how can you tell where yours are?
Typically, the machines in such panels are arranged in numerical order, in groups of two or three for each apartment. Old Soviet-style machines do not indicate that they are “off” in any way; they need to be overloaded, that is, turned off and on.
Figure out where yours are, and feel free to turn them off and on again! Problem solved? Likes, reposts, ovations.
You have old black machines, you turn them off/on and nothing happens.
Find your electric meter and visually determine whether it is in operation, as well as the wires coming from it and the wires leading from it, by which you will recognize the circuit breakers connected to them.
Check the presence of voltage at the terminals of the input and output circuit breakers, again using an indicator or a multimeter.
Instead of a multimeter, you can use a test lamp.
When the lamp is connected to phase and zero, it should light up. In modern apartment buildings, protection devices after the electric meter are installed separately in each apartment in the distribution board at the entrance.
So, having made sure that your meter is working, and there was no electricity, we move on to the next steps. We look for circuit breakers or “plugs” installed after the electric meter, and look at their on or off state.
If the switch is turned off, which can be checked with an indicator (upper terminal - the indicator lamp is on, lower terminal - the indicator lamp does not light up)
The light went out in the apartment, who should I call?
Useful services and facilities. You can find out about power outages in your home related to disruption of landscaping or excavation work on the Our St. Petersburg portal. Something strange has been happening to our electrical system for some time now: suddenly the lights go out throughout the entire apartment, they are off for 1-3 minutes, then everything comes back on.
The plugs are not knocked out, everything turns on and off by itself. They called electricians from the Housing Office, these idiots proved to me that everything seemed to be ok in the panel, which means that the problem is in the devices, but the problem is NOT IN THE DEVICES!
Everything turns off in the morning, during the day, and in the evening with a completely different set of plugged in different sockets, while sometimes, for example, 2 irons, a washing machine, a microwave, a dishwasher, lights throughout the apartment, a computer and a laptop work - everything works fine.
The neighbors don't seem to have a similar problem. This morning the electricity appeared and disappeared 6 times in a row - yes, no, no, no, but only one TV and lights worked in two rooms.
There is no light in the apartment: what to do if it is turned off for non-payment
What to do if the power goes out without warning?
Check if the machine is turned on.
Pay attention to the state of traffic jams.
If replacing the plugs does not bring the desired result, call the emergency service.
In some cases, the lack of light in the apartment is due to the fault of the specialist who installed the electrical wiring.
If aluminum electrical wiring was replaced with copper in your apartment, then the connections should in no case be made with twists.
Important! These metals oxidize when interacting with each other, and contact between them disappears.
Why does the light often go out in the house?
This is due to large-scale power outages. Why does this happen, how to deal with it?
Source: https://dengi-pod-raspisku.ru/prichiny-pochemu-propal-svet-v-kvartire-85244/
What does a kitchen hood do?
The apartment has adopted all energy saving measures, and there are only two channels that carry out air intake and inflow. Most often, the location of the first is the wall of the bathroom or toilet, and the second is the kitchen hood. Often, residents begin to notice that in the bathroom the ventilation is blowing into the apartment. What is this connected with? The answer is simple - modern kitchen hoods are high-power appliances that have a purpose: to extract the steam generated from cooking on the stove. When the hood is not working, air exchange occurs normally, but when it is turned on, the total amount of air is taken from all rooms. This leads to a reverse draft effect in the outflow channel located in the bathroom. When the natural flow into the apartment is limited, the air will find a way out from where to blow into the home - from the ventilation.
A powerful hood can cause poor ventilation in the bathroom.
Sometimes such a problem can arise even with normally functioning ventilation in the bathroom, and all the odors from this combined system reach you. The reason for this is the lack of air in other rooms.
Restoring the air duct with this problem will not require you to perform major repairs. While the kitchen hood is running, open the door or set the window to the “ventilation” mode. This will allow air to circulate normally throughout the room, and there will be no problem with backdraft. Check this in the same way as you checked the ventilation.
Possible problem options
If it is determined that one outlet is not working, then you will need to check all those in the room. If they are connected in series, and not from separate lines, and only one does not work, then this is the simplest reason - the contact has loosened, the wire has broken off. If the wire is of poor quality, then when loaded in a weak spot it will burn out due to sparking under the insulation. This reason is detected with a multimeter.
When, when connecting a powerful electrical appliance, the circuit breaker in the panel knocks out, it is possible that it does not have enough amperes. Each machine indicates the maximum current strength at which its shutdown mechanism is triggered. If a powerful electrical appliance (microwave oven, boiler, stove) is supposed to be used for this outlet, then a circuit breaker of the appropriate power should be installed on this line. The reserve is also not recommended, since during intensive operation of the electrical appliance the machine will not turn off, but the wiring will heat up. As a result, the insulation melts and the contacts burn. In the best case, the entire riser in the house will be de-energized; in the worst case, there will be a fire.
Sockets don't work, but there is light
A common reason why there is light, but the sockets in the apartment stop working is an unacceptable load on the point. A powerful electrical appliance will work until it is turned off, but the next time it is plugged into this outlet, it will not turn on. This means that the contacts inside the socket have oxidized. This happens for the following reason: when heated, all materials expand, and when cooled, they contract, as a result of which the bolt fastening weakens. When the wires are heated, there is contact and the device works. When there is a break in operation, the wires cool down and the contact disappears. The next time you turn on the device does not work - the problem is in the socket. Now that the lights are on and the sockets are not working, then what should you do?
You can remove the socket cover, tighten the contact, and the problem will be solved. But not for long if the same device is used in the future. In this case you need:
- replace the socket with suitable current parameters;
- replace wires with a large core cross-section;
- install a circuit breaker on the line equal in current strength to the connected electrical appliance.
The outlet may not be receiving power from the distribution box. They usually twist wires with soldering or welding. There are models of distribution boxes with contact groups, and in them the same problem occurs as in a socket - loosening of bolted connections.
Another reason is the poor quality of the product. Cheap sockets work for a year, at best two, if they include lamps, an iron or a weak consumer. Poor quality means brittle plastic housing, poorly designed wire clamps, and soft metal plug contacts. In such sockets, after five to eight turns on, the plug will dangle and the contacts will spark. After a few sparks, the outlet stops working.
The sockets do not work, but there is a phase
After checking the retro socket in the new apartment with a multimeter, it was discovered that there was a phase, but the connected electrical appliance did not work. This indicates the absence of “zero”. You need to remove the housing cover and check the connection. It is possible that you only need to tighten the bolts, and if the wire is burnt out, then the cause should be identified. You can strip the end and reconnect it, but this method only solves the problem temporarily if the cause was a power surge.
If the contacts in the socket are normal: tightly tightened, not burnt, the insulation is not melted, check the junction box from which the line to the socket extends. We eliminate the obvious cause, but when everything is in order in the box, but there is no voltage in the socket, then we check the circuit breaker in the panel. If it is turned on, then we test the line with a multimeter.
When a multimeter detects two phases on both contacts of the socket, the electrical appliance plugged into it will also not work. In this case, no short circuit occurs, just one phase “walks” in the circuit. The reason here is banal - the socket was connected by an amateur. In this case, you need to find the neutral wire and connect it correctly. It is possible that in a three-core cable different wires were connected to the “zero”. The phase is connected correctly, but the other two wires are connected incorrectly.
Only one socket is not working
If a group of sockets operates from one line, then if the wiring at the input is faulty, all sockets will not work. But if in this case only one does not work, then the reason lies only in this outlet. It needs to be disassembled, the contacts connected or repaired.
When each outlet in a room is connected to a separate line, and one of them does not work, then the reason must be looked for either in the outlet or on the line. If everything is fine with the outlet, check the junction box. When the distribution box is also in order, we check the circuit breaker in the panel.
When identifying a problem in the wiring using a multimeter, you should determine whether the brand of wire corresponds to the current consumed at a given point. The issue is resolved either by the fact that powerful electrical appliances will not be connected to this outlet, or by replacing the wiring.
All sockets in the room do not work
If all sockets are connected in parallel, then if the line breaks, they will all not work. The matter is more complicated when it is not clear why the lights are on, but the sockets in the apartment do not work, and each has its own separate line. Here you need to check first of all the central distribution box, from which the individual lines depart. They can go to other boxes, from which branches extend to a group of sockets. If not one group, but all sockets do not work, then it is logical that the problem is in the central distribution box. This is provided that everything is in order in the input panel. A new, more reliable junction box may be needed.
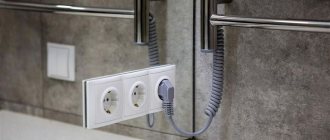
Installation of electrical wiring in the bathroom
In order to clearly understand the sequence of actions, you need to draw a lighting plan in which you indicate the location of each of the lighting fixtures.
In conditions of high humidity, it is necessary to use hidden wiring.
The bathroom is a room with high humidity, so all electrical wiring must be carefully hidden, for which gating is used
Stage #1 – calculate the lighting power
One of the characteristics of the luminous flux is its brightness. It is measured in lumens. Brightness depends on the type of lamp used and its power. The standard illumination for a bath should not be lower than 50 lumens (lm) per square meter. Source of information – SNiP 23-05-95.
A bright and light room needs less lighting, especially if you also take into account the light fluxes that will be reflected from the walls
By multiplying the standard value by the area of the room in square meters, we find out the need for lumens for the bathroom. Then you should decide on the type of light bulbs to be used. There is a relationship between the brightness indicator and the energy consumption of different light bulbs.
Indicators by type of lamps:
- Incandescent 25 W – 200 lm;
- LEDs in the 40-80 W range have about 6000 lm;
- Halogen at 42 W – 625 lm, and at 70 W – 1170 lm;
- Luminescent 40 W – 2000 lm.
To determine the wattage required to light an entire room, divide the total number of lumens by the number of lumens produced by the watt of the light bulb you need. Next, you can clear out the need for lamps.
But this luxurious bathroom, of course, could use additional lighting, especially since there are living plants here that also need light
Stage #2 – select the cross-section and type of wires
For the system to be reliable, you need to correctly calculate the load on the network and the required wire cross-section. To do this, we sum up the power of all lamps that will be used in the room, add to them the devices that are in the room and require electricity: washing machine, hair dryer, etc. We divide the result by 220. This way we get the load on the cable in amperes.
Aluminum or copper wires can be used for wiring, but one type of wire cannot be twisted with another.
Now you can select a cable with a cross-section suitable for the resulting load. For our type of premises, we need an aluminum cable with a cross-section exceeding 4 mm², but it is better to use a copper cable with a cross-section over 2.5 mm². Cables of different materials cannot be connected.
Stage #3 – installation work
The wiring should be hidden under the plaster, and the junction box should be installed in another room. Do not forget about the need to ground each device and lamp. It is also recommended to install a residual current device (RCD), which will prevent undesirable consequences in the event of a short circuit. Before starting installation work, check that the network is de-energized.
When laying cables, keep in mind that each of them must supply power to a specific system: separately to light sources and to electrical appliances. Each wire should be equipped with a circuit breaker. It is better to hide the wires themselves in corrugation. To ensure that the corrugated cable is securely fastened in the groove, each meter of it is secured with a small amount of plaster. The corrugated cable can also be placed in clamps secured in grooves. Electrical tape cannot be used as an insulator.
Corrugation has a whole list of amazing useful properties, but the most important thing in this case is its protection, which extends the service life of the wiring.
The cable is connected to the junction box, after which you need to make sure that all connections work properly. If all is well, you can seal the grooves.
When the wiring is already laid, you can install the lamps. If there are low-voltage lamps in the network, you will also need a power supply, which should also be taken to another room.
Why does the phase disappear and what to do in this case?
Modern housing has a high level of electrification. Therefore, faulty electrical wiring causes great inconvenience. External signs of electrical network failure:
- apartment lighting does not work;
- failure of the socket in one of the rooms or in the entire apartment;
- lack of light in an apartment building, as well as in one of the entrances or a group of them;
- lack of light in a private house or cottage.
The most common malfunction of this building engineering system is the loss of a phase of single-phase and three-phase networks. There is one fundamental reason for all these phenomena - a break in the current flow circuit. The reason is a break in the phase wire, as well as a break in the zero. The location of the break is determined using various techniques.
Socket faults
There are two main reasons why sockets fail:
- Mechanical damage usually appears immediately. Most often they occur when a plug that is not intended for it is forcefully plugged into an outlet.
- If the load capacity is exceeded, the outlet still works for some, and sometimes even for a long time. During this period, the conductive components heat up, after which the insulation and plastic structural elements begin to melt.
A failed electrical outlet can be easily identified by visual inspection, Figure 1. Sometimes this will require disassembling its mechanism.
Figure 1: External outlet damage due to overload
Lighting doesn't work
If there is no overhead light in one of the rooms, the check begins with the panel. There they control the machine to which the upper consumers of this room are connected.
The following options are possible:
- the machine is knocked out due to an inrush current, then the normal functioning of the network is restored after it is turned on;
- contact failure;
- failure of the machine.
Contact failure is detected by visual inspection. The faulty machine is replaced with a new one. The serviceability of the machine means a break or short circuit in the room wiring. Their location is localized by sequentially checking the presence of phase and normal voltage on all circuits.
No light in an apartment building
The failure of one of the phases, which occurred in the input panel of the house or at other group levels of the network (access panel), is externally manifested in the following:
- there was a blackout in several apartments that are connected to the same feeder;
- The lighting in the rest of the apartments works fine.
The main cause of the malfunction is a direct break in the neutral wire or a phase imbalance preceding it. The imbalance is accompanied by uneven current consumption by individual electrical receivers and an increase in the current of the neutral wire, which leads to the rapid burnout of one of the contacts of its circuit.
Figure 2. Method for detecting zero burnout
A fault in the neutral wire is easily detected by connecting a voltmeter between the working neutral wire and the grounding bus of the distribution board according to the diagram in Figure 2.
The peculiarity of this malfunction is that it cannot be eliminated independently. When it appears, you should contact the electricians on duty responsible for this network.
No phase in one of the rooms
The absence of a phase in one of the rooms means that its sockets are de-energized. Before starting the test, it is necessary to determine the connection diagrams of the sockets. In practice, two options are used for supplying voltage to sockets, Figure 3:
- daisy chain connection;
- star connection (individual lines).
With a daisy chain connection, you need to go from the farthest outlet towards the distribution box and check each of the outlets sequentially. If there are separate lines, you should immediately begin checking the distribution box with a visual inspection and a probe.
Rice. 3. Socket connection options
Short circuit of the electrical receiver
Another common malfunction is a short circuit of any electrical appliance that is connected to outlets. In appearance, it is very similar to a wiring short circuit. To eliminate uncertainty, remove all plugs and then check the voltage. If it is present, a conclusion is drawn about the normal state of the room wiring.
Then all devices are connected in series and the one that knocks out the machine is considered faulty. Before connecting, it makes sense to check the input resistance of the power circuits of this device with a tester, which is switched to ohmmeter mode.
Sometimes a failed device is identified immediately due to the characteristic sound that is accompanied by a spark or even a flash.
Lack of light in a private house
When a private house is completely blacked out, the check always begins with a visual inspection of the input device, the functions of which are performed by a single-phase and/or three-phase circuit breaker, often supplemented by a voltage relay. If, when the machine is not knocked out, no voltage appears in the network when turned on, then two options are possible:
- there is no voltage at the house input (monitor the presence of voltage at the input of the machine);
- The contacts of the machine itself are faulty.
Knocking out of the machine after turning it on indicates a short circuit, which may be in the wiring itself or in one of the electrical appliances connected to the network. To eliminate uncertainty, it is advisable to disconnect all devices from the network and turn on the machine again. When the light appears, you need to start sequentially turning on previously disconnected devices.
Electric stove failure
An electric stove is a powerful consumer and is often connected to a three-phase network input. A special feature of the stove as a consumer is that its burners are connected to different phases to equalize the load on the network.
When the stove is completely turned off, the network is checked towards the panel. If some burners stop working, they conclude that a phase has been lost, and checks are performed on those circuits that relate to the corresponding phase.
Failure of the heating element
Recently, tubular electric water heaters (TEN) have gained great popularity. Monitoring of a failed heating element is carried out using an indicator screwdriver.
First you need to make sure the network is working properly, and then check the heating element coil. The element is considered operational only when, when the machine is turned on, phases appear at the inputs of the tubes and are absent at the outputs.
Washing machine malfunctions
A washing machine contains two main electrical components: the motor and the heating element, which represent potential points of failure. Checking the serviceability of the unit and identifying a failed unit is carried out according to the rules described above.
In the case of powerful three-phase machines, a sign of the loss of one of the phase potentials is a decrease in the rotation speed of the electric motor shaft, sometimes accompanied by a characteristic hum. Additionally, due to voltage imbalance, the windings heat up and accelerated aging of the insulation begins.
Single-phase networks
Loss of a phase in this case means de-energization of consumers that are powered by the feeder belonging to this phase. There are no fatal consequences if the network is properly implemented with normal protection. To correct it you should
- localize the location of the fault;
- find out the reason for the refusal;
- restore network functionality.
When performing repairs, you should not only use high-quality materials and components, but also pay additional attention to the danger of two phases entering the outlet at the same time.
Three-phase networks
The loss of one of the phases of a 3-phase network leads to the cessation of operation of some consumers and uneven load of serviceable circuits. At the same time, the current of the neutral wire increases sharply, which in severe cases leads to its burnout.
Measuring equipment and probes used
Electrical wiring has no moving parts. Therefore, the most reliable data on its condition can only be obtained by instrumental methods.
Monitoring the network and searching for the fault location is carried out using an indicator screwdriver and a tester. A screwdriver allows you to distinguish a phase wire from a wire with zero potential and check the presence of line voltage on the phase wire.
When the tip touches a serviceable phase wire, provided that one of the fingers lies on the contact of the handle, an orange neon light comes on, Figure 4.
To control the voltage, touch is made at any convenient point, for example, on the contacts of a switch.
Rice. 4. Checking the phase with an indicator screwdriver
The tester allows you to determine the actual value of the mains voltage. To measure, probes simultaneously touch the bare parts of the phase and neutral wires. Indications when measuring phase voltages should be 220 V or differ from it by no more than 5 - 10 V.
Techniques for finding a break point
Restoring the normal functioning of electrical wiring begins with localizing the location of the fault and identifying its cause. For three-phase and single-phase networks, the procedures are the same.
They are carried out by eliminating known good parts by checking the presence of a phase.
Then the potentially faulty area of the network is divided into smaller parts, each of which is checked separately.
Great help at the first stage of the search is provided by the fact that the so-called upper (for chandeliers and other ceiling lighting devices) and lower (sockets) apartment wiring inputs are made from different phases. Therefore, a non-working upper light while the TV is functioning immediately indicates that the phase for organizing the lower input is working.
When checking, use an indicator screwdriver and a tester. When monitoring the overhead light, to access the contacts, you should unscrew the bulb and exercise some caution. In this case, there is a high risk of short circuiting the cartridge contacts with the tip of a screwdriver or the tips of the tester wires.
Localization of the fault location
The main means of localizing the location of a circuit break is sequential monitoring of its components. It is taken into account that the electric current flow circuit always contains 2 wires.
With a daisy chain connection, checks begin from the furthest one and are carried out towards the junction box. For cases of direct connection of the consumer to the wiring without a loop, you can immediately proceed to monitoring the junction box with checking the phase and neutral conductors.
When checking phase wires, visual inspection of individual circuit components is widely used. The malfunction often manifests itself in the form of soot and traces of melting of the plastic housing or polymer insulation, Figure 5.
Rice. 5. Internal breaker damage
To detect the loss of zero, for example, in a socket, if the phase is working, it is enough to connect a light bulb that will not light.
Source: https://www.asutpp.ru/pochemu-propadaet-faza.html
Checking traction
To check the draft, it is necessary to ensure air flow by opening the window slightly. Apply narrow strips of paper to the ventilation duct grille. If the strips adhere to the grille, then the ventilation is functioning normally. But if the paper does not sway, or, on the contrary, deviates from the hood, then there is a reverse draft effect. We will identify the causes and eliminate them.
Measuring draft with an anemometer
Using an anemometer, we measure the speed V (m/s) of the air flow passing through the ventilation duct. The air flow through the ventilation system channel is determined by the formula: D = V x F, m³/h, where: F is the cross-sectional area of the channel, m². After this, the calculation made is checked for compliance with standard parameters.
Checking the functionality of ventilation in the apartment
The ventilation system is a public communication that extends through all floors of the house. Therefore, the management company is responsible for maintenance and performance. Its representatives, according to legislative norms, are required to check the functionality of ventilation ducts twice a year. If any problems arise with ventilation in an apartment building, specialists will eliminate them using professional equipment.
If you suspect that the ventilation system is not working, you don’t have to wait for the technicians, but carry out a small check yourself. You need to proceed as follows:
- Open the kitchen window slightly.
- Place a thin cloth near the ventilation grille. If there is good traction, the paper should stick to the mesh. If this does not happen, the air exchange in the room is disrupted - the ventilation does not work.
What to do next
At the time of writing, the light in the bathroom is not on.
- Call the line from the box to the lamp.
- Despite the fact that aluminum leaves the box, a copper flexible wire comes to the lamp. (At this point, many will grin and say - you should have started with this, that you are fooling your head!) In addition, there is also a light bulb above the mirror above the sink. So, get to the place of this twist. To do this, cut a hole in the tile under the lamp using a crown. With any luck, the problem will be discovered.
- Tighten the wire in the plate. To do this: gouge the wall in the hallway until there is a hole in the slab into which the wires for the bathroom go. Using a hammer drill, drill into the ceiling slab where this wire should pass, and tighten the wires. But still, you need to get to the place of twisting, because the lamp above the mirror should also be on...
Why doesn't the ventilation work?
The humidity in your apartment has increased, it has become stuffy, unpleasant odors have appeared - it is clear that the room is poorly ventilated.
Here are the main reasons:
Plastic windows
If you recently installed plastic windows, this may be the problem. They practically do not allow air to pass through, making the apartment airtight. And ventilation without air flow does not function properly.
Install supply valves - they will constantly allow a small amount of air to pass through. Or simply open the windows more often and ventilate the apartment. The ventilation system will work more efficiently.
The windows are the same, there have been no changes in the apartment, and at some point the ventilation stopped working?
Blockage
You can check the vents that are high in the ceiling in the kitchen and bath/toilet yourself. Remove the grilles and evaluate the cleanliness of the air ducts. If the contamination is obvious and you can remove it yourself (with a rag, vacuum cleaner), remove it.
If something large is visible in the depths, most likely it is construction debris. Do not try to remove it - there is a risk of making the situation worse. Contact your management company (MC) or homeowners association (HOA). This is written below.
Is there a blockage? Or was there some junk that you removed? Now check if the ventilation is working.
Open any one window in the apartment. Take a sheet of tissue paper and hold it near the ventilation grill. If the leaf is attracted, then everything is working. It didn't work - the problem is in the ventilation shaft.
Neighbours
Have your neighbors recently renovated? They could have inadvertently blocked or completely blocked the ventilation hole.
They could also install a forced exhaust system by connecting it to a common exhaust shaft. This is a violation. They feel fresh and good, but you feel bad and stuffy, because your hood can’t cope.
Low temperature
If the house is not heated well enough in winter, your apartment may be cold. This in itself is bad, and it also affects the ventilation system. Air “pulls” when there is a sufficient temperature difference, otherwise it stagnates.
The ventilation system is incorrectly designed
In your house, do all the neighbors complain about the same symptoms: stuffy, humid, smells bad? Then it is clear that the ventilation in the entire house does not work as it should.
In cases with plastic windows and easily removable blockages, you can solve the problem yourself. In all other cases, contact the management company or the HOA (depending on who manages your house).
general information
The appearance of two phases is determined using special devices - voltage indicators and voltmeters.
In most apartments/houses the wiring is hidden. As practice has shown, it is more vulnerable than those installed openly. The latter will not be pierced by accident if it is necessary to hang a picture or a carpet. With hidden wiring it is more difficult. It is difficult to determine its location, because builders usually do not leave diagrams, and the equipment for such work is expensive.
Damage varies. Often an apartment/house or some separate room is left without electricity. In cases where circuit breakers are installed that quickly eliminate short circuits, this is not noticeable. If they are absent, the malfunction will be manifested by the appearance of sparks and smoke.
While such damage can be prevented, there is no protection against damage to the junction box. There are several reasons for their appearance:
- The work on connecting the wires was done poorly.
- The junction has oxidized and collapsed.
- A connection has been made between the aluminum and copper wires. When exposed to moisture, the wires oxidize, resulting in breakage.
Such faults are easily detected by the smell of burnt insulation.
Break of neutral conductor
If there is a zero break, electrical appliances connected to the outlet will not work. Perhaps the voltage will disappear in other sockets.
If the breakdown occurred for this reason, then the solution is quite simple. It is enough to turn off the equipment from the network. What to do next:
- Identify outlets without voltage. At this stage, a voltmeter, test load or indicator screwdriver will be useful. You should not use a single-pole indicator - it is useless. It is prohibited to use an incandescent lamp as an indicator. If exposed to 380V voltage, it may explode and cause injury.
- Next you need to find the damaged part of the wiring.
If you cannot do the work yourself, you should contact an electrician.
Break of neutral conductor with short circuit to phase
If the neutral wire breaks with a short to phase, it is not enough to just turn off the electrical appliances. This will not eliminate the appearance of two phases.
Broken phase conductor
If the indicator in the socket does not show anything, there has been a break in the so-called phase. Its location is easy to determine. It is necessary to check the presence of phase in the junction boxes located between the electrical panel and the damaged socket.
Protection devices
Despite the presence of protective elements (RCDs, circuit breakers), many houses have fuses. If the fuse at “zero” fails, the second phase will go to the sockets.
It is easy to correct the situation if you find the short circuit. It is necessary to turn off the lights, unplug appliances and install a new fuse. If it breaks, the breakdown concerns the wiring. Otherwise, when the fuse is OK, the fault should be sought in the equipment.
Mains faults
Another reason for the appearance of two phases in an outlet is a network failure. More often this is a break in the neutral wire. It can break anywhere, from a substation to a panel in a multi-story building. At the same time, electricity will not be lost in the apartments. In particularly difficult cases, the voltage will rise to 380 V, which will damage household appliances.
Two phases in an outlet also occur due to a phase/neutral short circuit on the power line.
This is a dangerous malfunction, because even RCDs do not always have time to respond. As a result, a fire occurs.
Only electricians should search for and repair power supply faults.
Overvoltage has occurred
Two phases also appear due to voltage surges (increase or decrease) in the network. This manifests itself in the blinking of light, too bright or, conversely, dim light bulbs. An increase is especially dangerous, because the equipment cannot work fully or burns out.
How to proceed:
- Turn off the power supply to the apartment/house.
- Turn off the equipment.
- Turn off the lights (set the switches to the “off” position).
- Call electricians.
Why can't you act on your own? Firstly, the slightest inaccuracy in work can lead to tragic consequences. Secondly, electricity is connected only after a fault report has been drawn up.
Damp walls
Often two phases are a consequence of excess moisture. Damp walls can cause a short circuit. The neutral wire will either fall off or stick to the phase.
To eliminate the breakdown, you need to find the location of the short circuit. Then you will have to change the wires from the socket to the distribution panel
It is also important to get rid of dampness and prevent its further occurrence.