When designing houses, the mandatory presence of ventilation in utility rooms, kitchens and, of course, in the bathroom and toilet is taken into account. This is necessary to ensure natural air exchange in these rooms.
As for the bathroom and toilet, it is thanks to ventilation that the maintenance of normal air humidity is ensured, the timely evacuation of exhaust air and its replacement with clean air.
If the exhaust hood in the bathroom and toilet does not work well, then air stagnation is inevitable, which in the near future will result in the appearance of mold and mildew, and will also negatively affect the decoration of these rooms. An extremely unpleasant situation, isn't it? But what to do in this case and how to prevent it?
In this article we will talk about the causes of ventilation problems in the bathroom and toilet, and also look at the best ways to solve them.
How is the ventilation of the bathroom and toilet arranged?
Ventilation is, first of all, a whole system consisting of air channels and shafts. When designing it in a private or apartment building, stable performance is calculated with proper operation.
The ventilation device includes:
- A ventilation duct (ventilation shaft), which is a set of solid straight air channels and vertical shafts. The shaft and channel can be either round or square. A prerequisite for stable air movement is their cleanliness and integrity. There are also horizontal ventilation ducts, but their length should not exceed two meters, otherwise air movement will become difficult.
- A ventilation outlet is a hole in the wall of a bathroom or toilet that is connected to a ventilation duct. The size of the ventilation outlet opening does not necessarily correspond to the cross-section of the duct and is calculated based on creating the throughput of the maximum possible volume of air.
- Ventilation grille is necessary to protect the ventilation duct from debris getting into it, as well as from the possible entry of insects and rodents into the room. Made from plastic or metal. It has a decorative appearance, since its front part should fit into the interior of the room.
It is worth noting that ventilation can be natural and forced . The difference lies in the use of additional devices to mechanically create more thrust.
The dampest and most humid room in the apartment is the bathroom. Proper operation of the hood will not allow humidity to rise and, as a result, the formation of mold, dampness, or rust.
Additional devices are installed in cases where natural draft does not provide effective ventilation of the room.
Features of the operation of ventilation systems
Ventilation of premises in apartment buildings and private sector buildings can be ensured by proper arrangement of natural and forced ventilation. Let's look at these two types of systems in more detail.
Type #1 - natural ventilation
Natural is ventilation performed according to general standards. It is used in all standard apartment buildings.
The principle of operation is based on the law of convection, the essence of which is that due to the difference between the temperature inside the room and the temperature outside, as well as due to the difference in pressure, which is different outside and inside the room, the air is independently drawn into the ventilation duct.
The force with which the air flow enters the channel is called thrust. The air that goes into the ventilation makes room for fresh air.
Type #2 - forced ventilation
The main difference between forced ventilation, as mentioned above, is that additional equipment is used, namely household fans of various types (axial, duct or radial).
The operating principle is based on additional traction enhancement due to the rotation of the blades of these devices. Ventilation equipment is installed independently.
Forced ventilation in most cases is an independent improvement of natural ventilation. It must be carried out in compliance with the standards (in particular regarding fan power), otherwise such an installation may disrupt the natural ventilation system of the room in an apartment building.
It is strictly prohibited to block the ventilation hole in the bathroom or toilet. Overlapping may be justified when installing forced supply and exhaust ventilation
Depending on the functions performed, forced ventilation is:
- exhaust , when the air flow is drawn out into the street using a fan;
- supply air , when the fan, on the contrary, supplies air to the room, and the full ventilation cycle is ensured by the air leaving naturally through shafts and ventilation ducts;
- supply and exhaust , when it is possible to both force air into the room and remove it from it.
The existing forced-air supply and exhaust ventilation is used for large rooms when the natural mutually regulated air movement in the room is not enough.
The hood does not turn on
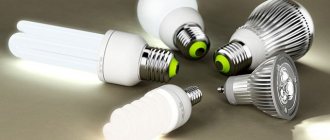
- The stove light does not work. If there is no lighting, but the fan is running, then most likely the light bulb has simply burned out. But if changing the light bulb does not solve the problem, then the light switch is faulty.
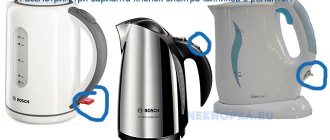
- The hood does not turn on at all. There may be several reasons: for example, the device is disconnected from the network or there is no current in the outlet.
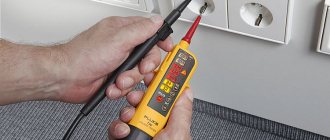
- The hood switch is faulty. You can check this using a tester, and if it breaks, replace it.
- There is no electric current. You need to check the electrical panel. A breaker may have tripped or a fuse may have blown.
- The power plug is faulty. The plug fuse may have blown. You can replace it yourself.
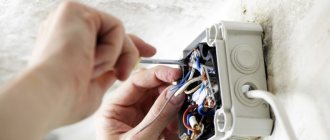
- Failure in internal electrical wiring. The examination should be carried out using a tester, tightening loose contacts along the way and squeezing the tips with pliers.
- The electric motor has broken down. In this case, there is no point in undertaking repairs; the exhaust motor just needs to be completely replaced. Trying to repair it in most cases is not economically profitable. Buying a new hood motor will be cheaper, more efficient and much smarter.
What kind of ventilation is needed in the bathroom and toilet?
According to the designers, natural ventilation should cope with air circulation on its own. However, normal air circulation in the room is often not ensured by natural ventilation.
This happens for three reasons:
- with natural ventilation, a constant flow of outside air into the room must be ensured - the door must be open, a special internal window must be opened, a supply valve must be installed in the wall;
- the internal walls of the ventilation ducts become dirty - dust, dirt, debris and cobwebs appear in the ventilation over time and in the absence of cleaning;
- External ventilation outlets become clogged.
Thus, to organize effective ventilation of the toilet and bathroom, it is more advisable to use forced ventilation. It will ensure a quick change of air in the room, remove odors and reduce humidity in the shortest possible time.
Full air ventilation cannot be provided by an exhaust duct or a fan if there is no sufficient air flow into the room. It is the balanced amount of incoming and outgoing air that affects the normal intensity of air exchange
It is worth noting that to determine the state of ventilation, it is enough to use a sheet of paper or a lit match brought to the ventilation grille. For optimal operation of the ventilation system, the flame should deviate significantly towards the channel, and the sheet of paper should be attracted to the grille.
If this does not happen, then we can talk about a problem with ventilation. One of the reasons for insufficient traction is the absence or weak air flow. Which may be a consequence of the tightness of the doors installed in the bathroom/toilet. This obstruction to the flow of fresh air is the reason that exhaust humid air cannot be drawn out of the room even with a properly functioning hood and with the fan turned on.
When choosing and installing exhaust devices, you must be guided by the main governing documents: SNiP 41-01-2003 (“Heating, ventilation and air conditioning”) and SNiP 2.08.01-89* (“Residential buildings”), which, by introducing certain changes, have been updated as of 2022 In particular, in the bathroom and toilet there must be an air exchange of at least 25 cubic meters per hour. If the bathroom is combined, then at least 50 cubic meters per hour.
Reasons for poor hood performance
Poor performance of exhaust ventilation cannot be caused only by contamination of ventilation ducts and outlets or the creation of an artificial obstacle to the occurrence of draft.
To get rid of high humidity and mold in the bathroom, it is prudent to install heated floors or change heated towel rails to more modern ones. This undoubtedly speeds up the process of drying the released moisture, but it will not be possible to completely get rid of mold and mildew if there are obvious problems with ventilation.
There are a number of other reasons why the hood in the toilet and/or bathroom stops working.
Among them are the following:
- High air temperature outside . Air circulation occurs more efficiently during periods of the year when the temperature outside the window drops below +5 degrees.
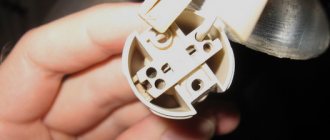
- Installation of axial fan . Due to the design features, when turned off, this type of fan interferes with the free penetration of air. The motor and blades of the axial fan do not move without electrical current.
- Excessive exhaust devices are too powerful . Using a fan that is too powerful will disrupt the designed air movement throughout the entire ventilation system. As a result, the dispersed air does not go outside, but enters other rooms of the apartment building.
- Redevelopment and illegal interference in the general ventilation system . As a result of the changes made, the tightness of the ventilation system may be compromised or one of the channels may be completely blocked. That is why any redevelopment requires approval from government agencies.
- Incorrect installation of the door to the bathroom or toilet . Usually the problem occurs when there are no special ventilation holes in the door leaf (typical of cheap doors) and there is no gap between the floor and the door.
- The appearance of reverse thrust . This problem is typical for the upper floors of apartment buildings due to the appearance of excessive pressure in the ventilation system.
When one of the reasons affecting normal air circulation appears, the humidity in the bathroom and toilet immediately increases.
Condensation on the walls, ceiling or bathroom mirror is the first sign indicating problems with the hood. If the condensation disappears when the door is open, the ventilation is working normally, it is worth widening the opening between the door and the floor. If it does not disappear when the door is open, there is a problem with ventilation
By the way, condensation not only signals problems with ventilation, but can also cause damage to ventilation equipment. For example, as a result of incorrect installation of additional equipment, a gap is formed between the fan and the sub-ceiling of the ventilation system. Due to the cooling of hot air, condensation forms in this gap, which is partially absorbed and partially flows down. The resulting condensation can damage the fan over time.
We also recommend that you familiarize yourself with the reasons why the hood may not work at all, as well as with ways to eliminate them.
The hood does not draw and does not remove odors well
This may occur if the device is not used correctly. In order for the hood to effectively cope with odors, it must be turned on in advance, before cooking, and turned off 15 minutes after turning off the stove, and not immediately. By following this basic rule, you will be able to get rid of unpleasant odors in the kitchen forever. A fairly common cause of such “breakdown” is a belated change of filters. Also, carbon filters may simply not work effectively. To repair the hood, the filter must be disassembled, first removed, and the carbon granules replaced with new ones.
To change the grease trap yourself, you need to remove the grate and place it face down, after which you can remove the old dirty filter. The grate should be thoroughly washed with detergent and a new grease trap should be attached to it. Disposable grease traps differ from reusable ones in that they have an inscription that is clearly visible even through the grate. When the filter becomes so dirty that it is time to change it, the inscription is no longer visible. Fiber filters are reusable; after washing and drying, they can be returned to their place, and this can be done repeatedly. Each time you carry out this procedure, you need to thoroughly rinse the grille.
Advice:
Methods for determining hood malfunction
There should not be poor ventilation in the bathroom. Otherwise, the level of air humidity increases, which is an indicator of the environmental condition of the premises . Damp air can cause people to feel unwell, feel stuffy and heavy, and also cause exacerbation of chronic diseases.
That is why there is a concept of optimal and permissible indoor air humidity, which is specified in GOST 30494-2011. For a bathroom, the optimal values are 30-45%, acceptable values are up to 60%.
You can prevent the humidity level from rising to critical levels if you detect a malfunction in the hood in a timely manner and fix it. Therefore, if you begin to notice that after visiting the bathroom moisture remains on the walls and mirrors for too long, it is advisable to check the traction force. For this purpose, you can use a sheet of paper (lean it against the ventilation grille) or a lit match (the flame will deviate towards the grille), which will allow you to determine the strength of the exhaust air flow. If it turns out to be too weak, you should call a representative of the management company.
A specialist, using a special air speed meter - an anemometer, will measure the air outflow rate per hour and give a conclusion on non-compliance with the standards. It can also determine the air permeability of the entire riser of an apartment building.
When designing a hood yourself, you should consider installing a fan, especially in situations where the ventilation duct is curved. Otherwise, draft will not be created and the hood will not work.
When installing an exhaust fan, you should consider its location. It should be located further from the entrance and as high as possible. The ideal location is on the opposite wall from the entrance directly under the ceiling. It is then that the air entering the room has time to pass through the entire room before entering the hood
It is worth noting that a utility specialist may not be able to identify the problem if it is related to a neighbor using an overly powerful fan—during the study of the draft force in the system, the exhaust device may be turned off.
In winter, you can also check the hood in the bathroom and toilet yourself. To do this, you need to open wide the window and doors of the room where the ventilation outlet is located. This will accelerate the exhaust draft by displacing warm air with cold air. It is enough to attach a sheet of paper to the exhaust grille. If the ventilation system is working properly, it should stick to the grille.
Best ways to solve the problem
Now let's talk about what to do if the hood in the toilet or bathroom does not work. Thus, the standard and most effective way to solve a problem related to a ventilation malfunction is to contact the management company, which must take effective measures to restore the normal operation of the hood. Their responsibilities include checking, cleaning and restoring ventilation ducts.
They are also obliged to force the residents of an apartment building, who independently dismantled or changed the ventilation ducts during redevelopment, to restore their original condition.
The main requirements for a bathroom fan are: power, quiet operation and moisture protection (IP). The optimal indicator for the latter is IP 25. To maintain normal audibility, the noise level should not exceed 48 dB. Well, the fan power should not exceed the created air exchange of 25 cubic meters per hour for a toilet and bathroom and 50 cubic meters per hour for a combined bathroom
However, engaging a management company is a rather lengthy process.
Therefore, some problems can be solved independently:
- If there is a problem with the “backdraft” effect, when air from the hood enters the room, then it can be solved in two ways: either by installing a blower fan, which makes the air pressure in the room stronger, or by installing a decorative grille with a check valve in a standard hood hole, which will create an obstacle to the penetration of air into the room from the exhaust system.
- Increasing the height of the duct at the end of the ventilation duct will help improve the performance of the hood on the upper floors of an apartment building. It is located on the roof of the house and you can increase its length yourself using a corrugated pipe. You can also install a deflector, which, under the influence of wind, will create additional draft in the system.
- The problem with the hood in a private house can be solved by installing a separate air duct. It will provide additional air flow and, therefore, increase the pressure in the room, which will create an air circulation process. A vertical channel with access to the roof will work most effectively.
- When the hood does not work in one of the rooms, the problem is solved by installing a fan. Only this installation must be performed in strict accordance with regulatory requirements in order to avoid consequences. Currently, you can buy fans equipped with a humidity sensor, a time relay and a motion sensor, which allows you to use them most efficiently while saving energy.
You should be careful about the cleanliness of the decorative ventilation grille. There are cases of dust clogging a special mesh, which is necessary to prevent insects from entering the apartment, as a result of which air cannot flow normally into the ventilation duct.
It is also necessary to regularly clean the fan in the bathroom and toilet, taking into account the manufacturer’s recommendations for caring for a specific model.
Disassembling the device: step-by-step instructions
Dismantling external ventilation parts
To remove the engine, it is necessary to disassemble the external parts of the kitchen ventilation. In this case, you can gain access to the engine system.
To do this you need to take the necessary tools and materials.
Attention You need to prepare a screwdriver of suitable diameter. In this case, there should be several screwdrivers, since some parts can be voluminous and engaged with large screws, and some elements are microscopic in size and can only be dismantled with special tools designed for careful removal of parts.. When the engine is removed from the device, check its resistance windings
To do this, prepare in advance a bundle of wires that go from the board to the electric motor. In this case, you can simultaneously diagnose faults in the motor and try to repair it without removing it from the hood. The method is less convenient, since a complex of additional work will first be required. It is better to dismantle the engine itself and not touch other parts in the ventilation housing
When the motor is removed from the device, the resistance of its windings is checked. To do this, prepare in advance a bundle of wires that go from the board to the electric motor. In this case, you can simultaneously diagnose faults in the motor and try to repair it without removing it from the hood. The method is less convenient, since a complex of additional work will first be required. It is better to dismantle the engine itself and not touch other parts in the ventilation housing.
Cleaning and checking
- Whatever caused the ventilation motor to break down, remove the dirt and lubricate the bearing with oil.
- The dismantled motor is placed on a horizontal surface and the starting condensate is checked.
- If there is no short circuit, it is returned to its place.
- If the condenser is broken, it is replaced with a similar one in capacity and operating voltage.
After cleaning all the grooves, dry the small parts well. Cleaning can be done with a soft cloth that does not leave streaks or scratch the surface. After cleaning, the serviceability of the engine is checked. The problem of its failure to work could be due to clogging of parts. After cleaning, the structure can become serviceable.
When the motor is installed in place, its performance is checked. If the problem also persists, the ventilation works very poorly, which means the engine needs to be replaced or some of its components are broken. The device is again removed from the fan and its performance is checked in detail.
Testing and assembly
- If a broken electric motor cannot be replaced, then you can try to short-circuit its wires. This testing will help determine the performance of the motor with shorter wires. Repairs to faulty wiring are rarely carried out. Branded hoods are designed in such a way that the motors in them rarely burn out. This means that the operation of the motor cannot be disrupted due to electrical problems. But this only applies to modern technology.
- If we talk about a simple hood with a simple motor, then everything is much more complicated.
You will have to test and assemble such a part in the ventilation several times in a row. It is necessary to apply mains voltage to the working and starting windings. There are situations when the motor hums (this means the electrical network is working properly), but refuses to work. The engine may gain speed when turned on when cranking it manually. This situation indicates a fault in the starting winding. It needs to be removed from the electric motor and replaced. - The hood motor is checked by ringing the windings according to the diagram specified in the operating instructions. If at least one winding does not ring, then the engine must be repaired or sent to a service center. And in the most difficult cases, completely replace it with a working one, which not everyone can do on their own at home.
- Incandescent or halogen lamps are simply replaced. They are simply turned out of the hood and checked for functionality. In this case, the procedure can be performed in any suitable cartridge or base.
- Repairing LED systems will require additional steps.
You will need to remove the lamps and connect them to a low voltage DC source. An adapter-converter is connected to the system, which will help obtain the 3 V voltage required for the LED. The converter adapter is also checked with a tester to ensure it matches the voltage required for operation. When using a standard 220 V LED lamp in the system, repairs only involve cleaning the contacts in the lamp base.