Backlight selection
Types of spotlights
Incandescent lamps are absolutely not suitable for lighting in a furniture cabinet. The efficiency of such light bulbs is extremely low; a large percentage of energy is spent on thermal radiation. This leads to an increased fire hazard, fading of the fabric, as well as damage to the material from which the furniture is made.
To illuminate the interior of the cabinet, the following types of spotlights are recommended:
Halogen lamps
They have rather low productivity and service life. The advantages include low cost and power supply from a low-voltage network.
Fluorescent lamps
Their performance characteristics are better than those of halogen ones, but there is a significant drawback - the release of mercury vapor in the gas mixture.
LED strips
They already have a number of small LEDs built into them. They come in a variety of colors, which is a plus for mood lighting.
LED bulbs
Ten times more powerful than halogen. Service life - up to 30 thousand hours. The disadvantages include the high cost.
LED backlight
Let's talk more about LED backlighting. It is divided into separate LED spotlights and LED strips, including RGB - capable of changing their color depending on the mode selected on the control panel. Tapes are much more convenient from both a decorative and operational point of view.
They are quite flexible and easy to install by hand. However, there are also difficulties. Firstly, for the LED strip you need to buy an additional power supply separately. Secondly, the tape either must initially be equipped with protection against dirt, or in addition to it you will have to buy a protective corner that prevents contamination. If these measures are not followed, the tape will quickly fail. And the complete set is quite expensive.
Cabinet lighting from Ikea
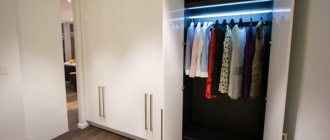
The innovative lighting system from Ikea stands out. NORFFLI LED lighting is equipped with a sensor, thanks to which the light turns on when the cabinet door is opened and turns off when it is closed. A micro switch allows you to change the automatic mode to normal - then the light is on constantly or completely off.
Types of lighting, pros and cons of options
First you need to decide on the type of backlight. The following options are possible:
- halogen;
- luminescent;
- LED
It must be taken into account that the devices will operate in tight spaces and in close proximity to the contents of the cabinet. You can use any type of lighting to illuminate a cabinet, but first you need to understand the features of each type. Let's look at them in order.
Halogen
This is a backlight that is a modified incandescent lamp. Bromine or iodine vapor is pumped into the flask, which makes the heating of the coil much higher and the glow brighter. The advantages of halogen lamps are:
- increased brightness that does not change throughout the entire service life;
- small sizes;
- safety of lamps.
Disadvantages should be considered:
- high heating of the flask;
- low strength;
- Do not touch the flask with your hands;
- sensitivity to voltage changes;
- limited service life.
The disadvantages of halogen lamps are quite significant, so their use for interior lighting is undesirable.
Luminescent
Using fluorescent lamps as lighting is a better option. They have a lot of advantages:
- no strong heating;
- significant light output;
- long service life;
- wide choice of colors.
The disadvantages are:
- quite large size;
- complex connection procedure;
- sensitivity to temperature.
Interesting! In addition, there are harmful mercury vapors inside the fluorescent lamp bulb. If, while searching for the right things, the fragile glass case is accidentally damaged, there is a danger of poisoning. This feature, combined with the large size, limits the use of fluorescent lamps for illuminating the wardrobe.
LED lights
LEDs have been used as a lighting option relatively recently, but are already confidently replacing alternative types of lamps. The reason for this is the significant advantages:
- no heating;
- low-voltage power supply, making the lighting safe for people;
- wide choice of color shade, brightness and type of devices;
- there are multi-colored elements capable of creating attractive decorative effects;
- long service life of LEDs.
Preparation for installation
Technical requirements
When installing the lighting yourself, you must comply with the requirements to ensure comfortable and safe use of the equipment.
Lighting for a furniture cabinet must comply with the following standards:
- the degree of illumination for the hallway is not lower than 50 Lux, for the dressing room - not lower than 75 Lux, for the kitchen - not lower than 150 Lux;
- since there is a possibility of direct contact during operation of the backlight, a reduced voltage should be used to power it;
- wires must be connected to the lighting system in one of the following ways: crimping, soldering, terminal connection;
- if the backlight is powered from a standard network with a voltage of 220 V, the network must be protected by an RCD, which will ensure that the lighting is turned off if the insulation is broken;
- The lighting should not be too bright and comfortable enough for the eyes.
How to choose the right lamps
Before connecting additional lighting or choosing a ready-made wardrobe already equipped with lighting, you need to decide on the right choice. After all, only in this case will lighting really decorate the closet, the room itself and provide the necessary practicality.
When selecting, the following points are taken into account:
- style and design features of the coupe;
- required degree of brightness;
- power;
- energy saving indicators;
- color design;
- price.
By definition, high-quality and durable lamps cannot be expensive. If this is a lighting option built into the cabinet, it should provide the degree of brightness required in your case, while maintaining absolute fire safety.
Before purchasing, ask yourself again: is the backlight needed specifically for my coupe, or is it an extra element that will not bring any particular benefit. Not everything that looks elegant and original in the photo has similar properties in practice.
Choosing a mounting location
What kind of LED lighting would you install in your closet?
ExternalInternal
The installation result directly depends on the correct choice of location for installing the lighting system. It is important to consider the type of room (hallway, kitchen, wardrobe, bedroom), type of furniture (dressing room or kitchen). Also, depending on the location of the devices, cabinet lighting is divided into internal and external.
External lighting
External lighting is provided by embedding lamps in furniture elements. Soffits can be placed on the doors and open shelves of the cabinet, as well as on the protruding canopy above the doors (if there is one). Soffits can be built not only into cabinet elements, but also on the surface above and below it.
Before installation, you need to check how this lighting will affect the appearance of the furniture. In the wrong place, open lighting can ruin the overall impression of the cabinet design.
Interior lighting
There are several principles from which to proceed when choosing the location of the backlight:
- On the top surface of the cabinet in the middle. Suitable for large internal compartments.
- On the front edge of the shelves. Used for multi-tiered cabinet sections. Such equipment will ensure uniform illumination of all shelves.
- On the rear top edge of the shelves. Suitable for small compartments, as it provides sufficient lighting and visually expands the space.
- On the side walls. Suitable for both low and high sections.
Expert opinion
Korzhavin Daniil Dmitrievich
Designer of stylish home furniture
The lighting should be located so that doors and drawers do not touch lamps, switches or wires. In addition, the lighting system should not interfere with the free use of the interior space of the cabinet.
Advantages and disadvantages
When installing a straight or corner wardrobe in a room or hallway, you should think about whether you have enough lighting in the room, or whether it would be correct to provide your own lighting for the furniture.
Before you start choosing a cabinet or installing lighting on existing furniture, you must decide whether you need it. External light sources have no functional significance, but serve as decoration. Also, lighting will be unnecessary if you have cabinets of small depth, and all things can be clearly seen without it.
But this solution also has a number of strengths. Namely:
- minimum space required;
- additional visual effect;
- simplifies the search and placement of things;
- additional light source in the room;
- the ability to highlight a specific area without turning on the main lighting.
Another advantage is that you can install such a system yourself. Imagine what a compartment might look like with lighting and mirrored doors, or deep shelves illuminated by comfortable and sometimes even original color lighting.
Inventory
To install a lighting system, you must first draw up a power supply diagram for the devices. Batteries, lamps and switches should be marked on it. It is most convenient to make a drawing on the cabinet diagram that comes with it. The next step is to transfer the markings to the cabinet frame, marking the places where the wires will be laid and where the lighting fixtures will be installed.
To carry out installation work, the following basic equipment is required:
- LED strips or individual spotlights;
- cables (the determining factor is power consumption);
- 12 V power supply;
- controller (when connecting a color RGB strip);
- light box (for completing closed LED strips);
- flux, solder and terminal connectors (for making electrical connections);
- switch or control panel (for manual control of the backlight);
- motion sensor (to create “smart” lighting with automated on/off).
Also during installation you will need the following tools:
- drill with attachments;
- screwdriver or screwdriver;
- construction stapler;
- stationery knife;
- soldering iron;
- pliers;
- wire cutters;
- scissors.
How LED cabinet lighting works
LED Strip Light
The design of the LED strip is quite simple; it is a flexible strip of plastic. There is a conductor inside, as well as LEDs. There are several parameters that affect the characteristics of the tape; we list the most important ones.
- Glow color. Diodes come not only white, but also in other colors. LED strip can be single-color or multi-color. If only white LEDs are used in a strip, they are divided according to the heat of luminosity.
- LED type. Marked with four numbers. The first two show the length of the diode, the third and fourth its width.
- Based on the direction of the glow, they are divided into end and frontal. Usually the second type is used.
- Density of light elements. The number of LEDs per linear meter is calculated. There are tapes with a density of 30–240 pieces/meter.
- Voltage. There are modifications for voltage of 12, 24 and 36 V. At the same time, you can also choose a strip connected to a standard 220 V in-house network. The permissible voltage parameter affects the choice of control unit.
- Power. Indicated per meter of tape, it affects the luminosity of the product. Is in direct connection with the number of LEDs. On sale you can find LED strips with a power in the range of 4.8–25 W/m.
- Degree of protection. Calculated depending on the number of open parts; it is optimal to select tapes with an IP60–IP rating
Brightness control
An LED strip in a closet definitely requires brightness adjustment. Dimmer controllers are used for this. They work by adjusting the power of the supplied current. They are divided into the following types.
- Managed. Allows slight changes in power as needed.
- Pulse. Perform automatic adjustment depending on the specified parameters.
There is a division by type of work - mechanical and electronic.
It is also worth remembering that dimmers are available for a single-color connection scheme and for a multi-color RGB strip. In the second case, you must carefully monitor the correct connection of the device to the tape.
power unit
The power supply is selected based on the total power of the tape. You can make a choice yourself. To do this, it is enough to take into account the following parameters.
- Pl is the load of one meter of tape. This parameter is specified in the documentation. Let's say we have 12 W.
- L is the length of the entire tape used. We have 5 meters.
- K is the safety factor. Usually they take 1.2.
The calculation follows the formula.
Ptotal=Pl×L×K
In our case.
Ptotal = 12 W × 5 m × 1.2 = 72 W.
That is, the power of the power supply must be at least 72 W.
If you look at the layout of the device, the optimal solution would be a unit with a sealed plastic case. It is the safest to use.
On/Off Switch
The last thing you should do is select the switch. In practice, several types are used.
- Regular push-button. Switching occurs by mechanical switching, a completely standard “switch”.
- Sensory. It reacts to touch, the principle of operation is similar to the previous one, just a more modern version.
- Infrared. It has a sensor that reacts to movement, for example, the opening of a sash.
- With drimmer. Allows you to adjust the brightness as needed, divided into touch and button.
- Control block. Allows you to adjust the operating mode of the tape, usually used on RGB tapes, controlling blinking, turning on colors and other additional settings.
Installation step by step
After all the preparations, you can begin installing the lighting. We will analyze cases with individual spotlights and LED strips separately, since each type of lighting has its own characteristics. If you purchased a ready-made lighting system, for example NORFFLI, installation is carried out according to the instructions included with the product.
Installation of individual spotlights
The entire installation consists of the following steps:
- Carefully drill holes at the installation points. To avoid damaging the chipboard, advance the crown slowly and without jerking. Before doing this, fix the center with a drill.
- Mount the switch on the cabinet as high as is comfortable for you. If there are children in the house, it is necessary to place the switch at a height inaccessible to them.
- Strip about 1 - 2 cm of the cable on both sides to connect the equipment.
- The wires must be inserted into the terminal blocks of each lamp, as well as the switch, and then secure them. You also need to connect a converter if you have a step-down power supply. If there are no pads, you can solder the wires with a soldering iron.
- The next step is to turn off the mains voltage and connect the lighting to the apartment circuit.
- Insulate all connections. Upon completion of work, make sure that the cable is intact around the perimeter.
- Check the functionality of the lighting equipment.
LED strip installation
The tape is much easier to install.
However, installation is not carried out in one stage. If you want to integrate an LED strip into a cabinet, here is a step-by-step action plan:
- Cut the piece of tape to the length you need (there are special marks on the strip for this).
- A plastic strip is needed under the tape. You can attach it by gluing it to liquid nails or double-sided tape.
- Drill a hole in the cabinet wall for the cable.
- From the input, route the wires to the location where the tape is installed. For this purpose, it is best to choose a corner of the cabinet. Install cable ducts that will hide the wire.
- Stick the LED strip on, then connect it to the cables and switch.
How does automatic lighting work on a kitchen set?
Sensors are used to turn automatic backlight systems on and off. Usually this:
- Sound sensor - to use it, you need to configure it so that it responds exclusively to the sound of opening headsets or clapping.
- A proximity (motion) sensor is a common option that is easy to install and configure. It works this way: the sensor is adjusted to an obstacle in the form of a furniture door and as soon as it opens, the obstacle disappears and the sensor gives a signal to turn on the light.
You can also use a light sensor that will automatically adjust the amount and intensity of light in the kitchen throughout the day.
Advantages
There are many advantages of lighting automation, here are the main ones:
- Saving electricity. The light will turn on automatically and only in those places where it is necessary. This system eliminates the “forgot to turn off the light after leaving” situation, thereby reducing electricity bills.
- Convenience. Most people have several switches, outlets, adapters, etc. in their kitchen. Automation allows you to get rid of all mechanical buttons.
- Design. From a design point of view, a clutter of electrical equipment looks unsightly. Automated systems take up much less space than classic light switches.
Types of automatic backlight
Any light source can be automated, even one that is not initially adapted to it. This can be done using a combination of microcontroller and relay. But on the market you can find ready-made options for automatic backlighting, such as:
Spot light – conveniently mounted on a headset and illuminates the desired area.
Spots are a group of light sources that are attached to the wall and focus on a specific area.
Light beams are long strips that are attached to the wall and are used to illuminate the work area.
Single LEDs and strips - used for local lighting of small areas, such as cabinets, shelves and furniture.
All types of lighting can be purchased with built-in sensors, or you can assemble an individual version yourself and add the necessary functionality.
Wired sensors
A motion sensor is the best option for creating automatic lighting. This element can be flexibly configured to suit any needs. For example, program the sensitivity of the sensor to turn on if movement is detected within a radius of 50-100 cm. By installing such a device in the work area or near the stove, it will turn on automatically when someone approaches this area and turn off after leaving.
You can also install a sound sensor that will respond to cotton. On the market you can find lamps already equipped with a sensor. It is enough to screw such a device into the socket and automatically turn the light on and off with a clap. Any lighting element can be connected to such sensors.
Wireless sensors
Wireless sensors are much more expensive than wired ones, but they allow you to control home lighting via Wi-Fi. Simple models control lighting remotely using a remote control. The functionality of such a remote control allows you to regulate the number of lamps, lamps, etc. that are turned on.