Today, in modern apartments, whether new buildings or old ones, an intercom is installed in the entire entrance, which also functions as a doorbell, with the help of which the tenant finds out that guests have come to him. However, many more residents use doorbells. There is a wide variety of types of such devices; they differ both in functionality (the ability to select a melody, video communication, etc.) and in the method of connecting them. This article will discuss the principles of operation of this device and the connection diagram, methods of repair and installation of a new bell.
Causes of electric bell failure
- Incorrect installation. The most common mistake is an incorrect connection to the network.
- Malfunctions of the button or noise units. To determine if the first one is broken, you need to detach the wires from the pressure element using a screwdriver. Next you need to connect them together. If there is a sound, then the button is really broken. To check the speaker, you will have to disconnect the top cover, remove the wiring from the screw terminals and check the presence of current in them using a voltmeter or multimeter. If the devices show an electrical signal, then the sound unit needs to be replaced.
- Natural wear and tear of the device after many years of use.
To determine if a mechanism element is out of working order, use the tips from the previous paragraph.
How to fix a wired call
Before starting work, for safety reasons, you must turn off the electricity.
To repair the mechanism, you need to take the following steps:
- Checking the network for a gap. Wear rubber gloves and slightly remove the insulating layer from the device wires. The next step is to connect the stripped wires to the outlet. You need to insert the plug of the table lamp into it. To continue the manipulation, you will have to temporarily turn on the machine in the panel. If the light comes on, then there is no break in the network. Accordingly, if nothing happened, then the factor causing damage to the mechanism was the loss of the electrical signal. To fix the problem, you need to call a specialist.
- What to do if a button or sound unit is broken? Take them apart first. Then check the tightness of all contacts. If necessary, clean them again. If after these manipulations the mechanisms still do not function, you will have to buy new ones and install them according to the instructions.
- If the new bell does not work, then you first need to verify the correctness of each installation stage. Where to turn if everything is done correctly? To the seller. The company will help repair the device or replace it with a new one under warranty.
Our staff will help you decide not only on choosing a quality door, but also on the components for it. Sign up for free opening measurements on the website.
Knowing the main reasons for the creaking of the front door, you can easily get rid of the annoying sound.
Description of all the intricacies of the process of “sealing” the door with foam.
We invite you to familiarize yourself with the updated rating of doors of standard sizes with good sound insulation.
Sequence of actions when repairing a bell
So, if all the tools specified in the paragraph above are prepared, then you can get to work.
Step 1 Power outage
In order to begin repairing the door lock, you must first turn off the power to it. But it is worth considering the fact that the table lamp must also be powered by something. To do this, you just need to turn off one automatic plug. Most often, the doorbell is powered by the same circuit breaker as the chandelier, so you need to turn on the chandelier and turn off the plugs one by one until it turns off. Once the required plug is disconnected, you can begin to work. At the same time, it will be possible to connect a table lamp to the outlet.
Step 2 Check for a network break
Before you begin repairs, you need to check the network for a break. To do this, you need to first wear gloves and remove the insulation from the bell wires. Then you need to temporarily connect the socket to the wires, and connect the lamp to the socket. After this, you should turn on the corresponding machine. If the lamp turns on, there is no network break. If switching does not occur, then this is direct evidence of a break in the network. This breakdown should not be repaired on your own, and you must call an electrician.
Step 3 Checking the Equipment Using an Ohmmeter
Again you need to turn off the corresponding machine. Then you need to turn off the temporary outlet. Afterwards, you should connect the ohmmeter to the wires, holding them by the insulated parts. Your partner must press the button, and if at this moment the arrow deviates, this means that both the wire and the button are in good condition.
Step 4 If the ohmmeter needle does not deviate
If the arrow does not deflect, then you need to disassemble the button. Then check the tightness of the ohmmeter contacts and carry out the testing procedure again. If necessary, clean the button contacts. Also, in order to avoid burnout, it is necessary to check the contacts to see if they are constantly occupied.
Related article: What does paneled doors mean?
Step 5 Call verification
After all the above measures have been carried out, it is worth checking it. To do this, you need to connect all the contacts in place, turn on the corresponding machine and perform a test run. If after this the call does not work, then it cannot be repaired. You need to buy a new device and install it as indicated in the manufacturer's instructions. If the call starts working, it means you have done a good job. It is necessary to attach all the elements in place so that the wires do not get tangled or stick out.
What will you need for the job?
Electricity is a delicate and dangerous matter. It is enough to accidentally close two contacts with your fingers and you can go to the next world. To protect yourself, always wear rubber gloves. Tools you will need:
- a pair of screwdrivers - regular and electric (probe or indicator);
- wire cutters;
- socket;
- desk lamp.
The most common reason for no sound is improper installation. If the device previously worked, and then suddenly stopped, you need to conduct a full check of it, and then make a decision - buy a new one or call a technician.
Circuit break
Such a breakdown cannot be repaired on your own - you need to call an electrician. However, before this, it is worth carrying out a number of manipulations to find out whether there really is a break in the circuit or whether the bell has simply broken due to old age and needs to be replaced with a new one.
What do we have to do:
- Using wire cutters, carefully remove the insulation from the bell wires.
- Connect an outlet to them.
- Plug in the desk lamp.
If the lamp works, there is no break in the circuit.
Check if the call itself is working:
- Unplug the outlet.
- Connect an ohmmeter to the wires and press the button.
- If the arrow deviates, the equipment is working properly.
If the arrow remains motionless, the problem may be with the button itself. How to check and repair it is written above.
If it is possible to save the old call (from the USSR era), do so. Modern devices of Chinese origin are of poor quality and burn out if you hold the button down for an extra second.
After all the manipulations, assemble the call and check its functionality. If it still does not ring, and there is no break in the circuit, then it needs to be replaced with a new one. It is quite possible to install it yourself.
We will manufacture custom metal doors for any purpose. The site presents doors for apartments and private houses, offices, and public buildings. Call us and we will advise you on all questions.
Why the wireless call does not work: solutions
A wireless call is an incredibly convenient device. I installed a dozen of these gadgets. In the apartment, garage, country house, and parents now have a device that completely relieves owners from problems with wires. Imagine my surprise when I discovered that a working wireless call did not work after installation. I thoroughly studied the problem and managed to fix it. I will talk about this and other ways to solve the problem in the article below.
Connecting to the network and checking functionality
After completing the installation work, it is necessary to connect to the power supply network. First, at the input panel, the power supply to the apartment is turned off using automatic switches. Then connect the neutral wire and phase to the corresponding supply wires in the junction box. A connection error may cause the main unit to break down, so you need to use the phase indicator before connecting the doorbell. If everything is done correctly, then after turning on the power the circuit should work. If the bell does not work, then you need to ring the wiring with a tester and fix the problem.
Why the wireless call doesn't work
Wireless calls vary depending on range, dust and moisture resistance, availability of batteries, material and other factors. Of course, you need to take them into account at the moment when you check the gadget:
- Replace the batteries with new ones.
- Bring the button and receiver closer to each other. The instructions usually indicate the maximum distance for direct visibility of the devices.
- Do not place the button in a place that is exposed to weather conditions.
There are other reasons:
- the wireless bell does not work on a metal door or gate;
- it lay idle for several years;
- The frequency of the radio signal has shifted.
Cable laying methods
Cable laying will only be needed for wired calls.
To do this, the surface of the walls inside the room near the exit from the house or apartment is inspected for the presence of the nearest junction box. Usually it is located at the top of the wall where the cable enters the house from the meter. Inside the premises, the cable can be laid externally or hidden, and outside the apartment only hidden, in order to provide reliable anti-vandal protection. For hidden wiring, grooves of a suitable size are cut into the wall using a hammer drill. External wiring is placed in boxes secured with self-tapping screws. No tags for this post.
How to fix the problem
Wireless calling devices are some of the most inexpensive devices, and most of them are made in China. The cheapest devices carry a lot of hidden problems. For example, a board that was initially flooded with something or a poor assembly. In more expensive options, it is even possible to adjust the frequency without disassembling the gadget. Below are solutions to the most common problems:
Clear call
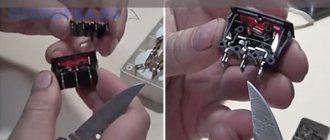
The first thing you can do if the wireless bell does not ring is to open the case and clean the board with alcohol. This will help if the gadget has been in the package for several years, has been exposed to rain, or only rings when it is near the receiver. In this way you will process oxidized contacts, and, perhaps, correct the original problem if the board was filled with some kind of liquid before assembly.
Change frequency
If your wireless doorbell does not work at all, then move it closer to the signal receiver. Perhaps the button only works at a minimum distance. If cleaning the board does not help, then the problem is the frequency range shift. Ideally, the adjustment wheel is provided by the manufacturer and is located on the device itself. Gently twist it while pressing the button. When you hear a sound, increase the distance between the parts of the device, sometimes turning the wheel. This way you will find out the maximum distance and ensure proper operation of the device.
If there is no frequency adjustment wheel, you will have to open the case. Also, you will need a dielectric screwdriver. It is necessary to tighten the inductor trimmer. It can be located in both the receiver and the button. You need to act very carefully and smoothly, remembering the number of revolutions in order to return everything to the initial position if there is no result. Otherwise, proceed as in the case of the wheel, gradually increasing the distance between the receiver and the button. By setting up the gadget in this way, you can determine the distance over which it will work.
You can always contact a service center so as not to perform the operation yourself. Craftsmen in the radio market will also help you. Thanks to this instruction, you will be able to speak with them “in the same language” and accurately indicate the problem and a possible way to solve it.
Metal gates
Why doesn't a wireless doorbell work on a metal fence, gate or door? Metal is a barrier to radio signals, and sometimes it is a huge antenna capable of receiving other people's signals. Place the gadget not on the metal surface itself, but on a brick wall or wooden pole. Or attach a wooden plate behind the bell - a barrier between it and the metal.
There are ways to connect a wired button and a wireless one: the first is located outside the gate, the second is inside. When you press the first, the signal is transmitted via wire to the second and then wirelessly to the house. If you have amateur radio skills, you can find circuit diagrams on the Internet and improve the gadget yourself.
Another good option: solder an antenna to the gadget. It is necessary to disassemble the button and connect the internal antenna and a new wire. This wiring can be raised above the fence or brought out through a small hole in the gate into the inner part of the yard. This operation can be performed for you by a skilled tradesman at the radio market or a service center.
When placing the bell outdoors, remember about dust and moisture protection. Also note that if the wireless call stops working in low temperatures, this is normal. After the frost passes, you will have to replace the batteries.
Finally, the last option for why the device does not work is a breakdown of one of its parts. The speaker, radio module, antenna or other elements may have failed. However, in other cases, you can solve the problem using the instructions provided.
How to repair a call
Hello, dear forum users!
Life has turned out in such a way that I have to solve some repair issues myself. Now the door bell, installed more than 30 years ago, has broken down. I'm interested in the process of diagnosing a fault. How to check whether the wire running from the button to the bell itself is intact? What to do if visual damage is not visible?
Moderators, please don't delete this thread because I have nowhere else to get advice!
vera3128 wrote: How to check if the wire going from the button to the bell itself is intact? What to do if visual damage is not visible?
It's 220 volts. Are you sure it’s worth climbing there on your own with this level of training? Do you at least have a tester?
Ask someone who understands electricity. There is no need to ring the button, there is 220V
vera3128 wrote: What to do if the damage is not visually visible?
Install a battery-powered wireless bell
.
AlexEE wrote: Install a wireless bell powered by batteries.
Good idea
If all else fails, I'll put it like this
E_Z wrote: There are 220 volts. Are you sure it’s worth climbing there on your own with this level of preparation? Do you at least have a tester?
Yes, my level of training is low. But, in my opinion, what is important is a person’s desire to understand the issue and reasonable caution. Everyone started learning at some point.
I have a tester.
Arpan wrote: There is no need to ring the button, there is 220V
Why shouldn't you ring the button?
How to install a doorbell button and other questions answered
The store may offer you two options for doorbells with a button: wireless and wired.
The most interesting and convenient choice is a wireless bell; its installation does not require wiring.
It transmits a signal over a distance of up to 50 meters or more, which is very convenient not only in apartments, but also in private houses, since there is no need to stretch the wire from the gate to the living area.
However, wireless calls have one significant drawback - they run on batteries, which have to be changed frequently.
In this regard, traditional wired doorbells are much more practical, especially if we are talking about a city apartment, where all the wires have already been installed by the builders.
A wired bell works on approximately the same principle as any lighting device in the room: one of the two power wires of the sound device is supplied directly, and the second is connected to the break (via a button). When the button is pressed, the circuit is closed and a signal is triggered.
This is what a standard doorbell button connection diagram looks like:
It is included in the kit?
A standard wireless device includes:
- door bell;
- remote control;
- screws (2 pcs.);
- battery (12V).
The wireless doorbell can also be equipped with an LED indicator, which is especially useful for people with hearing loss. It is triggered along with the playback of the melody when the button is pressed. You can make such an indicator yourself. It will also come in handy during night visits, in low light conditions. In general, when pressing, a light or color indicator will simply be a beautiful addition.
The wireless call has several dozen melodies, so choosing the right one will not be difficult. It is worth giving preference to one that does not hurt the ears and does not cause any discomfort. Why? To exclude subsequent substitutions.
Wireless model diagram
Connecting a doorbell button - instructions and rules
You can connect a wired doorbell yourself.
You just need to have the necessary tools and materials on hand:
- Electric drill with concrete drill,
- Dowel nails of suitable diameter;
- Screwdriver with indicator;
- Copper two-core wire with a cross section of 0.5 sq. mm. and a cable channel - they will be needed if the wires are not laid;
- Construction knife;
- Side cutters;
- Electrical tape.
A typical wiring diagram for a wired doorbell is no different from a light switch wiring diagram.
The only difference is that a sound device is used instead of a lamp, and a button is used instead of a switch.
Which wire should I run to the bell button - phase or neutral? Zero is connected directly to the sound mechanism, and phase is supplied to it through a button.
If you have moved to a new building and are going to connect a call, use the following instructions:
- Turn off the power supply at the electrical distribution panel;
- Choose the most suitable place to install the sound mechanism in the apartment and the button near the front door. The optimal installation height for the bell button is 145-150 centimeters;
- Lay a wire that will connect all elements of the circuit;
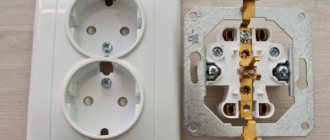
- Secure the button and sound mechanism by removing the front covers to provide access to the wire terminals;
- Connect zero directly to the sound mechanism;
- Connect the button phase to the doorbell phase;
- Connect the phase from the sound mechanism to the corresponding terminal of the distribution box;
- To connect the button, disassemble its body in accordance with the instructions and secure it to 2 dowel nails. Connect two wires to the button contacts - you can connect the wires to the bell button in any order;
- Double-check that the wires are connected correctly.
Features of laying hidden wiring
To connect a doorbell with your own hands, make a sketch taking into account all the technical features of the room for the optimal location of the button and the main unit. Then they cut a groove along the wall in the horizontal direction with a depth three times the diameter of the cable being laid. All cable turns are performed at right angles so that there are no problems finding them later. The wires are secured with plastic staples every meter. A margin of approximately 10-15 cm is left in the junction box and connection points.
The photo shows how to connect a doorbell
Why might the doorbell button not work?
There may be several reasons why the sound signal does not sound when you press the bell button:
- The sound mechanism itself is faulty. To check this, you should try to apply voltage to the bell terminals directly. If the signal does not work in this case, the reason is a faulty sound device.
- The button doesn't work. As a rule, the reason is that the bridge does not close the contacts. You can check this by connecting the contacts with a jumper (for example, a screwdriver). There may be no contact due to the formation of oxide on the bridge, which in most cases is made of a copper alloy. The problem in most cases can be solved by cleaning the bridge and contacts.
- The button-sound connection is not made correctly. Zero should go to the bell through the button, and phase should go directly to the sound mechanism. To fix the problem, you should check the correct connection and correct the error.
- The integrity of the wire is broken. To check the serviceability of the circuit (presence/absence of breaks in it), you should ring the wire with a multimeter (tester).
Attention! When performing the above manipulations, it should be taken into account that the doorbell operates from a 220 V network.
Basic safety rules must be followed when working with electrical appliances.
Answers to frequently asked questions about doorbell button protection
If the bell is installed indoors, no additional measures are required to protect the button. It is a completely different matter when the bell button is installed outdoors, where it is exposed to moisture and temperature changes.
- How to protect the bell button from rain? For these purposes, you can build a small canopy from any available means. However, it is better to purchase a ready-made waterproof button. Additionally, it would not be superfluous to treat the surface with hydrophobic (water-repellent) agents.
- Are there anti-vandal doorbell buttons for outdoor installation? Yes, there are special buttons on sale in an ergonomic, highly durable metal case. They are sold separately and cost about 200-300 rubles.
Connecting the main unit
The main unit is attached to the wall with dowels, after which it is connected to the laid cable in the gap of the neutral wire. If you connect it to a phase cable, then pressing the bell button can damage the electronics. The blue or black wire is neutral, and the red wire is phase.
The phase can be accurately determined using a special indicator.
Connections must be made on clamping blocks to prevent short circuits. The unit is disassembled in accordance with the instructions and the cable is connected to the terminals. A battery-powered doorbell can be simply mounted on the wall without laying or connecting wires.