In everyday life, situations often arise when, during construction work, it is necessary to move the connection point to the facade of the building or to the fence.
In this case, a stationary installation of an outlet is both impractical and dangerous, so power is supplied using an electrical extension cord.
In the same way, you can solve design flaws in household appliances (short cord or mismatch of cross-section with the load) or organize network connection points in any place convenient for you. To do this, you will need to make an electrical extension cord yourself.
DIY electrical extension cord
In everyday life, situations often arise when, during construction work, it is necessary to move the connection point to the facade of the building or to the fence. In this case, a stationary installation of an outlet is both impractical and dangerous, so power is supplied using an electrical extension cord. In the same way, you can solve design flaws in household appliances (short cord or mismatch of cross-section with the load) or organize network connection points in any place convenient for you. To do this, you will need to make an electrical extension cord yourself.
Which wire is best to choose for carrying?
For carrying, only copper wire is used, which has a sufficient degree of flexibility and double insulation. If one layer is damaged, the second will protect against electric shock. This is important because the extension cord is in the public domain.
All requirements are met by PVS brand wire. It has proven itself well in everyday life and on the construction site. PVA wire has a high degree of flexibility and can withstand severe mechanical loads.
The insulation of the PVA grade wire is made of PVC plastic. With prolonged use in extreme temperatures: below -25 degrees and above +40, it will crack.
Therefore, when operating an extension cord in harsh temperature conditions with frequent movements, it is worth using a KG brand cable with a rubber sheath and insulation.
What will you need to make an extension cord?
An electric carrier can be assembled from any available materials (old household devices, cable remnants, etc.). If you don't have them, purchase all the items from scratch. For manufacturing, take the following materials and elements:
- removable plug;
- cable of the required length;
- a covered electrical outlet or outlet bank (depending on how many connection points you need).
To disassemble the elements and then assemble them into an electrical extension cord, use a screwdriver of the appropriate size and shape. To cut the wires, you will need wire cutters or pliers, and a stationery knife to remove insulation.
To prevent overheating and accidents, all electrical carrying parts must be selected for specific needs.
How to choose materials?
All elements of the electrical extension cord are selected according to the total power of the devices included in it. If you plan to install one outlet, take the power of the largest load that can be connected to it for calculation. In the case of simultaneous switching on of several devices at several points, it is necessary to sum up their power or amperage. According to which the appropriate rating of the plug and socket, as well as the cross-section of the cable cores, is selected.
For example, if you install the unit on two sockets, one of which is intended for a vacuum cleaner consuming 5 A, and the second for an electric drill consuming 3 A. Thus, the total current will be 8 A. Accordingly, in this case, a plug and socket with a nominal value of at 10 A, leaving a reserve of 2 A if you need to connect a more powerful device.
To determine the cross-section of the wire, the same amount of load is used, to which 20 - 30% is added for a safety margin. The specific value of the core area is selected from the table in such a way that the resulting value of the connected load does not exceed the permissible value for a given wire.
Table: dependence of the permissible load on the cross-section of the core
For example, for a load of 8 A you add 20% of the reserve I = 8 + 1.6 = 9.6 A. Since copper wire is much more convenient and preferable for an electrical extension cord, let's consider it as an example. For the example under consideration, any brand of cable with a cross section of 1.5 mm 2 will be enough for you.
It should be noted that if you are going to use a homemade extension cord in a three-wire system (phase, neutral and ground), then you will need a cable with three cores, and the sockets and switch must have three terminals. If your house uses only two wires - phase and neutral, it makes no sense to make an extension cord with three terminals.
Repair - what to do if the surge protector button is broken
If, when you turn on the surge protector button, extraneous sounds begin to be heard, which are accompanied by the smell of melting plastic, the device should be immediately de-energized. Next, you need to disassemble the surge protector and check the condition of the contacts on the switch.
To do this you will need the following tools:
- soldering iron,
- crosshead screwdriver,
- tester,
- sandpaper-zero.
If the contacts are burnt out, the tester readings will confirm this (in this case, there will be no voltage at the output from the button in the “On” position). To clean the contacts, the switch needs:
- Disassemble the surge protector housing by unscrewing the mounting screws;
- Unsolder the button and remove it from the filter housing. The button is held in the housing by plastic clips, which should be carefully squeezed out.
- Disassemble. To do this, you need to disconnect the key by picking it up with a flat-head screwdriver.
- Take out the contacts and clean off any black deposits.
- Assemble the button. After this, we assemble the button in the reverse order, install it in place and solder it.
If the contacts have burned very badly and melted the plastic of the switch housing, it should be completely replaced.
To do this you need:
- Disassemble the filter;
- Unsolder the button;
- Remove the switch from the housing;
- Install a new one in its place (sold in radio parts stores, costs about 30 rubles);
- Solder the button and assemble the filter housing.
Often the button on the surge protector does not work due to mechanical damage. The most common case is the breakdown of the latches that hold the switch key in the housing. In this case, it is not necessary to buy a new button - the latches can be restored.
To do this you will need the following materials and tools:
- screwdriver (or drill) and drill with a diameter of 3.5 mm;
- toothpick;
- cotton swab;
- side cutters.
The process itself is very simple:
- A through hole is drilled in the key into which a cotton swab is inserted (it will act as a latch).
- A toothpick is inserted inside the cotton swab for greater rigidity. On both sides, the improvised retainer is trimmed with side cutters so that on each side it protrudes approximately 3-4 mm.
- Now all that remains is to insert the key into the body - to do this, just slightly bend the sides of the seat with a screwdriver.
VIDEO INSTRUCTIONS ” alt=””>
Making an extension cord: step-by-step instructions
As a rule, the manufacturing process does not take much time, so if you have all the necessary elements and tools, you can make an electrical extension cord in 15 - 20 minutes. To do this, follow these steps:
- Disassemble the fork; as a rule, it is unscrewed with one or more bolts, but the design may differ in different models. Rice. 1: Disassemble the plug
- Cut the electrical cable; to do this, remove the required length from the point where it is connected to the plug contacts to the point where the extension cord exits the plug. It should be noted that at the exit point the cable must have both layers of insulation, so you should not strip the top layer of dielectric with a margin.
Figure 2. cut the cable - Prepare a wire to connect to the plug terminals. To do this, step back about 1 - 2 cm from the edge of each core and carefully trim the rubber insulation. Rice. 3. Strip the ends
Be careful not to cut the core wire, otherwise this will reduce the cross-section and may lead to further overheating at the attachment point.
- Depending on the method of fastening in the plug contacts, prepare the ends of the wire (make loops, twist into one core, etc.).
- Do all these procedures for the second end of the wire.
- Connect the ends of the wire to the ends of the plug and assemble it.
Figure 4: Connect the wire to the plug terminal
Please note that the assembled fork should not have any gaps - both parts fit snugly against each other. If you find a gap, disassemble it again and eliminate the cause of the unevenness. Where it exits the plug, the extension cord should fit snugly against the edges; if its diameter is not enough, add a little electrical tape.
As a standard, they are equipped with one bolt in the center of the socket, but if the cover does not budge, you should inspect the structure for the presence of additional fastening points.
Rice. 7: standard socket mounting point
- Connect the ends of the wires to the corresponding outlet terminals of the electrical extension cord. Rice. 8: Connect the wire to the socket terminals
If you are making a device for a three-wire network, be sure to follow the wire markings. Especially for the ground wire, otherwise you may apply voltage to the body of the device.
- Reassemble the socket in reverse order, the electrical extension cord is ready.
Rice. 9: assemble the socket - the extension cord is ready
Please note that when connecting certain parts, contact must be ensured using special clamps, sleeves or by soldering. It is under no circumstances allowed to ensure contact only by screwing the wire to the lamellas or other parts. After making an electrical extension cord, do not rush to plug it into the outlet; first check its serviceability using a multimeter.
Checking the serviceability of the electrical extension cord.
To check the functionality of the carrier, you will need a regular multimeter or megohmmeter. The whole process can be divided into checking the integrity of the line and checking the insulation. Initially set the multimeter to dialing mode:
- Connect one lead of the multimeter to the socket of the outlet, and touch the second lead to the plug of the electrical extension cord. If the device does not report a circuit, touch the second prong of the plug.
- Hold the multimeter probe on the same contact of the plug where the device showed the circuit, and check other sockets in the block. Their contacts of the same name should also provide a circuit for the continuity of the electrical extension cord.
- Check the second pair of contacts of the electrical sockets and the output of the extension plug; they should also show the presence of a continuity circuit.
- If you are using a three-wire extension cord, make the same connection between the grounding pins on the plug and each outlet.
Rice. 10: principle of continuity of the extension cord
The presence of a circuit between all of the listed terminals indicates that the extension cord can normally transmit electricity in a closed circuit. But, in addition to the circuit, it is necessary to ensure the condition of the insulation. What is a megohmmeter used for? But if you don’t have one, you can use the same multimeter in insulation measurement mode. For industrial purposes, measuring insulation with a multimeter is not permissible, but for domestic needs this will be quite sufficient.
During the measurement process, you need to set a limit on the maximum resistance value in kOhms or MOhms. Apply the probes to the phase and zero terminals on the plug; if the resistance is more than 500 MOhm or infinity, its level is sufficient for normal operation of the electrical extension cord.
Rice. 11: measurement of resistance between phase and zero
If the resistance approaches zero or is tens of ohms, you have broken the insulation somewhere and you need to double-check all electrical contacts in the extension cord. If there is a grounding contact, the resistance value must also be checked between phase - ground and between zero - ground.
Rice. 12: ground resistance measurement
If during testing you have determined the integrity of the phase, zero and ground circuits in the manufactured electrical extension cord, as well as a sufficient level of resistance between all terminals, then such a carrier can be safely used to connect equipment.
Making a carrying reel
There's an electric cable
The main thing when working with electricity is safety. Therefore, to make the cable carrier we will use only dielectric materials.
- Plastic canister 5 liters
- PVC pipe with a diameter of 50 mm
- A piece of plexiglass
- Cable with a cross section of 1.5 mm, length 20 m
- Remote socket and plug
- M6 bolt and a pair of nuts
You will also need:
- hacksaw for metal
- jigsaw
- screwdriver with a set of bits
- glue
- dye
The carrier will consist of a body made of a canister and a spool for winding the wire.
Stage No. 1 - making a spool
We will use a PVC pipe as a spool.
We measure the width of the canister and mark this size on the pipe, departing from the outer edge.
We drill a hole in the middle of the pipe on one wall - a place for the wire to come out.
At this stage, we complete manipulations with the pipe , since it will be needed to apply markings to other elements of the homemade product.
Stage No. 2 – spool handle
The rotation of the spool will be carried out using a plexiglass handle.
To do this, on a sheet of dielectric with a previously prepared pipe (spool), we mark the place where the handle is attached. We also draw the shape of the future pen in any form. You need 2 pieces of such blanks.
We cut according to the markings; for this we use a jigsaw and a drill with a crown. We sand the blanks.
We glue the resulting parts together, sand them and paint them as shown in the photo above.
Stage No. 3 - preparing the canister
Mark and cut out
The spool will be exactly in the center, so we make markings on both sides of the canister.
The diameters of the holes for the pipe are different, so we mark them using a prepared PVC pipe.
We drill holes with a crown or cut out with a knife.
Stage No. 4 - gluing the spool and handle
The spool is completely ready
The paint on the plexiglass has dried, so you can glue the handle to the pipe.
But before that, you need to drill a hole on the handle for the bolt, which will be used for rotation. It should look like the one shown in the photo above.
Stage No. 5 – final assembly
We assemble the entire structure: we insert the wire through the spool, then through the canister and its lid. Everything should turn out as shown in the diagram below.
Materials for homemade carrying
To make an extension cord with your own hands, you will need:
But this set seems banal only to the untrained eye. The fact is that depending on the cable parameters:
- Wire material;
- Type of insulation;
- Conductor cross-sectional area;
- Lengths.
It will depend on how much total power of electrical appliances can be powered through a homemade extension cord.
Ratio of maximum power and wire length
It is best to gradate extension cords according to the connected power and cable length. For example, when used inside an apartment, the maximum load can rarely exceed 3 kW:
- TV - 100 W;
- Iron - 1000 W;
- Microwave - 1.8 kW;
- Laptop + router + 3 LED lamps - 100 W.
IMPORTANT: devices must not only be connected, but simultaneously operate at maximum load.
For a cottage or garage, it is better to make a carrier designed for higher power, well, at least 6 kW. But here the cable length factor intervenes. The dependence can be seen in the table.
For an apartment, a 10 meter long carrier will cover the needs in 99.9% of cases. For a summer house, garage and other household needs, it is better to make an extension cord on a reel with your own hands, with a cable 40-50 meters long. This will a priori solve almost all possible needs.
Cable or wire
Unlike a wire, a cable has additional, general insulation of conductors, which allows it to be laid in the ground, or temporarily placed on the ground, in the open air. Therefore, for indoor use, you can use a wire, and for universal carrying, a cable.
IMPORTANT: for extension cords, always use only cable products with stranded copper cores.
The main requirement for an extension cable is flexibility. Therefore, when choosing materials, all types of cables with aluminum conductors, as well as single-core copper wires, are eliminated from the list of candidates.
FOR REFERENCE: according to GOST 15845-80, a stranded cable should be distinguished from a cable with a stranded copper core. In the first case, each core inside the cable has its own insulation. In the second case, several thin wires are twisted into one core and have a common insulation.
The electrical cable for the extension cord must be marked PVS or PBPPG. Their difference is that PBPPG is flat, and PVS is round.
There must be three wires in the cable! Grounding is a function of an extension cord that is better to have and not use than to complain about its absence after a tragic incident.
Fork
As practice shows, it is best to make an extension cord with a straight plug.
The wire fits to it along the axis, without bending. In some cases, this feature can be decisive when connecting in places with poor access. An eyelet on the plug makes it easier to disconnect and can be used for hanging.
Almost all plugs have a ground connection. Protection class not lower than IP44.
What does IP44 protection class provide?
If the connection at the plug and socket is correctly assembled, then the IP44 protection class allows you to leave them in wet rooms, they are not afraid of splashes. If the contact group is suspended above the ground, then the carrier can be left in the rain.
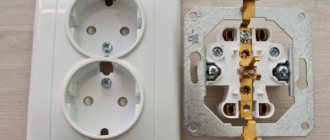
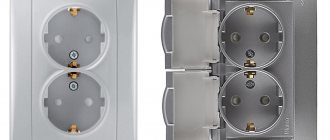
Socket block
There are two categories of products that are very similar in appearance
- Overhead sockets;
- Block (block) of sockets.
Such devices are easily distinguished when viewed from the back.
Please note that the socket block does not have special holes or slots for fastening on the back side. For the extension cord, you need to select exactly the socket block.
It may come with a switch
It doesn't make any fundamental difference. But do not forget that grounding must be required.
How to choose the protection class of a portable socket block is important if the extension cord will be used outside the apartment, such as in the country house, in the garage or even in nature. For universal carrying, the marking must indicate IP44.
Current/Power Relationship
On household appliances, the power consumption is usually indicated. But on electrical installation products, the permissible load is indicated in Amperes (A). To compare these values, there is a formula I=P/U, where:
- I - current strength in Amperes;
- P - power in Watts;
- U is voltage in Volts.
Since our voltage will be 220 V, we will have to operate with two variables, power and current. For example, carrying is needed to connect devices with a total power of 3 kW. Therefore, the permissible current at the plug and socket should be: 3000/220 = 13.63 A.
To select the right electrical installation product, it is necessary to round up the calculated current values, increasing. That is, on the plug and on the socket block there should be an inscription 15 A.
Now let's look at a real example of assembling a carrier.
Let’s say you need to make a carrying case, which will include a heater with a power of 1.5 kW, sometimes a drill with a power of 0.85 kW will be turned on, or some other small thing: a phone charger, a portable lamp, a soldering iron, and maybe something else. If you calculate the total power of all these devices, it will be no more than 3 kW. Based on this, I will take PVS wire 3 * 1.5 mm 2, it will be enough. There will even be a power reserve.
I’ll make a small digression and explain a little what these numbers mean - 3 * 1.5 mm 2.
3 – the first digit always indicates the number of cores in the wire. It is advisable to take a three-core wire for carrying, since in addition to phase and zero, we will also have grounding.
1.5 mm 2 is the cross-section of one core. It happens that in a wire or cable several cores have one cross-section, and one or more wires have a different cross-section.
Let's return to our assembly. In the store we buy a socket or block of sockets with a grounding contact. If our load is 3 kW, then the current will be approximately 13.6 A. Therefore, we buy sockets that can withstand 16 A. We also take a plug for 16 A, and it is imperative that it has a grounding contact.
Let's start assembling the carrier.
We have all the necessary materials and tools. First you need to disassemble the fork. Most plugs have a screw type connection. If you take and simply clamp a stripped stranded core with a screw, a significant part of the wires will be damaged.
As a result, the area of the contact connection may decrease, which can subsequently lead to heating and various breakdowns. Starting from the banal burnout of the wire, and ending with the complete failure of the plug.
Therefore, we will use special tips for crimping NShVI.
First you need to strip the wire. Carefully remove the top insulation, and then strip the wires to the length required for crimping with lugs. For stripping, it is best to use a special knife.
But if you don’t have one, then you can use any knife. By the way, I would not recommend stripping the wires with a stationery knife, as it cuts the wires. But it is very suitable for removing top insulation.
Now we crimp the wires, and you can start assembling the plug. Typically, all plugs are equipped with a special clamp to secure the wire. We clamp the outer insulation of the wire with a clamp and connect the wires to the contacts of the plug.
Attention. I want to explain to you why it is necessary to secure the wire with a clamp. The fact is that many people, when turning off a carrier or other electrical appliances, pull not by the plug, but by the cable. And thus the contact connection of the core with the plug contact may be damaged. Or the wire may even pull out.
Now we connect the wire to a socket or socket block. To do this, let's disassemble it. The grounding wire, in the same way as in the case of the plug, is pressed into the NKI tip. If this is not the case, then simply twist the core into a ring and connect it to the grounding contact. We connect the remaining two wires to the corresponding terminals.
Now, to close the cover of the socket block, we need to make a special recess for the wire. Carefully cut it out, then lay the wire, close the lid and screw it on.
To make everything clearer, watch the video.
And in this video, a person makes a carry without explanation.
In principle, everything, the carrier is ready and can be used. But you and I can improve it and insert a button into it.
Assembling the extension cord
The sequence of actions is quite simple, but some nuances should be taken into account:
- We strip both ends of the cable. First, remove the general insulation so that it fits inside the plug or socket strip. The insulation from the wires is removed at a distance of 1-1.5 cm from the edge.
Do this carefully so as not to cut the thin wires in each core. - We disassemble the plug and fix the three wires, as shown schematically in the image.
IMPORTANT: the yellow-green striped wire must be separated for grounding connections!
If you apply a few drops of silicone sealant to the socket through which the cable for the plug extension passes, you can provide IP44 protection class with your own hands. For guaranteed sealing, add a few drops of the polymer composition to:
- cable, outside the plug;
- screw socket;
- seat of the retractable module.
Until the silicone has completely polymerized (≈24 hours), try not to use the carrier.
- We disassemble the mobile socket block and connect the wires with the obligatory separation of the striped, yellow-green wire for grounding. For complete sealing, use silicone sealant before assembling the block.
According to the described scheme, a carrier no more than 15-20 meters long is assembled and designed for a small load of up to 3 kW. More powerful extension cords require a thick and heavy cable, which is better to wind.
How to assemble an extension cord on a reel
A semi-professional extension cord should provide current transmission with a power of 32 A per 50 m. For example, power a bathhouse in the country. The total power of the devices will be 7 kW! In this case, you will need a three-core stranded cable 3x10 mm. 50 meters of such cable weighs about 20 kg.
Only using a coil will it be clear how to make an electric carrier weighing more than 20 kg.
Where to get a reel
There are two options:
- Make/order a welded frame, cut out two circles from thick plywood, buy studs, bolts and nuts, assemble such a structure.
The cost of the product will be 1.5-2 thousand rubles. - Buy a reel without cable for 300-500 rubles.
But you will additionally need a set of electrical installation products with IP44 protection, rated for 32 A.
Assembly and operation of an extension cord on a reel
Connect the plug and socket block to the wires according to the diagram described above, with the same sealing control.
IMPORTANT: regardless of the connected load, during operation the cable is completely unwound from the reel! In addition to the fact that the wire will overheat in the coil, when current passes through a twisted conductor, magnetic induction occurs, and this can lead to explosive destruction of the cable.
As long as the cable is completely removed from the reel, it does not matter where the plug is located, inside the reel or outside.
We help you choose components for the extension cord
Extension cord without grounding, rated for power up to 1300 W
For assembly, a round flexible PVA cable with a cross-sectional area of 0.75 mm2 and a length of up to 20 m is optimal. The plug and socket can be the most common: made of plastic and without grounding, with a current value of up to 10 A.
Features of the extension cord
- Low technical characteristics and inexpensive components
- Affordable price
- Suitable for working with low-power consumers: drill, hammer drill, plane
Grounded extension cord rated up to 3500 W
Features of the extension cord
- Higher technical specifications
- Safety through grounding
- Affordable price
- Suitable for simultaneously connecting tools and equipment: circular saw, jigsaw, grinder
Reliable, grounded extension cord rated up to 3500 W
For installation, it is better to use a PVA cable with a cross-sectional area of 1.5 mm2 and a length of 50 m. Since one device will be connected, you can choose a plug socket instead of a socket block. The socket and plug must be rated for a current of at least 16 A.
Features of the extension cord
- Rubber as a material for sockets and plugs guarantees safety, as it protects contacts from dust, moisture and oils, has high strength characteristics, is resistant to chemical attack and wear
- Can be used outdoors due to more wear-resistant components and materials
- The cable length and power are ideal for garden equipment: trimmer, lawn mower, shredder, brush cutter, cultivator
Durable and flexible power strip rated up to 4600 Watts
When assembling, we recommend using a KG cable with a cross-sectional area of 2.5 mm2 and a length of 20 m. The wire of this brand better withstands low and high temperatures, voltage surges, frequent kinks, the effects of constant tensile force, and is also more resistant to abrasion. The cable connector is represented by a three-pin plug and a 32 A socket. The connector has a degree of protection IP44 and completely prevents the ingress of dust, fine dirt and splashing water. The socket is equipped with a protective cover.
Features of the extension cord
- Wide range of applications due to high power: work with diamond drills, trowels, painting equipment
- Safety and minimal risk of electric shock due to rubber insulation
- High flexibility ensures operation in harsh conditions, outdoors and at temperatures from -30 to +50 ° C
Extension cord for connoisseurs of European quality, designed for power up to 7200 W
When assembling, we recommend using a KG cable with a cross-sectional area of 4 mm2 and a length of 50 m. The insulating layer of rubber based on natural rubber ensures high flexibility even in cold weather. In addition, rubber is a good dielectric, so the wire is reliable and safe. The cable connector is represented by a three-pin plug and a 32 A socket. Thanks to the IP44 degree of protection and the cover, splashes of water, dust and dirt particles do not get inside the contacts.
Features of the extension cord
- High quality cable connector, made in Austria
- High flexibility ensures operation in harsh conditions, outdoors and at temperatures from -30 to +50 ° C
- For connecting devices and devices that consume current up to 32 A: heat guns and mosaic grinders
When you buy everything you need and read the next section of the article, you can start assembling. Soon you will see the results of your work!
Preparatory work
Before you start making an extension cord, you should decide in what conditions it will be used. Don’t forget the power of connected devices.
After all, it depends on this which cable you should buy to make an extension cord.
Once you have decided on the desired requirements, you should prepare a list in which you indicate which components you need to assemble a high-quality extension cord.
Operating principle of a triac power regulator
The operating principle of a triac power regulator consists of the unique properties of a triac, which operates as a controlled relay.
A triac is two silicon controlled rectifiers (SCR), connected back to back, which allows current to flow in both directions and the triac is used for switching and transmitting alternating current.
When the control terminal is de-energized, there is no voltage at the main terminals, since the VCUs block the electrical circuit.
When voltage is applied to the control terminal, both KUVs open and alternating current flows through the triac.
The triac is used in various devices:
- switch for switching on the electrical load;
- regulators:
- brightness of light;
- electric motor rotation speed;
- power.
Tools and materials needed for work
First you need to decide on the cross-section of the wire used as the cord. We recommend using copper wire.
If the extension cord will be connected to a grounded outlet, we recommend purchasing a three-core wire.
It is also worth deciding on the wire cross-section. A wire with a cross-section of 1.5 mm can withstand a load of up to 3.5 kilowatts.
If you plan to connect devices with a larger capacity, then it is advisable to use a wire with a cross-section of 2.5 mm. This wire can withstand loads of up to 5 kilowatts.
To make an extension cord that uses high power, we recommend finding tables on specialized forums or websites of cable manufacturers. They indicate the wire cross-section and the power for which they are designed.
You should carefully consider the choice of plug. If your sockets are of an old design, you should not purchase a Euro plug.
Try to decide on the number of outlets that will be required for the extension cord. It is not advisable to use a single outlet.
Of course, if necessary, you can connect a home-made extension cord with a factory-made version that has several outlets. But it is advisable to provide two or three sockets in the manufactured version.
When purchasing a block with sockets, try not to confuse it with the option that is used when working with open wiring. The back part of such pads very often falls out; there are no clamps to protect against the forks accidentally falling out of the socket.
What to do first
You bought a certain number of wires from the network of a new house, completed the wiring, its ends are connected to a control panel that has not yet been built into the wall, and there are automatic machines nearby. Remember: it is better to install one automatic packetizer or RCD at the entrance to the electric meter. There is no such thing as too much protection. Next, make a plan for connecting the wires to the arranged packages.
It is advisable to relieve the network by dividing it into zones - with heavy loads and normal ones: kitchen, living room-bedroom, corridor-toilet, veranda-basement. You will get confused with packets; the instructions for them describe currents, loads, and wiring cross-sections. Methods of contact with terminals and so on.
Extension cord manufacturing process
To assemble, you will need a sharp stripping knife, pliers, and a set of screwdrivers. After the preparatory work, you can begin the actual production of the extension cord.
We recommend starting assembly with the fork. To do this, remove the top insulation by 5-6 cm. After this, we clear the cores themselves of approximately 1 cm of insulation. We disassemble the plug and attach the bare wires directly to the plug.
The main point is not to confuse the grounding wire. The location of the phase and zero does not matter. After this, you should reassemble the plug in reverse order.
After this, you can begin installing the sockets on the extension cord. The housing is disassembled and the wires are attached inside the block. We pay special attention to grounding. After fixing the wires in the block, you should assemble the socket housing.
After final assembly of the entire extension cord, we recommend checking it with a multimeter. After checking, the work on manufacturing the extension cord can be considered completed.
If you plan to make a very long extension cord, we can recommend using a reel. In this case, using this extension cord will be most convenient.
You can use a certain amount of extension cord without the fear of getting tangled in an unnecessary part of the extension cord. Storing an extension cord on a reel is much more convenient than in a coil.
Rough burlap as fashionable and cozy curtains
Today, more and more often, fashion designers choose burlap curtains for window decoration. This accessory perfectly complements interiors in rustic, Provence, country, classic, Scandinavian and eco-style. Burlap curtains are truly a godsend for those who want to transform a room without a large investment.
Due to the fact that burlap is a rather dense material, it will not be possible to form beautiful folds on the curtains and make draperies. From this fabric you can make curtains of the simplest cut.
Almost any room can be decorated with long burlap curtains in the form of a rectangular fabric.
The kitchen can be decorated with curtains in the “Cafe” style with a lambrequin.
Burlap curtains can be hung with eyelets. It is not only convenient, but also very beautiful.
Curtains made of burlap with easy assembly are suitable for the Provence style.
Roman curtains made of burlap will ideally complement a Scandinavian-style interior.
For a classic style, rectangular burlap fabrics with or without tiebacks are suitable.
Short burlap curtains with cute accessories, such as bows, will help you decorate your house in a rustic style.
To make burlap curtains more interesting, you can combine the coarse fabric with lighter materials in contrasting colors.
Did you like the article? Subscribe to the channel to stay up to date with the most interesting materials
How to make an extension cord with your own hands
In everyday life, situations quite often arise when the available sockets in an apartment or private house do not allow the use of any electrical appliances or household appliances. The main reason is their inconvenient location, so owners prefer to use an extension cord. In some cases, increased power outlets or a longer cord are required. In this case, home craftsmen make an extension cord with their own hands. A self-made extension cord will be much cheaper. If you have the skills to work with the tool, the entire procedure takes from 15 minutes to half an hour.
Step by step instructions
Installation and connection should be carried out in stages:
- decide on the lighting task that is assigned to the lighting fixture;
- buy the appropriate device;
- make precise markings of the source installation and cable routing;
- select a connection scheme;
- carry out the electrical wiring;
- install a lamp;
- connect the electrical wiring;
- perform a test run.
In some cases, it is necessary to groove the wall and install a switch.
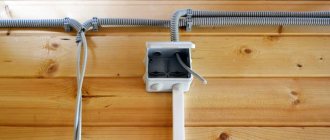
Instead of difficult internal wiring, it is possible to lay the electrical cord in an open way. In this case, the wire is placed in a closed box. This method involves installing the switch externally.
We recommend watching the video:
The photo shows a kkkkkombo! Low-quality soldering that has fallen off (red arrow) and a melted switch lamella (blue arrow). Unfortunately, switches burn frequently, especially on powerful loads such as kettles and heaters.
For convenience, the manufacturer can add a switch. It’s convenient to have such a block of sockets on the table - you go away and turn off all electrical appliances with one click. But a switch is an additional contact group that can fail, especially if the supplier slipped the manufacturer a batch of low-quality switches. Regular repair of a faulty extension cord comes down to replacing the melted switch. Therefore, if you do not plan to use the switch, then it is better without it.
The manufacturer may also add a small automatic fuse that will trip if the current is too high. Since such protection is based on a bimetallic strip, the protection is very slow; in the event of a short circuit, the circuit breaker in the electrical panel usually trips. Theoretically, such a switch should operate during prolonged operation with a slight excess current, but IMHO, if the cross-section of the extension cord is comparable to the cross-section of the cable in the wall, and allows operation at the maximum current for the plug, then the protection is provided by the circuit breaker in the panel.
Surge filters are often called “pilots” thanks to the domestic manufacturer who sold their products under this brand. The manufacturer is still alive.
A surge protector is an extension cord, in the socket block of which there is a certain node that can be called a filter. This can be a simple varistor (a blue washer with two terminals, often mistaken for a capacitor), or a full-fledged filter with chokes, varistors, suppressors and even arresters. The need for a filter is a controversial issue; any switching power supply usually contains a similar filter. If you do not live in a country house or in a village with long overhead lines, there is no need to buy and overpay for a surge protector. The photo shows network “filters”. Only the pilot‑s in the photo above and the vektor solo below have something sane. For the rest, the “filter” is reduced to only one varistor.
Preparing to assemble the extension cord
Before making an extension cord, you first need to decide on its purpose. This will allow you to determine the possibility of connecting certain devices, as well as the maximum permissible power. These factors have a direct impact on the choice of cable cross-section and other components. It is recommended to select all parameters with a small margin, so that in the future there is the possibility of connecting more powerful electrical equipment.
First of all, you need to buy a wire that will be used as a cord. The best option is considered to be PVS copper wire, which is characterized by increased flexibility. If there is a grounding contact in the socket, the wire must be three-core, but if it is absent, a cable with two cores can be used. When purchasing, you should carefully study the product labeling.
If the brand “PVA 3 x 1.5” is indicated, this means that the wire is three-core and the core cross-section is 1.5 mm. These parameters allow you to connect a load with a power of up to 3.5 kW. For a power of 5 kW, a cross-section of 2.5 mm will be required. The data for calculations can be taken in a special table, which will significantly speed up the solution to the question of how to make an extension cord with your own hands.
When choosing a cross-section, it is necessary to take into account the conductor length factor. For example, if the cable length is more than 100 meters, then during operation there may be a voltage drop due to the connection of high-power devices. Therefore, it is recommended to choose a cable with a larger cross-section than that provided in the calculation table.
Then you need to choose the right electrical plug, which should be removable. It is not recommended to purchase Euro-type products if you plan in advance to use sockets of an old design. Otherwise, you will additionally need an adapter. On the body of each plug there is a marking indicating the maximum current. For example, at 16A you will need a cable with a cross-section of 1.5 mm, and for 25A the cross-section will be 2.5 mm. If there is a ground connection, the plug must have a grounding pin in its design. It is not recommended to choose a single outlet. The socket block should be at least double, and preferably with three or four elements. When choosing, you need to be very careful so as not to accidentally buy an overhead structure designed for use with open wiring. It does not have a special clamp that protects against accidental pulling out, and over time the back cover of such sockets falls out. For extension cords, there are separate options in the form of socket strips or cable sockets. If you need to connect a computer or other office equipment, then in this case a surge protector is made, which has a push-button switch and light indication.
After all the materials are prepared, you can begin assembling the extension cord. This procedure is carried out using a knife, screwdriver and pliers.
Everything is ready for installation
So, the diagram has been drawn up and understood, the components have been prepared - nothing prevents you from starting assembling the electrical panel. First of all, the location of the shield is selected, on which the device is attached, as a rule, with self-tapping screws or clamps. The electrical panel housing is usually located near the entrance to the house or apartment - in the vestibule or hallway. If the owner has expressed a desire to hide the panel in the wall, and the wall turns out to be concrete, you can use a false wall or a plasterboard ledge: the area of the room may be slightly reduced.
When choosing a place on the wall to install an electrical panel, you should take into account that the distance from the device to the nearest doorway should be at least 15 cm, the distance to the floor - 1.5–1.7 m. If necessary, the owner of the home or a called electrician should be able to easily reach the panel : It is strictly prohibited to place the device inside cabinets or other furniture. The device should be located away from gas pipes and flammable materials.
To prevent the electrical panel from being too large or small, you can first determine its size by knowing the dimensions of the components that will be located in it. For example, the width of a standard single-pole circuit breaker is 17.5 mm, a two-pole circuit breaker is 35 mm, and a three-pole circuit breaker is 52.5 mm. The remaining components have the following dimensions:
- RCD single-phase two-module - 35 mm;
- Three-phase four-module RCD - 70 mm;
- single-phase two-module difavtomat - 70 mm;
- terminal block on DIN rail - 17.5 mm (1 module);
- counter (6–8 modules) – 105–140 mm;
- voltage relay of 3 modules - 52.5 mm; This is not a mandatory element of the shield, but when used, you can protect equipment from power surges or sags, and save household appliances such as a refrigerator, TV, computer and other electronics from failure;
- DIN rail socket (3 modules) - 52.5 mm.
The modules are located on the so-called DIN rail - a special metal plate 35 mm wide. The socket is not one of the required elements, but may be useful during repair work. If, when summing up the number of components, it turns out that a panel with 20 modules is needed, then it would be reasonable to install an electrical panel with 24 or even 32 modules - who can know how many household electrical appliances will be added to the house in a year, two or five?
How to assemble an electrical extension cord with your own hands
At the first stage, the top insulating layer is removed from both sides of the cable by approximately 5-7 cm, after which the ends of each core are stripped to 1 cm. Next, the plug is disassembled by unscrewing the fastening bolt. After this, you need to loosen the screws on the clamp that secures the cable inside the plug body. Then the stripped wires are connected to the two plug contacts.
The location of the conductors does not matter; the most important thing is to correctly connect the grounding contacts on sockets and plugs. After connecting the conductors, the plug is reassembled. At the final stage, the socket block is disassembled and two conductor cores are connected to the contacts. The third wire is connected to the ground pin, exactly the same as on the plug. Thus, both ground contacts are connected by a single wire.
If the core consists of many wires, then it is recommended to solder it or fix it with a tip. As a last resort, you can simply twist the wires using pliers. After all connections, the cable is fixed inside the housing and the final assembly of the unit is performed. The finished extension cord is checked by plugging it into a home electrical outlet or using a multimeter.
How to connect an extension cord to the network using a lamp
So, we will need pliers, insulating tape, a lamp, wire cutters and the extension cord itself
Take the lamp, carefully break the glass, and use pliers to remove the glass burrs from the threaded part of the lamp. We leave the central glass rod, then we bite off the central antennae with pliers, leaving the side electrodes
We take an extension cord plug, one electrode and tightly wrap several turns onto the pin of the plug and insulate it with insulating tape. Moreover, the glass rod should be between the pins of the plug in the middle.
We do the same with the second electrode and part of the plug, then we wrap the entire connection with tape for elasticity and insulation. We screw our assembly into the socket, turn on the switch and the extension cord under voltage.
How to properly use a homemade extension cord
When using a homemade extension cord, several mandatory requirements must be met.
- There should not be any damage on the cable, and if it does appear, it must be insulated. Isolation is performed when the extension cord is unplugged from the outlet.
- If a plug or socket fails, it must be replaced. They should be protected from moisture and avoid excessive overloads.
- When operating at maximum loads, the cable must be completely unwound to avoid overheating.
Briefly about the main thing
Most often, for the manufacture of street extension cords, rubber-insulated conductors KG and its European analogue XYMM, KG-HL, KGN and cables with a polyvinyl chloride sheath PVA and PRS are used. Each of them has its own operating characteristics and recommendations for use.
When choosing a carrier, the following number of parameters are taken into account:
- Length and number of sockets.
- Brand, conductor cross-section.
- Protection from destruction.
- Fork modification.
- Resistance to external conditions and network fluctuations.
When selecting a conductor for the manufacture of an extension cord, it is necessary to determine its power loss and the risk factor for the sheath fire from possible heating.
Instructions for assembling a good extension cord
So, first, let’s figure out what you can use to make a good electrical extension cord at home:
- Demountable electrical plug. You can cut it off from a broken electrical appliance, or you can buy a new one. The requirement for the plug is that it must be grounded.
- Three-core cable of the required length. Here you need to pay attention to the purpose of the future homemade product. If powerful electrical appliances (for example, a welding machine) will be connected, the diameter of the cores must be suitable. It is better to calculate the cable cross-section in terms of current and power in advance, so that in the future you do not encounter problems such as melting of the socket and short circuit. Most often, when assembling an electrical extension cord at home, PVS 3*1.5 and PVS 3*2.5 wires are used.
- A block of sockets (or just one). There are also several main requirements here: the back wall of the outlet must be closed, the product must have grounding contacts, and the design must be made dust and moisture resistant. If all these requirements are met, the issue of safety of using such an electric carrier will not worry you in the future.
As for tools, you may need the following:
- multimeter (allows you to check the extension cord after assembly);
- curved and straight screwdriver;
- pliers or a special tool for removing insulation from wires;
- sharp knife;
- insulating tape.
Using an example, let's look at how to make an electrical extension cord yourself from a three-wire cable with sockets for 4 sockets. So, the assembly instructions look like this:
- Unscrew the plug and socket block to prepare places for fixing the cores.
- Remove 4-6 cm from the top sheath of the cable on both sides.
- We strip each wire by 10 mm, as shown in the photo below.
- We insert the wires into the corresponding terminals and tighten the screws thoroughly with a screwdriver.
- We twist the socket block and plug in the reverse order. If the cable dangles in the pass-through hole, wrap a little insulation to make the fit tighter.
- Using a multimeter, we connect a homemade electrical extension cord. If everything is correct, plug the plug directly into the power supply and use it.
That's all the instructions for creating. We hope that now you know how to make an electrical extension cord with your own hands at home. If you suddenly have any questions, ask them to our specialists in the “Questions to an Electrician” category!
I would like to additionally note that it is possible to make a more reliable version of the electrical extension cord with a switch in the form of a button. In this case, you can turn off or turn on the power to the sockets. If you decide to assemble a long carrier (for example, 50 meters), then it is better to wind it on a special reel so that the wires do not constantly get tangled. In addition, a coil is more convenient to store than a coil of wires.
We also recommend watching this visual video lesson:
Electrical wiring in a wooden house
When installing wiring, you should strictly observe safety precautions and precautions, especially if the house is wooden.
Installation of electrical wiring in such a house is carried out in accordance with the following requirements:
- In a wooden house, it is allowed to use a self-extinguishing cable with high-quality insulation.
- Distribution boxes must be made of metal.
- All wire connections must be sealed.
- If installation is carried out in an open way, then a porcelain insulator is laid under the cable.
- In case of installation of wiring in a closed way, a metal pipe or box (made of copper or steel) with grounding is required to be laid in the grooves. If plastic corrugation is used, it is installed in the plaster. This method is more reliable and aesthetically pleasing.
To ensure greater safety, it is recommended to install a residual current device in a wooden house that stops the machine in the event of a short circuit or current leakage.
If you look at the photo of the finished electrical wiring in the house, you can conclude that the work is not easy, but this task is quite doable. With careful preparation and study of the relevant materials, electrical wiring installation work will not cause you any difficulties.