A chandelier is the most common type of lighting fixture for spacious halls and living rooms. Typically, this bulky and luxurious device operates in several modes, providing economical or full lighting with one, two or more installed bulbs.
The product requires painstaking care - from sweeping away dust and washing lampshades to replacing electrical wiring. During the repair work, the device is removed, so below we discuss the question of how to remove a chandelier from the ceiling without damaging the structure.
Main stages of dismantling
The general scheme for dismantling a chandelier does not depend on the materials used to make the ceiling. First, you need to prepare well and be sure to turn off the power to your apartment/private house (at least the room from which the device is removed).
The correct sequence of actions is as follows:
- Gather the tools needed to dismantle the old lamp and install the new one. Carefully inspect the design of the future chandelier and make sure there are no defects.
- Turn off the power supply to the room/apartment with a switch inside the distribution panel, usually located in the vestibule or entrance (on the site).
- Check if everything was done correctly by turning on the lighting devices and connecting electrical appliances to the outlets. Ideally, you need to use a tester (or a simple indicator screwdriver).
- Despite the power being turned off, work must be carried out wearing protective rubber gloves designed for operation under voltage of 220 V.
- Unscrew the old chandelier and, provided the fasteners are the same, fix the new one to the ceiling. If the holders are different, then the work will become much more complicated.
How to remove the lamp
The technology for replacing a spotlight is determined by the type of bulb base and the presence of a retaining ring or spring clips.
Spotlight lamps.
Lamp manufacturers produce light bulbs with several types of base: threaded (screw), designated by the letter “E,” and pin, designated by the symbol “G.” There are no problems with replacing light bulbs with E socket. I unscrewed the burnt out light bulb and screwed in a new one.
Threaded (E) type of base.
Pin (G) socket type.
In sockets marked G, everything is also simple. With straight pins, the light bulbs (G53) are removed by moving towards you - you need to pull the bulb, inserted in the opposite direction until it clicks. It’s a little more complicated with the GU10, GX53 base, where there is a thickening at the ends of the pins. Here you need to hold the body of the lighting fixture with one hand, and with the other turn the lamp counterclockwise 200 degrees. The new light bulb is inserted into the housing in the reverse order.
Socket for light bulb with E base.
Depending on the fastening - a retaining ring or springs - the light bulb must be removed from the lamp body or from the platform along with the cooling radiator.
Housing with retaining ring
How to remove a spotlight from a suspended ceiling with a locking ring? The operating procedure is as follows:
Compress the retaining ring.
- The room is de-energized. In this case, not by a switch - phase zero can pass through it instead, but by an automatic switch. If such a device is not installed in the apartment, then you need to go out into the corridor and remove the plugs;
- The retaining ring is compressed by the antennae with special pliers (you can use your fingers, but it is very inconvenient) and removed from the socket. You need to hold the stopper with your second hand so that it does not fly to the side (it may be spring-loaded) and injure your face;
- The lamp body itself falls out of the platform and is held on by wires. All that remains is to remove the light bulb using one of the methods described above;
- A burnt-out light bulb is replaced with a similar one of the same power (with a lower power it will be a little dark, with a higher power the ceiling panel may overheat);
- Insert the lamp body into the platform and secure it with a locking ring.
Spring housing
How to remove an LED lamp from a stretch ceiling fixed in the platform with springs? The algorithm of actions is slightly different:
the lighting system of the suspended ceiling is de-energized; the lamp is loosened to create a small gap for a screwdriver; Using a flat screwdriver, carefully, so as not to damage the canvas, press the edge of the lamp body away from the platform; insert a second flat-head screwdriver into the gap formed; Using two screwdrivers, the housing is carefully removed from the ceiling until your fingers reach the springs;
Lamp mounting diagram.
the springs are pressed against the body of the lamp with your fingers, after which the lighting device is easily removed from the ceiling;
The spring is pressed against the body with your fingers.
- by moving toward you or turning counterclockwise, the lamp is removed from the socket;
- a new light bulb is installed in the socket;
- the springs are pressed against the lamp body with your fingers and inserted inside the holder ring, after which with a slight movement the lamp body is put in place;
- the power is turned on.
Preliminary preparation
Changing the interior, making repairs, breaking down – there are countless reasons why people decide to replace an old chandelier with a new one. If a similar need arises, you can go two ways - call an electrician you know or try to do everything yourself.
In the second case, you need to read the instructions for dismantling a specific chandelier from a specific ceiling and be sure to follow safety rules.
After the voltage at the switchboard is turned off, you will have to prepare the necessary tools. During the work you may find it useful:
- indicator screwdriver;
- stepladder or stable chair;
- wire cutters, pliers and a stationery knife for removing insulation.
Tools and accessories
The variety of lamps leads to the need to know exactly when you can simply replace a light bulb, and when replacing it requires disassembling the lamp. In this case, you will need some tools and accessories:
- stepladder or strong table;
- indicator screwdriver with LED or tester;
- pliers for removing retaining rings;
- flat screwdrivers 2 pcs.;
- Phillips screwdriver;
- construction knife;
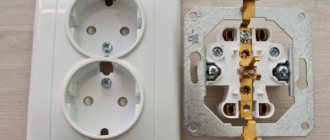
- terminal block.
Attention: in many works you can find a recommendation to have insulating tape to insulate twisted wires. In our opinion, it is better to refrain from this type of connection - due to poor contact, the wiring may heat up and ignite. A simple terminal, which costs several times less than electrical tape, will quickly and reliably connect the wires.
Dismantling the elements that make up the chandelier
When you have collected all the necessary tools, visually examine the chandelier. Once again, make sure that there is no voltage, and then begin to remove all hanging elements from the device, which include glass decorations, lampshades, etc.
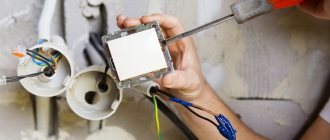
Be sure to unscrew the light bulbs from the sockets and remove the cover under which the wires are hidden. The remaining parts used to connect the device to the electrical network are located under a decorative cap secured to the base of the ceiling with a screw.
Dismantling the chandelier mount
Not only the wires are hidden under the decorative cap, but also the fasteners necessary to securely fix the device to the ceiling. There are two standard options for mounting a chandelier - a hook and a cross-shaped bar. In the first case, everything is much simpler than in the second, where there is a need for additional tools - wrenches of the required sizes.
Before removing the chandelier mount, remove the insulation and disconnect the wires. The latter necessarily move in different directions. When the chandelier with the mount is removed, turn on the power and use a tester to check each exposed wire. Insulate them by marking phases and neutral.
Safety precautions
The first thing you should pay special attention to is your own safety, since you will be working in an active electrical installation. Therefore, it is initially necessary to ensure that voltage is removed from current-carrying elements
To do this, it is not enough to turn off the switch key, since for a number of reasons it can break the neutral conductor instead of the phase conductor. As a result, a dangerous potential will be present at the cartridge contacts.
To remove the chandelier safely, follow these steps:
- Disconnect the input circuit breaker on the distribution panel; it will be good if it is a two-pole switch that simultaneously breaks both the phase and neutral conductors.
- If the machine is single-pole or you are operating not an input machine, but a dedicated machine, be sure to check the absence of voltage. The easiest way is to turn on the switch; if the chandelier does not light up, the circuit breaker has broken the circuit. But this does not guarantee the absence of potential if the machine breaks zero instead of phase. Therefore, it is more advisable to use an indicator screwdriver.
- When performing work to remove or replace a chandelier, it is necessary to install a stepladder so that all work is carried out to the side of you. Since when you are under the device, there is a possibility of small particles and debris getting into your eyes.
- If nothing is immediately connected to the supply wire after dismantling the chandelier, it is better to insulate the wires. This will ensure that you don't get an accidental electric shock from touching them.
Features of dismantling depending on the type of device
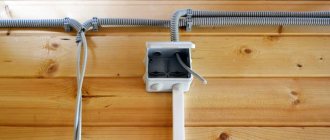
Not only chandeliers, but also other lighting fixtures are installed on the ceilings of living rooms, halls, bedrooms and other living rooms. Moreover, the dismantling process depends, among other things, on the design of the ceiling itself. Recently, suspended and suspended ceilings have become widespread.
Removing a spotlight from a suspended ceiling
Such work can be done independently without calling an electrician. The main thing is to follow the sequence of actions exactly. Use a screwdriver and remove the installed light bulb from the housing. Insert another screwdriver into the hole where the light bulb was, then carefully pull out the housing. Stop as soon as you can get your fingers inside the hole to press the latches (latches) and remove the device from its seat.
Unscrew the screws from the terminal block and pull out all the contacts. All actions must be performed without haste, carefully so as not to damage fragile structural elements, including fixing latches. If you do not hold them, they will fall back and are likely to damage the ceiling structure.
Often, a spotlight is dismantled to be replaced with a new lighting fixture. The installation process also requires strict adherence to the sequence of actions. Disassemble the device and put a temperature protection ring on it, and then insert the device into the finished hole, securing it with the same clamps.
Connect all wires to the terminal block, securing them with screws. Make sure that the connections are made strictly according to the color markings. Close the contacts with special caps and place them in a box with a lid. Install a light bulb inside the spotlight, and then check the operation of the device by connecting the electricity.
Often there is a need for a banal replacement of a failed light bulb. In this case, there is no need to dismantle the lamp, but you must turn off the current. Unscrew a halogen or regular light bulb. If the device uses an LED product, you will need to move the clamps, remove the thermal ring and pull it out of the housing.
Hold the ring firmly to avoid springing back. Use gloves when removing halogen lamps, as greasy marks left on the glass body can significantly reduce the life of the device. Instead of gloves, special wipes are suitable. To install the light bulb, follow the reverse sequence of steps.
Removing a spotlight from a suspended ceiling
Suspended ceilings are much harder than stretch ceilings. Most of them are constructed from durable sheets of plasterboard, which affects the process of dismantling spotlights and other lighting fixtures. Before dismantling, select a new device that will be installed in place of the old one.
To securely fix the housing in suspended ceilings, products with spacers are used - two springs are placed opposite each other. Hold the device on both sides and pull it out of the frame to a certain distance so that there is enough space to unscrew the base. If you need a simple replacement of a light bulb, then these steps will be enough - unscrew the lamp and install a new one, then return everything to its place. Be sure to press the spacers against the base, and then insert the device into the seat. When the springs are released, the fixation occurs and the device remains in the ceiling.
Often, replacing a light bulb may require complete dismantling of the lighting fixture. Hold the product at either end and pull down using minimal force. When you notice the springs, compress them so that the lamp leaves the holes without any problems. Hold the springs firmly to prevent them from slipping out and injuring your hands.
Removing a chandelier from a suspended ceiling
Chandeliers can even be installed on suspended ceilings, for which special fastenings are used. Dismantling such devices is a more difficult task compared to removing spotlights, so there is often a need for help. Before starting work, turn off the power to the room.
The further process depends on what fasteners were used to mount the device. In any case, you will need to get rid of the protective cap to reveal the insulated wires connected to each other. Remove the insulation and double check that there is no electricity by applying an indicator screwdriver to the various contacts. Disconnect all wiring and remove the chandelier hanging on the hook. All the same is done for installing a chandelier with a similar mount.
Instead of a hook, a cross-shaped bar can be used. The sequence of actions will be almost identical. The only change is that after disconnecting the wiring, you need to unscrew the nuts or screws holding the chandelier bar under the ceiling.
How to hang a chandelier from the ceiling yourself: step-by-step instructions
Photo from Instagram. Author master_ekb66
When deciding how to hang a chandelier, it is worth considering the material of the ceiling and the nature of the fixture's mounting. For a stretch ceiling you will need a wooden base; for a plasterboard ceiling, do not use a hook. Once the chandelier is assembled with all the shades, we begin its installation. The step-by-step instructions are as follows:
- Disconnect power from the wiring in your house or apartment.
- Remove the old chandelier; wires and a hook will be visible from the ceiling.
- Determine which wire is phase using an indicator screwdriver; the light that lights up will indicate the phase.
- Determine the type of fastening - on a hook or to the ceiling by screwing the base of the lamp with dowels.
- Connect the wires using metal terminal clamps; tighten the wires in the terminal blocks as tightly as possible.
- Hang the chandelier on a hook or screw it with dowels.
- Check the operation of the lamp.
If suddenly not all the lights light up, you need to check the reliability of the contacts.
How to install on a hook
The ceiling covering, and not just the design of the chandelier, determines whether the chandelier can be attached to a hook. With a plasterboard ceiling, you should choose other types of chandeliers. A concrete ceiling or in wooden houses with strong ceilings are quite suitable.
For lamps weighing 1-1.5 kg, a screw hook is suitable, which is screwed into a special dowel. For heavy products, you will need metal expansion anchors with a length of 50 mm and a cross-section of 10 mm.
To attach a chandelier to a hook:
- make a hole of approximately 8 mm next to the wires coming out of it;
- fix the dowel, screw the hook into it and insulate the hook with two layers of electrical tape;
- connect the wires of the chandelier with the wires from the switch;
- pull the decorative bowl to the ceiling and secure it.
Before screwing the cup to the ceiling, you need to make sure that the wires are securely connected. Sometimes a gap forms between the cup and the ceiling because the height of the cup is not enough. This should be taken into account when purchasing a chandelier.
When using dowels, it is better to choose corrugated ones, with a length of 40 mm, since smooth ones do not hold well. Butterfly dowels are suitable for plasterboard ceilings.
Option for installing a hook on a gypsum board
Rail mounting
This type of fastening is more complex and is best done together with an assistant. The metal bar must take on the entire load. If suddenly there is a hook from an old chandelier on the ceiling, it must be removed or bent.
Installation is done like this:
- attach the plank to the ceiling and determine where the holes for the dowels will be drilled, mark them with a pencil;
- drill holes and fix dowels in them;
- insert the mounting bolts into the bar and secure with nuts until they stop;
- place the strip on the ceiling and secure it with self-tapping screws;
- attach the decorative box to the bar so that the mounting bolts fit into the holes on the box, and first connect the wires of the lamp and switch;
- press the box to the ceiling and secure it with decorative nuts.
If we are talking about a suspended ceiling, you need to prepare in advance a mounting platform from a block of wood for attaching the mounting strip.
Dismantling methods depending on the type of fastening
Chandeliers can be attached using a hook or a cross-shaped strip.
Removing a chandelier hanging on a hook
The simplest option. After removing the protective cap, insert your hand into the hole and remove the chandelier hanging on the hook. Be sure to de-energize the room or the entire house/apartment first. All that remains is to disconnect the wires and install a new product.
Removing a chandelier from a cross-shaped strip
In this case, after removing the protective cap, a different picture is observed. The fastening system is hidden under it. The plank can be either cross-shaped or rectangular. First, unscrew the screws or dowels with which this strip is attached to the ceiling.
Tips to make the process easier
Incorrect dismantling
There are many articles on the Internet that provide incorrect instructions for dismantling a ceiling chandelier. Some “specialist authors” recommend cutting the canvas around the circumference of the lamp in order to quickly and without any effort remove the lighting device. This approach is wrong and very dangerous. And that's why:
- It is almost impossible to restore the ceiling structure after this.
- It is not always necessary to completely dismantle the product - often the device requires a simple replacement of the light bulb.
- When cutting the fabric, you can touch the wires, which will cause an electric shock.
- It will not be possible to install a new lamp of the same size in place of the old lamp. In this case, you will only have to hang a chandelier with a larger diameter.
- As a result of such actions, it may be necessary to completely replace the stretch ceiling.
Possible problems during dismantling
Lighting fixtures do not always leave their installation location freely. Problems especially often arise when dismantling spotlights. The most common of them are:
- overly compressed springs, leading to destruction of the contours of the grooves or crumbling of the thermal ring made of plastic;
- electric shock if the room was not de-energized before starting work;
- injury to fingers due to spring-type latches when removing the lamp from its seat;
- damage to the ceiling structure due to careless removal of the lamp.
Dismantling a chandelier or any other lighting fixture is not fraught with difficulties. The main thing is to follow basic electrical safety rules and clearly follow the designated sequence of actions. If you do not have experience working with electrical appliances or do not have basic knowledge, then this task should be entrusted to a specialist.
How to replace small lamps with large ones
Sometimes the lighting scheme is poorly thought out and there is not enough light in the room.
Then there is a desire to install larger lighting fixtures. Let's look at how to do this. The first step is to dismantle the spot. Then a thermal ring of the required diameter is glued onto the stretch ceiling fabric, so that the old tread ring is inside. After the part is firmly fixed, the film is cut out, creating a large hole.
Then the embedded platforms are adjusted to the diameter of the base of the new lamp. To do this, you need to carefully cut out the excess plastic rings with a knife so that the device body fits freely into the hole. When the site is ready, the lamp and light bulbs are installed.
You can replace lighting fixtures yourself, without the help of specialists. But if you have doubts about your own skills and knowledge, it is better to entrust this work to the specialists who installed the suspended ceiling. After all, careless actions lead to damage to the material, and improper handling of electrical appliances results in serious injuries.
This is interesting: The incandescent lamp and its features - let’s look at it in order