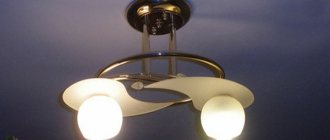
A chandelier is a favorite and main lighting fixture in most apartments. The varieties and varied designs make it universal, suitable for any style and size of room. Installing a chandelier is a rather complicated process that is best left to specialists. If you are “your own master,” then we hope our article will help you understand the basic principles and details of this operation.
Types of chandelier mounting
As we know, there are two types of chandeliers - ceiling and pendant. They differ in appearance and in the method of attachment. A pendant chandelier is more difficult to install. There are only three mounting methods:
- using a hook;
- mounting on a bar;
- mounting on a bracket.
A chandelier will delight you with its light and decorate the room only if it is securely fastened and connected correctly. Therefore, we devoted this article to practical issues of installing and connecting a chandelier, and we will try to understand the technology of each method.
Installing a chandelier on a suspended ceiling using a hook
When the profile necessary for installing the stretch ceiling is secured, all that remains is to attach the fishing line.
Take two pieces of this material; they should be attached in opposite corners of the room and intersect in the middle.
The intersection point is where the chandelier should be hung.
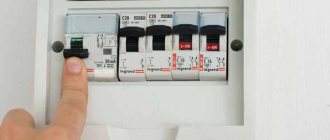
Before you begin installing the chandelier, you must turn off the power to the entire room.
Further work is carried out in accordance with generally accepted instructions:
- First you need to turn off the power to the room.
- A hook should be attached using an anchor or dowels. It is important that the end of the part is not below the fishing line.
- The next stage of work will be stretching the fabric. After this, you should wait 24 hours, and only after that proceed to further work.
- Where you plan to fix the canvas, you should attach (you will need glue) a special plastic thermal ring. This part is needed to protect the material.
- After the glue has dried, you should cut a hole in the ring to get the wires out.
- At the last stage of work, you need to attach the chandelier to the hook and install a cap to hide the wires.
Craftsmen recommend choosing a ring with a diameter smaller than the chandelier cap. After all, after installing an element that matches the size of the lamp, you don’t have to worry about aesthetics.
Features of mounting a chandelier on a hook
Depending on the weight of the chandelier, different types of fasteners are selected. The hook is considered the simplest and most reliable option. It is always screwed into a solid base - concrete or wood. The choice of fastening also depends on the type of ceiling covering. The following types of hooks exist:
- Anchor - a hole is drilled for it, in which it is fixed by surprise. Mainly used for concrete ceilings.
- Through - even at the stage of building a house, the hook is installed through the ceiling and securely fastened.
- Mortgage – fixed in a concrete slab if there are voids there.
- Simple hook with thread, self-tapping screw.
The type, type and size of the mount depend on the weight of the lighting fixture. Typically, installation parameters are indicated on the packaging of the chandelier. However, the hook is usually not included in the kit, which means you need to purchase it yourself. And here there are certain rules:
- If the weight of the chandelier does not exceed 4 kilograms, then installation can be carried out using a regular threaded hook. To do this, just drill a hole in the ceiling, place a plastic dowel in the channel, and then screw in the hook as deeply and tightly as possible.
- If the weight of the lamp exceeds 4 kg, then an anchor option will be required. Such a hook is a whole structure consisting of a spacer sleeve, which, in fact, ensures reliable installation by expanding in the drilled hole; threads and nuts, which ensures the convenience of screwing the thread. When screwed in, the spacer sleeve expands and is securely fixed in the concrete base.
After installing the hook, electrical power is supplied to it. The main advantages of such fastening:
- The most reliable method allows you to attach the chandelier to a suspended ceiling. Special high-strength hooks can withstand very massive models.
- It is possible to change the lighting device if it is out of order, or you have started repairs - there can be a lot of reasons. Just remove it from the hook. When attaching to the bar, you will have to unscrew a lot of things.
The main drawback is that this option is not suitable for low ceilings.
Types and methods of fastening
When choosing your lamp, even in the store you need to pay attention to the mounting methods.
Modern ceiling lighting fixtures are available with several types of chandelier mounting options:
- a loop on the luminaire fixture that allows it to be installed on a ceiling hook. This is one of the main types of mounting a ceiling chandelier. In this case, the base should be as strong as possible, for example, concrete floors.
Hook mounting diagram
- attaching a ceiling chandelier to a bracket or a special mounting strip. With such fastening, the load from the weight of the lamp is divided into several different points. The bracket is attached to the ceiling with dowels with screws screwed into them. In this case, the weight of the chandelier should not exceed 1.5-2.0 kg.
Mounting diagram for mounting plate
- a cross or double perpendicular strip allows you to hang a lamp adjacent to the ceiling, for example, a ceiling chandelier. A cross bar is not much different from a bracket, except that the fastening is carried out at a greater number of points and the lighting device can have a larger mass.
Mounting on a cross-shaped strip is used, as a rule, when installing square lamps
- a reliable I-beam platform for mounting a massive, heavy chandelier. Allows fastening at several points.
Scheme for attaching a heavy chandelier to a platform
Installation work on hanging a lamp usually does not cause much difficulty. As a rule, dowels with self-tapping screws are used to attach a chandelier to the ceiling. The diameter of the screws must correspond to the size of the hole in the fastening strip; their length should not be shorter than 4 cm and not longer than 6 cm.
Having considered the types and methods of fastening, you can decide how to install the chandelier on the ceiling correctly, without unnecessary and unpleasant consequences.
Read: Which chandeliers are suitable for suspended ceilings
Attaching the chandelier to the bar
The mounting strip is included with the chandelier. Special plates that are fixed to the ceiling with self-tapping screws come in three varieties:
- For small devices, conventional longitudinal ones are used.
- Cross-shaped - if the weight of the chandelier is significant.
- For the heaviest and most massive ones, I-beams are used.
Sequence of installation operations:
- First, mark with a pencil the intended location for attaching the chandelier.
- Use a drill or hammer drill to make holes for fastening.
- We insert plastic dowels into the holes.
- The plank is applied in such a way that the holes on it coincide with the dowels, then we screw the plank.
- We fix the chandelier on the bar, connect the wires.
- Tighten all existing nuts.
You won’t be able to do this alone, since you have to hold the chandelier and connect the wires at the same time. This method is often used when installing on a suspended ceiling.
Methods for installing a chandelier on a suspended ceiling
There are several options for fixing the lighting fixture to the hanging canvas. However, when choosing a method, you should take into account the characteristics of the room and the individual preferences of the apartment owner.
To hang a chandelier, it is recommended to use the following methods:
- Hook. The use of this method is considered the most popular and reliable solution. Moreover, the installation of the structure can be carried out using a conventional hook (anchor). Sometimes the hook is welded to the plate, after which it is fixed to the coating.
- Mounting plate. Mounting using this method is suitable for compact chandeliers that are small in size. Almost always the plate is an integral part of the purchased chandelier. Moreover, there are also special fasteners, or clamps.
- The installation bar is cross-shaped. Such a mount is often also one of the components of a medium-sized lighting structure.
- I-beam. You can hang heavy or oversized lamps on it.
There are several ways to hang a chandelier. The main thing is to do everything correctly and not damage the tension fabric
After choosing a suitable chandelier and selecting the necessary fastening, you should take care of the correct installation of the structure.
But is it possible to attach a chandelier yourself? It should be noted that if you use special instructions, the entire work process will not become a problem. However, it is worth starting to install the profile before carrying out repair work on the suspended ceiling.
Mounting a chandelier on a bracket
The chandelier is mounted on the bracket using the same technology as on the bar. You will just have to drill more holes, since the bracket consists of several crossed strips. It is required when the chandelier is very massive and heavy. The bracket is also included in the package. In this case, several holes are made in the ceiling, so careful preliminary marking is necessary. Installation consists of two stages: securely attaching the bracket to the ceiling and attaching the chandelier itself.
On a plasterboard ceiling
Chandelier fixed to plasterboard ceiling
What difficulties may arise when installing a chandelier on a plasterboard ceiling? The fact is that both the appearance of the plasterboard ceiling and the mechanical strength of the installed structures are important.
You need to decide in advance on the choice of chandelier, and determine how it will be fixed. Let's look at the main recommendations:
- The place on the ceiling where the heavy chandelier will be located must be additionally reinforced with a metal profile. This needs to be taken care of when making the frame of the ceiling structure.
- To attach a small chandelier directly to drywall, you need to buy fasteners (folding spring dowels, butterflies). There is no need to strengthen anything.
During work, it is important to follow safety precautions - ensure safe movement under the ceiling and de-energize the electrical system
We attach the chandelier to the plasterboard ceiling
Chandelier on a plasterboard ceiling
Drywall has strong mechanical properties, and for this reason the installation is carried out directly to the material itself. But this method has limitations.
- Since a plasterboard sheet can withstand a load weighing up to 6 kg per square meter, taking this feature into account, when purchasing, preference should be given to chandeliers that have a relatively light weight.
- It must be taken into account that deformation of the plasterboard ceiling may occur during operation of the device, for example, when replacing a lamp or if you accidentally catch the chandelier with your hand. Therefore, in order to preserve the attractive appearance of a plasterboard ceiling for a long time, it is not recommended to repeatedly change the chandelier, especially not to make new ones next to the old holes.
Installation of a hanging chandelier
First, consider the option of mounting a hanging chandelier. The first step is to drill a hole in the drywall (for the selected fastener) and insert a spring dowel or butterfly - this is where the chandelier will be suspended from the ceiling.
Holes are made at the designated points, as in the case of a hanging chandelier, but there was a hook, and here we will use butterfly dowels, to which the strip will be attached with self-tapping screws. Now the most interesting part - holding the chandelier under the ceiling, you need to connect the wiring, and only after that it will be possible to fix the chandelier.
How to attach a chandelier?
During installation, it is necessary that the lighting device is not only securely fastened, but also does not damage the ceiling covering. The fasteners included with the chandelier will not always be suitable for your ceiling. Therefore, we analyze it in detail.
- Wooden ceiling - this is the easiest place to strengthen a chandelier. We mark the surface, make holes, screw a bar or hook (you can use a self-tapping hook with a thread), connect power and hang the lighting fixture.
- Concrete ceiling - this will require some work. We choose an anchor hook for this purpose - it, as a rule, is not included in the chandelier package. We fix it in the ceiling, as described above, that is, we drill a hole so that the hook fits into it as tightly as possible - choose the correct diameter of the drill, and the depth of the hole exactly matches the length of the hook. When drilling, to prevent dust from flying into your eyes, craftsmen advise putting a plastic or paper cup over the drill. We connect the wires and carefully place them inside the decorative bowl. We check the strength by hanging a load heavier than the chandelier.
- Stretch ceiling - fixed either with a hook or on a strip. All preliminary work is carried out before installation of the structure. A hole is made for the hook, a chain for the chandelier is attached to it, and the cut hole is covered with a bowl. When mounting on a bar, the algorithm is slightly different. The strip is fixed on a wooden base - bars equal to or exceeding the width of the strip, so that it does not overlap or pinch suitable wires. Then they install the suspended ceiling and mark the place where the strip is fixed, glue a special plastic ring in the center, cut a hole inside, take out the wires and attach it to the lamp.
- Plasterboard (suspended) ceiling. It is located at some distance from the ceiling and installation of the lamp has its own characteristics and difficulties. The most desirable method of fastening is on a hook. To do this, mark the location of the lighting fixture on the ceiling, where an anchor hook is inserted, around which the frame is mounted, leaving a hole for the hook. The ceiling chandelier is attached using a strip, to which a timber base is created. The bar is fixed to the base, and then the lamp is attached to it.
Installation using a mounting strip
Before attaching the chandelier to the ceiling using a mounting strip, it must be:
- try it on in the place where it will presumably hang. At the same time, the decorative components of the lamp, covering the mounting location and wires, must fit tightly to the ceiling;
- if this is the center of the room where the mounted hook is located, then it needs to be bent, but not cut off. Perhaps in the future, when replacing lamps later, it will still be useful.
Trying out the bar for a future position
- Markings are made for fastening the strip. To do this, the plank is applied to the ceiling and outlined with a pencil so that the attached elements do not interfere with the connection to the electrical network. Mark the drilling locations. Plastic dowels are carefully driven into the drilled holes. The plastic should be ribbed, which will prevent it from becoming loose over time and starting to fall out of the nest;
- Using screws or self-tapping screws, the fastening strip is attached to the ceiling.
We fasten the bar and bend the hook (maybe it will be useful in the future)
- After installing the connecting wires, the bowl or other decorative element is applied to the installed bar, aligning the connecting holes.
Connecting the wires
- Tighten the entire structure with decorative nuts, after which you can screw in the light bulbs and install shades or other components of the lamp.
Completion of work - finished chandelier in the interior
It is worth noting that hanging a chandelier from the ceiling can be difficult alone. Another hand is needed to connect the wires. Therefore, when connecting a lamp to the mains, one person holds the chandelier, the other handles the wires.
In case of installing suspended ceilings, the base for attaching the strip must be installed in advance. This can be an ordinary wooden block of the required thickness, which, before installing the canvas, is attached to the ceiling, and then a plank is mounted on it.
Bar for suspended ceiling
It is necessary to consider how to properly install a lighting fixture on a plasterboard ceiling. It has already been noted that, given the light weight of the chandelier, it can be fixed directly to the sheets. For a more massive version of the lamp, you need to take care in advance of an additional substrate in the form of a bar or metal profile on which the mounting strip will be attached.
You can correctly hang a chandelier on a crosspiece or an I-beam platform in the same way as in the case of a mounting strip. It is worth considering that this option involves heavy lamps, so you need to take dowels and screws of greater length and diameter.
You can mount a chandelier on the ceiling with your own hands without any problems, the main thing is to prepare the necessary material and tools, study the included connection instructions and always have an assistant.
Safety precautions at work
Of course, we deliberately omit purely technical terms here to make things easier to understand. For more detailed instructions on installing a chandelier, we address you to professionals, and we will now touch on safety issues that must be observed when performing electrical work.
- Just turning off the lights is not enough; turn off the power to the apartment by turning the circuit breakers on the distribution panel to the “off” position. If you have an old electric meter and no panel, then simply remove the plugs.
- Check the wiring, and it is better if a specialist does it.
- Make sure there is no voltage on the wires using an indicator device. It has either phase or zero. If there is voltage, the device will show the phase.
- Connect the wires using terminals or blocks. Simple twisting is extremely unreliable.
- Choose only high quality consumables, both your safety and the reliability of the system depend on it.
- All installation tools must be in good working order.
- If you are installing lamps in a damp room (bathroom), then be especially careful.
- Copper and aluminum wires cannot be twisted together - only using terminal blocks with separate clamps for each wire.
- Do not neglect grounding, although this will complicate the work.
And most importantly: do not touch the wires without disconnecting them from the network.
How to hang a chandelier on a suspended ceiling (video)
Attaching a chandelier in a room where there is a suspended ceiling will not be a problem even for a beginner. You just need to choose the right lighting design and follow the instructions very precisely, not forgetting the safety rules. Moreover, installation work often does not take much time, and if it is done well, the room will acquire a cozy and comfortable atmosphere.
Sources:
There are no similar posts, but there are more interesting ones.
Installation instructions for the chandelier
We are armed with knowledge about the types of fastening of chandeliers, about how to install them on different types of ceilings, is it time to get to work? We will need:
- Stepladder - how else to do work under the ceiling. Don't have a stepladder? You can get by with a table, but only if the ceiling does not exceed 2.5 meters. Of course, the table must be reliable and strong.
- An electric drill or hammer drill, but they must be powered by a battery, not from the mains - you will turn off the electricity.
- A screwdriver, also battery powered.
- Several different screwdrivers, flat and Phillips, an indicator screwdriver for checking the voltage in the wires.
- A device for measuring electrical voltage, called a multimeter.
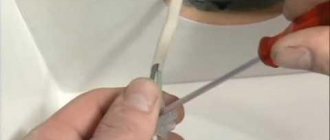
- A knife for stripping wires must be sharp.
- Soldering iron and solder.
All consumables and mounting tools are usually included with the chandelier. And you will probably need an assistant to carry tools when you are near the ceiling and hold the chandelier.
And finally, a few more very important recommendations:
- Make all connections and connections in strict accordance with the diagram specified in the instructions for the electrical device.
- Wrap the exposed parts of the wires in several layers of electrical tape.
- Do not use random supports when working: no boxes or crates, this is very dangerous. Only a reliable stepladder with a latitude limiter.
- All tools must be in good working order and not slip out of your hands.
- When drilling holes, be sure to ensure that no wiring is running through there. Use a sound locator for this.
- Pay attention to the switches; if they are not connected correctly, you may get an electric shock when connected.
Hanging a chandelier yourself is difficult, but it is possible. The main thing is to approach this issue responsibly and seriously. Follow the strict sequence of work and follow the instructions. Electrical work is associated with increased danger. Wear goggles over your eyes and rubber gloves on your hands.
Choosing a chandelier for a stretch ceiling
Before choosing a chandelier for suspended ceilings, you need to find out the conditions for its further operation. It should be noted that the surface of the canvas will be located directly above the lighting fixture.
Most often it is made of PVC film with a maximum operating temperature of 600C. As this indicator increases, stretching and deformation of the canvas will occur. Therefore, the lamp should not give off heat in large quantities directly near the ceiling covering.
Other factors relate to different types of fastening, the reflectivity of the ceiling and the availability of free space between the rough and suspended ceiling. All this must be taken into account when choosing the optimal lamp model.
The choice of chandeliers occurs in accordance with the type of intended mounting.
For suspended structures, a mounting hook is provided, which is initially installed in the floor slab. Overhead chandeliers are mounted using special panels secured with self-tapping screws to pre-prepared structural elements. Without preliminary preparation, only the first option can be implemented.
As a rule, a classic chandelier has several arms. When choosing, you need to pay attention to their location and direction.
If these luminaires use incandescent or halogen lamps, the horns should not point upward. In this case, an upward air flow with a high temperature will be generated with minimal dissipation. As a result, the ceiling will become very hot.
Too bright lamps with an additional reflector will focus radiation onto the surface of the coating, forming noticeable circles of light.
All the details of the internal structure of the horn will also be visible, reflected in the glossy coating. The type of lamps used in chandeliers is of great importance. Theoretically, you can use any lamps, subject to certain restrictions, but in practice, this is not always possible.
Methods of fixation using a hook
Before changing the chandelier, you need to think about how the fixation will be done. How to install a chandelier on a suspended ceiling if you plan to use a hook for fastening? There are several ways that make it possible to achieve your goal. In some cases, a chandelier is mounted on a suspended ceiling using an anchor bolt.
The following stages are expected:
- drilling a hole in the surface;
- inserting a hook into the previously obtained space;
- tightening the suspension nut.
It is necessary to hang the hook as correctly as possible
In this case, special attention is paid to the diameter of the anchor. This value must be selected taking into account the weight of the entire structure
If such a hook is not at hand, it can be replaced with an ordinary nail. To do this, this element is driven into the upper surface for most of its length, and the protruding part is bent into the shape of a hook. But such a simple design will support a small simple lamp weighing several kg.
Lamps and chandeliers for suspended ceilings are often chosen for large houses. In this case, it is more advisable to resort to another method of fastening. It is recommended to attach the chandelier to the suspended ceiling by drilling a hole in the ceiling directly between the floors. Next, you need to start preparing two metal plates. They should be rectangular in shape with a hole in the middle.
Installing a chandelier on a suspended ceiling with your own hands will only be effective if all requirements are met. First of all, this concerns the size of the plates. Their parameters should be as follows: 20 by 20 for the first and 30 by 30 for the second.
Installing a chandelier on a suspended ceiling suggests that one of the plates needs to be installed on the second floor (on the floor), and the second on the first. You need to select elements so that all the parts fit together correctly. A hook must be attached to the resulting hole. Care must be taken to mate the hook directly to the thread used for the retaining nut.
Is there another way to mount the device? Another option is offered to your attention (when using a six-hollow). You can change a chandelier on a suspended ceiling using a hole with a diameter of 50 mm. It is formed in a hollow-type channel. The installed hook will give a positive result after implementing the following sequential measures:
- insert of a metal rod (diameter - 10 mm);
- using wire rod (diameter - 8 mm) to directly create a hook;
- use of fittings.
There are cases when, when drilling a concrete surface, the drill falls into the void, and sand and debris rain down on the master. This is normal, because slabs are usually not made monolithic. To improve sound insulation and reduce pressure on the walls, builders make small holes in the slabs that are placed along the slabs. They are end-to-end. If such a situation occurs, it means that the master got into exactly this hole when drilling.
For this option, you should purchase a metal hook of the Molly system. It is used to hang a lighting fixture into the hollow surface of a slab. This hook will support larger structures weighing up to 30 kg. Simply insert the dowel into the hole and turn it clockwise until it stops. At a certain moment, the master’s own hand strength will not be enough, so he will need some kind of leverage.
Stage 2. Dismantling the old chandelier
The process of dismantling a lighting device differs depending on the method of its attachment. There are 2 ways to attach it to a sub-ceiling: on a hook or a mounting strip (with 2 or 4 screws).
To dismantle the lamp from the hook, follow this plan:
- De-energize the room in which the lamp to be replaced is located. Be sure to check that there is no voltage.
- Remove the trim to reveal the hole in the trim.
- Stick your hand into the hole in the ceiling, carefully remove the lamp from the hook, and pull it out along with the wires.
- To remove an old chandelier, ask someone close to you to support it. Remove the electrical tape from the wire connection areas. As soon as you see exposed wiring, apply a tester to it; if the light does not light up, then there is no power supply.
- Disconnect the wires from each other, wrap the bare ends with electrical tape.
To remove the lighting structure from the bar, perform the following steps:
- Turn off the power, make sure there is no voltage.
- Unscrew the cap nuts and remove the decorative trim.
- Remove the screws that secure the plank to the platform on the sub-ceiling.
- Remove the device along with the bar, ask an assistant to support it.
- Then disconnect the wiring strands and process the ends as in the previous case.
Important! Before removing the old chandelier from the ceiling, remove all parts from it (shade, lamp, various decor) that can be accidentally broken.
During dismantling, be extremely careful to avoid damaging the tensioned fabric.
How to hang a chandelier on a hook if the chandelier has a strip?
To hang a heavy chandelier, you need an anchor bolt. Installation work is carried out in the following order:
Expert opinion
It-Technology, Electrical power and electronics specialist
Ask questions to the “Specialist for modernization of energy generation systems”
How to hang a chandelier on a plasterboard ceiling: an overview of mounting methods When the laying of wires is completed, a hole is made in the plasterboard sheet in the area where the lamp is attached for a new connection. Ask, I'm in touch!
Basic errors in connecting tapes
All major errors are associated either with incorrect connection of LED strips or with incorrect installation. Let's look at each one separately.
Incorrect connection
- Serial connection of tapes to each other, especially those longer than 3 meters.
ATTENTION! LED strips must be powered exclusively in parallel. It does not matter whether the incoming wire (from the network to the block) or the outgoing wires (from the block to the tapes) will be used as the supply line.
- Connecting the tapes to a transformer unit designed to deliver more power (with higher voltage).
Incorrect installation (location)
- LEDs still heat up during operation, especially considering that there are several dozen of them on 1 linear meter of strip. Therefore, they should be located exclusively on shaded, non-heating surfaces, with a temperature not exceeding +40°C. The operating ambient temperature should not exceed +45°C. All heating devices, as well as incandescent lamps, must be located at a distance of at least 60 cm from the tape.
- The luminous tape should not come into contact with any other objects or surfaces. There should be no chafing or strong kinks. It should not be touched by the edge of the door, etc.
Errors in connecting LED strips can lead to short circuits of varying power. Therefore, it is most logical to pay attention to this issue at the stage of designing the backlight circuit.
Ceiling hooks for chandeliers in the OBI online store
The OBI hypermarket sells ceiling hooks for household chandeliers at a low price. The assortment includes more than 10 products costing from 120 rubles per set.
Features of choice
When purchasing accessories, consider the following nuances:
- • Material of manufacture.
- • Configuration and dimensions.
- • Mounting method.
- • Placement (in the center or perimeter of the room).
To create products, stainless steel with a protective galvanized coating is used. The elements are fixed to the ceiling using a threaded connection or dowels with screws.
Payment and delivery methods
- Buy goods online with delivery
- • You can pay for your order in cash or by bank transfer.
- • You will agree on the date and time of delivery with the operator by phone when confirming the order.
- • The conditions for the free provision of the service depend on the city, amount and weight of the product.
- • Unloading of goods, lifting and carrying are considered additional services and may be paid separately, check with the store operator.
Detailed information about intervals and zones by city, conditions for unloading and picking up the order are on the service page, where you can independently calculate the cost of your delivery in advance, indicating the postal address and parameters for unloading.
- Order and pick up where you want
- • When filling out the order form, indicate the date and time convenient for you to visit the hypermarket.
- • You can pay for your purchase in cash or by bank transfer at the store's cash desks.
Purchased goods can be picked up independently at any of the OBI stores in Moscow, St. Petersburg, Ryazan, Volgograd, Nizhny Novgorod, Saratov, Kazan, Yekaterinburg, Omsk, Krasnodar, Surgut, Bryansk, Tula and Volzhsky.
We will deliver the goods you have chosen on the OBI website to a place convenient for you: to your home, to your country house, to your office.
Select products, place an order on the website, specifying delivery, and receive it at a time convenient for you at the address you specified. You can pay for your order and delivery in cash upon receipt.
Delivery is carried out within 1-2 days; 3 time slots available.
To save your time, we will collect all the products you have chosen and prepare your order for collection at the OBI hypermarket.
Select a product, place an order on the website and pick it up yourself at a time convenient for you. You can pay for your order on the spot upon receipt.
First, you need to select the OBI hypermarket where you plan to receive your order. The currently selected hypermodel is indicated in the upper left corner of the site.