SlavagodM
11477 0 0
SlavagodM October 10, 2016Specialization: master of interior and exterior finishing (plaster, putty, tiles, drywall, lining, laminate, etc.). In addition, plumbing, heating, electrical, conventional cladding and balcony extensions. That is, the renovation of an apartment or house was done on a turnkey basis with all the necessary types of work.
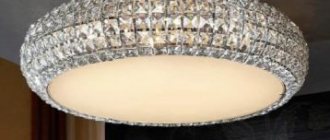
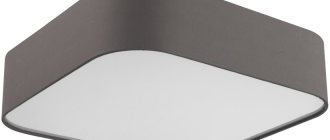
Chandelier on the ceiling made of plasterboard
GCR is not a very durable finishing material, so attaching a chandelier to a plasterboard ceiling may seem to you like something dangerous or even unrealistic, but this is not so. Such installation is possible. But, in order not to be unfounded, let’s get down to business and, to strengthen our knowledge, watch the video in this article.
Features of drywall
It is a flat sheet consisting of layers of special cardboard and gypsum with various additives that make it stronger.
The material has advantages:
- holds heat well and “breathes”;
- is an environmentally friendly and hypoallergenic material;
- has a good level of fire safety;
- does not, of course, completely solve the problem of sound insulation, but significantly reduces noise from the outside;
- there are moisture-resistant types of drywall, which expands the scope of its application;
- has absolutely no odor;
- cuts perfectly with the most common tools;
- the process of fastening and installation can be done either using a metal frame or using glue, long nails, etc.;
- used as a final finish for wallpaper, paint, ceramic tiles, stucco and other decorative elements.
When composing an ode of praise to drywall, one cannot ignore its weaknesses:
- insufficient strength, so it is very difficult to hang heavy structures on it;
- even moisture-resistant drywall should not be used in very wet rooms, because gypsum tends to deteriorate;
- you have to be very careful when transporting, because... The slightest bend will lead to splitting of the sheets.
Now, knowing all the features of the building and finishing material, you can move on to more specific issues of its use, for example, when installing lighting.
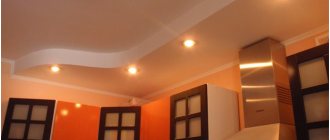
Built-in spotlights
Built-in spotlights (rotating and fixed) are the most common type of lighting used for plasterboard ceilings. They are very convenient to use and also easy to install.
Spotlights for plasterboard ceilings are used to create a general background or special night lighting and emergency lighting. This type of lighting has gained particular popularity due to its excellent performance in individual workplaces. Swivel models have a frame that can rotate, which creates a very interesting effect in the room.
Ceiling plasterboard: what is it and how to attach it
There are plenty of types of drywall. Among them: wall, ceiling, fire-resistant, moisture-resistant, arched, laminated, façade, reinforced. We are interested in the ceiling. What he really is?
- Sheets that are too heavy will be very difficult to attach to the ceiling, so for this it is proposed to use slabs with a thickness of no more than 8-9.5 mm, and to create something shaped, even thinner - no more than 6 mm.
- Select the correct finishing material according to the room’s humidity level. For bathrooms and kitchens, it is better to take more moisture-resistant samples that do not absorb moisture.
- It is unlikely that you can install sheets of plasterboard on the ceiling using glue. For reliable fixation, it is necessary to install guides and ceiling profiles.
- But the installation tool you need is the simplest: a screwdriver, self-tapping screws, a building level and a hammer drill.
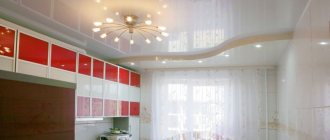
Create a masterpiece with LED strip
Of course, spotlights, chandeliers and fiber optics are very interesting, but the best option for lighting a plasterboard ceiling is, of course, LED strips. Here we will dwell on them in more detail. True, for this, as a rule, it is necessary to construct a two-level structure from gypsum plasterboard.
First level installation
Installation of a plasterboard ceiling with lighting includes the construction of a frame; a metal profile is used. The procedure consists of 5 stages:
- stepping back about 10 cm from the ceiling, you draw a horizontal line around the perimeter of the room. A laser level or hydraulic level will help to make it level;
- the starting profile is attached to the wall along the line.
Scheme and names of required profile types
- you will need to insert the main profile into the starting profile and then attach it with hangers;
- you can make the structure more rigid. To do this, install jumpers between the profiles using crab connectors.
Creating a 1st level frame
after the jumpers have been connected, the frame is sheathed with sheets of plasterboard (gypsum plasterboard). To ensure reliable fastening, use self-tapping screws.
Covering the frame with gypsum plasterboard sheets
Installation of the 2nd level frame
You have built the first level using plasterboard on the ceiling. It's time to start the second one:
- at the 1st level the boundary of the second is drawn;
- Having allocated space for the cornice (usually 5-6 centimeters), the starting profile is fixed.
Marking the second level frame
sections of the main profile are cut with metal scissors. They are fixed in the starting guide and serve as suspensions. The starting profile is fixed with hangers.
Assembly of the 2nd level frame
- the main profiles are inserted into the ceiling and the wires are brought out. The frame is sheathed with material;
- Finally, putty is applied to the plasterboard ceiling and the seams are processed.
Sheathing the frame with gypsum plasterboard sheets (don’t forget to install lighting)
Organization of lighting and installation of tape
When installing LEDs, the following installation rules should be observed:
- the tape is cut only in designated areas;
- the elements are connected only using connectors;
- The power supply must have a minimum power reserve of 20% or it will quickly burn out.
You should also remember the location of the LED strip
To make a backlit plasterboard ceiling with your own hands, you need to accurately calculate the power of the power supply. Working with the tape, it will play the role of a transformer. Let's imagine that you are just installing a plasterboard ceiling with lighting in your bedroom. The tape is 6 meters long and has a power of 9.5 W. Multiplying the power by the length, we get 57 watts. Don't forget about additional power in reserve. Applying a coefficient of 1.25, we get a value of 71.25. Thus, you need to stock up on a 72-75 W power supply.
The circle of the tape is connected like this. Power the unit with a voltage of 220 V, connect the LEDs to it. If an RGB strip is used, it is connected through the controller. The red wire is positive, but the negative can be black or blue. Is everything working properly? Can be carefully glued to the ceiling.
A visual diagram of the correct connection of the LED strip
LED lighting kit
A place to put the power supply
Your home requires special attention and effort. When you know how to make a plasterboard ceiling with lighting, it is quite possible to create comfort and warmth in absolutely any room. In addition, this does not require any special skills or a rare, terribly expensive instrument. The ceiling is ready without any effort - you can relax!
How to get started with a plasterboard ceiling
Mounting spotlights on a plasterboard surface is not difficult. The material is an ideal basis for spots. LED lamps also work well with drywall. In addition, they bend well, so they can be used with any configuration of plasterboard construction.
It will be more difficult with chandeliers as they are heavier devices. This requires special stages of preparation for installation and special methods of fastening. Let's consider what experts recommend before starting work with a plasterboard ceiling:
- if the finishing is just beginning, you should think carefully about where exactly the chandelier will be located;
- if the ceiling is already finished, then there is only one way out: select not very heavy models of lighting fixtures;
- the number of profile strips will depend on the fastener: one is enough for a hook, two profiles are needed for a bracket;
- At the place where the chandelier is mounted, attach an additional profile for strength;
- be sure to purchase special fastenings; which ones exactly will be advised to you at a hardware store;
- if you haven’t marked the location of the profile in advance, you can find it using a magnet;
- You must not forget about safety measures: turn off the electricity during installation, use a special screwdriver with an indicator, insulate the contacts.
Information about the weight that drywall can withstand will not be superfluous. High-quality sheets and the right technology allow you to hang lighting fixtures weighing up to 6 kg or even more. This is quite a lot, most lamps are approximately like this.
That's basically it. All that remains is to decide on the type of fasteners and the model of the chandelier.
Useful tips
Some tips for those wishing to install a chandelier on a plasterboard ceiling:
- We determine the type of lamp and mounting methods in advance.
- We equip the area where it is planned to install a ceiling lighting fixture with an additional profile or embed. To attach a heavy chandelier, you will need an additional strip.
- If the chandelier is light and will be mounted on plasterboard, you need appropriate fasteners (dowels, spring structures). If the lamp is heavy, we use anchors.
- When performing installation, we take into account the requirements of safety regulations. We are talking about reliable scaffolding, turning off power during work, and using personal protective equipment.
- A responsible attitude towards electrical wiring is especially important. It should be placed in a corrugated pipe. This will better protect the wires.
- If the wire is installed in the base ceiling, you will need a groove - a special channel with a depth of 5 cm.
- The chandelier should be attached to the anchor hook after the reliability of the fastening has been checked. This can be done, for example, using a 16-kilogram weight hung on a thick rope.
The quality of drywall and fasteners is especially important. You shouldn't skimp on safety. Poor quality materials will not allow the fasteners to support the weight of the chandelier, and the structure may collapse.
Types of fasteners
Do you have the right tool and know how to use it? Then all you have to do is choose the right fasteners and know where and which one fits.
- Self-tapping screws of various lengths. To use them you definitely need a profile. If you drive it directly into a sheet, it will not be able to hold absolutely anything, even the lightest appliances.
- An anchor will serve as a more reliable fastening. Its peculiarity is that you will have to make a hole in the drywall and drive the anchor into the concrete floor. For this work you will need an electric drill with a hammer function.
- An extended hook or ring will allow you to calculate the height at which you want to hang the chandelier. It, like amperes, needs to be mounted in a concrete floor.
- Flexible cable hangers will allow you to increase the hanging height.
- The most reliable types of fasteners are brackets, which can be a square solid plate or a cross. If you plan to hang a massive or even cascading chandelier, then brackets are the most suitable option.
You will also need dowels, each type of which has its own application features:
- a plastic dowel nail with tendrils that straighten out after driving; he plays, most often, an auxiliary function;
- The dowel received the name “butterfly” because of the design that looks like wings; the permitted load on it is high - up to 28 kg;
- the “molly” element is screwed into the hole and only then the screw; permissible load – up to 25 kg;
- dowels with or without a drill, made of nylon or metal - driva;
- for the heaviest structures, the Knauf-Hartmut is suitable, where special antennae lock the latch and screw;
- A very common method of fastening is on a spring dowel with a hook and blades.
Mounting options
Anchor fastening
This type of fastening is used for hanging the heaviest lamps. The chandelier is fixed directly to the ceiling slabs or wooden beams, depending on what is the base floor. If there is more than one attachment point, then a dedicated hole is created for each in the plasterboard sheet.
First they make the markings. Accurately measure all distances from the centers of the holes to their edges. In this case, it is necessary that the diameter of the holes allows anchors to be fixed in them. The latter should fit tightly, but without excessive effort.
Anchors are selected taking into account the upcoming load, and even with some margin. The drill or drill must match the diameter of the desired hole, which is made using a hammer drill.
The anchor is installed with the nut slightly loosened and the pin extended. The nut is tightened all the way. If the distance between the base ceiling and the plasterboard sheet does not make it possible to place a lamp, a metal rod of the required length is placed on the anchor.
Hook mount
This fixation method is carried out in one of the three ways proposed below:
- Threaded. Threaded hooks are most effectively used for installation into wooden floor joists. Hanging devices are available in a variety of lengths. Therefore, a suitable element is selected based on the distance between the plasterboard sheet and the fastening area, as well as the depth of installation in the wood. We drill a hole in the beam, the diameter of which is slightly smaller than the diameter of the hook. Next, we screw the fastener into the beam. After this we place the lamp.
- Suspension. Hooks are also used in ceilings where the floors are made of reinforced concrete slabs. Such slabs often have voids. The location of the hollow channels should be kept in mind when marking. We make a hole in the slab using a hammer drill (depth - from 50 to 70 mm). We insert reinforcement or a pin into the hole (2 times longer than the diameter of the hole). Next, we place the reinforcement along the hollow channel of the slab. We create a double-curved hook from wire (diameter 5-9 mm). We hook one loop to the pin located in the slab, and use the other to place a chandelier on it.
- Spring folding dowel. This type of fastening is used for installation in plasterboard sheets. However, it can also be installed directly into the floor slab. At one end of the dowel there are folding petals that open after they are installed in the hole. In the case of spring dowels, no additional transverse pins are needed. The diameter of the hole for the dowel is chosen to be slightly larger in comparison with the diameter of the folded petals.
The above methods for attaching lamps are the main ones when it comes to plasterboard ceilings. However, this list is not exhaustive: if desired, you can use other methods of fixing the chandelier. The main thing is that the fastening is reliable.
Tools and materials
To complete the work you will need the following tools:
- In the case of concrete floors, you need a hammer drill and several Pobedit drills. If holes need to be made only in drywall (or similar soft materials), an electric drill and a screwdriver are sufficient.
- Pliers or pliers. With their help we will screw the hook into the dowel. A screwdriver with a thick blade will also work.
- To properly connect to the network, you will need an electrician's kit. The following tools are required: side cutters, knife, indicator screwdriver.
Note! Core bits are best suited for making holes in plasterboard sheets.
You will also need the following materials:
- The chandelier itself that we will install.
- Metal molly with a hook or plastic dowel with a similar device.
- If the fastener is installed directly into drywall, we use a molly with a plastic collet. In this case, they are no less effective, and the price is lower.
The procedure for installing a chandelier on different mounts
- Hook mounting
- drill a hole with a diameter of 60-80 mm, choosing a place between the concrete floors, use a hammer drill for this;
- insert a pre-prepared harpoon hook into the hole and secure it securely using special tendrils;
- hang the chandelier by a ring under a decorative glass;
- When installing, take into account the height of the hanging sheet, because the base of the device will fit tightly to it;
- the resulting cracks and inaccuracies can be repaired with alabaster.
- Ceiling profile installation
The fastening method is suitable if you have just started installing the ceiling and lighting. In addition to the mandatory guides and ceiling profiles for the plasterboard sheet itself, additional ones are installed where the chandelier is supposed to be installed. Then an electrical cable is brought to the center of the structure, always in an insulating sheath. Next comes the important stage - hanging the sheet, but before that you need to mark exactly where the hole will be. Remember the advice about the magnet if you suddenly forget to do this. The lighting fixture is attached with self-tapping screws through the canvas to the prepared profile.
- Installation using anchor bolts
Powerful mount that can support a massive chandelier. Follow the correct technology:
- drill a hole in the concrete floor, carefully calculating its diameter, because the anchor should fit into it easily, but not dangle;
- pull out the stud, unscrew the nut a little, insert the anchor, tighten the nut;
- To increase the distance between the canvas and the chandelier, insert a rigid rod on which to hang the device.
Everything ingenious is simple, and in our case it is also reliable.
- Bracket Mounting
The plate or cross type bracket is installed before the drywall is hung. The part is securely attached directly to the concrete floor. In the center of the bracket there is a hook for hanging the chandelier. On the sheet of finishing material, the location of the hole is marked, through which the main fastening of the chandelier to the ring occurs.
- Installation using a mounting strip
This method is used if the lighting fixture is equipped with a strip. For fastening using this method, a place is provided under the drywall for the embedded part, which is securely screwed with anchors. After installing the finishing sheet, a standard strip is attached using self-tapping screws, onto which the chandelier itself is hung. It is quite possible to use a wooden beam as a mortgage element.
When installing a chandelier using any of the above methods, it does not hurt to check the reliability of the fasteners. To do this, you need to hang a test weight on it, tug on it, and hang on it a little.
Installation in the manufacture of plasterboard suspended ceilings
When installing a fixture for a chandelier during the manufacturing process of a plasterboard suspended ceiling frame, it is necessary to leave an embedded jumper made of a metal profile with a hole drilled in it at the place where the lamp will be mounted.
With this option, the fastening is somewhat simpler and can easily withstand a weight of up to 8–10 kilograms. Of course, this method is more convenient than others, but it’s not always the people who installed the suspended ceiling who have to hang the lamp. Sometimes it is installed much later, after the next renovation.
How to hang a chandelier if there is already drywall
There are situations when you want to change the lighting, but there are no plans to renovate the entire room. The ceiling is already covered with plasterboard. Installation of a lighting device is also possible in this case. Actions must be carried out strictly in accordance with the proposed plan.
- Cut a hole in the desired location. This can be done using the following tools: a circular saw, a jigsaw, nibblers, a hacksaw blade, or drill with a drill.
- Using a drill inserted for convenience into a plastic bottle of the same circumference as the hole, drill another hole, but this time in the main ceiling. The bottle will play the role of a garbage collector.
- Using a suitable size wrench, tighten the anchor thoroughly. The end of the anchor bolt must be wrapped with insulating tape.
- Hang the chandelier on the hook, connecting all the necessary wires.
- Put on a decorative cap.
How to attach a chandelier to a plasterboard ceiling with your own hands
If you follow simple rules, attaching a chandelier to a plasterboard ceiling with your own hands is not so difficult. To do this, you need to prepare all the necessary power tools, you will need the ability to work with a hammer drill (or impact drill), as well as a set of mounting hardware for hanging a lamp of a certain weight.
Particular attention should be paid to connecting the chandelier to the electrical network. For example, when connecting a two-key switch or remote control to it, fundamental knowledge of electrical installation is required
Therefore, if you have doubts about connecting the chandelier to the network yourself, then it is best to contact an electrician.
Fastening and fixing elements
To hang a chandelier from a plasterboard ceiling, you must select mounting hardware. For this purpose, you can consider the most popular devices:
- different types of screws;
- anchors and anchor bolts;
- hanging fasteners, cables;
- brackets.
The simplest mounting method is to hang the lamp on self-tapping screws. In a situation with a plasterboard ceiling, this fastening method is not always justified. The use of self-tapping screws is often an intermediate step. For example, they are used to fix the fastening strip to the ceiling embedded (on wood, CD profile).
Anchor bolts are used for heavy luminaires. They are mounted in the main ceiling of the room, in a concrete floor slab, through a hole in a suspended plasterboard level.
Suspended fasteners and cable hangers are used when the lighting device needs to be hung on the main concrete ceiling or at a certain level from it (in height).
Brackets are used for hanging very heavy cascading chandeliers. This type of fastener is the strongest and most reliable. The brackets are fixed to the concrete slab of the main ceiling before the stage of covering the ceiling with plasterboard.
Electrical installation rules
Electrical wiring is installed in accordance with the project, in the specified location. The power indicators of the lighting device are necessarily indicated in the technical specifications of the instructions; they must be strictly followed.
Basic rules for installing a luminaire:
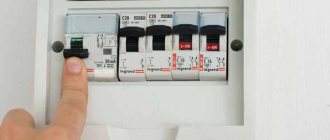
All work must be carried out with the power supply turned off. When connecting a lighting device, its power and the maximum voltage of the power grid in the room must be taken into account. It is important to consider the type of electrical wire - copper, aluminum. With old aluminum wiring, it is necessary to use a terminal block (adapter)
Connecting two types of wire in one twist is unacceptable. It is necessary to take into account the type of energy insulation of the wire and its cross-section. Connecting wires in the form of “twisting + electrical tape” is strictly prohibited. For a chandelier with a double switch, the connection to the network must be in strict accordance with the phase-zero diagram. When wiring a lamp with a remote control, follow the connection diagram described in the instructions for the lighting device.
Warning! It should be remembered that work involving electric current requires strict adherence to safety rules. If there are doubts about the implementation of the task and its quality, it is better to leave this work to an electrician who has the appropriate permit.
How to fix a chandelier on a plasterboard ceiling
There are different ways to attach a chandelier to a plasterboard ceiling. This depends on the type of lamp, its weight and the design of the fasteners. As a rule, in most cases a standard technique is used for this process, which can be divided into main stages:
- Most often, a chandelier is hung not from the “body” of drywall, but from the main concrete ceiling.
- To secure the lighting fixture, use a ceiling mounting hook or bracket.
- The mounting for the chandelier should be located strictly above the level of hanging the lighting fixture, taking into account its mounting device.
- The embedded part must be rigidly fixed to the concrete base of the floor block.
- To hang a lamp on a hook, a mounting part is not needed. The ceiling hook is fixed in the main ceiling through the plasterboard level to a collet-spreader mechanism.
- If you plan to use a mounting console to hang the lamp, then in advance, even before the stage of covering the ceiling with plasterboard, you should reinforce the place where the chandelier is attached with an additional profile (or several profiles).
- The lamp must be connected to the mains after the main installation.
Attention! Any of the presented mounting methods should ensure that the chandelier is kept suspended in weight with an additional reserve of strength
Wiring a chandelier on drywall
If you are not a power supply specialist, then you need to know at least the basic rules for connecting a lamp to power. But a chandelier with several lighting options will still require the help of specialists.
To ensure that the device works and you remain safe, follow the following rules:
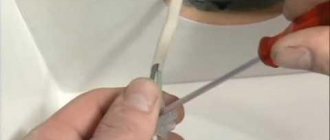
- turn off the electrical panel;
- you need to have a special adapter for fastening the wires, because this cannot be done directly;
- pass the phase wire through the switch;
- be sure to use terminals and not twist;
- Protect all exposed contacts with insulating tape.
To install a chandelier on plasterboard, use only high-quality elements and parts. The reliability of the design and your safety depend on this.
Preparatory stage
To attach a chandelier to a plasterboard ceiling as securely as possible, it is best to prepare in advance, especially if the lighting fixture itself is quite weighty. To do this, when you install the ceiling frame, you need to do the following:
- determine the location of the lamp;
- attach the metal profile in the right place.
Pre-prepared profile
Note! Finding this profile under sheets of drywall will be very easy if you use a magnet. Instead of a metal profile, you can also use a wooden beam, but finding it will be much harder