Do you agree that lighting in a home is one of the most important issues during renovation? Probably most people will answer this question in the affirmative. Especially those who for many years are content with the light of a single chandelier in a large hallway or are forced to cook in the kitchen with the lighting of a gloomy lamp.
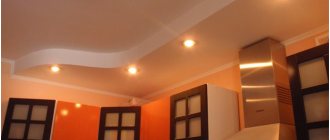
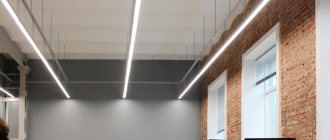
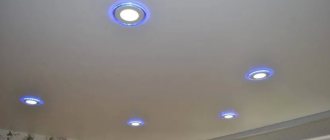
The problem of insufficient lighting can be solved by installing spotlights that guarantee uniform light. It is with their help that you can finally illuminate the most secluded corners in the house, which will give the room unprecedented comfort.
The advantages of spotlights over any other lighting devices are undeniable. But, after preference is given to this particular type of lighting, another question arises - how to install spotlights and whether it can be done with your own hands. We will answer these questions in this article.
The main difficulty that arises when carrying out such work is the different types of materials from which the ceiling is made. Because of this, the installation procedure varies and different tools will be needed.
Stages of installation of spotlights
The connection process comes down to the sequential implementation of the following steps:
Stages of connecting a spotlight.
- design and layout;
- laying and pulling cables to installation sites;
- making holes and connecting;
- connection testing.
Such a detailed breakdown into stages is due to the fact that part of the work must be performed when forming the ceiling covering.
The location of the lamps is planned before covering it with finishing material, that is, during the installation of the frame.
Design takes on special meaning when there are several levels near the ceiling. In this case, it is necessary to provide wiring to the mounting points of the lamps at each level, taking into account the distribution of the luminous flux. Lamps that are located within the same level must form one single circuit.
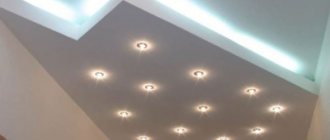
When planning the number of spotlights that will provide the required illumination of the space, it is necessary to take into account that the distance from the wall to them should be no more than 60 cm, and the distance between centers should be 25-30 cm. In this case, the lamp should be no less than 30 cm from the frame cm. If the lamp is placed closer to the frame, then its installation at the final stage may be difficult.
The device of the lamp.
The presence and location of other lighting fixtures in the room affects the final number of fixtures. The spotlight can be equipped with a rotating mechanism, with which the direction of the light flow can be changed. Therefore, they can be diverted when using several lamps at the same time.
The wiring is laid during the installation of the frame. It is placed in special boxes or fixed on it in such a way that when making holes for spots, it is not difficult to get out. If it is not possible to select locations for installing spotlights during the installation of the frame, then you can lay the cable to only 1 lamp. And connect each subsequent spotlight to the previous one, stretching the wire already in the mounted ceiling covering. But this method of laying wiring somewhat violates safety regulations, since the wires remain lying directly on the surface of the suspended ceiling.
The cable, when laid along a frame or in protective boxes, can be used with 2 or 3 cores. The loop for attaching each spotlight is left 10-15 cm in size. It is attached to the frame near the location of the spotlight using a plastic tie. But the fastening should not be tight, so as not to cause difficulties when dismantling it during final connection.
Drilling holes for each spotlight is carried out upon completion of the ceiling installation. Proper design of spots placement allows you to avoid their location on metal frame elements. In addition, if the spotlight is located at the joint between the sheathing sheets, then it should be moved or the sheets redistributed so that the joint is moved to the required distance.
Connection diagram for several groups of lamps.
The holes are drilled with a drill with a special attachment - a hole saw, the central drill of which is installed in the center of the lamp location. A perfectly even circle is formed, which avoids unnecessary gaps. The diameter of such a saw should be 3-4 mm smaller than the corresponding external size of the lamp, but 3-4 mm larger than the internal dimensions.
After all the holes are drilled, you need to remove the loop of wire that was left for attaching the spot. If such loops have not been made or the wiring for each spotlight is not connected, then it is necessary to stretch the cable to them. Pulling the wire must begin from the outermost lamp, gradually moving further along the line of their installation. This can be done using a hook, which is made of strong wire.
Comments:
Vector
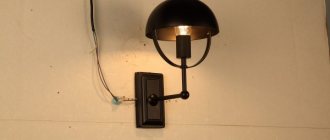
The article is good, but one detail is missing. The wall lamp must be mounted at a minimum height convenient for its use. If it is installed near a chair and is intended for ease of reading on it, then it should be installed 5-10 cm above the level of the seated person’s head. If above the bed, then 50-70 cm above your head
Semen
The lamp near the chair works well in combination with a motion sensor. My dad likes to sleep in a chair, and when he falls asleep, the light turns off.
Zakhar
A wall lamp near the chair is an inconvenient and unjustified solution, in my opinion. What if you decide to move the chair to a different location? Isn't it better to use a floor lamp in this case?
Kilowatt
Zakhar, then you shouldn’t use a stationary lamp above the bed either. What if you decide to rearrange the bed? Kitchen? Move the bath to another room? Not all people move furniture, some leave it in its place