A wall lamp (sconce) is a popular lighting fixture that complements a chandelier and sometimes replaces it. It gives a beautiful diffused light, which in some models can be directed in different directions. This lighting is ideal for reading in the evenings, working, creating a cozy atmosphere
Sconces have many advantages over floor lamps - they are cheaper and do not take up extra space. Before you begin installation, you need to decide how to connect the sconces, choose a diagram and location, and also purchase the necessary tools.
Preparatory stage
When thinking about how to connect a wall lamp, the user does not always remember the preparatory stage. You will need a number of consumables, as well as a basic set of tools. First of all, this:
- drill and drill bits (taking into account the wall material);
- dowels and screws;
- screwdrivers of different sizes;
- indicator screwdriver (phase indicator);
- pliers and knife (for stripping wires);
- level;
- pencil;
- stepladder (not always needed).
A wall lamp is usually attached to the wall using a special fixing plate or a series of holes located directly in the housing
It is important to mark the holes as accurately as possible by aligning the lighting device in accordance with the level readings or using a laser level. The second option allows you to significantly simplify the process by quickly leveling both the sconce itself and maintaining the placement points of electrical fittings around the perimeter of the entire room at the same height
Drilling holes
Since building materials have different strength characteristics, it is necessary to choose the right type of drill and tool. For example, a hammer drill is good for concrete, and an impact drill is good for a brick wall. If the wall is made of plasterboard, plastic or wood, then the optimal solution would be a conventional low-power drill. To reduce the amount of dust in the room, when drilling holes, you can attach the hose of a functioning vacuum cleaner to the area being treated. Then all small particles formed during the operation of the power tool will be absorbed by it and will not clog the surrounding space.
Fixing the fastener
The mass of a relatively small wall sconce is usually small. Therefore, it can be attached by using standard metal screws and plastic dowels, the dimensions of which must match each other. The diameter of the drill is selected taking into account the diameter of the dowel. When a self-tapping screw enters a dowel hammered into the wall, the latter expands, forming a reliable connection with the wall from the inside.
Often sconces are mounted in a plasterboard wall with an air cavity inside. In this case, a dowel of a special design – “butterfly” – is suitable. Outwardly, it is not much different from the usual dowel, but after the self-tapping screw is inserted into it, one end of the fastener is brought closer to the other. As a result, this fastening tandem is transformed into a super-reliable structure that ensures long-lasting fixation of the sconce in the wall.
As soon as the dowels are inserted into the wall through pre-drilled holes, a lamp (or its mounting part) is applied to it, through which the self-tapping screws are screwed. For this purpose, you can use a screwdriver, a battery-powered screwdriver, or even an electric drill. After the mounting part of the sconce is fixed, the remaining elements are attached to it. In fact, the wall lamp itself is nothing more than the original mounting hardware into which the lamp is subsequently screwed.
What tools are needed to connect?
The choice of drill for the job depends on the material of the walls.
Connecting a sconce with a chain for one lamp to the mains is not difficult. To do this, you will need a minimum set of tools that every home craftsman has. To connect you need:
- screwdrivers: Phillips, indicator, flat;
- wire cutters, pliers;
- ruler, pencil;
- insulating tape;
- electric drill with drills, the choice of drill depends on the material of the walls;
- a knife or device for stripping insulation from cores;
- stepladder if the lamp will hang high.
The sconce comes with an installation diagram. It shows in the pictures how to connect the lamp to the electrical wiring.
Before starting installation, you need to clarify a few nuances:
- Availability of a suitable degree of IP protection. When used in the kitchen or bathroom, protection should be increased.
- Type of light bulbs and their power. The load of lamps must not be exceeded; it should not be higher than that stated in the lamp’s passport.
- Supply voltage. If the lamp requires a voltage of 12-24 V, you should select a step-down transformer and connect it to the circuit.
Then you can proceed to installation. It will differ depending on the type of sconce.
Selecting a location
When sconces are used to illuminate corridors, they must be installed at a distance of approximately 2 m from the floor
For comfortable use of the lamp, you should choose the best installation location. The lamp must be accessible and at such a height that all family members can turn it on. This task is especially relevant when installing paired sconces, which should be located on the same line.
The sconce can be the main source of light in the corridor. In long hallways, several lamps are hung symmetrically on each wall.
The sconce can also be hung in the bathroom. Since this room has a special difficult microclimate, you should buy waterproof models.
To choose the right location, you need to make calculations in advance. The optimal installation height is 1.5 meters. For models with a plug, there must be a socket nearby so that the lamp can be connected to the mains.
Preparing to install sconces
In this case, the location for installing the lamp was chosen initially. The wire is laid along the brick wall, then ceramic tiles are laid on top. The switch for the sconce is located in the hallway.
It is necessary to take into account that the wall will then be drilled in this place to secure the lamp. Therefore, when laying the power cable, we note where it is secured so as not to damage it when installing the sconce.
After the tiles in the bathroom are laid, the installation location of the wall lamp should look like this:
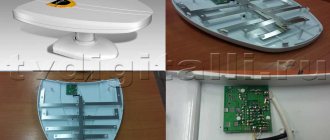
VVG cable for connecting a wall sconce
The slot in the tile from which the outlet for the sconce comes out may be larger than shown in the photo. Anyway, later this place will be covered by the lamp body.
Cable outlet for connecting sconces
But what you should urgently ask the tiler about is that under no circumstances should the cable be moved from the laid path. If the cable is laid vertically, the location where it exits the tile may only move slightly up or down. If the cable runs horizontally, the exit point may shift left or right.
Otherwise, very unpleasant consequences are possible, including removing tiles or laying a cable channel due to a broken cable.
Step by step instructions
All modern lamps have three wires - phase, neutral and ground. If the apartment has appropriate wiring, there will be no connection difficulties. If there is only a working phase and zero, when it is not possible to change the wiring, you will have to act differently. You can install the lamp by connecting a phase and a zero through one phase interrupted by a switch, while observing the markings.
Choosing a location for connecting a wall lamp
Usually sconces are placed in the bedroom at the head of the bed. For a small one, one electrical appliance is enough. If the bed is of an impressive size, it is optimal to mount one lamp on each side. In the nursery, sconces are usually placed so that the bright light does not disturb the baby. A good solution is to hang a lamp above the chair so that you can read a book to your child before bed. For older children, place a lamp above the bed.
Sconces can serve as the main light source in a bathroom or hallway. In such rooms they are mounted symmetrically on both walls or the area around the mirror is illuminated. For the bathroom you will need a waterproof lamp.
Preparation for installation work
Before carrying out the work yourself, immediately prepare the necessary tools and devices. You will definitely need an electric drill with a drill, which is selected depending on the material of the walls. For concrete ones, do not use wood drills and vice versa.
Also needed for work:
- screwdriver;
- indicator screwdriver;
- pliers;
- pencil;
- sharp knife.
Installation
To connect the sconce, you need to follow the following step-by-step instructions:
- Turn off the required circuit breaker to de-energize the room or the entire apartment, depending on the type of electrical wiring installation.
- Using an indicator screwdriver, make sure that there is no voltage on the contacts.
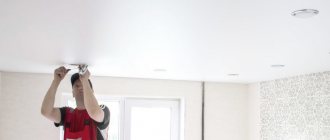
- Attach the sconce cover to the future installation location, which is already marked on the wall. Make marks with a pencil in the area of the holes into which the fasteners will then be installed.
- Use a drill to drill holes according to the marks. You can carefully cut through the wallpaper first so as not to tear it with a drill.
- Secure the sconce cover with dowels to the wall.
- Remove 0.5 cm of insulation from each core with a sharp knife.
- Connect the wires to each other according to the selected connection diagram, usually standard.
- Secure the sconce body with special bolts that come with the lamp. Attach a lampshade, if available.
Next, a light bulb is screwed into the device and the machines are turned on. As you can see, you can install sconces with your own hands; it is not necessary to invite an electrician to do this.
When installing standard electrical installation products, situations often arise when, for the convenience of further use, it is necessary to solve a technical problem, such as how to connect a switch from an outlet. This operation is not at all difficult; it is enough to follow certain installation and electrical safety rules.
An important feature is the ability to connect switches with one or two keys from a socket. If necessary, several such units can be connected at once
It should be remembered that the reverse actions cannot be performed, that is, the socket cannot be connected from the switch for technical reasons. This is due to the fact that the socket is more reminiscent of a distribution box, through which the phase and neutral power wires also pass. The switch does not have such qualities and when turned off it will simply stop supplying power to the outlet.
Comments:
Vector
The article is good, but one detail is missing. The wall lamp must be mounted at a minimum height convenient for its use. If it is installed near a chair and is intended for ease of reading on it, then it should be installed 5-10 cm above the level of the seated person’s head. If above the bed, then 50-70 cm above your head
Semen
The lamp near the chair works well in combination with a motion sensor. My dad likes to sleep in a chair, and when he falls asleep, the light turns off.
Zakhar
A wall lamp near the chair is an inconvenient and unjustified solution, in my opinion. What if you decide to move the chair to a different location? Isn't it better to use a floor lamp in this case?
Kilowatt
Zakhar, then you shouldn’t use a stationary lamp above the bed either. What if you decide to rearrange the bed? Kitchen? Move the bath to another room? Not all people move furniture, some leave it in its place