Published: 01/29/2012 Category: Electrical Views: 70671
Installation of lighting in the apartment. Chandelier installation
Lighting installation begins with calculations and drawings. Determine where lighting points, lamps and switches will be located. After the diagram is drawn up, the installation of wires for the lamps begins.
The most typical cross-section of the lighting wire is 1.5 mm², which represents a maximum load of 4 kW. It is unlikely that the lighting in the apartment will reach such an indicator, because this is equal to 40 100 W bulbs turned on at the same time. Don't worry: you might install jupiters for professional video shooting at home.
If you don’t want to pay extra money for a cable, you can calculate exactly what cross-section of wire will be needed in each individual case. It's simple. Let's say there is a lighting area that consists of 3 spotlights, each with a 60 W bulb. A wire with a core cross-section of 1.5 mm² is suitable for the junction box. For 180 W this is a bit much.
We take the total power of the lamps - this is exactly 180 W (60 + 60 + 60) - and divide it by 220. If the number is less than 10, then you can safely install a wire with a TPG cross-section of 0.75 mm² from the box to the lamps. When it is less than 15, the TPG cross-section is 1 mm², and if it is more than 17, then a TPG of 1.5 or 2.5 mm² is suitable. In this case, it turned out to be 0.8 - less than one.
If you have a wire with a cross-section of 0.35 mm², then that will do. The difference in price for cables with cross sections of 0.75 and 1.5 mm² is at least 1.5 times, not to mention 0.35 mm². After the thickness of the wire in various parts of the lighting network has been determined, it is necessary to decide which wire is needed - two- or three-wire. If there is no grounding in the apartment and it will not be installed in the future, then the three-wire wire disappears by itself. What remains is a two-wire one with phase and neutral conductors.
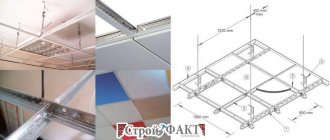
Type of wiring when power and lighting wires are powered from one common cable
Most lamps do not have a contact for a ground wire, so there is no need to be upset. A three-core wire will be useful if the apartment has grounding and fluorescent lamps with electronic ballast will be installed.
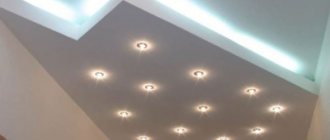
Visual lighting diagram
Remember that it is advisable to place separate boxes for lighting. In this case, there will be less confusion and it will look neater. Whether to use stranded or single-core wire is a personal choice. In some cases, for example, when laying lighting in a tight space on a suspended plasterboard ceiling, it is better to use a flexible wire such as PUGNP.
Optimal internal wiring diagram: a - connection diagram for pass-through switches; b - control circuit for a multi-lamp lighting device; c - diagram of a lighting network with two switches; 1 - neutral wire; 2 - input; 3 - phase wire; 4 - counter; 5 - meter winding; 6 - fuses; 7 - line to public devices; 8 — sockets with grounding; 9 - regular sockets; 10 — lighting lamps; 11 - switch; 12 — switches; 13 - two-key switch
Features of proper installation of the lamp
Installing lamps is partly a creative process, so before starting work it is recommended to make a sketch of the future composition.
In this case, it is necessary to take into account several factors, including:
- Type of device (shades, chandeliers, mortise models);
- Number of lamps (one or several);
- The material from which the ceiling is made (wood, PVC film, fabric, plasterboard, reinforced concrete panel ceilings).
The list also includes such parameters as room area, type of lamps according to the method of emitting flux, and characteristics of the bases. Despite the complexity of installation, with a competent approach and strict adherence to all recommendations, lighting fixtures can be installed with your own hands, without involving specialists.
Features of connecting 12V lamps
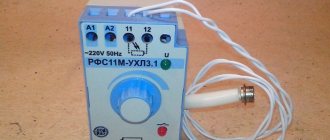
Many people prefer to use 12 V spotlights for lighting. Connecting them requires a voltage-reducing transformer and a device that stabilizes the current (can be made from a capacitor, resistor, diode bridge). Factory-produced devices are more reliable and are sold with a guarantee.
The driver parameters must be calculated after purchasing the lamps. Its power should be 20% higher than the total power of the lamp(s). It’s difficult to make a mistake with your choice, since popular manufacturers indicate the power on the packaging. It is imperative to evaluate the conditions at the installation site of this equipment. For example, for a bathroom you need to buy a driver that is resistant to high humidity.
The connection diagrams are the same as for a 220 V network. The transformer is mounted and connected first, wires are pulled from it to the lamps.
Most often, spotlights are used in suspended ceilings. These are built-in models that come with a driver and a connection connector. The cable in the ceiling structure is laid in advance. At the installation site of the lamp, a hole is drilled, the braiding and insulation are removed from the cable cores, and the covers hiding the terminals are removed from the transformer. The wires are connected according to the diagram on the case. Two terminals are provided for the cable, the rest (usually on the other side) for lamps. First, the cable wires are connected (exact polarity is not necessary, since the current from the network is alternating). On the other side, the wires of the lamp (or several lamps, if the driver is designed for this) are connected.
Next, the transformer covers are put in place, the device is hidden in the hole, and only the connector for connecting the lighting device remains outside. The lamp body is installed in the hole, the clamp is removed, the light bulb is installed, and secured with the clamp.
Surface preparation
The procedure depends on the nuances listed above. For example, it is necessary to install lamps on a suspended ceiling. In any case, you can’t do without an estimate. Ignoring this stage risks improper distribution of finances and already purchased materials.
Costs are calculated based on a pre-designed layout of lighting fixtures. Their number depends on the area of the ceiling. The formula is simple: there should be one light source per 1-2 m2.
First they work with the base ceiling:
- Indicate places of fastenings.
- Mount the racks at the indicated points.
- Fix and check the wiring.
- Install brackets and fasteners for the canvas and the lamps themselves.
- Carry out installation of devices.
- Connect a cable to them.
- Connect the protection system.
Then they begin to stretch the ceilings. It must be carried out by specialists. In the stretched fabric, neat cuts are made at certain places, which are then framed with rings. This prevents the occurrence of additional breaks.
Advantages and disadvantages
Spotlights have certain advantages and disadvantages. The advantages include the following aspects:
- Organization of partial lighting of the room. Often the entire space is not used, so lighting the entire room will become irrational.
- High-quality light, high brightness, holistic directional light flow.
- Uniform illumination of the room when each lamp is turned on. Due to the uniform installation of the point devices, there will be no dark corners left.
- Preventing the appearance of dark areas. Since the light source is practically located above the head and directs the light flow downward, there are almost no shadows. In addition, in each situation, the beam of rays that emanate from an adjacent device is additionally concealed.
- Economical. Such a device will consume less electricity than, for example, large chandeliers. When LED models are used, the overall savings will be even greater.
- Security of the premises. With small sizes, such devices will not affect the perception of the interior concept.
- Using multi-colored lighting when installing the appropriate lamps.
- Cost savings. A general chandelier with 4-6 shades from a well-known designer will be much more expensive than 8-10 spotlights.
Advantages of spot lighting
However, such equipment also has disadvantages. The main ones:
- Difficult design and installation. Such a system includes many devices, and therefore the design will become more labor-intensive. To connect, you will need to use auxiliary cables.
- When 12-watt lamps are used, you need to use transformers or power supplies.
- Most types of lighting fixtures require a special ceiling design, which is undesirable for low surfaces.
- In a situation where the light becomes excessively hot, the ceiling may be damaged. For example, overheating of halogen light bulbs in suspended ceilings. As a result, polyvinyl chloride loses its appearance.
Important! It is worth noting that there are significantly fewer disadvantages than advantages. Almost every one of them can be eliminated when the installation is done correctly.
Disadvantages of spot lighting
This is interesting: Bathroom lamps - how to choose and which ones are better
Electrical wiring
To connect ceiling lights to electricity, you will need the following devices and tools:
- Scissors for cutting metal;
- Tape measure, pencil;
- Drill, hammer drill;
- Hydraulic level, screwdriver, indicator;
- Drills (brazed, crown).
The list of required materials includes corrugated pipes, a transformer, anchors, connection blocks, dimmers, branch boxes, wires and the lighting fixtures themselves.
The procedure is quite simple:
- We place the cable (from the main box to the lighting point);
- We connect the wires coming from the lamp and the switch in a box;
- We evaluate the performance of the system.
Important! When laying the wire, it should be “packed” if the ceiling is covered with plasterboard or wood slabs.
How to connect spotlights.
When illuminating large areas, point light sources are very much inferior to diffused light ceiling lamps, in terms of energy efficiency - on average, two and a half times. When lighting long, narrow corridors, the ratio improves, but only slightly. The question arises - if spotlights are an integral part of “European-quality renovation” (in our understanding), then what to do with the well-known European trend of widespread savings, including electricity?
The fact is that the initial idea was to make the control of each such lamp separate. People, going about their business in the evening, turn on the lights only in a certain area of the room they need.
Of course, this leads to higher installation costs - more cable is consumed, and the work itself becomes more complicated. The place of conventional switches, near the entrance to the room, is occupied by touch control panels of electronic switching devices - controllers. The latter, very often, in addition to alternative switching from a remote control, have the ability to connect to a computer local network and implement the concept of the so-called “smart home”.
The issue of saving electricity is not so relevant here because of its relative cheapness. And the question of the cost of repairs is the opposite, due to the widespread lack of extra funds. Therefore, usually, spotlights are connected in parallel, in a loop, and are turned on accordingly - all at once. In the best case, especially when there are a lot of them, they are divided into two groups, which are switched on separately through a double switch. Detailed description of electrical connection. You can look at lamps through a single switch here, and through a double switch here.
The figure below shows a parallel daisy chain connection.
The blue and red wires of the cable are the power wires, and the green wires are the ground wires of the lamp body. This is a connection option in “new” apartments, where grounding wires in the lighting network are present initially. In old apartments (there is no grounding in the lighting network), only two supply wires are connected.
Installation of lamps on suspended ceilings
In this case, you should pay attention to lighting fixtures that are lightweight. These can be point, cardan, fluorescent and halogen devices.
The list is supplemented with lamps with tungsten filament. By choosing one of these options, you can solve two problems at once: illuminate the room and give it originality.
To prevent deformation of the canvas, you need to install lamps whose power does not exceed the limit. For suspended ceilings, compact spotlights are considered the best option.
After the fixation rings are inserted, you can proceed with the following actions:
- Installation of the lamp. It should be noted that the diameter of the lamp must match that of the mounting holes. Otherwise, everything will have to be redone;
- Connecting wires.
- Checking level and height;
- Design of fixed edges with special profiles;
- Adjusting the position of the lamp if it is equipped with a rotating mechanism;
- Housing insulation. For this purpose, thermal insulating rings are used.
Important! Before connecting halogen lamps with your own hands, you should wear protective gloves.
Installation of various types of fasteners
Installing a hook for a chandelier
Since ceiling mounts are the most difficult, they need to be dealt with more carefully.
There are situations when there is no installation box for wall lamps in a room. You can attach a metal plate to the surface in the following ways:
- Screw the plate to the ceiling using self-tapping screws onto a wooden block. The beam must be placed in the hole in the ceiling.
- Make several holes on the ceiling surface. They need to be positioned so that they line up with the holes on the mounting plate. When the holes are made, you need to attach the plate to the ceiling and secure it with dowels.
The hook on which the chandelier is suspended can be attached using similar methods.
Wall lights
Devices are connected to the wall depending on the circuit used. They can be divided into two groups - with a toggle switch built into the body and with an external switch. The first category includes decorative structures in the form of wall sconces and ceiling lamps installed in furniture. The second type includes products for lighting auxiliary rooms (pantry, corridor, hallway, kitchen). The main advantage of such devices is ease of installation and dismantling.
Algorithm for installing wall lighting:
- Marking mounting points on the wall. To do this, you need to attach the case to the wall and make marks where the fasteners will be.
- Fixing the lamp. It is done using dowels or on a bracket or other supporting structure. The second method is suitable for massive structures.
- Installing the light bulb into the socket.
- Functionality check.
The correct placement of the lamp depends on the accuracy of the marking of the rear part. Usually there is a small gap on the mounts, thanks to which the position can be adjusted if the location is chosen with a slight discrepancy.
Next the wires are connected. Zero always goes directly, and phase goes through the switch, if a model with a switch is selected. Before connecting the wires, you should check what a particular core is responsible for. This can be done using an indicator screwdriver or a multimeter.
Connecting built-in luminaires
Laying the cable of spotlights under a suspended ceiling
The technology for installing built-in luminaires differs from classic wall and ceiling lamps in the presence of an additional power supply. It also plays a protective role.
Installation of recessed luminaires is carried out as follows:
- Determining the installation location. Creating a wiring diagram and power supply.
- Laying cables.
- Cutting a hole in a suspended or stretch ceiling of a certain diameter for a lamp.
- Pulling wires through the hole.
- Connecting wires and installing lamps in the mounting hole.
- Functionality check.
Massive structures are attached to a steel slatted frame before the ceiling tiles are assembled. Then the lamp is dismantled, leaving a transitional mount in its place. When the plasterboard or MDF boards are laid, mark the position of the body on the canvas, make a corresponding hole and make further connections.
Installation of chandeliers and shades
Installation of lampshades is permissible on any type of ceilings, except suspended ones. To achieve a strong fastening, you will need self-tapping screws. They are screwed in using a hammer drill.
The terminals are connected to the wires only after the housing has been secured. The next step is to fix the light bulb. Then the master fixes the light bulb and covers it with a diffuser.
- The installation method is chosen based on the type of lamp. Chandeliers are most often hung on hooks.
- They are carefully screwed into the ceiling, and the latter can be made of PVC panels, plasterboard, OSB and wood.
- The terminal block is hidden under the cover of the lamp.
Instead of a hook, a fastening strip is often used. In this case, the procedure is similar to the algorithm for installing a lampshade.
How to install spots yourself
Installing lighting fixtures in a suspended ceiling is very simple.
Step 1. You need to run electrical wires to the places where the lamps will be placed. And this must be done before installing the ceiling.
Step 2. After completing this stage, work on the holes for the spots. Cut them into the ceiling. It is best to use a circular saw for this. Then connect the wires and insert the lighting fixtures, to do this, squeeze the clamps and bring them to the top. When you place them in the holes, the latches should be released. This way the lamp will be securely fixed in place.
Installation of spotlights in a suspended ceiling
Step 3. Screw in the incandescent bulbs. Halogen bulbs need to be handled differently than standard incandescent bulbs. First install the plug-in connectors, and then insert the lamps into the luminaires. For fixation, use locking rings; manufacturers supplement each set of lighting fixtures with them.
Step 4. Don't forget about protection; work with fabric gloves. It is not recommended to touch the glass of halogen lamps with bare hands, as the products may prematurely lose their functionality.
How to markup
Since you will have all the spot spots inside, it is not surprising that the lighting angle of the room will be limited. Near the lamp it reaches 30 degrees, and then, at a short distance, the light dissipates. To avoid shadows and keep the room flooded with bright light, place the lighting fixtures so that the light streams intersect. This trick will ensure that the room is illuminated evenly. For example, the room has standard-height ceilings, then you should retreat 60 centimeters from the edge of the wall. Place the spots at a distance of 1 m from each other.
Popular placement options for spotlights
Apply marks before starting work. They are easy to make using pieces of electrical tape. Cut two small strips and stick them crosswise in the place where you plan to install the lamp. Repeat the action, the number of stickers should correspond to the number of lamps.
Once you've made your markings, look at the placement of the marks. This must be done after the crosses are evenly distributed across the ceiling. Take a tape measure and measure the distance between adjacent marks. Make adjustments if necessary.
Marking the ceiling for lamps
How to make holes for spots
To make holes, prepare the following tools.
- Buy an electric drill. If it is not there, use a regular screwdriver.
- Prepare a crown; it should be similar to wood. Focus on the diameter of the spots, usually it is 6.8 centimeters.
Insert the crown into the electrical appliance and use it to cut holes. If there is no crown, then the circles will be harder to make. In this case, buy a wood or metal drill. You will also need a utility knife.
Drywall crown
Draw a circle of the required diameter. It should be slightly smaller than the diameter of the outer part of the lighting fixture, then the lamp will not fall inside. Drill a hole using a thin drill bit. Use a utility knife to remove burrs on the surface of the material. When all the holes are ready, you can move on to the next stage.
Connecting wall-mounted lighting fixtures
Many types of lamps listed above are installed on walls. Local lighting is relevant if the room is divided into functional zones.
The light emanating from such sources makes the room more impressive and at the same time calm, helping to relax after a difficult day.
Installation of wall-mounted devices is carried out in the following order:
- Determine the location.
- The electrical cable is supplied.
- Make holes, having previously marked the attachment points.
- Fix the lamp;
- Check its functionality.
It should be noted! The cable must be de-energized during installation.
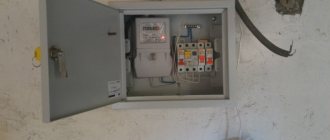
Connecting the cable
The VVGng-LS 3*1.5mm2 power cable must be laid in advance along the luminaire location route.
You cannot use any kind of wires and cords, such as SHVVP, as home lighting wiring. The approved brand is VVGnG-Ls, or NYM.
In this case, select the minimum permissible cross-section of group cable lines to be
at least 1.5 mm2 .
No 2*0.75mm2! Even if your load is very small. In the place where the light spot will be located, leave a supply of cable in the form of a loop (it will need to be cut later).
This loop should hang at least 10-15cm from the already stretched fabric or the lower edge of the embed.
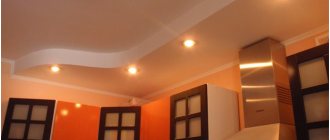
Photo of the ideal installation of lamps
Installation of spot and LED lighting
The connection diagram for spotlights is also not particularly difficult. When installing, maintain a distance (minimum 10 cm) between the base and suspended ceiling covering.
Proper installation of lighting fixtures will cover all wiring connections. The housings will not be visible.
Point ceiling devices require a certain voltage. For this, several transformers are used, which reduce the voltage and do not affect the ceiling sheet.
Connection:
- simple installation - several light bulbs running separately are connected to one wire. To prevent light bulbs from burning out, take care of the rectifiers in the circuit;
- another option. From the distribution box there is a connection via a separate wire to each light bulb. In this case, a rectifier is not needed.
Connecting LED ceiling lights does not require any special skills. The installation is not difficult to do yourself.
LED ceiling lighting fixtures differ from other options in that the LEDs are mounted directly into the lamp body. If the light bulb stops working, then it will not be possible to replace it - you need to completely replace the failed lamp.
To connect LED lights on the ceiling, you need to calculate their number and determine the location on the ceiling. The diagram should show how to connect light bulbs in a suspended ceiling. Choose light bulbs based on wattage.
Connecting LEDs cannot be called easy. How to do it:
- make holes in the hanging panel for LED connectors;
- after connecting the wires, secure them with dowels to the base surface;
- The connection of all lamps must be carried out with a stranded wire and according to the diagram. The wires must be soldered before installing the suspended covering;
- After connecting to the network, secure the LEDs to the ceiling by snapping them into place.
Make sure that the bulbs do not get too hot. Otherwise, the ceiling canvas may be damaged.
Main advantages of wall lamps
An important advantage of wall-mounted sconces is:
- the possibility of creating soft locally directed lighting of a small area with their help;
- the formation of a diffused light flux where the functional purpose of the room requires it;
- focusing on certain interior elements;
- the appearance of an additional light source, allowing you to read or do other favorite things;
- the ability to adjust the direction of incidence of the light spot;
- a wide selection of technical features of the device (type of switch, number and type of light bulbs, installation method, etc.);
- use as a convenient night light in the sleeping area;
- use as an important element of interior design (variety of shapes, materials and colors).
Difference between parallel and series connection of lamps
If any light bulbs are connected in parallel to each other and, accordingly, in series with the switch, then the voltage on each of them will be equal and in this way light sources of different powers can be connected. The main condition is that the operating voltage at which they operate normally must be equal to the voltage of the power source. If in this case a step-down device with a rectification system is used, then the opening contact must disconnect the circuit in front of the converter, as shown in the figure.
In this case, it does not matter whether two or three light sources will be turned on. Most often these are halogen and LED lamps, designed for a reduced voltage of 12 or 24 Volts.
With a serial connection the situation changes dramatically. The supply voltage will be divided by the number of light bulbs, that is, if the network is 220 Volts, then on two artificial light sources connected in a series circuit, the voltage will be approximately 110 Volts. This must be taken into account when choosing and purchasing them. Another nuance with this connection is related to the power of each of them. It should be the same or as close as possible to each other, because With such a connection, the current is the same in all parts of the circuit. If one lamp is 500 W and the other is 50 W, then the lamp with the lower power, connected by one wire to each other, will still flow more current, corresponding to the most powerful load. A light bulb with less power will burn out instantly. This rule applies to all types of lamp sources, from incandescent to LED.
If you need to connect an LED light source from the network or from sockets, it often consists of a so-called driver installed inside the light bulb housing. It performs several functions at once: rectifying and reducing. These lighting devices are not intended for serial connection, only for parallel connection.
For fluorescent daylight sources, both with an electronic starting device and a starter, a series connection is most often found in raster lamps, as it allows one choke and two starters to ensure stable operation. In this case, the starter itself is selected for 127 V with the calculation of the operating voltage of a standard 220 Volt network. The switch in this circuit uses a regular single-key switch and also breaks the phase wire with its contact.
As for the parallel connection of several fluorescent lamps or compact lamps, the operation of which is based on the glow of a phosphor applied to a glass tube, then in this situation it is possible to connect any number to one switch, either single-key or two-key. The main thing is to take into account the power of all light sources, on which the current in their circuit directly depends. For any switch it is limited and indicated in the technical data sheet, on the packaging or case. If, for example, a current of 5 A is specified, then you should not exceed its value, since this will very quickly render the breaking contact itself unusable.
To fully understand the serial and parallel connection of light bulbs, we recommend watching the video:
Preparatory stage
- When starting the installation process, familiarize yourself with the type of tow hook. It is important! After all, the type of trailing hook is different and depends on the type of ceiling covering. Considering the fact that manufacturers do not include several types of hooks in the package, therefore, you will have to buy it yourself;
- Be sure to buy drills and dowels for the trailer hook. They must match perfectly in size;
- Prepare tools: hammer drill, drill.
This is what a hook for mounting a pendant lamp looks like
Main practical stage
- Drill a hole for the dowel.
- Screw in the hook.
- Secure the product.
On a note
- Often, residential buildings made of reinforced concrete already have holes with ready-made fasteners. Consequently, installation steps are reduced;
- if the ceiling is made of wood, the installation process is identical;
- Ceiling suspended structures require the use of specially shaped hooks. If the shape of the hook is standard, then it is necessary to add washers.
Algorithm for installing a standard sconce on several light bulbs
First of all, it is necessary to de-energize the room. Then follows:
- checking that there is no voltage on the wires to which the lamp will be connected (use an indicator screwdriver);
- marking the mounting holes, for which the main mounting element of the sconce is leveled, and the drilling points are marked with a pencil;
- drilling holes at the required points, inserting dowels and fixing the base with self-tapping screws;
- stripping wires (removing braiding from 0.5 to 1 cm);
- connecting wires to the terminal block taking into account the diagram;
- final fixation of the remaining elements of the sconce body.
If the lamp is installed high enough, then it will not be superfluous to use a stepladder. After screwing in the light bulb and restoring access to electricity in the room, the quality of installation and correct connection of the wires should be checked. If there is no sparking, everything works like a clock, and the lamp burns evenly, then everything is done correctly.
Manufacturers now offer a huge range of wall sconces for home and office. All of them are designed to create comfortable zones with local lighting. Before you buy your favorite design solution, you should take into account many factors relating not only to its external design and operational and technical indicators, but also to installation features.
Comments:
Vector
The article is good, but one detail is missing. The wall lamp must be mounted at a minimum height convenient for its use. If it is installed near a chair and is intended for ease of reading on it, then it should be installed 5-10 cm above the level of the seated person’s head. If above the bed, then 50-70 cm above your head
Semen
The lamp near the chair works well in combination with a motion sensor. My dad likes to sleep in a chair, and when he falls asleep, the light turns off.
Zakhar
A wall lamp near the chair is an inconvenient and unjustified solution, in my opinion. What if you decide to move the chair to a different location? Isn't it better to use a floor lamp in this case?
Kilowatt
Zakhar, then you shouldn’t use a stationary lamp above the bed either. What if you decide to rearrange the bed? Kitchen? Move the bath to another room? Not all people move furniture, some leave it in its place