How to remove a recessed ceiling light
A special feature of installing spots in a suspended ceiling is that the device is attached not to the film itself, but to a special structure - a mortgage. This part is located behind the canvas and serves as a load-bearing base. It is from this that you need to remove the lighting device. The lamp itself is attached to the mounting platform using two spring clips.
The dismantling process consists of several simple operations:
- Turn off the automatic switch responsible for the corresponding group of devices.
- Pull the lamp body slightly so that a small gap is formed.
- Slowly remove the lighting fixture, first from one side, then from the other, until your fingers can reach the fasteners.
- The latches are pressed and held firmly with your hands, and the lamp body is carefully removed from the ceiling.
All actions must be careful. The latch holding the device inside the mortgage must not be allowed to hit the PVC film. Such carelessness can lead to damage to the finish.
There are other problems too. Often the spring latch hits your fingers. Therefore, it is necessary to hold the clamps securely while removing the device. If you do not de-energize the circuit on which dismantling is being carried out, when disconnecting the contacts, electric shock may occur.
Instead of the old device, insert a new one of the same size. Installation is carried out in reverse order. Sometimes dismantling is necessary to replace light bulbs.
In suspended ceilings made of plasterboard, slatted and cassette type "Armstrong" no additional embedded platforms are used. The finishing material is sufficiently rigid for mounting lamps.
Dismantling is carried out in exactly the same way, only even easier, because there is no risk of damaging the material, as is the case with a thin stretch fabric. To remove the built-in lamp from the suspended ceiling, you can use a screwdriver, this makes it easier to pry up the ring and reach the spring.
Choosing a recessed luminaire
The ceiling lamp can be built-in or overhead. The second model is attached more easily directly to the mortgage hidden under the tension fabric. As for built-in point light sources, there are certain difficulties associated with cutting holes in the tension fabric.
But first things first, let's start with choosing a recessed spotlight. The variety of point models on sale is huge. There are different shapes, decorative finishes, there are even lamps with shades, etc. But regardless of the design, the design of all spotlights is the same:
- the device consists of a housing with a profile ring;
- 2 ear-shaped springs are attached to the body as fasteners.
The case size of each model may vary. The diameter of the hole that will have to be cut in the tension fabric depends on this. Inside the housing there is a socket for a lamp or LED unit.
Round or square?
There is one very important point that requires special attention before choosing lamps. The fact is that the shape of the models can be round or square. The easiest way to install round lamps in suspended ceilings. They are easier to level.
Installing square lights is a little more difficult. Devices on the ceiling will have to be leveled using a laser level, otherwise distortions will be clearly visible from below. However, there is another pitfall.
Not every company will even undertake to install devices with a square body. Cutting square holes on the tension fabric is dangerous; at the corners it can shoot out like arrows and break. If you wish, you can try to install models with a square body only on a fabric stretch ceiling. And then, first, round holes are cut out in the canvas where the mountings for the lamps are located. From the inside, the canvas is glued to the mortgage, and only after the glue has completely dried, the hole is given a square shape.
You can install recessed lighting fixtures with a square body only at your own peril and risk. Square housings are generally not suitable for PVC suspended ceilings, since the film will immediately burst at the corners of the cut hole.
How to change a light bulb in a spotlight on a suspended ceiling
Depending on the type of socket, light bulbs are removed differently. Let us consider in detail the replacement process for each type of base. Before starting work, it is better to turn off the power supply at the panel, otherwise there may be an electric shock.
It is not very convenient to remove light bulbs of this type from spots, since the outer part is recessed into the lamp body and is located above the plane of the stretch ceiling. In the lampshades they are held in place using a special retaining ring or a wire clamp with antennae at the ends. Such lamps are compatible with LED and pin-type halogen elements.
To change a light bulb with a G5.3 socket, you need to squeeze the two antennae and pull out the fixing bracket. If a retaining ring is used as a retaining part, it is simply unscrewed. The lamp falls out. Then you need to disconnect it from the contacts by pulling it towards you. After this, a new lamp is connected, inserted into the lamp body and the fixing ring is installed in place.
Note! Halogen bulbs must be inserted carefully; it is advisable to use a napkin or gloves for this. Touching the bulb with your fingers will shorten the life of the device.
Sometimes the retaining ring does not fit back in after replacing the light bulb. This happens for several reasons:
- the body is deformed - it will have to be replaced;
- the ceiling is fixed too high and the base rests on the concrete base - you need to purchase a lamp of exactly the same size, a difference of 1 mm can cause a problem;
- The fasteners are the wrong size - this happens if you had to unscrew several light bulbs and the rings were mixed up.
In luminaires with a GX53 base, the lamps protrude beyond the ceiling by 3-4 mm. On their back side there are two contact pins that are inserted into the corresponding grooves on the body of the lighting fixture. Dismantling is carried out by turning the lamp counterclockwise until it clicks, then it is simply pulled out.
Replacement is very easy; there is no need to install fixing parts or disconnect wires. Simply insert the new lamp and turn it clockwise.
G4, G9
The design feature of such lamps is that the body protrudes beyond the plane of the ceiling. LED and halogen pin-type models are available with G4 and G9 sockets. To dismantle the lamp, just pull it down. Then simply insert the new one into the groove. There is no need to rotate the lamp. In some models, you first need to disassemble the spotlight, namely, unscrew the decorative diffuser.
Installing and removing the lampshade
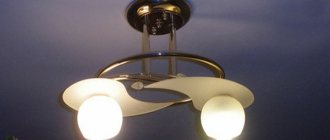
In the first picture, the lampshade is screwed into the body of the lighting fixture. Do not tighten the connections too much, then it will be difficult to unscrew them back. This design was popular in Soviet times, but is rare on modern models. Sometimes the lampshade is mounted by screwing in bolts or a latch
It is important here to calculate the forces and not squeeze the plastic or glass, which can crack
In models from 10-20 years ago you can find a lampshade with a fastening system in the form of two springy plastics mounted under a cartridge. They securely hold a plastic or glass lampshade, pressing it to the seat. In order to remove the lampshade, you need to unscrew the light bulb, press the plates against the socket and pull it towards you. Installation occurs in reverse order. You just need to hold the lampshade well so that the plates do not damage it with a sharp blow. Lampshades on a metal tripod are less common.
The most common method of attaching the lampshade is a plastic ring screwed into the cartridge thread. Sometimes when unscrewing the ring, the insulating part of the cartridge is unscrewed along with it, so you need to be extremely careful.
How to replace small lamps with large ones
Sometimes the lighting scheme is poorly thought out and there is not enough light in the room. Then there is a desire to install larger lighting fixtures. Let's look at how to do this.
The first step is to dismantle the spot. Then a thermal ring of the required diameter is glued onto the stretch ceiling fabric, so that the old tread ring is inside. After the part is firmly fixed, the film is cut out, creating a large hole.
Then the embedded platforms are adjusted to the diameter of the base of the new lamp. To do this, you need to carefully cut out the excess plastic rings with a knife so that the device body fits freely into the hole. When the site is ready, the lamp and light bulbs are installed.
Note! It is possible to increase the diameter of the embedded part only if universal platforms are installed, which are a stepped structure consisting of several rings with a pitch of 5-10 mm.
You can replace lighting fixtures yourself, without the help of specialists. But if you have doubts about your own skills and knowledge, it is better to entrust this work to the specialists who installed the suspended ceiling. After all, careless actions lead to damage to the material, and improper handling of electrical appliances results in serious injuries.
Over time, the service life of any light bulb in a lighting fixture comes to an end and the need arises to replace it with another. It is important to understand that there are different ways to unscrew a light bulb from a suspended ceiling. The process is influenced by the type of lighting fixture used, the surface of the ceiling, and the type of light source.
Types of socles
Regardless of what type of lighting device is used to illuminate the room: energy-saving, halogen, LED, incandescent, you need to decide on the type of mounting. When choosing, the design of the lamp is taken into account. In order to figure out how to change a light bulb in spotlights, you need to learn about the types of bases.
You may be interested in LED strip ceiling for lighting box
Socles
What is a base? This is the part of the light bulb that is used to mount the structure in the socket. In addition, it serves to conduct electricity. Without a base, the lamp will not work. Despite this, baseless devices are sometimes used. They are designed to conduct light in automotive applications.
The design of the base is simple: the body is made of metal or ceramics. Inside are the elements of the light bulb, outside are the contacts for connection.
Types of socles:
- screw;
- pin;
- bayonet
Each type is marked with letters and numbers. The letter means type, the number means characteristic.
Screw
The most common type for apartments is a screw base. Marked with the letter "E". This is the oldest type of light source mounting. Invented by Edison. The original name is “Edison Screw Type”, or Edison screw type. Hence the letter "E". The number indicates the outer diameter.
Screw base
Among all Edison sockets, the most common is E27. Lighting fixtures with a diameter of 27 are the most popular in Russian apartments because it is easy to find a light bulb for them. E27 is equipped with traditional incandescent lamps, but has recently been found in halogen, fluorescent and LED lamps.
E14 is also found on the market. They call him "minion". This type is most often found in sconces, table lamps, but sometimes also in suspended and suspended ceilings. Less commonly used are “E” with diameters of 5, 10, 12, 26, and so on.
The main advantages are the prevalence and ease of fastening. There are no shortcomings observed.
Shtyrevoy
This type of base does not use a screw, but a pin connection system. The numbers indicate the distance between the centers of the pins. Used in halogen and energy-saving lamps. Denoted by the letter "G".
Shtyrevoy
The G4 connection is used in small halogen light bulbs. Most often used for decoration, in spotlights, as well as in built-in lamps. There is a G9 type. Used in 220 V AC power supply, suitable for decorative lamps.
For office lighting use tubular G5. For compact lighting fixtures, there are sockets with four pins (2G10, 2G11). There are many such lamps. In order not to get confused when buying a new light bulb, it is recommended to take with you an old, burnt-out light source.
In addition to the types described above, there is the “GU” type. This means that the lamp is energy saving. The most common for suspended ceilings is GU5.3. Their thickness is 2.7 centimeters.
Bayonet
This type of connection is also called bayonet or pin. The source is installed in the lighting fixture by inserting and scrolling. Widely used for various purposes, most often in suspended, stretch ceilings and cars. The device operates in the presence of strong vibration.
Bayonet
This type of connection between a lighting fixture and a light source is often used in transport and more. For example, in the UK this is a standard connector.
You may be interested in this Features of an infrared heating lamp
Bayonet fasteners are usually designated by the letter “B”, and the number that comes after the letter indicates the outer diameter of the connector.
There are bases with different numbers of contacts (from 1 to 5). They are also designated by the letter:
- “s” - single contact;
- "d" - double;
- “t” - three contacts;
- "q" - four;
- "p" - five.
In everyday life, as a rule, lamps with one and two contacts are used. The rest are in production.
How to replace an LED light bulb in a suspended ceiling
Before purchasing a new LED lamp, it is recommended that you first check that it is working properly while still in the store. You can use testers for this.
If during operation it becomes necessary to replace the LED light source, you will need to perform the following work:
- Remove the existing fasteners from the LED lamp.
- Remove insulation from electrical wires. Carefully disconnect the wires.
- Replace the LED lamp according to the attached instructions. Connect the wires to the light source.
- Restore electrical insulation. Hide the wires and replace the lamp cover.
If lamps in the same lamp burn out quite often, then it is worth checking the serviceability of the base, since in most cases this may be the problem.
Preparing to replace the chandelier
Choosing a suitable chandelier is the primary task facing owners who decide to change it. This must be done in advance in order to clearly determine the location of its installation, additional preparation, installation method and other important points before starting work.
When choosing a product, it is recommended to pay attention to the following requirements for it:
- The lamp should not have sharp edges. The stretch ceiling fabric is quite durable, but any untreated protrusion can very quickly damage it and thereby render the entire coating unusable.
- It is better if the base of the lamp is made not of metal, but of plastic or any polymer. In this case, its heating will not be dangerous for the PVC film.
- It is advisable to choose a lamp model in which the lamps will be directed in the direction opposite to the ceiling.
- If the product uses incandescent lamps, it is necessary to ensure a sufficient distance from them to the surface of the coating. The optimal length of the suspension in this case is from 15 to 25 cm.
This last requirement can be difficult to fulfill, since most modern lamps place the light sources directly near the ceiling. To avoid heating the film, many people abandon incandescent lamps in favor of energy-saving ones: this solution allows not only to protect their home, but also to significantly save on electricity.
Having chosen a suitable new model, you can start dismantling the old one
You also need to be very careful when removing the lighting fixture so as not to puncture the film.
It is important to de-energize the wiring in a timely manner, ensuring the safety of all actions performed. To do this, the fuse on the distribution board in the entrance is turned off or the plugs are turned out
https://youtube.com/watch?v=TFt1GF2F_jg
How to change a halogen light bulb in a suspended ceiling
As a rule, halogen lamps are used for indoor and outdoor lighting, in floor lamps. The algorithm for carrying out work to remove the light source will be similar in all cases; it is enough to adhere to the following dismantling algorithm:
- Turn off electrical energy in the room, which will protect people from electric shock.
- After this, you need to slightly press the halogen lamp with one end of the base into the socket, after which you should pull the other end towards you, while holding the glass bulb at all stages of unscrewing.
- The new light sources are then inserted into the socket, press it slightly and insert the opposite end of the lamp into the second end of the socket.
The halogen lamp should not subsequently dangle in the socket.
Main stages of dismantling
The general scheme for dismantling a chandelier does not depend on the materials used to make the ceiling. First, you need to prepare well and be sure to turn off the power to your apartment/private house (at least the room from which the device is removed).
The correct sequence of actions is as follows:
- Gather the tools needed to dismantle the old lamp and install the new one. Carefully inspect the design of the future chandelier and make sure there are no defects.
- Turn off the power supply to the room/apartment with a switch inside the distribution panel, usually located in the vestibule or entrance (on the site).
- Check if everything was done correctly by turning on the lighting devices and connecting electrical appliances to the outlets. Ideally, you need to use a tester (or a simple indicator screwdriver).
- Despite the power being turned off, work must be carried out wearing protective rubber gloves designed for operation under voltage of 220 V.
- Unscrew the old chandelier and, provided the fasteners are the same, fix the new one to the ceiling. If the holders are different, then the work will become much more complicated.
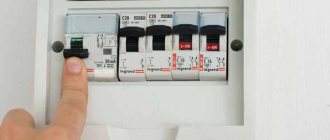
Power outage
The first step in our dismantling is to disconnect the electrical network that powers the chandelier. If the electric meter in your home has several circuit breakers that are responsible for specific areas of the house, you need to turn off the one that provides power to the room with the chandelier to be dismantled. If the meter is old with a minimum of “automatic machines”, we turn off the network in the entire house or apartment. Remember, just turning off the chandelier light will not provide you with safety from electric shock.
How to remove a tungsten light bulb from a suspended ceiling
Tungsten light bulbs are most often called Ilyich light bulbs. Despite the fact that such light sources are no longer popular due to their low service life and high electrical energy consumption, they can still be found in suspended ceilings. As a rule, such light bulbs are unscrewed counterclockwise; replacing them does not cause any particular difficulties.
How to change a fluorescent lamp in a suspended ceiling
As practice shows, fluorescent lamps of several modifications can be used for suspended ceilings:
- fluorescent lamps in the form of tubes;
- classic glass flasks.
The tubular housing usually needs to be installed in the contact panel of a lighting fixture that has a starter device. To remove the housing from the socket, you will need to remove the protective casing, which is first pressed in the longitudinal direction, rotated and pulled out of the socket. Installation work must be carried out in reverse order.
The process of replacing fluorescent housekeepers with screw sockets is carried out in the same way as for conventional incandescent lamps. If the base is slightly stuck in the socket, then you need to unscrew the lamp using a rotating motion.
The procedure for removing a pendant chandelier from a hook
Before removing the lamp from the ceiling, it is necessary to rid it of fragile hanging elements that increase weight: lampshades, decorative pendants, chains, light bulbs; It is most convenient to use a stepladder. On a regular (not suspended) ceiling, the algorithm consists of the following steps:
Release the connection point. To do this, lower the locking cap down, using a screwdriver to loosen the clamping screw, or unscrew the central nut. Use an indicator screwdriver to check the absence of voltage.
- Unscrew the terminal blocks and remove the lamp from the hook.
- Suspended ceilings require a different approach:
- When access to the hole in the canvas is open, the product is carefully removed from the hook and pulled out along with the connected wiring elements.
- The chandelier needs to be disconnected. At this stage it is advisable to have an assistant who will support the item. All that remains to be done is to loosen the terminal blocks (or strip the wires of insulation) and disconnect the wires.
Sometimes it becomes necessary to dismantle the hook (for example, when replacing a hanging device with an overhead one). The mounting hook in the form of a screw with a half ring, fixed to the floor slab, is simply unscrewed from the ceiling.
In suspended and plasterboard structures, fixation to a mortgage or lathing is implemented. The mortgage is understood as a wooden beam that is mounted on the base of the ceiling using self-tapping screws or a suspended platform. Before removing the ceiling chandelier from the suspended ceiling, you need to unscrew the screws.
After the device is lowered down and the fasteners are removed, you need to protect yourself from a short circuit. To do this, the wires are marked using a multimeter (tester) and an indicator screwdriver, marked and placed in terminal blocks or insulated.
How to change fiber optic light bulbs in a suspended ceiling
Today, fiber optic light sources are the most reliable; their service life can exceed 10 years. Due to their high level of strength, they can be used in any room, regardless of humidity levels and temperature conditions.
Since fiber optic lighting devices are small in size and, if necessary, they can change the color of the glow to any shade, they are most often used to create a starry sky in suspended ceilings.
Many experts consider such light bulbs to last forever, since they are less likely than other types to burn out. If one of the lamps burns out, it must be immediately removed through the existing hole in the suspended ceiling and a new one installed in its place.
Replacing the LED lamp
When working with lighting devices, the first thing you need to do is turn off the power to the apartment. To do this, turn off the required element in the power supply branch
Do this with due care and caution, following safety rules. It is also better to take a chair and any other stand with which it will be convenient for you to do your work. Be careful with the stretch ceiling fabric, any sudden movement can damage it
Be careful with the stretch ceiling fabric, any sudden movement can damage it
Now proceed to directly replacing the lamp
Be careful with the stretch ceiling fabric; any sudden movement can damage it. Now proceed to directly replacing the lamp.
To begin, unlock the lamp in the mounting system. A special fixing ring is responsible for this. Be careful, the ring can easily slip out of your hand. Next, slowly unscrew the old lamp. Inspect it and select a new lamp with the appropriate characteristics: size and power. After replacing the lamp, return the retaining ring to its place and secure it in proper condition.
Here are some tips on how to remove a light bulb from a stretch ceiling:
- If the ceiling requires the installation of LED lamps, but you definitely don’t have enough power, use a little trick: instead of the usual, standard yellow color, buy white. With this simple replacement you will increase the brightness of the lightening without affecting the power consumed.
- To achieve a harmonious effect of transmitting light into the suspended ceiling of one room, it is better to mount lamps of the same model. This way you will get an aesthetic and attractive appearance. If for any reason you cannot find the lamp you need, replace everything in the room. To do this, always purchase a couple more light bulbs so that you can quickly replace them at the right time.
- To make the lamp last longer, do not screw it into the lamp with your bare hands. Use gloves or a dry cloth.
- Do not forget that a suspended ceiling will not withstand an overly powerful lamp. It is better to purchase it with a power of no more than 35 W to avoid possible damage to the material.
How to replace a broken lamp
There are times when a lamp in a lighting fixture bursts. Before removing the flask, it must be covered with a small amount of tape. Halogen lamps, as a rule, have glasses that are quite thick, as a result of which adhesive tape is used to prevent the leakage of gases and the appearance of sharp chips, which can cause significant injury.
Things are much more complicated with fluorescent lamps. Before removing the flask, it is recommended to put a thick bag on it, which will prevent a large number of fragments from appearing all over the floor. The most unpleasant moment is when the bulb shatters into small pieces, and the base, as before, is in the cartridge. In such situations, it is necessary to completely remove the panel from the stretch ceiling, and then disassemble the nest.
Required Tools
It is not always possible to carry out basic work of replacing lighting fixtures on a suspended ceiling with bare hands - you need tools and devices:
- a sliding ladder (stepladder) will help you reach the ceiling and work in comfortable conditions (if you don’t have one, you can use a table);
- An indicator screwdriver will help to check the presence of voltage in the wiring of the lighting fixtures being replaced - a break in the electrical network by an electrical switch often leaves the red wire energized, since it is not a phase that has passed through the switch, but a zero;
- pliers will help remove the retaining rings (the task will be especially simplified if they have pointed jaws);
- two flat screwdrivers will help pull the light source with a spring fastening system out of the socket;
- a Phillips screwdriver is needed to unscrew the terminals when changing the cartridge;
- a stationery knife will help to strip the wires of the purchased lamp;
- A terminal block will be required if the wires were connected by twisting before replacing the socket.
This is interesting: Lighting in the kitchen with a suspended ceiling - ceiling lights for suspended ceilings in the kitchen, options, chandelier, spot lighting, spots, how to arrange, location, LED lighting
How to remove a spotlight from a suspended ceiling
If there is a need to remove a spotlight from a suspended ceiling, then dismantling must be done in stages. The algorithm for dismantling the lighting fixture is as follows:
- The first step is to remove the protective glass, if any. After this, carefully unscrew the light bulb from the spotlight socket.
- After this, you need to pry off the decorative strip from the outer edge. To make dismantling easier, you can use a screwdriver or knife. The result should be a small gap into which a flat-head screwdriver is immediately inserted.
- The lamp body should be pulled out at the moment when there is a gap into which you can stick your finger. It is in this position that you can reach with your fingers the fixing elements that need to be pressed against the body of the spotlight and carefully remove it.
If you need to completely remove the lighting fixture, then you should unscrew the bolts located on the terminal block.
Features of working with different lamps
The range of lighting devices produced today is very diverse. Often, installation and dismantling problems are associated not so much with the processes themselves, but with the unusual designs of pendant lamps.
The type of ceiling covering is also of great importance. The algorithm for working with a suspended ceiling may differ from manipulations with a standard or suspended type of structure.
Removing a chandelier from a suspended ceiling
Stretch ceilings are most often found in modern houses and apartments. They are attractive due to their ease of installation, cost and variety of designs. When installing lamps, a special fastening system is often used, which includes a wooden mortgage or a suspended platform. As for the type of fastener, it all depends on the type of lighting device. In order to change the chandelier in such conditions, it is necessary to turn off the power to the room and prepare a stepladder and tools. The further algorithm of actions will look like this:
- cleaning the body (removing all decorative parts, shades, glasses and lamps);
- dismantling the protective cap;
- releasing wires from terminals and insulation;
- checking the absence of electricity in the network (using an indicator screwdriver);
- dismantling the lighting fixture from a hook or strip with careful removal through a slotted hole in the ceiling.
The remaining ceiling wiring must be insulated to prevent short circuits after the power is turned on.
How to properly remove spotlights from a suspended ceiling
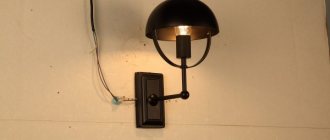
Spotlights do an excellent job of providing additional lighting, replacing outdated wall sconces. Replacing such a lamp in an apartment yourself is quite simple. You just need to strictly follow the sequence of all actions, namely:
- De-energize the room.
- Using a flat blade screwdriver, remove the housing cover and remove the light bulb.
- Carefully pull out the body of the spotlight, if a gap forms, insert your fingers and press the latches, thereby releasing the lamp and dismantling it completely.
- Using a lever or hidden spring, open the terminal block and pull out the contacts.
Removing a spotlight from a suspended ceiling
The instructions for dismantling built-in lighting fixtures from a suspended ceiling differ from the suspended version. Its design is much more rigid, which allows the luminaires to be installed using a spacer system. Such fasteners provide more reliable fixation of the device.
To remove the spotlight, you need to carefully hold the device, pull it out, forming a gap, and then unscrew the base, gaining access to the wiring diagram. Then everything is simple: the contacts are disconnected and isolated.
How to change a light bulb in a suspended ceiling
Ceiling panels are often emphasized with the help of lighting placed in a certain way, and it is enough for one lamp to burn out for the appearance of the room to change, so it is better not to delay replacing them. But if in a regular chandelier it’s quite easy to change the lamp, then with a stretch ceiling it’s more complicated. Quite often, in order to pull it out, you need to remove the entire lamp from the socket. The algorithm of actions in this case depends on the type of lamps, namely:
Important! There are lamps with LEDs, which are a single mechanism. In this case, the entire device changes!
Safety first
Electric current is a risk factor that can cause harm to both health and property. The process of dismantling a lighting device can be made as safe as possible only if the rules and safety precautions are followed.
- All work is carried out with the power turned off (the machine on the panel is turned off or the plugs are unscrewed).
- Before manipulating the wires, be sure to check the absence of voltage using special tools or equipment (indicator screwdriver or multimeter).
- Do not touch exposed, uninsulated contacts.
- All wiring cables are marked.
In the case of simultaneous preparation of contacts for the subsequent installation of a new chandelier, it is worth making the necessary grouping and securing the wires in the terminals.
Features of removing a chandelier
Removing a chandelier is usually not difficult. If you are afraid of electric shock, you can turn off the power to the entire apartment, not just one room. In this case, this event does not pose any danger, you will not be nervous, and everything will go smoothly.
This process includes the following steps:
- When the chandelier is hung on a hook, you first need to remove the protective cap, then stick your hand into the gap that appears and feel for this hook. Bring the wiring into view and disconnect the wires. Hold the chandelier firmly where it is attached and remove it. Ready!
Safety precautions
The first thing you should pay special attention to is your own safety, since you will be working in an active electrical installation. Therefore, it is initially necessary to ensure that voltage is removed from current-carrying elements
To do this, it is not enough to turn off the switch key, since for a number of reasons it can break the neutral conductor instead of the phase conductor. As a result, a dangerous potential will be present at the cartridge contacts.
To remove the chandelier safely, follow these steps:
- Disconnect the input circuit breaker on the distribution panel; it will be good if it is a two-pole switch that simultaneously breaks both the phase and neutral conductors.
- If the machine is single-pole or you are operating not an input machine, but a dedicated machine, be sure to check the absence of voltage. The easiest way is to turn on the switch; if the chandelier does not light up, the circuit breaker has broken the circuit. But this does not guarantee the absence of potential if the machine breaks zero instead of phase. Therefore, it is more advisable to use an indicator screwdriver.
- When performing work to remove or replace a chandelier, it is necessary to install a stepladder so that all work is carried out to the side of you. Since when you are under the device, there is a possibility of small particles and debris getting into your eyes.
- If nothing is immediately connected to the supply wire after dismantling the chandelier, it is better to insulate the wires. This will ensure that you don't get an accidental electric shock from touching them.
Removing the spotlight
Every owner of suspended ceilings sooner or later wonders how to change the lamps in such a ceiling. This process also has its own nuances, which we will talk about. In order to avoid problematic situations during the work, before starting work, you should carefully read the diagram, then everything will go without a hitch.
Removing a spotlight has some difficulties, namely:
- When you remove the lighting element, the springs securing it above the ceiling can hit your fingers
- If you do not turn off the power, there is a high risk of electric shock.
- When the springs are too tight, the strobe can be damaged when removing the lamp.
However, with some precautions, these problems can be avoided.
Considering all the above rules, you can easily change the built-in lamp in your suspended ceiling.
Instructions for replacing the lamp
Before you start replacing lamps in a suspended ceiling, you should decide on their type and the design of the lamp base. There are several main types of lighting fixtures used in suspended systems:
- Spots. They consist of a frame base attached to the floor slab and the lamp itself installed on the base. When installing the lamp, the decorative ring is secured in such a way that the stretch ceiling material does not tear. The lamp is inserted into the socket, but in order to get to the socket, you need to release the side springs;
- Spotlights. They can be equipped with traditional lamps with a base, as well as lamps with a housing that serves as a fuse against excessive heat. In both cases, you will have to change the lamps either by screwing them in the usual way, or by inserting them into the housing.
Those who have not previously encountered the question of how to change a light bulb on a suspended ceiling should first study the instructions for removing and installing various types of lamps.
Removal
To replace a lamp in a lighting fixture, you need to know what base it has and how the lamp is secured to the base of the lamp.
Screw. Traditional base, like in old incandescent lamps. There are two types on the domestic market: E14 and E27; in European countries, the E26 type is common. Not only incandescent lamps, but also LED, halogen and fluorescent lamps are equipped with such sockets.
Removing such a lamp is simple - you need to take it by the bulb and turn it from right to left. Chandeliers and spotlights are equipped with sockets for a screw or threaded base.
The protrusions on the base (pins) are designed to ensure reliable fastening of the lamp in the socket, and are also contact conductors of electric current. The protrusions can be straight, without thickening, or with thickening at the top.
The base with straight protrusions is removed by simply pulling the lamp towards you.
Before replacing an LED lamp on a stretch ceiling with thickened projections, you will have to make a slight turn from right to left and pull it down. In addition to standard pins, there are also plate-shaped protrusions.
Expert opinion
Viktor Pavlovich Strebizh, lighting and electrical expert
Any questions ask me, I will help!
The new device is carefully inserted and secured inside the structural hole of the stretch ceiling to the platform installed on the adjusting posts. If there is something you don’t understand, write to me!
Lighting
In any case, a suspended ceiling consists of a frame and a facing board - plasterboard, cellulose, plastic, Armstrong mineral board, for example, metal and others. The lighting device is mounted only in a cell formed by a frame; mounting to a lathing or facing material is impossible, with rare exceptions. The device is fixed to the base ceiling, and not to the suspended ceiling; only the lighting part remains visible.
The exception is ceiling suspended structures - chandeliers, for example.
Based on the method of placement in the cell, there are 2 types of lamps.
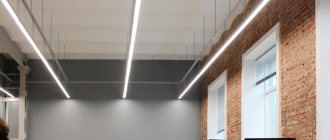
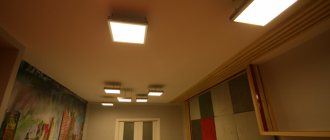
- Modular - is a block with light bulbs and a transparent top part, which in size matches the dimensions of the suspended ceiling cell. The module creates uniform diffused lighting, which is ideal for service premises - office, retail, and so on.
- Spotlights are compact, powerful lighting fixtures with one bulb. With their help, both diffuse and directional lighting is created. Most point models also allow free mounting, which means the ability to direct the light flux as desired. In this case, a hole is made in the Armstrong ceiling slab for the device.
Dismantling methods depending on the type of fastening
Chandeliers can be attached using a hook or a cross-shaped strip.
Removing a chandelier hanging on a hook
The simplest option. After removing the protective cap, insert your hand into the hole and remove the chandelier hanging on the hook. Be sure to de-energize the room or the entire house/apartment first. All that remains is to disconnect the wires and install a new product.
Removing a chandelier from a cross-shaped strip
In this case, after removing the protective cap, a different picture is observed. The fastening system is hidden under it. The plank can be either cross-shaped or rectangular. First, unscrew the screws or dowels with which this strip is attached to the ceiling.
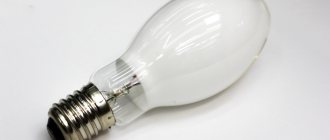
Types of light bulbs
- Incandescent light bulb - has the highest luminous power, is not very durable and heats up noticeably. However, its size, shape and power vary over a very wide range, so changing it is not difficult. In addition, it tolerates voltage fluctuations well and is not too sensitive to moisture: it can be used in the bathroom either in a regular chandelier or in an Armstrong suspended ceiling module.
- Metal halide - has excellent light output and much better color rendering, can generate excellent daylight, and does not affect the shades at all. The durability of the device is higher, but the sensitivity to voltage drops, especially in the acoustic range, is high.
Before changing such a light bulb, you need to accurately determine its type. Devices are produced for a variety of purposes, including operation in a specific position.
- Luminescent - today they are considered the best in terms of light output, that is, with a strong luminous flux, they consume a minimum of electricity and, moreover, practically do not heat up.
Can be installed without restrictions in any type of lamp, including on a suspended ceiling. This is the most economical type of lighting, but is also sensitive to voltage changes and moisture: they are not used in the bathroom. In the photo there is a spotlight.
- LED lamps have all the above advantages and are free from all the disadvantages: they are slightly inferior in light output to fluorescent lamps, withstand weather conditions well, are extremely durable, do not heat up and are completely safe. Can be used both in the bathroom and outdoors. There is only one thing - the cost.
Replacing an LED fixture is as easy as replacing a regular one.
Low frequency flickering of LED lamps
The amplitude of the alternating mains voltage changes with a frequency of 50 times/sec and has the form of a sinusoid. The luminescence of the matrix is provided exclusively by positive and negative half-waves passing through the LED. If a light source equipped with LEDs blinks, this may be the reason for significant savings on the power supply by the manufacturer.
In inexpensive models of such lighting equipment, a single-bridge rectifier is often used to reduce its cost, designed to convert AC voltage to DC. A certain number of oscillations are cut off after the diode bridge, and by adding a capacitor to the electrical circuit, ripple is reduced. Such a scheme allows you to observe the pulsation of the light flux with a frequency of 25 times/sec.
The capacitor, as a rule, accumulates charge at the amplitude maximum and returns it to the load at the minimum. At the output, the average voltage amplitude decreases, and the ripple becomes significantly less. If the resource capacity is insufficient, the capacitor is not enough to recharge the LED elements, whose brightness changes with each half-wave. According to sanitary standards, the pulsation of the light flux should not be more than 10 percent of the nominal intensity.
How to change a light bulb
There are 3 ways to attach the light source. Depending on this, as well as on the type of light bulb, replacement is carried out using different methods.
Before work, the lighting must be turned off on the panel and a stable base must be prepared. You can change the lamp only after the housing of the lighting fixture has completely cooled: there is a very high risk of damage to the glass part, which could result in injury to the worker.
There is no need to disassemble the suspended ceiling for this; the device is not even removed from the cell.
- A special cartridge is typical for fluorescent and LED devices. First of all, remove the fixing ring, remove the glass from the transparent part of the device, and then unscrew the light bulb. The special chuck requires an additional 90 degree rotation.
To change an LED or fluorescent model, you should wear cotton gloves or protect your hands in some other way: greasy stains on the quartz glass of the bulb sharply reduce the service life.
In the lighting panel, replacement of any device is carried out only after its complete dismantling. The module is detached from the wires and removed from the ceiling frame.
The video discusses in detail all replacement methods.
Another way to clean a dirty crystal chandelier
You can clean crystal parts with an alcohol solution (100 grams of alcohol diluted in five liters of water). After rinsing the frame and pendants in running water, the chandelier is assembled and returned back to the hook.
Here are two more tips on “How to clean a crystal chandelier with pendants”:
- Half a glass of mustard powder, half a glass of vinegar and the same amount of alcohol are diluted in three liters of water. The chandelier, removed from the ceiling, is simply lowered along with the pendants into the resulting detergent. After allowing the water to drain, the pendants are wiped dry with a dry and soft cloth.
- Ten potatoes are boiled “in their jackets” in three liters of water. The chandelier, removed from the ceiling, is lowered into a chilled potato solution and, after standing for some time, is immersed in a rinse aid prepared with one’s own hands: two tablespoons of ammonia and a tablespoon of vinegar are dissolved in a container with two liters of cold water. As in the previous tip, allow the remaining product to drain from the pendants, and then wipe them dry with a dry cloth.