When unscrewing from the base, the light bulb may burst. In some cases, the base may remain inside and be difficult to remove.
This may be due to oxidation and rust in the inside of the cartridge, due to factory defects, sudden voltage surges, poor quality products and other reasons.
You can remove the stuck part from the chandelier using several proven methods, using which even a person without experience can remove the base.
It is important to follow safety precautions when working and turn off the electricity, otherwise there is a risk of electric shock.
Top 6 most effective ways
Before removing the base from the light bulb, you need to decide on the technique. If the lamp breaks, use 6 main methods to remove it. Each of them has its own advantages and disadvantages; the choice of the appropriate one is determined by the skills, convenience of the user and the availability of appropriate tools in the house.
Important! Before removing a broken light bulb from a chandelier, be sure to turn off the power in the room.
For illumination, it is better to use a flashlight placed on your forehead. If the light bulb is removed from a table lamp or sconce, simply unplug it. If there are several machines installed in the apartment, you can turn off the power to a specific room and bring an extension cord from another with the lamp on.
Pliers or needle nose pliers
You can unscrew the burst part using pliers (pliers, thin-nosed pliers). The tool is selected taking into account ease of use; it is desirable that it be equipped with insulating handles. The following algorithm must be performed:
- carefully remove any remaining glass;
- grab the base body with pliers;
- start unscrewing the part;
- If you can’t reach the base, you can bend its side walls inward and start unscrewing it.
The method requires special care in execution. During operation, you need to hold the lampshade so that it does not fall off. The base may become deformed; the main thing is to ensure that the cartridge is not damaged. If you can’t pull out the element with pliers, you can take thin-nose pliers, place them inside the base and push the ends into the side walls. The part is unscrewed counterclockwise.
Scissors
If the lamp bursts, it can be removed using scissors. The technique is similar to the method of removing with thin-nose pliers. The scissors must be placed in the center of the base, straightened so that the blades rest against the edges of the component. Then you need to unscrew the base counterclockwise.
Plastic bottle
If you don’t have a special tool at home, you can separate the glass flask using a bottle. This is one of the simplest, most convenient and safest methods. The diameter of the bottle neck is sized to fit the common e27 base.
Crafts from incandescent lamps
Let's look at examples of using an incandescent lamp. Many decorators use an old lamp to make a mini-terrarium. Some DIYers have learned to convert a standard lamp into an economical LED lighting device.
Original mini-terrarium made from a light bulb
First, the light bulb is prepared. Having taken out the contact, split the black insulation and pull it out. Using a flathead screwdriver, peel off the inner structure and then remove it. An empty flask with a base and a smooth, neat hole remains in your hands.
Next, you can take a beautiful stone or make a twisted stand from wire. In the first case, hot melt adhesive is applied to one of the faces at four points and a light bulb is glued. Now you can start decorating.
Ordinary forest moss is used as a filler for the terrarium. To this you need to add some soil and tree bark. To ensure that all this is inside, a cone is made from paper and inserted into the hole. A drainage of small pebbles is poured onto the bottom of the lamp, and a layer of sand is placed on it.
Carefully level everything with a stick and add soil. Then they take tweezers and use them to lay the plants. Water is drawn into a syringe with a needle and “watered” the planted area. Now the hole needs to be closed. To do this, you can use an acorn cap or a cork cut from a branch.
The terrarium is hermetically sealed, but it continues to consume carbon dioxide, produce oxygen, and circulate water. It's a kind of small planet with its own climate
Its own microflora is formed inside. Plants continue to grow and develop.
Making an LED lamp
Some home craftsmen make their own LED lighting devices based on incandescent lamps.
To do this, heat the soldering iron and remove the solder at the lowest point of the base. Next, the insulation is cracked, the internal filling is removed and the hole is expanded to the maximum.
Three LEDs are connected in parallel. A resistor is soldered to the “plus” of each of them. Since the resistance value depends on the power source, its value may be different. Two wires are connected to the circuit to supply voltage.
Thus, with a little effort, you can modernize a regular incandescent lamp by converting it into an LED one. In addition to the satisfaction of a job well done, you will also receive cost savings.
The structure is inserted into the hole and carefully straightened to prevent the wires from connecting to each other. The wires are brought out through the hole in the base. Connect the lamp to a constant voltage to check its functionality. Then the base is soldered.
What to do if the light bulb is stuck in the socket
When gluing the base and the cartridge, you will have to unscrew the entire product. When the lamp gets stuck, you can break the glass bulb and use the methods described above. It is important that the fragments do not scatter throughout the house. To do this, before breaking, you need to place a container under the lamp. You also need to ensure that the cartridge is not damaged, otherwise it will not be usable.
You can use WD-40 or KONTAKT spray to remove the light source from a removed chandelier. This method is not applicable to a lamp mounted on the ceiling due to its danger.
Withdrawal options
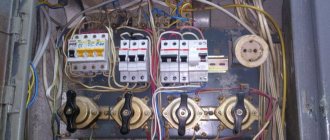
The first step when unscrewing a light bulb is to turn off the power, that is, turn off the power to the home from the electrical panel. Remember: you need to not only turn off a specific light bulb, but turn off all lighting. Not every one of us knows that it is necessary to turn off a phase, and the switch goes to zero. You shouldn't put yourself at risk.
Next you need to remove the lamp stop ring, it serves as a retainer. To remove it, just press the antennae; the lamp easily comes out of its body and hangs on the contact socket. Now you just need to pull it towards you or turn it to the left (depending on what type of lamp) and pull it out.
Lamps may also be without retaining rings. In this case, you have to completely remove the entire lamp from the socket.
The easiest way to unscrew the so-called “tablets” is to slightly turn the lamp back with one hand, wait for a click, pull it down and pull it out. The rest of the lamp remains in place.
Light bulbs with E14 and E27 sockets are even easier to maintain: they are replaced according to the familiar scheme with an ordinary standard socket. We unscrew the old light bulbs, as always, and screw the new lamp back in the same way. Here it is only important to choose sizes 14 and 17.
When replacing any light bulbs, pay attention to the type and size of the base. When unscrewing halogen lamps, they should not be touched with hands without gloves; marks can easily remain on them, which give dim light in the room. In addition, lamps that are touched by oily fingers quickly burn out.
This is especially true for models with a G4 or G9 base. They have a special design - the lamp body does not have additional fasteners, so to remove the light bulb you just need to pull it down.
When working with halogen products, do not forget to wear gloves or hold the lamps with napkins. If you don't have them on hand, wrap the bottom with regular paper tape. Halogen lamps must not be contaminated in any way.
To easily remove the light bulb, you can completely remove the lamp body from the suspended ceiling by carefully prying up the decorative circle with a screwdriver. Then the inside opens and you can easily bend the pressing pins and pull the housing out of the suspended structure. You can also remove the lampshade to replace it.
How to prevent the problem
To prevent such a situation when you need to select a method for removing the base, it is recommended to comply with the following requirements:
- install only lamps of suitable power in the socket;
- secure the light bulb tightly into the socket, but do not press it all the way;
- You can first coat the thread with graphite;
- do not buy cheap products from unknown manufacturers;
- work with gloves so that no greasy marks remain on the lamp;
- Monitor voltage surges in the apartment, install additional stabilizers if necessary.
Following these simple rules will help prevent your light bulb from breaking or exploding.
Don't forget about safety
Precaution is the most important step when working with electrical equipment. The following safety conditions must be observed:
- First of all, before carrying out work, you should turn off the power to the apartment. This is done by turning off a special toggle switch in the electrical panel.
- All work must be carried out with rubber gloves.
- Tools used for twisting must have wooden handles or be wrapped in electrical tape.
- It is advisable to first check the presence of voltage with a special tester. If the test result is positive and the indicator on the thin screwdriver lights up, you should call a technician, as this is caused by problems with the wiring.
- You need to collect all the pieces from the light bulb or put a bag on it before breaking it. Additionally, it is recommended to cover the floor with newspapers or film.
- Once the cartridge is removed, it must be cleaned and inspected for damage. If the device is not damaged, it can be installed back into the chandelier.
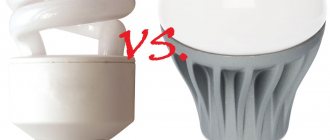
- After work, it is important to properly dispose of incandescent or halogen lamps. They consist of materials that are recycled or disposed of separately from other waste. LED lamps are disposed of along with normal household waste.
By following the instructions, you can independently remove the broken light bulb from the socket without any problems.
Changing fluorescent housekeepers
For suspended ceiling structures, fluorescent lamps are used in two modifications, in the form of tubular fluorescent lamps or classic bulbs with an E27 socket.
Tubular housings are installed in contact panels of luminaires equipped with a starter device. To unscrew the housing from the socket, it is enough to remove the protective casing, lightly press it in the longitudinal direction, turn it and pull it out of the socket. Installing a fluorescent tube on a suspended ceiling is performed in the reverse order.
Replacing housekeepers with a screw socket is carried out in the same way as for a conventional incandescent lamp. If the base is “caught” in the plastic socket, then the device can be unscrewed using rotating movements without much effort.
How to change a socket in a chandelier: what is needed to remove the part, features of replacing different types of bases e14, e27, g4, g13 > Light and lamps
This is the bottom part of the cartridge, which has a wide base and holes for fastening. It may have various bushings and inserts in its design for removing the wire. Most often it is attached to the body of the chandelier.
Expert opinion
Viktor Pavlovich Strebizh, lighting and electrical expert
Any questions ask me, I will help!
In cases where a regular direct-incandescent light bulb stops working, it is not always wise to throw it away immediately, since individual parts may still be useful in the household. If there is something you don’t understand, write to me!