Today I did gel polish. The lamp burned my thumbs more than the others, it became so painful that they involuntarily began to shake! I almost cried there (Why is this burning sensation? My nails are in excellent condition, not damaged
For me, too, it burns unbearably. By the way, I noticed that if it doesn’t burn, the varnish doesn’t stay on afterwards, the more it burns, the more it sits like a glove.
Why didn’t your master explain to you that if it burns, you need to take your hand out of the lamp and after a few seconds put it back there. There will be no burning sensation. I always do this and the polish lasts great.
It could be a strong lamp or low-quality gel polish. I’ve had such a burning sensation several times in salons, now I’m doing it myself, the lamp is the most common, inexpensive, without a timer and only for gel polish, it doesn’t burn anything, it lasts a long time, like two weeks minimum.
Girls, why don’t you ask the master such questions? Are you shy? It depends on the thickness of the nail plate, and not on the quality of the gel! I have a thin plate, my nails also hurt. I’ll stick it out of the lamp for a while, then back!
They applied it in a thick layer, which means it burns. There are bases that bake a little, and there are none at all.
I have X Come il pho base, it doesn’t bake at all) I apply the first layer thinly, then I level it with the second layer, and nothing bakes for me or my clients))
Girl, maybe the lamp is of poor quality? Before the gel polish procedure, hands are smeared with a special cream to prevent allergies, and in general, alternate gel polish with regular strengthening polish, look at nail polishes by Christina Fitzgerald, the colors are awesome_) especially emerald green
Girl, maybe the lamp is of poor quality? Before the gel polish procedure, hands are smeared with a special cream to prevent allergies, and in general, alternate gel polish with regular strengthening polish, look at nail polishes by Christina Fitzgerald, the colors are awesome_) especially emerald green
What kind of lighting do you prefer?
Built-in Chandelier
About the lamp and the poor quality gel it’s complete nonsense! What cream?! Also some kind of nonsense! You can’t use any cream before gel polish! I, as a manicurist, will explain everything now! Level the nail with a thick layer of base. It bakes due to an exothermic reaction that releases heat! This is why it burns your nails! If it’s baking too much, stick your hand out of the lamp for a short time, put it back in and that’s it!
Girls, why don’t you ask the master such questions? Are you shy? It depends on the thickness of the nail plate, and not on the quality of the gel! I have a thin plate, my nails also hurt. I’ll stick it out of the lamp for a while, then back!
Girl, maybe the lamp is of poor quality? Before the gel polish procedure, hands are smeared with a special cream to prevent allergies, and in general, alternate gel polish with regular strengthening polish, look at nail polishes by Christina Fitzgerald, the colors are awesome_) especially emerald green
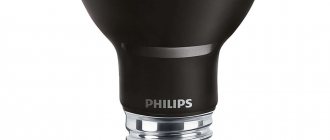
Lamp for manicure: types, choice, manufacturers, rules of use, tips
Now the most common types of devices for fixing gel polish and extensions are lamps based on UV and LED radiation.
Expert opinion
It-Technology, Electrical power and electronics specialist
Ask questions to the “Specialist for modernization of energy generation systems”
How to understand that a nail lamp has burned out However, you must understand that only appropriate specialists should service and repair any professional electrical equipment, including manicure lamps. Ask, I'm in touch!
LED lamp
This type of lamp is more modern.
Ultraviolet radiation comes from the LED. This technology allows the gel to harden in half a minute. Drying time is significantly reduced. The varnish is applied in a similar way, in three stages, between which drying takes place. LEDs, unlike UV lamps, are practically harmless. In addition, they work much longer. The service life of such a lamp can reach 40-50 thousand hours.
Dryers with this type of emitters are slightly more expensive than their UV counterparts. LED lamps, as a rule, cannot be replaced due to their durability. If the lamps burn out, the device is simply thrown away.
Main differences:
- UV uses a fluorescent light bulb, LED uses a light emitting diode;
- The UV lamp has a shorter lifespan and is harmful to the skin and eyes;
- LED does not work with all types of gel polishes;
- LED dries much faster;
- Low power UV units do not dry the gel properly.
Advice! Experienced users know that for optimal performance it is better to choose a hybrid device that contains both LED and UV technologies.
LED UV/Led lamps for nails
Low-power and miniature models can only be considered as a travel option for long trips on vacation. They have very small lighting angles and not all fingers can be dried equally well.
You will have to constantly twist your palm and look for a more or less comfortable position to grab the little finger.
The undisputed leader in sales among high-power UV/LED lamps is the SUN brand.
They have a great variety of models. And even masters sometimes get confused in the assortment.
According to the manufacturers, the LEDs here last up to 50 thousand hours during continuous operation.
However, these indicators should be treated with some skepticism.
As practice has shown, such a duration can be achieved only in two cases:
- economical operation with long cooling breaks
- modernization and integration of additional fans into the case
Without these conditions, your vaunted SUN lamps will last on average about 6 months.
Go
According to the instructions for the resin, the hardener for it is UV light with a wavelength of 400-405 nm. A proven solution would be to buy a branded dryer for the printer, but the price is not at all understandable - with a printer budget of 32 thousand rubles, paying another 23 for a box with LEDs is kind of a barbarity.
The solution is to make a lamp yourself from available components. Were purchased:
- UV 3W LED Unit - 19 pieces for 68 rubles (bought offline in my hometown, apparently these are from Ali)
- LED driver stabilized for a current of 600 mA at 22-38 volts (spoiler: it immediately died and was replaced with this one) - 450 rubles
- Table lamp ERA NL-202 black - the quality is below the baseboard, but suitable for cramps - 1299 RUR
- Radiator in Chip and Deep - 170 RUR
- Hot melt adhesive - 190 rub.
- 2 meters of fire-resistant cable - 60 RUR
Since our lamp has the shape of a boat, we adjust the radiator under it:
We disassemble the lamp itself and throw out all the guts:
The first option for arranging LEDs: 9 pieces in series connection - total consumption 32.4 volts 600mA.
We prepare jumpers:
Degreasing the radiator:
Apply glue:
We drill the finished radiator with glued units - we will use the remaining standard holes for self-tapping screws:
Let's get contacts:
We solder everything sequentially:
Done: try on the driver, which fits exactly into the standard place of the lamp electronics
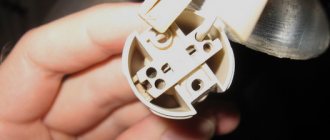
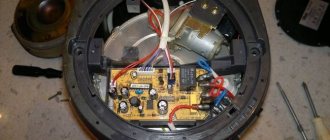
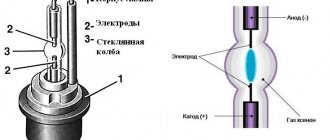
How to make a UV lamp yourself
You can make a nail dryer at home. However, it must be taken into account that such an invention will probably not inspire confidence among clients of a nail salon and will undoubtedly not add to its image. When assembling the lamp you need:
- Ballast. This device limits the current and is a ballast. The electronic type is suitable for the dryer, as it has less pulsation.
- Fluorescent lamps.
- Frame.
- For interior decoration, you will need food foil so that the light falls on the nails.
- Cord with plug to connect to the electrical network.
- Button to turn on and off.
- Soldering iron.
Select 4 lamps whose power is 9 watts, then you need to come up with a housing, taking into account that the lamps heat up. To assemble, you need to disassemble the lamp base, to do this, remove the legs with pliers, and then remove the white base. Four wires will appear, through which you need to connect the lamps to each other and connect them to the ballast. Now all that remains is to connect the cord with the button and check whether all devices are in working order. Then install the assembly into the case itself.
When making your own nail dryer, you must follow safety rules, including when using it. Protect the device from water, wipe with a slightly damp cloth, and remove dust from the lamps with a soft brush. It is forbidden to rub the light emitters, as they have very thin glass that can crack. If varnish gets on the lamps, you need to carefully wipe it off with a blade or razor.
How to change in ICE?
Lamps for manicure based on conventional tube ultraviolet lighting elements are considered more outdated compared to their analogues with LEDs or, as they are also called, LED lamps. There are no individual LEDs that are used in manicure machines available for free sale. Therefore, to replace damaged elements, you will need a “donor” - a broken or the cheapest lamp in the segment.
Read also: Yellow toenails in men and women: reasons, what to do at home
To replace you will need: an iron, a powerful soldering iron, a screwdriver, wire cutters, a utility knife, an LED lamp with a burnt out or lost element, a “donor” device for LEDs, tweezers, fluxes, resealable small containers for LEDs and device bolts, preferably 2 for each device so that small elements do not get lost. All actions are performed according to the following instructions:
- The housing of both lamps is disassembled one by one. To do this, you need to find the exits of the screw caps, use a screwdriver to unscrew them all, place them in closed containers, you can use matchboxes.
- Carefully open the covers, taking into account that the connecting wires of the top cover buttons and the LEDs on the base are usually short and can easily break.
- Disconnect the connecting cables through the special connectors in order to work only with the base of each lamp.
- The plates on which the burnt or lost LEDs are located are unscrewed.
- Using a heated, powerful soldering iron, the back part of the fixed plate is heated, where the lighting element is supported by tweezers. As a result of sufficient heating, the part should detach on its own. If this does not happen, but some traces of adhesive or other substance remain, you need to use a utility knife or wire cutters to clean the place where the diode is attached, and use a hot soldering iron to remove the excess from the surface of the socket.
- Removing the diodes from the donor device is easier: the board with the lighting elements is removed, the reverse side is placed on the surface of a heated iron, fixed in a rigid position, the edges of the LEDs are coated with flux.
- After 20–25 seconds, remove the part that has come off the board. As a rule, this time is enough, but it is better to always keep tweezers at the ready.
IMPORTANT! Avoid overheating the LEDs, as this may damage them or reduce their service life.
- Before soldering, it is necessary to determine the correct polarity of the LED, usually this is marked on the board, and on the element “-” on the ground corner. The place where the diode is attached is first coated with flux, the part is installed on it, and using a hair dryer or a 60-watt soldering iron, the “landing” point is heated on the back side of the plate.
- The board on which all manipulations were performed should cool to room temperature. After this, the corresponding wires of the housing parts are connected, the device is carefully and very carefully connected to the network and its functionality is checked. If problems are found, it is necessary to find an error in the actions taken.
- If the installed LED works, you should put the lamps back together, clean up the area after yourself, and lay out the tools.
- The device is now ready for use.
Read also: Why does gel polish peel off from nails and tips: how to avoid?
Impact and description
The design of a standard lamp for drying nails is extremely simple. This is a housing with built-in lamps inside, which is equipped with a control panel on the outside. There are more bulky models that allow you to dry both hands at once. Such options are most often used for professional purposes, because the cost of the equipment is quite significant.
Compact models perform their functions perfectly at home and are more accessible for purchase for personal use.
Also, depending on the model, there may be universal devices equipped with a timer, a fan for cooling (and more comfortable drying), a sound signal and other additional accessories.
The design differences lie in the very principle of exposure, or more precisely in the lamps used for drying. The first generation of devices includes ultraviolet lamps, the next models use the latest LED lamps. Often, it is these differences that cause a clash of interests, as well as the problem of choosing a suitable device. To study these two options in more detail, you need to familiarize yourself with the pros and cons of both devices. You can purchase such a lamp already in a ready-made set of gel polishes for beginners.
Video of an ultraviolet lamp for drying nails:
Hybrid CCFL+UV lamp
However, speed is speed, but no less worthy results are shown by the so-called hybrid CCFL + UV lamps for nails.
They combine ultraviolet and diode light. Co-glow is useful when drying any capricious material.
Among the popular hybrid models is the Diamond 36W Led+CCFL. It is also called Diamond Stone Diamond.
It costs around one and a half thousand rubles. It has a compact shape and touch sensors. The timer here is for 10-30-60 seconds.
The bottom of the latest models is removable and magnetic.
36 watts consist of a 12W UV cold cathode coil and 24W LED diodes.
Below is a visual comparison on nail tips, drying capricious BMG gel polish in two different models.
We dried it in regular UV for 2 minutes and got the following result.
And in this hybrid Diamond it’s only 30 seconds.
In a hybrid, the varnish is completely dry and does not smudge. And in the ultraviolet there was shrinkage. There is nothing worse than dry polish.
Advantages of this hybrid option:
- average price category
- fast drying time
- compact size
But do not forget the disadvantages of CCFL - the upper location of the spiral and poor lateral drying of curved fingers. Service life and periodic replacement of lamps.
How to make your own ice lamp
As mentioned earlier, one of the disadvantages of LED drying is the cost. Yes, it will last more than five years, but then you will have to completely replace the device. Making an electrical device from scratch is not so easy; you can’t do it without basic skills. But there is a simple upgrade option.
If you already have ultraviolet drying with conventional fluorescent lamps, you can speed up the polymerization process by replacing the UV lamp with an LED one. This technology appeared recently, as a result of the fact that many craftsmen began to look for a way to make a more powerful LED analogue from a simple ultraviolet lamp, and at no extra cost. Such a light bulb costs five times more than a regular one, but its lifespan is very long.
LED light bulbs for ultraviolet devices have a base, the shape and size of fluorescent light bulbs, only instead of pipes there is a bed with LEDs. To replace a UV light emitter with an LED, you need to follow the same algorithm as for a simple replacement:
- Disconnect from power and remove bottom
- Pull the lamp to be replaced towards you and dispose of it
- Insert the new light bulb at the same angle
- close the bottom
Thus, you can get a hybrid model if you replace not all the bulbs in a powerful UV device, but one or two. If you still want to make an LED lamp entirely with your own hands, then you need to understand its structure; the easiest way is to disassemble the existing model.
What power should I choose for a gel polish lamp?
36 W power is not enough to quickly polymerize the entire thickness of the material. Therefore, in such cases, masters resort to tricks and perform extensions not in one layer, but in several.
What power to choose a lamp for gel polish:
- A transparent gel base is immediately applied, then a thin layer of camouflage is applied, which is dried in a lamp, and with the next leveling drop the final layer of camouflage gel is applied.
- But such implementation also requires a decent amount of time, which a manicurist sometimes doesn’t have enough of. It is for this purpose that powerful lamps were created; their main task is to dry camouflage, thick or white gel, which is laid out in a thick layer, in 30 seconds. With powerful lamps there will not be situations that were sometimes observed with 36 W lamps.
- When, after polymerization for 1 minute, the top layer polymerized, but the lower part of the material remained wet. This could worsen the wearability, the nail became soft over time.
- Even if a person walked before removal, then during the removal of the material with a cutter, it became clogged, due to the fact that the gel polish was washed away not by thin shavings and dust, but by wet flaps that heavily clogged the edges of the cutter. Thus, this led to damage to the cutters, cleaning them with iron brushes, or in ultrasound. As you know, such cleaning greatly dulls the cutter, reducing its service life.
Powerful lamp
How to make a UV lamp yourself
You can make a nail dryer at home. However, it must be taken into account that such an invention will probably not inspire confidence among clients of a nail salon and will undoubtedly not add to its image. When assembling the lamp you need:
- Ballast. This device limits the current and is a ballast. The electronic type is suitable for the dryer, as it has less pulsation.
- Fluorescent lamps.
- Frame.
- For interior decoration, you will need food foil so that the light falls on the nails.
- Cord with plug to connect to the electrical network.
- Button to turn on and off.
- Soldering iron.
Select 4 lamps whose power is 9 watts, then you need to come up with a housing, taking into account that the lamps heat up. To assemble, you need to disassemble the lamp base, to do this, remove the legs with pliers, and then remove the white base. Four wires will appear, through which you need to connect the lamps to each other and connect them to the ballast. Now all that remains is to connect the cord with the button and check whether all devices are in working order. Then install the assembly into the case itself.
When making your own nail dryer, you must follow safety rules, including when using it. Protect the device from water, wipe with a slightly damp cloth, and remove dust from the lamps with a soft brush. It is forbidden to rub the light emitters, as they have very thin glass that can crack. If varnish gets on the lamps, you need to carefully wipe it off with a blade or razor.
To assemble a UV lamp, you need to ask a friend, husband, or buy everything you need and give it to an electrician, because it will be very difficult for the fair sex to make the device on their own.
Ultraviolet lamp for manicure
Before purchasing a particular brand, ask yourself the question: for what purpose will you use the lamp?
If you are not yet a professional craftsman making money from this, but just want to apply gel polish yourself at home, then there is little point in buying an expensive branded LED hybrid lamp.
Take a closer look at UV options. The very first models for home use were 9-watt UV lamps of a similar design.
They have only one light bulb inside the housing. To be honest, it doesn't make much sense. The only thing it can dry is a transparent single-phase gel, which is very liquid in consistency.
There is no way to polymerize white, colored, or pigmented gels in it. Therefore, despite the attractive low cost, today professionals do not recommend buying such a lamp in principle.
Even for infrequent home use.
Also immediately discard any pocket or USB models. They are only suitable for fixing some small design elements.
But under no circumstances use them for full-time work. They simply do not have the power required to dry the entire coating.
As a result, you will get a negative result, and the varnish coating will not have shine and will not last long.
Meanwhile, with sufficient power and the right shutter speed, you can get a very beautiful result.
How to determine if a UV lamp has burnt out
The typical operating life of an average mercury UV lamp is 9,000 hours, which is several times shorter than modern UV LEDs. But even such a period is possible provided that there is continuous burning and the optimal characteristics of the electric current feeding the lamp are observed. In reality, the lifespan of the emitter can be much shorter.
Of course, mercury bactericidal lamps, including the Philips TUV15, which is very popular in our country, do not suffer from the fact that the phosphor can burn out, due to the lack of one in them. The reason for the loss of efficiency of the device lies elsewhere, namely, in the deposition of mercury vapor on the inner surface of the flask, which leads to a loss of its transparency. The difference in this indicator between new and emitters that have worked for a significant period of time can be seen even with the naked eye.
Another reason for the decrease in transparency lies in particles of tungsten evaporating from the filament, which, like mercury vapor, settles on the inner surface of the bulb.
As a result, the lamp works, but its efficiency rapidly decreases. Therefore, the emitter is considered unsuitable for use not when it stops burning completely, but when its efficiency drops to the limit level specified in the operating instructions.
What varnishes and gels dry different models
Inexpensive UV models with power up to 36W can cope with the following material:
- any gels, including LED
- biogels
- gel polishes
Less powerful ones can only work comfortably with transparent coatings. For example, finishing with gels.
Why do we need LED models if UV copes with such a wide range? Due to the longer wavelength in UV specimens, polymerization occurs gradually and takes much longer.
Even gel polishes dry in them in up to two minutes. They will also delay the hardening of the material.
That is, between the time you place your hand inside the device and the time when the gel polish stops spreading and somehow fixes, 20-30 seconds pass.
It is during this period that problems arise.
And in ice lamps everything happens in a matter of seconds. No matter how large the drop is.
That’s why professionals recommend diode models for beginners, although they are more expensive. But at least you will make fewer mistakes with them.
LED manicure lamps polymerize:
- gel polishes
- some biogels
- expensive LED gels
Well, in general, always be guided directly by the inscriptions on the bottles:
- LED – can be dried in LED or hybrid lamps
- UV/Led – universal material for all types
- UV only – dry in UV fluorescent, CCFL or hybrid
When there are no inscriptions at all, then apply as for UV. Now let's finish with the theory and move on to specific examples and brands.
Possible causes of malfunction
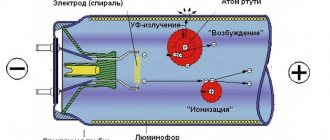
The use of ultraviolet radiation for manicure is not accidental. This is not due to any special marketing ploy of beauty salons and similar institutions. The fact is that new substances have appeared to cover nails - polymers. They don't just dry out as the solvent evaporates. Their polymerization occurs. To speed up this process, it is not blowing or high temperature that is needed, but light with a certain wavelength.
Due to the special properties of these polymerizing gels, it is the ultraviolet light bulb that accelerates the process, and not any other light. Therefore, repairing an ultraviolet lamp for drying nails in large cities where there are many beauty salons is a very common occurrence. Today, among such devices there are many Chinese products. For this reason, certain problems occur. Very often, a UV nail lamp comes in for repair, the electrical circuit of which, according to the owner, is lost. But most likely it was not there from the very beginning.
To obtain the minimum cost, Chinese manufacturers save on everything, including accompanying documentation. So the repair of UV lamps turns almost into a detective story, in which instead of searching for a criminal, it is searching for a malfunction. To repair such a modern electronic device, you must:
- check the lamp;
- find out the performance of the ballast.
The differences between an ultraviolet lamp and a regular lamp are indicated on the nameplate.
Common malfunctions encountered in an ultraviolet nail dryer are as follows:
- after the power is turned on, the light does not appear;
- after a short period of normal operation, the light flashes;
- The light bulb turned on, worked for a while and turned off.
There may be other manifestations of malfunctions. However, either the lamps or the electronic filling of the ballasts are to blame for all the troubles. Almost all manufacturers of such devices use energy-saving lamp circuits in them. Therefore, components of energy-saving lamps can be used, for example, if you need to repair a UV lamp at home yourself:
- You need to start by studying the electronic circuit of the ballast and its connection to the lamp. But there are dryers with several light bulbs.
- If the light does not turn on, the fault is either in the ballast or in the lamp itself. It has two electrodes on each side of the flask. It is necessary to check the resistance between them with a tester so that the remaining elements of the circuit do not affect this test. If there are no readings from the device, it means that the electrode spiral is damaged. You must either replace the lamp or try to adjust the ballast to restore the device's functionality. Information on how this is done can be found on the Internet.
- If the light blinks, it means the lamp is working, but the ballast inverter is unstable. Perhaps the transformer winding is broken, or one of the diodes does not hold reverse voltage. We must look for this provoking element. This is a complex malfunction, since you will have to check everything in the circuit.
- It is also impossible to clearly name the cause of the malfunction when the light goes out periodically. Additionally, in comparison with the previous case, one can indicate overheating of the transistor in the inverter. But if it worked fine before and started to heat up too much, then something is wrong with it. For a silicon transistor to operate incorrectly due to overheating, its temperature must be above 70 degrees Celsius. And this is easy to determine, as they say, “by touch.”
Common UV lamp inverter ballast circuit
It is difficult to name the exact causes of malfunctions
When searching for them, we advise you to pay attention to electronic components based on their reliability. The most resistant are resistors and non-electrolytic capacitors
Among semiconductor devices, diodes are more reliable than transistors. If the transformer is well made, it is very reliable. And one more tip:
Repair UV light inverters only using an oscilloscope. Without an accurate understanding of the pulse parameters, it is almost impossible to make a good repair for a complex fault.
How to make it yourself from your phone?
This option is suitable for phones with a built-in LED flash. So, to assemble a simple UV lamp from a phone you will need:
- phone with LED flash;
- transparent tape;
- purple and blue marker or felt-tip pen;
- stationery knife.
Now let's look at a step-by-step diagram of assembling such a lamp:
A small strip of tape is placed on the flash to cover the LED flash.
It is important that no air bubbles or folds form under the adhesive tape. The first layer of tape is painted with a blue marker. It is better to make a stroke once so that the color completely covers the tape. Another layer of tape is applied to the painted strip and painted purple. Apply a third layer of tape, which is painted blue. A final layer of tape is applied and painted purple. Turn on the flash and watch the effect of the resulting UV lamp.
ON A NOTE! You can assemble a UV lamp from any LED-based lighting device. For example, from a regular flashlight.
These devices can be assembled at home. This will require a minimum of personal time. You will also have to spend money on some radio components. But the result will exceed all expectations!
DIY UV nail dryer.
By the way, have you thought about making controls? for example, turning off after 3 minutes or 5 minutes, as well as a constant glow?
As an option it can be improved, thanks for the idea. In the meantime, I decided to start small)
The video that the girl showed me and from whom I took the concept. https://www.youtube.com/watch?v=gmJ08cgAHcQ
I would cut off the visor;)
I would be glad, but the ballast is long) The visor protrudes just 3 centimeters beyond its limits.
Well, to cut down the size of the ballast, I just don’t know, for me it doesn’t work comme il faut;) But again, the owner is a gentleman =) and a plus for the implementation!
Author, do I understand correctly that lamps of this type cannot be connected directly to the ballast, but you need to unscrew the base? I have several lamps to attract insects, I want to remake a lamp to kill mosquitoes.
I'm not good at electrical things, but I couldn't connect them without disassembling the lamps; they simply didn't light up.
Several dozen coils of copper wire are placed around the device, insulated (so that God forbid it kills you) and connected to the network, and you can still “warm” your hands.
By the way, you can install a handle inside to hold on. Now, when your friend starts using this device, the muscles of her hand will involuntarily squeeze the handle, and without outside help she will “warm” her hands for 25 seconds until she loses consciousness from painful shock, or dismantles this device.
To be on the safe side, I would also screw/weld the case to the table so that it doesn’t fidget or scratch.
If anyone needs it, I have a non-working 450W power supply, I’ll give it to you for 500 rubles. You will also make an ultraviolet nail dryer.
It works cheaper
No, a new working one costs 2,000 rubles, which is a crazy minimum. The only cheaper thing is that Down will sell it to second-hand stores.
You have to take it
It’s like, I remember, I was selling a GTX660 on a forum, the consignment shops were offering 2,200 rubles. lolishche. As a result, I sold the norms to Pasen for 6,000, I myself took it before the crisis for 5,500. The maximum of Jewry is shorter.
I’m just wondering, is 25 nm really that critical? In addition, the lamp also shines in the visible range, so 400 nm can easily catch
The girl said that even one 9-watt lamp dries, but it takes a long time.
I don’t really need a dryer, but I’ll go crazy for this lamp!
just take care of your eyes
All means are good
There are several ways to quickly dry gel polish without a lamp, let's look at the main ones in descending order of effectiveness:
- ice water. Drying with plain water is suitable for light-insensitive gel polishes. Place freshly coated hands in very cold water (you can put ice) for 15 minutes, the gel polish will set. You can polymerize the coating by keeping your hands in the freezer for 2-3 minutes;
- cold coating. Keep the gel polish in the refrigerator for about 20 minutes and immediately apply it to your nails; it will dry several times faster;
- the catalyst (usually cyanoacrylate based) can be in the form of an ointment, spray or gel. A couple of minutes after applying the varnish, drop one drop of the substance onto the nail plate and spread over the entire surface. The varnish will dry in 1-3 minutes;
- olive oil. Apply two or three drops to the plate, spread over the entire surface and wait about 5 minutes. Then rinse it off with a stream of cold running water;
- sunlight - dry your fingers directly under the sun's rays, this is a long drying process;
- a blue medical lamp can dry gel polish, but the process is lengthy;
- regular hairdryer. The result will be if it is powerful enough and there is a cold blowing mode. Blow freshly coated fingers with a powerful cold jet for 5 minutes; the gel polish should be a single layer. The method is long and the quality of drying is low.
Powerful lamp for gel polish: reviews
Below you can find customer reviews.
Powerful lamp for gel polish, reviews:
Alina. I professionally do nail extensions and gel polish. I do my work at home and buy mostly inexpensive materials, mainly on AliExpress. Last time I ordered a powerful lamp rated at 76 W. In my old 36 W tunnel lamp, camouflage gels did not dry well. There are no such problems with this lamp. The main problem is that the nail gets very hot, clients complain of a burning sensation. I usually tell them to pull the nails out for a couple of seconds, then put them back into the lamp.
Svetlana. I recently became the owner of a powerful Sun lamp designed for 2 hands. A very convenient purchase, especially if you use a thick base and pigmented gel polish that does not flow. This way you can coat all your nails without wasting time drying one at a time. Before this I worked using the conveyor method, but now I cover all my nails at once. Of course, it will not be possible to level the nail plate by immersing both hands in the lamp at once, since usually bases that are well leveled can flow. Therefore, I do the leveling using the conveyor method. I apply a base for extensions to all nails and strengthen them with polygel on both hands at once. It is convenient to dry pedicures in such a lamp, since there is no need for a leveling layer of material, it does not sag.
Oksana. Before that, I had a 48 W lamp, it completely suited me. Recently there has been a fashion for powerful lamps, I couldn’t resist and purchased a SAN. I’m very pleased, but in this lamp almost all the bases bake very strongly. I associate this with high power. Now I try to pull my nails out as soon as the burning starts. Sometimes I set the mode with a gradual increase in power. Fortunately, the lamp allows you to do this.
Lamp
Interesting articles for manicurists and home users can be found here:
How to choose the color of nail polish for a perfect manicure?
Nails peel under gel polish, after gel polish: reasons, what to do? What base is suitable for peeling nails, how to apply the coating?
Primer and degreaser, dehydrator - are they the same thing, which is better? What to use first: primer or degreaser, dehydrator for nail extensions, eyelashes?
For home users who are not experienced craftsmen, it is not recommended to purchase powerful lamps. This can cause onycholysis and burns of the nail bed due to rapid drying of the base.
Features of UV lamp
Undoubtedly, buying a ready-made UV lamp is easier than making it yourself. However, homemade ultraviolet drying has some advantages:
- the ability to make a lamp at your own discretion in shape and design;
- the amount spent on the necessary elements for the dryer is much less;
- confidence in the high-quality assembly and safety of the device, provided it is manufactured correctly.
The body for the dryer is made of plastic by injection.
This design of the dryer helps to better dry the varnish, especially near burrs. The inner sides of the device must have a special reflective material. For a homemade dryer, food foil is suitable.
Almost all UV lamps have a timer. On devices with low power there is only one button, most often for 2 minutes. More expensive models have more than one timer and touch panel.
Is it worth buying a powerful 72.96 W nail lamp?
High power is an ideal option for those who do nail extensions using dense camouflage gel, polygel. Very often, white gel, as well as acrygel and dense camouflages, do not dry well in a 36 W lamp.
Should you buy a powerful nail lamp:
- If you are a home user who makes regular gel polish for yourself, then you can save money and purchase one of the available options. Now these are 24-48 W lamps. This power is quite enough to dry standard gel polish at home.
- If you are a master who models nails using solid materials such as polygel and gel, then it makes sense to purchase a powerful lamp.
- It has been proven that such lamps dry dense camouflage, white gels better, without leaving undried areas on the plate. This minimizes the appearance of detachments, as well as premature nail breakage.
San
How to check functionality
Measuring device – multimeter
Since the design and operating principle of such products are similar to fluorescent light sources, the verification algorithm here will also be similar. Here, you should also use a multimeter as a measuring device.
To check, you should carry out the following manipulations:
- disassemble the lamp;
- remove the light source from it;
- connect a multimeter to it and determine whether voltage passes through the lamp.
If a value appears on the device display, then the lamp is functioning properly and the cause must be looked for elsewhere. But if the output voltage is zero, then the reason lies precisely in the light source. In such a situation, the cause may be a broken connection. If this is the reason, then the contact can be replaced in place yourself. But if the fault lies inside the glass bulb, then nothing can be done about it. You will have to buy a new lamp and install it in place of the damaged one.
UV lamp processing
Preventive maintenance of irradiators is carried out within the period specified for each model and includes several processes:
- Removing dust from the emitter bulb and all surfaces of the device;
- The filter (in recirculating sterilizers) is changed quarterly, or earlier if there is a critical degree of contamination. While performing this manipulation, the grids holding the filter should be disinfected by wiping them with a special solution or immersing them in it.
- Disinfection of the device is carried out in accordance with the requirements of MU287-113.
- Before turning on the device, its external surfaces, lamps and reflectors are processed in accordance with the same guidelines.
What are the problems at work?
Like any lighting product, ultraviolet lighting devices also fail. Failure can occur for a variety of reasons:
Ultraviolet light
- tungsten filament burnout;
- failure of certain elements of the lamp device;
- contact burnout;
- failure of electrodes;
- damage to the elements of the lamp itself.
In addition, such a lamp may not work due to faulty electrical wiring in the room, as well as failure of sockets or switches. If the problem lies in the ultraviolet lamp itself, then you can check this with a multimeter. If the problem is not there, then you need to look for another reason. The following indicates that the light source is not working properly:
- complete absence of mercury vapor glow when the lamp is connected to a power source;
- flashing during operation. Moreover, blinking can occur both rarely and quite often;
- various lighting effects that are not typical for the normal operation of the lamp;
- the presence of an uncharacteristic odor during operation of the lighting device (for example, a burning smell). It appears in a situation where there is a burnout of the wires inside the lamp body.
If such effects occur, the first thing to check is the performance of the light source.
Do-it-yourself repair of ultraviolet drying gel nail polish
There are several reasons why ultraviolet lamps fail:
- The LED lamp driver burns out.
- The resource runs out and the tubular lamp ceases to perform its functions.
- Any type of lighting element burns out.
- The power supply fails.
To repair, it is necessary to determine the cause and essence of the breakdown. If this is just a burnt-out lighting point, then the easiest way to replace it in tubular UV lamps is by simply replacing it with a new one. In LED lighting devices, it is necessary to completely disassemble the equipment, remove the burnt element, and solder a working element in its place.
If the driver burns out, you should determine which LED has failed. The difficulty is that not all of them light up and it is impossible to visually diagnose the point of failure. To do this, the elements are removed one by one, tested with a multitester and, if they work, soldered back in, the broken one is replaced until the entire device is fully operational.
The power supply can be repaired by a specialized service center or completely replaced at home. As a rule, the structure of a part is complex, and without the necessary skills it will not be easy to understand what exactly is wrong with it.
What else?
Let's note some of them:
- a special spray - usually a bottle of oily liquid. A fresh manicure must be completely sprayed with this composition and wait 5-10 minutes;
- special oil for drying. Sold in a bottle with a dropper. It is enough to apply a drop of oil to the nail plate, spread it over the entire surface, after 5 minutes the coating will harden;
- fan drying. This is a drying option with a special small fan, inside which fingers with “No Light gel” varnish are placed and air is blown through them;
- drying with clear varnish. Regular varnish is applied two minutes after applying colored gel polish. After 5 minutes the coating will harden; this method increases the durability of the manicure.
Fan for drying varnish
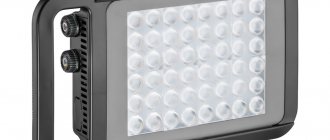
List of Best High Power Gel Polish Lamps
The power of the lamp is strongly felt not only on transparent bases, but also on gels with a camouflage effect. This is due to the high pigmentation of the gels and translucency. This way the nail remains very sensitive.
If you use camouflage gel in your work, before applying it to the nail plate, try to apply a layer of base gel, which is slightly thicker in thickness than with a standard coating under artificial material.
To feel less burning, try to apply a thicker layer of transparent base. Alignment is not necessary if you are not going to do your nails using the filing-free technique.
List of the best high wattage gel polish lamps:
- STAR 5 at 72 W
- lamp SUNUV X Plus, 72 W
- lamp TNL Professional Sun, 72 W
- Manicure lamp SUN Elpaza S-2T 72 W for
2 hands
Powerful lamp
Why doesn't gel polish dry?
The reasons for poor polymerization can be divided into 2 categories: a problem with the gel polish or its application and problems with the lamp.
What could be wrong with the varnish?
- Thick layer when applied. Gel polish begins to harden in the lamp from above, so if it is applied in too thick a layer, the lower part of the coating will not have time to dry in the standard time. And increasing this time will not solve the problem. In addition, the varnish may begin to shrink (wrinkle) when drying and will burn. Therefore, it should be applied in a thin layer, although you will have to increase the number of layers and time to cover all nails.
- Highly pigmented color. Usually these are bright, dense shades. Such gel polishes contain a high concentration of color pigment, which prevents the penetration of lamp rays and, accordingly, polymerization of the material, so they take a little longer to dry than usual.
- The gel polish has expired. The expiration date is usually counted from the moment the bottle is opened, less often - from the date of production. Usually this is 2-3 years. Therefore, it is worth remembering when you started using this gel polish (or mark somewhere). After it expires, the gel polish may not only dry poorly, but also not stick to the nails and cause other problems. Therefore, it is better to use them only on tips.
- The gel polish lasted a long time. If you do not use it, then over time the pigment in the bottle settles to the bottom, and due to the unevenness of the composition, the gel polish does not dry well. Therefore, before applying colored gel polish, it is always recommended to roll it a little in your hands, but do not shake it like polish: this provokes the appearance of bubbles in the gel polish!
- Improper storage of gel polish. The bottle should be kept in a dark place and away from a working lamp, otherwise over time the material will begin to thicken and dry poorly.
- Cheap gel polish or fake. If all the above reasons do not suit you, then this one remains. Unfortunately, you can't protect yourself from fakes. Buy materials from trusted manufacturers who have been in business for a long time and have good reviews.
Beginners may think that the gel polish has not dried due to the residual stickiness (dispersion layer of the gel polish) after drying. It is present in almost all colored gel polishes and does not need to be washed off: it is needed for better adhesion of the material between layers. The sticky layer is removed only from the top coat upon completion of the procedure.
Lamp problems:
The light bulbs are out of order. In lamps, especially ultraviolet lamps, the bulbs burn out over time and require replacement. If this is not noticed, the materials will take longer to dry or may not dry completely.
Low power lamp
By default, the material in them dries longer, so pay attention to the power parameter when purchasing. However, it happens that over time the lamp power decreases, so here you will have to either accept an increase in drying time or change the lamp
Unfortunately, this can only be noticed when working with the same materials: if they begin to dry worse, it means the lamp power has dropped.
The varnish dries only under an LED lamp. There are gel polishes that are produced only for a certain type of lamp, so if your polish does not dry well, pay attention to the instructions for it, it may not be suitable for your lamp.
Incorrect hand placement. If your hand lies at an angle, the material may move to the side (float) and dry poorly. In addition, in this position the rays will hit the material unevenly.
Dirty lamp. The bottom of the lamp, as well as the light bulbs themselves, must be periodically wiped from dust. Otherwise, contamination will reduce the flow of rays, and the varnish will dry worse.
What to do?
How to deal with the problem is easy to understand by studying the causes. Here are the basic rules:
- Apply gel polish in a thin layer.
- Monitor expiration dates and proper storage.
- Roll the bottle in your hands before use to evenly distribute the pigment.
- Monitor the condition of the bulbs in the lamp and its cleanliness.
Optimal lamp power for drying gel polish
In most cases, a 36-48 W lamp is quite acceptable for home users. Even pigmented gel polishes dry quite well at this power, drying within 1 minute.
Optimal lamp power for drying gel polish:
- Masters, in turn, want to save their time, so they often purchase powerful paws that allow them to listen to artificial material for 10-30 seconds. If with ordinary gel polish, which is applied in 2-3 layers, a power of 36-48 W is sufficient when drying for 30 seconds, then varnishes that are applied in one thick layer may not dry out in a 36 or 48 W lamp.
- It is for this purpose that highly powerful lamps have been created that allow you to dry even dense artificial turf within 10-30 seconds. It has been noticed that in such lamps the top and base dry out in just 10 seconds. This is a very short time, which allows you to reduce the period of manicure for masters and, accordingly, take on more clients.
- In fact, a saving of 20-30 seconds seems insignificant, but if you consider that the coating is performed on 10 nails in several layers, then you get quite a significant saving of 10-15 minutes. This time is enough to relax, have a snack and drink tea. Accordingly, masters are ready to purchase high-power lamps for drying gel polish.
Powerful lamp
Let's sum it up
It is possible to quickly dry gel polish without a lamp, but is it possible to obtain ideal quality? Hardly. A good gel polish or shellac, due to its chemical composition, requires exposure to a UV or LED lamp.
UV lamp for drying gel polish
Every lover of beautiful nail design will have to choose: buy expensive equipment and forget about the problem of applying gel polish for three whole weeks, or choose another option - buy light-insensitive gel polish and dry it using all available methods. The quality is not guaranteed; the duration of the nail coating is reduced to approximately 5 - 7 days.
How to work with a powerful 72-96 W gel polish lamp?
There are features of working with such lamps. The fact is that any polymerization reaction of gel polish is accompanied by the release of a large amount of heat. That is, an exothermic reaction occurs, as a result of which the nail can become very hot. This is especially felt on very thin and weak nails.
How to work with a powerful gel polish lamp:
- Many women who have a thin, weak nail plate, which is very paper-like in thickness, have encountered the fact that the thick leveling layer of base in the lamp burns very strongly. This is despite the fact that a standard 36 W lamp can be used. In a powerful 96 or 80 W lamp, the reaction occurs several times faster. Accordingly, the burning sensation will be more intense.
- This can subsequently lead to onycholysis, chemical burns of the nails, and the formation of voids. Now podiatrists are really alarmed that there are several times more patients than a few years ago. This has something to do with the widespread use of manicure machines, as well as powerful ultraviolet lamps for drying gel polish. When drying in a powerful lamp, the nail becomes very hot, resulting in a burn to the nail bed.
- The nail simply lags behind the flesh, leaving a void. Very often, in these voids, if hygiene standards are not observed, Pseudomonas aeruginosa and fungi grow. Which subsequently leads to damage to the nail plate. To prevent this from happening, be sure to use the power boost mode on thin and brittle nails. That is why you should not purchase the cheapest powerful options.
Buy devices that have the ability to set the mode. Some of them already provide for a gradual increase in power. For the first 10-15 seconds, the power is low, at 24-36 W, but towards the end of the drying period, the power increases. This allows you to dry gel polish as efficiently and quickly as possible, as well as artificial material such as gel.
Powerful lamp