In this article, we offer step-by-step master classes on how to make table lamps with your own hands from improvised materials that you always have in the house. It would seem at first glance ordinary and unnecessary things, but from them you can make original and designer lamps for your desktop.
The most popular and simple materials at hand are: glass bottles and jars, cardboard and paper, plastic vessels, water pipes and cement . We will show and tell you how to make lamps from this in this article.
Master class: Table lamp made of copper pipes
With a simple and elegant copper table lamp, you can decorate any corner of your home by making it yourself. It will fit perfectly into a modern interior from loft to rustic style. Prostate and laconicism are the main trump cards of this table lamp.
To do this you will need the following tools:
- Roulette, marker
- Pipe cutter and washcloth
- Wire stripping and stripping tool
- Pliers and a thin flathead screwdriver
- crosshead screwdriver
M materials:
- Copper pipes
- Acetone and super glue
- Copper corners 90°, 7 pcs.
- Electric wire
- Plug and Electric socket
- Switch and light bulb
Technique for assembling a table lamp
To get started, take a tape measure, a marker, a pipe cutter, a rag, copper pipes and acetone.
Mark and cut the tubes
- Use a measuring tape and marker to mark where you will cut the copper pipes.
- Do this carefully, measuring every millimeter precisely, because if the parts are different, then the end result will not be the same size as they should be.
- Guide the pipe cutter and use the nut to adjust the diameter of the pipe. Look at the copper tube, gradually adjust the diameter with the nut , so that the closure continues until the pipe is cut.
- Afterwards, using acetone and a rag, you can wipe the markings off the pipe.
TIP: Our parts have: 3 cuts of 15 cm, 1 cut of 20 cm, 1 cut of 45 cm, 1 cut of 25 cm. We used 12 tubes. When designing your light fixture, please note that the copper elbow size will be added.
While the cable is inside, we connect the parts
Insert the parts together and glue with super glue. In order to avoid problems in the future, it is better to glue each part and place it next to each other.
Even though the glue works instantly, you may want to wait a few minutes before proceeding to ensure that the pieces are glued together perfectly.
Tip: It will be more convenient to apply glue if you use a brush. If you want the cover to be at the very top, install it first. This way the first part will be ready, and the cable will go in a different direction.
Tools:
- Wire Stripper and Wire Stripper
- Incisors
- thin flat screwdriver
- crosshead screwdriver
Materials:
- fork
- electro chuck
- switch
- Copper pipes
- electrical wire
Install the electrical system
- Open the front panel of the cover and start by stripping the insulation. Connect the ground (blue color) and phase (brown, gray or black) using the two screws that you will find inside.
- Repeat the same process on the plug and switch.
- In the switch you will find two pairs of small screws, a cable that you must cut to the height you want the switch to be and connect to the corresponding sockets going inside the small screws.
- All you have to do is screw in the light bulb to create your copper table lamp.
Finally, place the lamp in a corner or place you like and see how it will become a wonderful addition to your interior, lighting up the space!
Technical features
To make a table lamp, you need to carefully study the design features and requirements for the lighting part.
Any lamp consists of several parts.
- Electrics. Responsible for supplying electricity from the power supply network to the cartridge.
- Support. Responsible for the stability of the device, provides support for the reflector or illuminator.
- Illuminator. Most often it is a lamp.
When making stand lighting fixtures, the main focus is on the design of the lampshade. If the lamp is on hinges, then it is necessary to think through all the design details.
When manufacturing a lamp, special attention is paid to the lighting part and electrical safety. The standard scheme includes:
- Power plug;
- Cable;
- Cartridge.
Some models may require a voltage controller. A standard E27 socket is installed on a tail with an M10 or M12 thread. If the lamp base is narrow, then the E14 socket is used.
When assembling electrics, experts recommend adhering to a number of rules.
- The cable is round and double insulated.
- The cores chosen are flexible with multiple wires. Section from 0.35 sq. mm.
- If the wire passes through conductive structural elements or places where moisture can enter, it is protected with dielectric bushings, elbows or cuffs.
When planning the device, make sure that the tension inside is not excessive.
Master class: Paper table lamp
When I first saw the Robert Delta table lamp, it was love at first sight! The shape is amazing, it comes in a variety of bright colors, just the way I like it. I was recently wondering since the accessories were surprisingly durable, why not use them for a lamp?
Here are all the materials used:
- old lantern or lamp kit
- template and thick cardboard or paper, you can take polypropylene sheets
- glue and putty
- sanding block (medium + fine)
- wood block (add weight to base)
Tools:
- art tapes
- metal ruler/xacto knife
- drill (can optionally replace xacto knife)
Lamp manufacturing technology
- Firstly, print the template (6 pieces of each triangle) (1 of each hexagon).
- Cut out the shapes so that they fit snugly on the board. Then use glue to attach the pieces to the back of the mat.
- Using a metal ruler and Xacto knife on a cutting board, cut each shape.
- Put them together.
- Next, glue the bottom (shapes 2 + 4) to the base (shape 6). The triangles fit together nicely and if you did everything right they will just fall into place.
Then use small pieces of art tape to attach them together and wait for the glue to dry completely.
TIP: Use super glue, it dries instantly (we used Aleene). Apply glue lightly, and wipe off excess.
- After gluing the bottom half (shapes 2 + 4 to the base, turn mold 6 upside down (open end down), place the square on a flat surface and let it dry overnight, this will help maintain its area.
- The next day, start working on the top of the lamp. Glue the shape 1 + 3, leaving a little hole to insert the lamp inside. The top one (form 5) was glued together with artistic tape, but it is not yet glued to form 1 + 3.
- Then reinforce the seams with glue on the inside.
Then start working on the base of the lamp.
The level at the bottom of the lamp needs to be made a little bigger, so cut some 1×4s to raise it a little. It will also add extra weight, giving it more stability. Use screws to attach the 1×4 to the existing metal base. (We swapped the existing rod with one from another lamp to get it to the correct height).
Next, drill a hole for the cord and insert a plastic sleeve from an old lamp. The lamp should be disassembled, and the cord and wire should be pulled through the threaded rod of the hole in the new base. Inside the lamp, glue it in the center.
At the top (shape 5), mark the center and drill a hole for the center rod. Then glue it in place.
- After applying the adhesive, remove excess, and if necessary, lightly, and apply a second layer after sanding.
- Using a medium-grit putty and fine sandpaper, finish with a sanding block. At this point, you will notice its strong base.
Once you've finished removing dust, apply paint! To cover the top of the threaded rod, use the top of an old lamp - it just slides over the rod. Then return it back to the nest!
That's it, your handmade table lamp is ready.
How to make a New Year's lamp from LEDs, a lamp from disks in the shape of a ball?
It’s worth talking separately about hand-made New Year’s lamps. On the eve of the New Year holidays, which evoke associations of miracle and magic, I want to decorate my apartment with something glowing and bright. At the same time, you want the decorative elements to fit harmoniously into the interior of the room. Lamps are perfect for these purposes; making them will not be difficult. Below are some simple options.
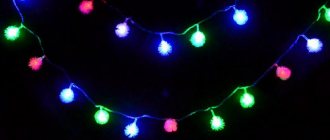
Important: A lamp made from an LED garland - nothing could be simpler. Choose a beautiful glass container: it could be a vase, serving cap, bottle. Place an LED garland inside.
The LED garland does not heat up, so it is the safest for lamps of this type.
New Year's lamps
It is advisable that the garland be battery-powered so that you do not have to make a hole in the glass container for the wire. This is what lamps made from bottles and garlands look like in the dark.
Bottle lamps in the dark
Another option for making an elegant bright lamp is from old music CDs. The discs are attached with a glue gun, it is quick and reliable. At the base of the lamp, one disk is placed in the center, then the rest are glued together in the shape of a ball. When the ball of disks is formed, place the garland inside. Take the garland out of the disc holes so that it looks out. Then cover the top of the lamp with a disk, placing it parallel to the base.
Such lamps are suitable not only for decorating a room for the New Year. They can become everyday decorative elements in your room if you love bright, glowing elements.
Lamp made from scrap materials
Bottle table lamp
A bottle or large jar makes a great base for a table lamp. All you have to do is come up with a beautiful lampshade and stretch the wire and electrical wiring through the hole in the bottle. For a detailed master class - how to make a hole in a bottle, how to attach a lampshade - see the article " How to make a chandelier from a bottle with your own hands"
Tin can lamp
This lamp is perfect for a home desk, both for students and schoolchildren. Boys will especially appreciate it; it looks more like a transformer and a robot from the future. You can paint or decorate the jar itself with paper, thread, or make it more embossed. How to properly paint jars with acrylic - read in this article .
Table lamp made from plastic bottles
Plastic bottles can always be found around the household, so decorating an old table lamp is not difficult. Usually, when restoring old lamps, the bases are left and plastic is used for the lampshade. The lampshade mount is usually used as an old one. When working with plastic bottles, remember that it is easier to cut them with a paper knife or a construction knife . Glue is used for rubber or special glue for plastic.
You can read in detail the technology and methods for assembling lamps in the article “Lamps from plastic bottles” - here are step-by-step master classes with photos.
Four types of LED devices
Depending on the placement of LEDs, such models can be divided into the following categories:
- DIP . The crystal is arranged with two conductors, above which there is an enlarger. The modification has become widespread in the manufacture of signs and garlands.
- "Piranha" . The devices are assembled similarly to the previous version, but have four outputs. Reliable and durable structures are most often used to equip cars.
- SMD . The crystal is placed on top, which significantly improves heat dissipation and also helps reduce the size of the devices.
- OWL . In this case, the LED is soldered directly into the board, which increases the glow intensity and protects against overheating.
A significant disadvantage of COB devices is the impossibility of replacing individual elements, which is why you have to purchase a new mechanism due to a single failed chip.
Chandeliers and other household lighting products typically use SMD design.
Table lamp made from branches and slices
Wood in the interior is always a classic - it is always fashionable and relevant. By decorating a table lamp with a cut of wood or an old piece of driftwood with your own hands, you will get a designer item that simply has no price.
See here: 6 Master classes - DIY chandeliers and lamps made of wood
- To do this, we need to select any piece of wood we like, process it correctly, namely dry it, apply a pest-resistant impregnation and coat it with varnish.
- The second stage is to mount the top of an old floor lamp into the base. If this is not the case, it doesn’t matter; light supply stores usually sell bases for lampshades.
To properly process branches or cuts, read the article “How to properly process wood for the interior.”
DIY lamps: photos and principles for choosing a light bulb for the device
The first thing you should pay attention to when choosing a lamp for a homemade lamp is wattage, which determines the amount of energy produced by the light bulb. For a regular table lamp, the figure varies from 40 to 120 W. It is important to take into account the type of material from which the device is made, since fire safety will depend on this criterion. Thus, an incandescent lamp, even of relatively low power (60 W), when used for a long time, can cause a plastic lampshade to melt, damage the integrity of a wooden lampshade, or even cause a fabric lampshade to ignite.
You should also pay attention to the lumens indicator, which determines the amount of light emanating from the lamp. Accordingly, the higher this value, the brighter the lamp will shine, but for a table lamp you should not choose an option higher than 1000 lm. It should be noted that the proximity of artificial light to natural light depends on the number of lumens. There are other things to consider when choosing a light bulb.
Form. The pear-shaped type of light bulb is considered traditional. It should be said that not only incandescent lamps, but also modern energy-saving fluorescent options are distinguished by this form. In addition, there are spiral lamps, in the form of a candle or tube. The choice of product generally depends on the design of the homemade lampshade.
Base size. Repairing a table lamp, which involves changing the light bulb, is much easier to carry out if you have a standard E27 socket. Other, no less popular options are E14 or E40. Modern DIY LED table lamps have a bayonet base, characteristic only for this type of light bulb.
For table lamps, a lamp with a power of 40-120 W is suitable
Life time. Basically, manufacturers indicate on the packaging the approximate service life of the product, but in most cases this indicator depends on proper use and the characteristics of the power supply. It is logical that with frequent voltage surges, a lamp of any class will fail faster. Among all lamps, LED products have the longest service life.
Character of lighting. The instructions for the device indicate what kind of light will come from the device (it can be cold or warm). The choice of warmth of light depends on the selected lampshade and its color, as well as on the main functions assigned to the device.
Energy consumption. If you plan to use a table lamp as a night light, you should choose the most energy-efficient light bulbs that will save on electricity. Despite the fact that you will have to pay a little extra when buying a light bulb, utility bills will be lower.
Contains hazardous elements. Fluorescent lamps contain mercury inside, so it is extremely dangerous to install such a tabletop device in a child’s room. These lamps must not be thrown into the trash because they must be disposed of properly to prevent environmental pollution.
