Home » Useful tips » Electrician's tricks » How to disassemble a light bulb
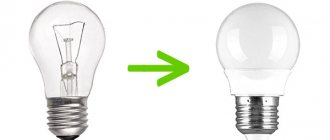
To decorate the interior or make various crafts, many people began to use ordinary incandescent lamps. However, to use it, you need to disassemble it, and this is not so easy, because you need to take into account several features. If you do not take them into account, the lamp may burst and scratch a person. Therefore, in this article we decided to tell you how to disassemble a lamp at home using a minimum amount of materials.
Actions after removal
- When you have removed the tick, you must treat the area with any antiseptic. Remember that this is an open wound into which bacteria and infections can easily penetrate, leading to inflammation and suppuration. It is also advisable to cover the area with a band-aid.
- In order to find out whether an infected insect bit you or not, the extracted individual must be sent for examination. This will allow you to determine the risk of infection at an earlier stage, apply the necessary treatment and prevent complications.
- To do this, after removal, it must be placed in any container that closes tightly. If there is no flask, a jar will do, but if there is no jar, you can use a regular bag that needs to be tied in a knot. It is advisable to place a piece of a damp cloth or cotton wool with it so that it does not die.
- It is better to take it to the laboratory alive. But if it happened that he died, or the abdomen came off during removal, still submit it for testing. Research is also carried out with dead individuals within 3 days after death.
- When an attack occurred in a dangerous region for tick-borne encephalitis, it is recommended to carry out emergency prevention. It consists of an injection during which a person is injected with antibodies to the virus. In case of infection, vaccination will prevent the development of infection and severe complications.
- If the above actions have not been carried out, then be sure to monitor your health for 3 weeks after the bite. If you experience symptoms such as fever, weakness, headache, nausea, fever, joint pain, consult a doctor as soon as possible and report the bite. The sooner proper treatment is started, the easier it will be to defeat the infection.
How to prevent the problem
To prevent such a situation when you need to select a method for removing the base, it is recommended to comply with the following requirements:
- install only lamps of suitable power in the socket;
- secure the light bulb tightly into the socket, but do not press it all the way;
- You can first coat the thread with graphite;
- do not buy cheap products from unknown manufacturers;
- work with gloves so that no greasy marks remain on the lamp;
- Monitor voltage surges in the apartment, install additional stabilizers if necessary.
Following these simple rules will help prevent your light bulb from breaking or exploding.
Disassembling an LED lamp for repair
Before repairing an LED light bulb, study the instructions, as well as the design of the broken lamp.
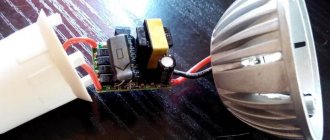
Due to the fact that there are no gases inside the LED lamp and the housing is not sealed, if it fails, you can try to repair the device yourself. This is what a disassembled LED lamp looks like Source tauray.ru
Step-by-step instructions on how to repair an LED lamp:
Open the lamp to get to the internal structural elements.
To begin disassembling the light bulb, you must first open the clips holding the light-diffusing dome. If the matte top of the lamp is held in place by screws, you need to unscrew them; if the restraining factor is sealant, it needs to be carefully removed.
Remove the radiator.
After disconnecting the diffuser, take a screwdriver and carefully remove the heatsink (it will be located under the board with the LEDs).
Separate the matrix.
After removing the insides of the light bulb, the LED matrix must be separated from the entire structure. To do this, you need to unsolder it: warm up the contacts with a soldering iron, then carefully separate the part with tweezers. In this case, you need to start with the central board, which must be separated from the two contacts. You should also remove the sealant located around the perimeter of the lamp, or unscrew the retaining screws.
After nothing will interfere with the removal of the matrix with LEDs, you need to arm yourself with a thin metal tool like an awl or a needle. Carefully sliding it under the board, walk around in a circle so that you can pick it out.
Working with the LED lamp matrix Source masterpotoku.ru
To remove the matrix with LEDs, which is no longer held in place, you will need to insert the central element into the slot. After this you can remove the matrix.
Identify the broken link.
To identify a breakdown, in most cases you just need to look at each of the LEDs, which look like very small yellow squares. On one of them, upon closer inspection (you may need a magnifying glass), a small dark spot (black dot) will be noticeable.
Remove the non-functioning element.
Now we’ll tell you how to repair an LED lamp after non-working diodes have already been detected. To remove all non-working LEDs from the matrix, you can heat it from below, then the process will be simplified (open flame cannot be used). Don’t forget to first fix the circle with diodes in the desired position above the work surface. After a good warm-up, the desired LED element can be simply removed with tweezers.
Clean the contacts after removing the diode.
After cleaning the location of the burnt diode, you should also apply a special paste.
Another option for an LED lamp Source vodakanazer.ru
In order for the lamp to work again, you need to replace the burnt out LED with a new one. As a last resort, you can install jumpers on the old one. To solder a working LED to the space vacated by the old element, you first need to look at what LEDs are used in 220 V lamps, and during operation, use a heating element.
Allow the matrix to cool.
Important Notes
If the lamp is made using sealant, you will need an awl, a syringe and a solvent to remove the cap. It is necessary to run an awl along the edge (the connection between the cap and the lamp) so that a groove is formed. After this, you should fill the syringe with a needle with a solvent and inject it around the entire perimeter into the groove made. When half a minute has passed, you can unscrew the cap, because the sealant should have dissolved by this time.
At the fourth stage, when determining a non-working LED, in some cases you can use a multimeter.
A multimeter can be used to test some diodes Source mineavto.ru
How to disassemble an LED lamp
First of all, it is necessary to check the voltage supply to the cartridge contacts. To do this, screw in a working lamp; if the light comes on, the previous device is faulty.
The reasons for the failure of an LED lamp can be very different - the diode is burned out or the board is not in order.
They often stop working due to condensation that has accumulated inside the housing. In any case, the LED lamp needs to be repaired with preliminary disassembly of the structure.
The components of an LED lamp are:
- shell;
- base;
- matrix with a package of LEDs;
- diffuser;
- driver.
The lamp bulb is not airtight because there are no gases in it. The shell can be made of either plastic or glass. The plastic light diffuser is located at the top.
The LED lamp bases used are varied. The components of the package are groups of LEDs soldered onto PCB or aluminum boards.
Drivers in the form of individual blocks or built into the housing serve to transform the input voltage to a value most suitable for LEDs assembled in groups. The most popular power supply schemes are transformer type.
LED lamps are completely safe. They do not emit ultraviolet and infrared rays. They contain no mercury or heavy metals
To make the inside accessible, you need to open the fastening clips that hold the diffuser dome. If it is attached to the housing with screws, they must be unscrewed.
There is another disassembly method used for devices made using sealant sizing. For implementation you will need a syringe with a needle, an awl, and a solvent. To detach the diffuser, you will need to remove the sealant that secures it to the retaining ring.
An awl is passed along the edge and the solvent with which the syringe is filled is injected into the groove. After 30 seconds, the diffuser is removed by twisting. The radiator is removed using a screwdriver, and the LED matrix is unsoldered.
A burnt-out LED can be easily identified visually. It reveals itself by having a black dot. As an option, to make the lamp work again, a jumper is placed at the edges of the unusable LED, but it is better to replace it with a new one.
What you will need
- Incandescent lamp
- Long nose pliers
- Simple scissors or metal cutting shears
- Long forceps
- Flat head screwdriver
- Gloves (rubber, plastic or gardening fabric)
- Protective glasses
- Soap and/or baking soda
- Paper towels
- Newspaper or boxes
- Hydrochloric acid (optional)
To make something interesting with their own hands, DIY enthusiasts implement non-standard ideas using improvised means. A use was also found for the ordinary bulb of a burnt-out incandescent lamp. But fluorescent and LED ones are not suitable for these purposes; they are disassembled only for repairs.
In any case, it is important to know how to disassemble the light bulb, and then you can experiment with its further use. We suggest you understand the intricacies of this process.
The article describes in detail how to act correctly if there is a need to open and disassemble various types of lighting fixtures. In addition, we have prepared interesting homemade solutions from old incandescent light bulbs
We suggest you understand the intricacies of this process. The article describes in detail how to act correctly if there is a need to open and disassemble various types of lighting fixtures. In addition, we have prepared interesting homemade solutions from old incandescent light bulbs.
Old lamps are used to create vases and containers for spices, miniature aquariums and many other crafts.
If you decide to master this process, then you should start with an ordinary incandescent light bulb. Inside it does not have a filling that is hazardous to health in the form of additives from harmful substances. Therefore, disassembling it is not only simple, but also completely harmless to health.
Briefly about the device
To begin dismantling the insides of the lamp, you need to become familiar with its structure in general terms. The main element is the filament body, the ends of which hold the electrodes.
Additional rigidity is created by holders mounted on a glass support - a bead. The rod is connected to a leg, which includes electrodes, a rod, and a plate.
Lamp and its leg. The components of the structure are: bulb (1), filament body (2), additional stands (3), rod (4), electrodes (5), blade (6), intermediate leads (7), plate (8), rod (9 ), external terminals (10), terminals (11), base (12) (+)
All internal elements will have to be removed from the flask through its lower part.
How to disassemble
Here it is necessary to take into account some nuances, because You will have to work with glass. The material of the leg is very thin, while that of the base insulator is quite rough.
To prevent flying fragments and associated risks, you need to use a cardboard box as a workspace. Its bottom is covered with soft material.
Before starting the operation, you need to arm yourself with thin-nose pliers. With their help, it will be possible to dismantle the contact, firmly sealed at the neck of the flask.
The element is loosened and turned until the two wires going to the main part of the lamp - the filament body - break. Next, the released contact is removed.
The next task is to open the base insulation. This will require the same tool. Using thin-nose pliers, swing the light bulb leg and remove it complete with the plate, rod, electrodes, and filament body.
Having opened access to the internal cavity of the lamp, carefully clean it with a piece of textile. Without the insides of the light bulb, only the heat-resistant glass bulb remains.
How to use it depends on your imagination - it can become a container for spices, a tiny aquarium, a lampshade or a lamp.
For some crafts, a base will be superfluous. It is not difficult to remove since the connection is not very strong. You can simply keep it for a day in a mixture of hydrochloric acid with ammonium nitrate or in hydrofluoric acid. Which will dissolve the glue that attaches the base to the base of the flask.
With this option, it is important to thoroughly rinse the product in a soapy solution after the acid. And don’t forget to wear gloves to carry out all manipulations
Another way is to unscrew the part at the point of contact with the glass, then remove the glue and remove the vessel. Sometimes it is enough to scratch the junction of the base and the bulb with a glass cutter to get rid of it.
Disassembling the lamp with socket
If the filament breaks, the ballast may still be operational. In this case, the flask is disposed of, and the working device is used as a spare part.
If there is a fuse in the control circuit, it may blow. The issue is resolved by installing a resistor with a resistance of several ohms in its place.
Safe work with fluorescent lamps
CFLs can be disassembled, but not for the purpose of further use for crafts, but only if you need to repair the launcher. It is better not to touch the bulb of a fluorescent lamp at all, since you need to stay away from toxic mercury vapors.
The wires coming from the lamp filament to the board are sometimes not soldered to the latter, but wound onto special pins
This lamp consists of five parts:
- U-shaped or spiral flask;
- the upper component of the body with the bulb attached to it;
- an electronic board with a ballast mounted on it;
- lower housing element with electronic ballast placed in it;
- plinth - together with the bottom of the case, this is an integral structure.
To disassemble and access the launch controller, use a flat-head screwdriver with a wide tip. With its help, the housing latches are disconnected one by one. To perform the operation, you need to insert the tool into the groove and turn it.
This is not so easy to do. After prolonged use, accompanied by constant heating, the plastic loses volatile substances and becomes hard. The latches themselves often break during the disconnection process.
The lamp opening line is located in the place where the technical parameters of the device and the name are written. The base of the flask is also located here.
If the constipations do break, they are simply cut off with a sharp tool or sawed off. To do this, you need to arm yourself with a small disk cutter. You can buy it or make it yourself.
First, measure the circumference of the body with a caliper. Then a pin with a cutter is inserted into the chuck of the drilling machine. This is done in such a way that the latter is above the frame at a height equal to ½ the diameter of the lamp body.
The drilling equipment is turned on, the lamp body is pressed against the cutting tool and the outer part of the body is carefully cut. Similar cuts are made at intervals of 1.5 cm along the entire contour.
A screwdriver with a thin rod is inserted into the slots and the cuttings are lifted. Then take a screwdriver one size larger and open the housing of the lighting fixture.
Next, check the lamp bulb for serviceability. Why take a multimeter and check the conclusions in pairs. Resistance within 15 ohms is considered normal. If everything is normal, they conclude that the ballast module is faulty.
If the filament breaks, the ballast may still be operational. In this case, the flask is disposed of, and the working device is used as a spare part.
If there is a fuse in the control circuit, it may blow. The issue is resolved by installing a resistor with a resistance of several ohms in its place.
Burnt elements on the electronic board are visible to the naked eye. Based on the power of the lamp, this could be one or a pair of resistors, transistors or swollen capacitors (+)
If only one filament has burned out, it can be shunted with a resistance, but this will result in an overload of the ballast. Such a restored lamp will not be able to work for a long time - a year maximum.
Once the repair is complete, the two halves of the lamp are simply glued together. To simplify the reconstruction process, the product is sometimes heated using a hair dryer.
If the lamp cannot be repaired, it must be disposed of. Read about where to dispose of used fluorescent lamps in this article.
How to connect the cartridge
To connect a light bulb socket to a 220 volt network, you will first need a voltage indicator.
How to disassemble a light bulb socket
Unscrew the bottom of the cartridge
and take out the ceramic core with contacts. Make sure that the bolts that hold the bracket contact plates (from the side where the light bulb is screwed in) are well tightened. If possible, tighten them with a screwdriver for a strong connection.
How to connect cartridge e27, e14 to the wire
When connecting, use a voltage indicator to find the phase
on one of the two connected wires.
The second wire will be correspondingly zero - check this.
How to find a faulty LED with a multimeter?
But what if all the LEDs are visually intact and there are no black dots on them? Here you will need a Chinese multimeter.
The ones that work best are those that run on 9V power and not on AA batteries.
Set the switch to diode testing mode and touch the LED legs on the platform with the probes. If it is working properly, it should light up.
A damaged LED will not light up.
When doing this, observe polarity. The LEDs light up only when the probes are in the correct position (“+” and “-”).
The faulty one will not light up, no matter how you change the polarity. After identifying a malfunction, carry out further repairs as shown above.
Top 6 most effective ways
Before removing the base from the light bulb, you need to decide on the technique. If the lamp breaks, use 6 main methods to remove it. Each of them has its own advantages and disadvantages; the choice of the appropriate one is determined by the skills, convenience of the user and the availability of appropriate tools in the house.
For illumination, it is better to use a flashlight placed on your forehead. If the light bulb is removed from a table lamp or sconce, simply unplug it. If there are several machines installed in the apartment, you can turn off the power to a specific room and bring an extension cord from another with the lamp on.
Pliers or needle nose pliers
You can unscrew the burst part using pliers (pliers, thin-nosed pliers). The tool is selected taking into account ease of use; it is desirable that it be equipped with insulating handles. The following algorithm must be performed:
- carefully remove any remaining glass;
- grab the base body with pliers;
- start unscrewing the part;
- If you can’t reach the base, you can bend its side walls inward and start unscrewing it.
The method requires special care in execution. During operation, you need to hold the lampshade so that it does not fall off. The base may become deformed; the main thing is to ensure that the cartridge is not damaged. If you can’t pull out the element with pliers, you can take thin-nose pliers, place them inside the base and push the ends into the side walls. The part is unscrewed counterclockwise.
Scissors
If the lamp bursts, it can be removed using scissors. The technique is similar to the method of removing with thin-nose pliers. The scissors must be placed in the center of the base, straightened so that the blades rest against the edges of the component. Then you need to unscrew the base counterclockwise.
Plastic bottle
If you don’t have a special tool at home, you can separate the glass flask using a bottle. This is one of the simplest, most convenient and safest methods. The diameter of the bottle neck is sized to fit the common e27 base.
Before you start repairs
If a table lamp breaks, the first thing you need to do is disconnect it from the power supply and remove the plug from the socket. All repair work, including inspection, must be carried out with the lamp completely disconnected from the power supply. Indeed, in the event of an insulation breakdown, exposed wires can come into contact with the metal elements of the lamp body, and if they touch, you will receive an electric shock.
You should not touch its metal parts immediately after turning off the lamp; this is unsafe. Capacitors retain a static charge for some time, and if the insulation is broken, the product body may become energized. We need to wait for the capacitors to discharge! The lack of current in the switched off lamp is checked with a voltmeter, and only after that can the repair begin.
Typical design of a table lamp.
If the lamp uses an incandescent lamp, it is important to remember that during operation it heats up and can heat nearby elements, including the metal lampshade. Wait until the lamp cools down to avoid burns when touched.
For this reason, table lamps do not use bulbs with more than 60 watts of power.
You should handle the light bulb carefully when unscrewing it; it may crack in your hands. There is no need to screw the light bulb into the socket too tightly - unscrewing it after prolonged use at high temperatures will not be easy, and this often ends in the socket breaking
Don't forget about safety
Precaution is the most important step when working with electrical equipment. The following safety conditions must be observed:
First of all, before carrying out work, you should turn off the power to the apartment. This is done by turning off a special toggle switch in the electrical panel. All work must be carried out with rubber gloves. Tools used for twisting must have wooden handles or be wrapped in electrical tape. It is advisable to first check the presence of voltage with a special tester. If the test result is positive and the indicator on the thin screwdriver lights up, you should call a technician, as this is caused by problems with the wiring. You need to collect all the pieces from the light bulb or put a bag on it before breaking it. Additionally, it is recommended to cover the floor with newspapers or film. Once the cartridge is pulled out, it must be cleaned and checked for damage.
If the device is not damaged, it can be installed back into the chandelier. After work, it is important to properly dispose of incandescent or halogen lamps. They consist of materials that are recycled or disposed of separately from other waste.
LED lamps are disposed of along with normal household waste.
By following the instructions, you can independently remove the broken light bulb from the socket without any problems.
Step-by-step replacement instructions
To replace the cartridge, you will need the following:
- terminal blocks designed for connecting wiring;
- insulating tape;
- screwdriver;
- construction knife with several different blades;
- indicator mini-tester;
- new base for replacement.
The replacement process is carried out in several stages. Below are step-by-step instructions using the example of a model for base E14.
Turning off the light on the dashboard
This needs to be done first. Since power outages are necessary, replacement should be done during daylight hours. If the breakdown occurs in the evening or at night, you can try to disconnect only the ceiling line. As a rule, wiring has such a distinction. If the input circuit breaker is turned off, the room is completely de-energized. In this case, you will need to either reschedule the repair until the morning, or arrange for illumination with a flashlight. If there is an internal shield, shutdown is performed by pressing one button.
Important! Turning off the power should only be done at the panel, and not at the switch that controls the lamp
Disconnecting wires
According to electrical installation requirements, the circuit breaker must be installed on the phase line, in front of the chandelier. Then you need to check the voltage at the terminal block of the lamp with an indicator.
What can lamp elements be used for?
Most often they are used to make such crafts as:
- florarium for mini-plants;
- miniature aquarium;
- flower vase;
- kerosene lamp;
- container for storing paper clips or other small items.
Miniature florarium
To make a florarium for plants out of a light bulb, you need to remove everything unnecessary from it and leave only the base and bulb. You can put beautiful stones at the very bottom. Next, filler is laid, it can be forest moss. Sometimes soil and pieces of tree bark are added. If there are stones below, you can pour sand on top of them.
Fig. 7 – florarium made from an incandescent lamp.
Next, you need to take the plant with tweezers and carefully insert it into the soil or sand. You can close the flask not only using the base. A cork cut from wood or an acorn cap is suitable for this. It is better to use a large incandescent lamp.
Inside the hermetically sealed flask, oxygen is produced, carbon dioxide is consumed, and the water cycle occurs. There is no need to water a closed florarium. It's like a miniature planet with its own climate.
The open option requires moderate watering as the soil dries. If you overfill the water, mold will appear. Mosses can be sprayed occasionally. Just like on earth, plants in a light bulb will gradually grow and develop.
It will be useful to read: Why light bulbs explode.
Crafts from incandescent lamps
Let's look at examples of using an incandescent lamp. Many decorators use an old lamp to make a mini-terrarium. Some DIYers have learned to convert a standard lamp into an economical LED lighting device.
Original mini-terrarium made from a light bulb
First, the light bulb is prepared. Having taken out the contact, split the black insulation and pull it out. Using a flathead screwdriver, peel off the inner structure and then remove it. An empty flask with a base and a smooth, neat hole remains in your hands.
Next, you can take a beautiful stone or make a twisted stand from wire. In the first case, hot melt adhesive is applied to one of the faces at four points and a light bulb is glued. Now you can start decorating.
Ordinary forest moss is used as a filler for the terrarium. To this you need to add some soil and tree bark. To ensure that all this is inside, a cone is made from paper and inserted into the hole. A drainage of small pebbles is poured onto the bottom of the lamp, and a layer of sand is placed on it.
Carefully level everything with a stick and add soil. Then they take tweezers and use them to lay the plants. Water is drawn into a syringe with a needle and “watered” the planted area. Now the hole needs to be closed. To do this, you can use an acorn cap or a cork cut from a branch.
The terrarium is hermetically sealed, but it continues to consume carbon dioxide, produce oxygen, and circulate water. It's a kind of small planet with its own climate
Its own microflora is formed inside. Plants continue to grow and develop.
Making an LED lamp
Some home craftsmen make their own LED lighting devices based on incandescent lamps.
To do this, heat the soldering iron and remove the solder at the lowest point of the base. Next, the insulation is cracked, the internal filling is removed and the hole is expanded to the maximum.
Three LEDs are connected in parallel. A resistor is soldered to the “plus” of each of them. Since the resistance value depends on the power source, its value may be different. Two wires are connected to the circuit to supply voltage.
Thus, with a little effort, you can modernize a regular incandescent lamp by converting it into an LED one. In addition to the satisfaction of a job well done, you will also receive cost savings.
The structure is inserted into the hole and carefully straightened to prevent the wires from connecting to each other. The wires are brought out through the hole in the base. Connect the lamp to a constant voltage to check its functionality. Then the base is soldered.
How to remove the base from a light bulb?
The most difficult thing in disassembling a light bulb is removing the base. The socket helps the lamp to secure itself in the socket, and it also transmits current. It is difficult to remove and consists of two parts: top and bottom. How to disassemble the lamp and remove the base? In order to remove the base, take pliers, grab the base, loosen it and pull it out. It is advisable not to squeeze the pliers too hard so as not to damage the base. It happens that the base gets stuck in the cartridge. How to separate the base from the cartridge? We take pliers and pull out the base from the socket in the same way as from a light bulb. You just need to do this carefully so as not to damage the cartridge itself.
In order to understand when purchasing which base is in
a particular lamp, it is worth knowing the following designations:
- E - Edison threaded base;
- G - pin base;
- R - base with recessed contacts;
- B — pin base (bayonet);
- S - soffit base;
- P - focusing base;
- T - telephone socket;
- K - cable socket;
- W - lamps without a base.
Small letters indicate the number of contacts:
- s—single-contact;
- d - two-pin;
- t - three-pin;
- q—four-pin;
- p - five-pin.
There are 7 types of bases: threaded (incandescent), pin (halogen), pin (in car headlights), soffit (car interior lighting), focusing (film projectors, flashlights), telephone (remote backlights), with recessed contact (quartz halogen).
Before you run to the store to buy light bulbs, look at what shape your socket is, so you don’t make a mistake when choosing a base. The shape depends on the species. If it is a threaded type, then there should be a thread on it, if it is a pin type, then the base looks like a plug from a plug. The most common type is threaded, as it is used in almost all types of light bulbs.
In cases where an ordinary direct-incandescent light bulb stops working, it is not always wise to throw it away immediately, since individual parts may still be useful in the household
But before using them for their intended purpose, it is important to find out how to disassemble a failed light bulb, some of the components of which are shown in the figure below
To bring it into this state, you will need to prepare the appropriate tool (pliers, duckbills, tweezers and a screwdriver), and to protect against cuts you will have to use thick rubber gloves.
Installing a new light bulb
After the burnt element is unscrewed, you need to insert the light bulb correctly to ensure its secure fastening and long-term operation. There are no particular difficulties here, just follow a few tips:
- Check the condition of the thread and the absence of carbon deposits on it if the base had to be torn off. If there is damage or dents, it is better to replace the outer part of the cartridge; it can be purchased assembled.
- Be sure to bend the contact on the inside so that it presses well against the base. You just need to pull it a little towards yourself, since over time the spring steel loses its elasticity and the contact deteriorates, which often leads to the bulb burning out.
- First, screw the outer part of the cartridge until it stops; it should not dangle. Then carefully screw in the light bulb clockwise. If it does not fit in easily, gently wiggle it or unscrew it a little and screw it in again, do not apply force.
After screwing in, be sure to check the operation of the light bulb.
After finishing work, turn on the power supply and check the operation of the light bulb. If everything is in order, you can remove the tools and accessories.
How much mercury can be in an energy-saving lamp?
To find out how much toxic substance your light bulb contains, just study the packaging; its composition is described there. The concentration of mercury in Russian and Chinese light sources is 3 – 5 mg. When creating European light bulbs, amalgam is used, so they are safer.
This is interesting! For comparison, a regular thermometer holds about 2.6 g of mercury, and one housekeeper holds from 1 to 5 mg of the substance. Therefore, it cannot cause serious poisoning, but it will not do without negative consequences. Moreover, mercury vapor tends to accumulate in the body, worsening a person’s condition and causing various disorders.
According to research, immediately after the integrity of the flask is compromised, more than 50% of the toxic metal it contained is released into the air. Over the course of a day, another 20% of mercury enters the atmosphere (if the fragments are not removed after the lamp breaks). Thus, after 24 hours, approximately 70% of toxic vapors (from 2.5 mg) accumulate in the room. And this is 5–10 times more than normal.
You can consider exceeding the mercury norm using the example of a room whose area is 20 square meters and the height of the walls is 3 m (total area is 60 m²). If a lamp containing 5 mg of a toxic compound bursts here, the mercury level will reach 0.083 mg/m³. This figure is more than 200 times higher than normal.
Using Exploded Elements
Such products are most often disassembled for purely applied or decorative purposes, which require the presence of an original container based on heat-resistant glass. An empty glass flask can be used in the following cases:
- For the purpose of filling it with water and containing flower stems in it, for example;
- Some craftsmen pour fuel into a flask and, lowering a homemade wick into it, use the structure as a lamp;
- To place an attractive craft inside a glass shell (a sailboat, for example);
- If you add earth to its bottom, you can plant a very small plant in it.
And finally, the lamp bulb can be used as an aquarium or as a container for long-term storage of spices.
The metal base of the light bulb should simply be carefully broken off, after first scratching the place where it meets the bulb with a glass cutter. In addition, you can lower it into a very strong chemical solution, and after dissolving the metal component, separate one glass part from the mixture. As a result of this operation, it will be possible to obtain a high-quality heat-resistant insulator.
If complete disassembly of the lamp is required, then it is most convenient to simply bend the base at the point of its connection with the glass, after which you should crumble the adhesive and release the bulb. Most often, this can be done without much difficulty, since a lamp that has been in use for a long time or is old loses its strength in this area.
Tips: how to unscrew the socket if a light bulb has burst
If a light bulb suddenly bursts, don't panic. It can be easily replaced if you know in what order to act and what tools to use. A light bulb can burst for many reasons. Its shelf life may have expired, perhaps there was a voltage drop or the light bulb was of poor quality.
A simple solution for unscrewing the cartridge is to use pliers. In this case, you need to grab the base as carefully as possible, otherwise there is a risk of damage to it.
It is important to note that the entire operation will take place with the lights off, so you need to take care of a flashlight in advance
How to unscrew a light bulb:
- Take a plastic bottle.
- Melt the neck of the bottle.
- Insert the melted part into the base and leave for a quarter of an hour.
- The bottle should be turned counterclockwise.
This technique will keep the cartridge safe and sound. A broken lamp can be pulled out easily with a wad of newspaper or duct tape. When unscrewing, you should not make sudden movements - everything should happen smoothly and accurately. Interestingly, most often the light bulb breaks due to the fact that the base is stuck. You can prevent the base from boiling - this will greatly simplify the task of unscrewing the lamp if necessary. To do this, before installing the light bulb, you need to outline the base with graphite. Graphite will not allow the base to boil.
Method 3 - nargev from friction
Another way to break off a bottleneck is to use frictional heating on the glass. To do this, two plastic ties are put on the bottle, which serve as limiters. Three turns of twine are wound between them, after which the twine begins to move forward/backward by the free ends. After 2-3 minutes, when the glass is sufficiently hot, the bottle is placed in cold water, and when lightly tapped, a chip occurs along the heating line. If you make a small cut on the bottle with a glass cutter before rubbing with twine, then you do not need to use cold water: the glass will crack when heated on its own.
Solving driver problems
Driver problems are a fairly common problem with LED lamps. Most often, a resistor or capacitor burns in the driver.
Using the measuring instruments available to the home craftsman, it is quite problematic to determine the level of performance of this element. Therefore, it is recommended to simply replace it with a working one with similar parameters.
The reasons why a capacitor fails may be an initial manufacturing defect or regular overheating of the module as a result of poor-quality heat dissipation.
It is not always possible to find a suitable part in lighting stores. It is better to immediately go to the radio market or to a place where radio electronics are sold and try to find the thing you need there.
When it is purchased, you will need to dismantle the faulty unit and put a working element in its place.
To correctly disassemble and repair LED light bulbs, you do not need complex, expensive equipment. A minimal set of simple tools will help you troubleshoot problems.
A multimeter will allow you to check the presence of voltage in the circuit, make it possible to detect the presence of breaks and show how efficient the remaining parts of the circuit are.
A multimeter is a universal device designed to measure the main basic parameters of various electronic products. With its help you can find out what condition the LEDs of any LED product are in.
A soldering device with rosin and solder will be required to repair breaks found in the circuit and subsequently replace damaged parts and elements.
The heating temperature at the time of soldering should not exceed 2600. A simple soldering iron heats up more, so a piece of copper wire with a cross-section of no more than 4 mm must be wound onto its tip in a tight spiral. The more you can lengthen the tip, the lower its operating temperature will be.
With a small screwdriver you can carefully separate the control elements from the lamp body, and with a thin, durable stationery knife you can delicately detach the parts from the circuit board.
Conclusions and useful video on the topic
Video of the disassembly process, where everything is clear without unnecessary explanation:
The process of disassembling and repairing an LED lamp:
Disassembling the incandescent light bulb is easy. You can make a lot of interesting things out of it, but you can’t reuse it for its intended purpose. Fluorescent and LED light bulbs can be disassembled to a certain point and repaired.
Do you have experience disassembling lamps? Or maybe you have made interesting objects from old lamps? Please share your skills with readers - leave and attach photos of your homemade products. The feedback form is located below.
Video description
About how to disassemble an LED lamp with sealant (second part): Some craftsmen try to do this by heating it with a hairdryer, but this method will not be successful, because at the bottom (under these LEDs) there is an aluminum radiator. To remove an unnecessary LED from the board, you first need to remove the yellow film from it. A small, thin screwdriver or needle is best for this. When the elastic filter is removed, under it you can see a metal surface with a crystal, which in a working lamp should give light.
On the metal surface of the damaged LED, you should put a little gel-like flux, solder or low-melting alloy (for example, Wood's alloy, which has a melting point of only 60-68.5 degrees Celsius, is suitable). You will also need a well-heated soldering iron with a power of about 60-80 W. The tool must be applied to the diode until it is unsoldered.
Wood's alloy Source ozone.ru Thanks to the use of the specified alloy, mixing with the main solder occurs and, as a result, the melting point of the latter decreases. Thus, the use of this method eliminates the possibility of overheating the printed circuit board.
Using Exploded Elements
All about incandescent lamps
Such products are most often disassembled for purely applied or decorative purposes, which require the presence of an original container based on heat-resistant glass. An empty glass flask can be used in the following cases:
- For the purpose of filling it with water and containing flower stems in it, for example;
- Some craftsmen pour fuel into a flask and, lowering a homemade wick into it, use the structure as a lamp;
- To place an attractive craft inside a glass shell (a sailboat, for example);
- If you add earth to its bottom, you can plant a very small plant in it.
And finally, the lamp bulb can be used as an aquarium or as a container for long-term storage of spices.
The metal base of the light bulb should simply be carefully broken off, after first scratching the place where it meets the bulb with a glass cutter. In addition, you can lower it into a very strong chemical solution, and after dissolving the metal component, separate one glass part from the mixture. As a result of this operation, it will be possible to obtain a high-quality heat-resistant insulator.
If complete disassembly of the lamp is required, then it is most convenient to simply bend the base at the point of its connection with the glass, after which you should crumble the adhesive and release the bulb. Most often, this can be done without much difficulty, since a lamp that has been in use for a long time or is old loses its strength in this area.
Opening by cutting the flask
So, the instructions on how to open a light bulb in order to save the base involve removing the insides through the bottom of the contact part. But often, for further use of the lamp, it is not at all necessary to preserve its base. In this case, the problem of how to get the insides out of a light bulb disappears by itself - the task is to efficiently cut the bulb at the base and separate everything unnecessary from it.
Thermal method
It is based on the fact that with a rapid change in temperature, due to uneven expansion, the glass breaks at the point of stress. To control the process, you need to locally heat the flask along the line of the future cut, and then cool it sharply. For this you will need:
- silk thread;
- alcohol;
- container with water.
First of all, you need to wrap a thread around the base of the flask. It doesn’t hurt to mark the future line for separating the base by marking it with a glass cutter. A ring of wound thread is moistened with alcohol liquid and set on fire. During combustion, you need to rotate the bulb for uniform and complete burnout. As soon as the flame goes out, you need to immerse the hot area in a vessel with water. As a result of thermal shock, the light bulb will crack exactly along the line of the most intense heating.
After cutting the bulb, the edges of the chip should be smoothed using sandpaper. It is better to carry out this procedure by moistening the paper with water so that fine glass dust does not accidentally get into the respiratory tract or eyes.
Mechanical method
It consists of cutting the flow at the base of the cylinder with various tools. The easiest way to do this is with a diamond file with edges. You can make the cut using rotary tools - on a grinding wheel or with a Dremel with appropriate discs. In this case, it will be useful to wrap the cut area with insulating tape in one layer and make a cut directly along the tape. This method does not require water cooling, and therefore is not difficult if you have a tool and suitable abrasives.
There are other methods for disassembling light bulbs, such as cutting with a laser or cutting with nichrome thread using electricity. But they can be too demanding on equipment that the home craftsman does not always have on hand.
It is important to remember that all of the opening methods listed apply only to incandescent lamps. In no case should luminescent devices be disassembled using such methods - they contain highly toxic mercury vapor, so their disposal is carried out only at specialized enterprises
A light bulb that has burned out can be used to create a variety of trinkets and other practical tasks. Therefore, you need to be able to disassemble a light bulb. The following equipment will be needed for work:
- needle nose pliers;
- screwdriver;
- protective gloves.
The composition of the lamp is as follows: electrodes with a spiral, a glass container and a base. One electrode is connected to the base sleeve, the second? to its central contact. There is a spiral on the electrodes.
The insulating glass is located between the sleeve and the contact. During the manufacturing process of the lamp, the sleeve is filled with inert gas. This is necessary in order to avoid rapid oxidation and burnout of the coil.
Particular care should be taken when working with fluorescent and energy-saving lamps, as they contain toxic mercury vapors
When disassembling such a light bulb, it is important not to break the bulb
Conclusions and useful video on the topic
Video of the disassembly process, where everything is clear without unnecessary explanation:
The process of disassembling and repairing an LED lamp:
Disassembling the incandescent light bulb is easy. You can make a lot of interesting things out of it, but you can’t reuse it for its intended purpose. Fluorescent and LED light bulbs can be disassembled to a certain point and repaired.
Do you have experience disassembling lamps? Or maybe you have made interesting objects from old lamps? Please share your skills with readers - leave comments and attach photos of your homemade products. The feedback form is located below.
Related publications
Removing one base
If you carelessly unscrew a burnt-out light bulb from its socket, its bulb may separate from the base and remain in a person’s hand. Before disassembling the light bulb with the base remaining in the socket, you will need to do the following:
- After a power outage, you need to put gloves on your hands and glasses on your face, which will ensure their protection from glass fragments (if the light bulb is located high, it is recommended to wear a hat);
- If the remains of broken glass are visible on the base, you will need to lay a newspaper or a large sheet of thick paper on the floor under the lamp;
- Then you should grab the edge of the exposed base with the platypuses and begin to rotate it counterclockwise;
Note! If it is difficult to rotate, it must first be loosened with sharp movements in both directions.
- You can also try to rotate it in the opposite direction (of course, if it gives in).
Once you manage to turn the base by at least one thread, turning it out further will not require too much effort.
Another option is possible when it is not possible to grab the base of a broken lamp by the edges. In this case, it is necessary to insert the pliers inside the base glass and forcefully push their jaws apart, resting against its walls from the inside. Then, turning the tool with force in a given direction, you should try to completely unscrew the base from the lamp socket (see photo below).
If you have to remove the broken base of a pendant lamp or sconce, first remove the lighting fixture from the wall and place it on a work table or workbench so that there is a stop. If it is available, removing the broken element will be much easier.
For ease of disassembly in all the described situations, it is recommended to first bend the edges of the base slightly inward using a flat screwdriver. This will make it much easier to grab the edges of the broken part.
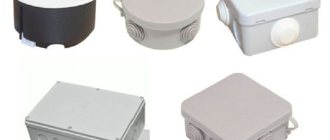
Preventing contamination
Cleaning chandeliers is not the easiest or most enjoyable task. In order to do this as little as possible, it is worth taking measures to prevent the appearance of dirt on the surface of the devices. This is especially true for those lamps that have bizarre shapes or are decorated with many small elements, because they attract the greatest amount of dust.
The easiest way to slow down the formation of dirt on a chandelier is to treat the device with special antistatic agents, which are sold in most household chemical stores.
Today, to care for lighting fixtures you can purchase:
- wipes impregnated to repel dirt;
- sprays that need to be applied to lampshades and decorative elements of lamps;
- cream and gel-like compositions that must be dissolved in water before treatment, and then also applied to the surface of the device.
The chandelier should be treated with one of these products once and allowed to dry completely. There is no need to wipe the lampshade additionally - there should be no streaks left on it. If the composition is of high quality, the next cleaning will need to be done no earlier than six months later.
Other ways to prevent contamination include:
- Regular cleaning of devices from dust with special brushes. This advice is especially relevant for fabric lampshades, which “attract” dust at incredible speed;
- location of lamps away from the dining table, stove, oven, etc.;
- In addition, if all rooms in the house are cleaned in a timely and careful manner, then dust and dirt will accumulate on the chandeliers much more slowly.
Additional recommendations
- Do not neglect to turn off the electricity before washing the lamps - here we are talking about your own safety when carrying out hygiene procedures. After turning off the devices from the network, also wait until the light bulbs have cooled completely, otherwise you may get burned during operation.
- Make sure that someone in your household can back you up when washing the chandelier. This way, cleaning will be done faster, more efficiently and with less risk to health.
- Take care to protect your skin and respiratory tract from the harmful effects of chemicals, dirt and dust. Wear rubber gloves and a special mask. In case of an allergic reaction, prepare an appropriate drug to block it.
- Small dirt left on the surface of lampshades by insects can be easily removed with a cotton swab dipped in any alcohol-containing liquid. Perfumes and colognes, as well as vodka or medical alcohol, are quite suitable for cleaning in this way.
- Complex products can be cleaned with an old toothbrush. It easily penetrates even into hard-to-reach places in the structure and quite carefully cleans surfaces from dirt and dust.
- If your home has multi-tiered chandeliers with a large number of small parts, before washing such devices, take photographs of them from different angles - this will make it easier to return all the decorative elements removed for cleaning to their places.
- It is better to treat metal structural elements with a cloth slightly moistened with water or a special composition. Using too much liquid may cause rust.
The process of cleaning lamps from dirt and dust can be quite simple and effective. You just need to follow the simple cleaning rules listed in this article.
Go to all chandeliers
Washing a chandelier with and without removable elements
More thorough cleaning will be easier if the chandelier is removed from the hook that holds it.
First of all, you need to decide how the lighting device will be processed:
- A solution based on soapy detergent used for dishes.
- Solutions based on ammonia.
- Detergent made from vinegar and baking soda.
- Shampoo or soap.
- Specialized household chemicals.
In cases where it is not possible to lower the lighting fixture down, the question arises of how to wash the chandelier without removing it. Most often, this problem is solved in stages:
- First of all, remove everything that can be removed from the base.
- Wash all elements separately.
- Then the base attached to the ceiling or walls is processed.
This step-by-step cleaning of dust and contaminants will not only improve the lighting characteristics of a lamp or chandelier, but will also carry out preventative measures.
As a rule, in city apartments it is necessary to carry out cleaning according to the second type. To do this, a person often needs to climb up with a chair or stepladder closer to the ceiling in order to be able to clean the non-removable part of the lamp from contamination.
In some cases, the chandelier is completely monolithic. And there is no way to wash some of its components separately. This is the most difficult type of cleaning to carry out.
With age, this procedure will require more strength and endurance. Also, when cleaning, you should adhere to certain rules that explain how to clean a chandelier not only efficiently, but also safely for human health.
How to avoid such troubles?
To reduce the risk of a problem, it is recommended to install lamps that match the power parameters of the lamp. When using products with increased power, intense heat generation occurs, leading to deformation of the cartridge and base. The increased current promotes sparking at contact points, which further increases the risk of parts burning. To reduce sparking, you need to screw the lamp base tightly into the socket.
For luminaires installed in damp rooms, it is recommended to treat metal parts with a special compound that repels moisture. It is allowed to use a pencil lead, which is used to rub the surface of the base and the metal part of the cartridge. It is recommended to remove traces of corrosion or replace parts, since rusted elements impair contact and contribute to the burning of parts.
If the lamp uses a light source with the bulb filled with inert gas, then install the lamp while wearing gloves. Oiling the flask leads to uneven heating of the glass and destruction due to thermal stress.
Detergents
Special compositions for cleaning glass and crystal can be purchased at household chemical stores. If for some reason there is no opportunity or desire to use the “achievements” of the chemical industry, you can use traditional methods.
These include:
- use of ammonia: the active solution is prepared from 20 g of the drug and 1 liter of water. With the resulting liquid, carefully wipe all the decorative elements of the lamp, and then allow them to dry thoroughly. The method allows you to achieve a pure and bright shine of crystal and glass parts; it is also suitable for processing frosted glass;
- using a mixture of vinegar and salt: for washing, mix 9% vinegar and ordinary table salt in equal proportions. The resulting pulp is diluted with warm water. All contaminated parts are washed with the prepared liquid. After the procedure, the chandelier will shine and shine like new;
- treatment with soap and soda solution: the product is prepared from soap shavings and a small amount of soda. You just shouldn’t use soap so that streaks and smudges don’t form on the lamp. Soap film can also cloud the crystal over time. Baking soda added to the washing composition helps to avoid such unpleasant consequences.
Household gels used to wash dishes are quite suitable for cleaning lamps from dirt and dust. A few drops of any of these products are added to water and the decorative elements of the chandelier are washed with it, after which all parts should be lightly blotted with napkins or a paper towel.
What is the design of LED light bulbs
An LED lamp can have a different structure. It must be studied before repairing it. Consider the design of a two hundred twenty-volt light bulb. It consists of several LEDs, semiconductor devices in which, when an electric current is passed, charge carriers move. These in LED devices are electrons and holes (negative and positive charge). Moving from one electronic level to another, they emit light in a narrow range. LED light bulbs burn out most often due to the breakdown of diodes or other elements included in their composition.
The current source for series-connected LEDs is the so-called driver (sometimes a power supply), a current converter. Between the LEDs and the driver there is a heat-conducting board with radio elements and an aluminum radiator (for some lamps the housing is made of plastic with ventilation holes, inside of which a radiator is placed to remove heat). The entire structure is housed in the housing, under a protective cap. At the bottom, the lamp is equipped with a base to which two wires are soldered; It is through them that the voltage is transmitted to the driver.
What the driver looks like Source hsto.org
The design of an LED lamp and its successful repair depend on which driver is installed in it. It can be without stabilization at all, or with current or voltage stabilization. In fact, only the first type of the three listed can be fully called drivers. Depending on the type of lamp assembly, the repair will be slightly different.
One of the types of LED lamps is filament lamps. This is a special type of LED device in which instead of a circuit board there are filament rods in a glass bulb. They are thin sapphire or glass tubes, each about 2 mm thick and about 3 cm long. The rods contain 28 miniature LEDs. This type of light bulb cannot be repaired.