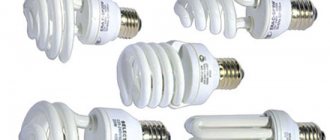
Most often, you may encounter the question of why an LED lamp is blinking after repairing or replacing conventional incandescent lamps with energy-saving ones. There are 6 different ways to solve this problem. But to find out the reason for this strange behavior of the lamps, let’s first delve into the theory.
Here is one of the typical diagrams of an energy-saving lamp.
A voltage of 220V is supplied to the diode bridge. The result is a constant voltage of a certain ripple. To level out these ripples, capacitor C4 is used. It is this capacitor that is the culprit.
Switch backlight
The most important reason for blinking of switched-off LED and energy-saving light bulbs is the presence of backlight in the switch. When the switch is turned off, a small current still continues to flow through the backlight circuit, charging the filter capacitor. Having charged, the capacitor tries to start the lamp power circuit, but there is not enough “power” and it immediately discharges, and the light flashes briefly. Then it all repeats itself over and over again.
There are 6 common methods for eliminating the flickering of switched off energy-saving lamps:
- shunting with a resistor
- capacitor bypass
- connecting the backlight with a separate wire
- using a pass-through switch
- dismantling the backlight inside the switch
- connecting a conventional LED light bulb in parallel
Reasons why cheap lamps flicker
Certificate of Conformity
Cheap products from little-known manufacturers often do not meet the declared characteristics. The reduction in the cost of goods is associated with the use of low-quality materials and savings on electronic components. This can be observed in cheap LED light bulbs, which begin to flicker almost immediately after purchase. The manufacturer installs cheap drivers, does not use radiators, and this affects the operation of the device.
The lamp blinks frequently, but in most cases the device remains operational. If the cause of the blinking is eliminated, the light bulb can be used for the time stated by the manufacturer without harm to health.
In cheap devices it is not always possible to fix the problem. For this reason, it is recommended to immediately buy a proven device from a reliable supplier. At the purchase stage, it will cost more, but all declared characteristics will correspond to the operating parameters.
Shunting with a resistor
You can combat blinking by shunting the circuit with a certain resistance. To do this, take a resistor with a resistance of 1 mOhm and a power of 0.5 to 2 W.
For safety, it is better to insulate it with heat shrink.
The best connection location for the resistor is at the junction box. Connect it between the neutral and phase wires of the light bulb (in parallel with the energy-saving wire). It is especially convenient to connect this resistor through Wago clamps.
After this, your lamp will stop blinking.
If your junction box is hidden and there is no access to it (although this is already a violation), or there is no free space in it, then the resistor can be soldered directly to the phase and neutral wires of the chandelier. Then hide the ends in the terminal block.
The method has a big disadvantage.
The resistance will heat up, and if the power is selected incorrectly, it can even lead to a fire.
In addition, modern electronic meters in the apartment will take into account the energy consumption for heating the resistance, and you will end up paying not only for lighting, but also for this “modernization”.
Flickering when the switch is on
One of the reasons why LEDs blink is poor installation. If contacts and circuit elements are not securely fixed, adverse phenomena appear, including flickering of LED diodes. When connecting the cable, it is important to observe the polarity of the device. Installation is greatly simplified by color marking the wires.
In old buildings, use an indicator and a multimeter to find the phase and neutral conductors. An incorrect connection will result in a constant voltage in the circuit (albeit small), so the lamp will periodically flicker. In rare cases, the problem can be solved by replacing the old transformer with a flexible tape power supply.
Low voltage in the electrical network
To measure the voltage in the network, use a special device - a multimeter or voltmeter. If the value is normal, the indicator will display 215 - 225 V. Such errors are considered acceptable. If you see something less than 200 or more than 230 V, you should contact the housing office or the electrical network in the area. The organization must independently take measurements and, if there is a discrepancy, adjust the operation of the power transformer at the nearest substation.
In practice, there are cases when repairmen cannot adjust the voltage in accordance with the PUE. In such situations, a current limiter or voltage stabilizer must be connected.
Dimmer application
Not all LED lamps are suitable for use in a circuit with a dimmer (a device designed to change brightness). If you turn on a source through this element, flickering may occur. As power increases, the flashing may disappear.
The way out in this situation is to turn on the lamp without any devices that reduce the voltage, or do not set the dimmer switch to the extreme positions.
Eliminate blinking LED lamp using a capacitor
If you don’t have a resistor, then instead you can use a capacitor with a capacity of 0.01 to 1 µF and a voltage with a double surge noise margin of 2*220=440V. But it is most reliable to take at least 630V.
When there is no capacitor for 630V, but there is one for 400V, then using a soldering iron you can assemble a circuit like this.
Here, one resistor serves to protect the capacitor from impulse noise, and the second to discharge the capacitor.
In an alternating current circuit, a capacitor is essentially a reactance, which is not taken into account by the electric meter and, unlike a resistor, the capacitor does not heat up.
Therefore, installing a capacitor is more preferable and safer. Install it in the same places as described above using resistance (distribution box, chandelier terminal block).
Where can I find such a capacitor? In order not to run around radio stores, you can simply disassemble the already burnt-out energy-saving lamp and pull it out or take it from a regular starter for fluorescent lamps.
True, there is one BUT. It is better to use paper or ceramic, because... Electrolytic may explode unsafely during power surges. So if you take it as a shunt, be sure to take it with a large voltage margin.
Design
To understand the reasons for blinking and ways to correct this shortcoming, let's consider the main design features of an LED lamp.
The functions of the emitting element of this source are performed by a set of semiconductor crystals, the pn junction of which, when direct current flows, begins to generate light in the visible wavelength range.
The LED is a point source, therefore, to obtain uniform radiation, individual crystals are connected into series-parallel chains, placed on a supporting base according to a special scheme.
The spectral composition of the emitted light can be adjusted by various additives to the crystal material, and the brightness of the glow can be changed over a wide range by changing the value of the forward current.
A developed metal radiator is used to remove heat. All structural elements are mounted on a plastic supporting base equipped with a standard base and covered with a protective glass bulb.
An alternating voltage is supplied to the lamp from the network, which, according to GOST, can vary within a fairly wide range.
To obtain the direct current necessary for the operation of semiconductor emitters, a so-called driver must be introduced into the lamp.
It is understood as a device that provides rectification of alternating current and its stabilization when the mains voltage changes within the limits of those standard tolerances allowed by network standards.
For the working elements of the lamp, the driver performs the functions of a multifunctional current source, the older models of which provide:
- galvanic isolation of emitting crystals from a 220-volt network, which is a necessary condition for their long service life;
- obtaining direct current from alternating current;
- stabilization of the current through the crystals when the mains voltage changes;
- suppression of various ripples and impulse noise induced in the network.
Separate neutral wire
If your switch is located in the same block as the socket or the neutral wire is also connected to the switch, then the backlight can be rigidly connected to the phase and neutral. It will be on constantly, but the light will no longer blink. The method involves laying additional wires and is not very convenient.
Turning off the indicator light
People who do not have a lot of time to diagnose electrical wiring and purchase new elements for soldering on the network can use a more radical and simpler method. It involves completely turning off the backlight in the switch. It is enough to have a screwdriver and wire cutters on hand to block the process.
As a rule, this is already enough for the flickering to be permanent. But, we repeat, if we are talking about low-quality products or violation of installation rules, the flickering will continue, although not so intensely.
Pass-through switch
You can also use a pass-through switch instead of a regular one. In this case, the light will be on in one position, and the backlight in the second. The light will also not blink.
This is achieved by direct supply of only neutral conductors to the lamp in the off position.
And no amount of interference will make it light up. True, here you also need to connect the neutral conductor to the switch. But this method allows you to get rid of blinking, even when the backlight is not the cause! (discussed below).
If you are not too bothered by the additional costs associated with purchasing a pass-through switch, and you do not want to go into the weeds of choosing suitable resistors and capacitors, then this method is the most optimal.
Flashing in normal light mode
The reasons for the unstable functioning of a switched-on LED lamp are quite varied.
Insufficient filtration efficiency
As trivial as it may seem, the well-known rule of inevitable financial losses for stingy people often manifests itself in LED lighting technology.
The user’s desire to save money and buy cheap products instead of high-quality ones can potentially lead to flickering even with a fully functional light bulb, the normal glow of which was demonstrated by the seller upon purchase.
The current sources of many lamps of Chinese and, what is especially unpleasant, domestic production, instead of a full-fledged driver, are implemented on the basis of a simple circuit similar to the one shown in Figure 2.
They are assembled on one of the types of diode bridge D1 - D4, in series with which the output smoothing capacitive filter C2 - Rph is connected.
The input voltage is reduced to a given value by a chain of parallel-connected quenching resistor Rg and smoothing capacitor C1.
The filter effectively removes residual ripples of the bridge-rectified current at standard mains voltage parameters. At the same time, it is not able to cope with impulse noise, which leads to blinking.
In addition, the slightest deviation of the input voltage from the specified one due to the high slope of the current-voltage characteristic is accompanied by significant changes in the current, which immediately affects the brightness of the glow.
The situation in this case is not hopeless and can be corrected by increasing the filter smoothing coefficient. In this case, you can take advantage of the fact that a constant voltage is supplied to the LEDs, which allows you to use an electrolytic capacitor Cd, which is highlighted in Figure 3 with a red circle and is soldered in parallel with the smoothing capacitor C1.
The power supply for an LED lamp, even of a middle class, is a full-fledged driver, which includes an integrated current stabilizer (usually implemented using a PWM circuit).
The latter maintains a constant current through the diodes due to the presence of stabilizing negative feedback.
Figure 3. Retrofitted bridge rectifier
Reduced mains voltage
The lamp driver provides the required current only within a certain range of power voltage changes. If the voltage differs significantly from 220 V, the driver sooner or later goes into an unstable operating mode, in which the nonlinearity of its circuit elements begins to have a significant impact on the amount of delivered current.
In this case, the current itself becomes pulsating: during most of the time, when it is not enough to maintain the normal level of glow, the charge accumulates in the capacitor.
Then the driver briefly returns to normal mode, during which the capacitor quickly discharges, after which the lamp sharply reduces the luminous output or even turns off completely.
In this case, the cause of the ripple can be detected using a conventional tester, which measures the network voltage, and the main means of combating it is to increase it to a given level with an autotransformer.
Availability of dimmers
The dimmer, or variable dimmer, was originally designed for incandescent lamps and therefore does not work well with most LED lamp models.
This is due to the fact that the typical design of this component is designed for a minimum load power of approximately 50 W, which is noticeably higher than the power of LED sources.
With less power in the load, the dimmer control circuits are not able to correctly supply voltage to the lamp, which is externally manifested in the form of its flashing.
In any case, the dimmer must initially be designed for LED sources.
In some situations, you can cope with blinking by switching control from the leading edge to the falling edge, which is available for older models of these devices.
Connecting a simple light bulb
And when the chandelier has several horns, instead of one energy-saving light bulb, you can place an incandescent lamp in parallel. The flashing should also stop. The method only works if there are several cartridges in one lamp and is probably the least expensive.
There are pros and cons here. The downside is that you lose the benefits of energy savings, for which you most likely switched to energy-saving devices. Plus, the lighting becomes more pleasing to the eye. Some jewelry workshops use just this kind of light.
Why do LED light bulbs hum?
Sometimes an LED lamp interferes not with vision, but with hearing. Sometimes it buzzes. The sound is intrusive and unpleasant. There are several reasons for this: an incorrectly selected dimmer, a low-quality lamp, poor installation of the lamp.
Incorrect use of dimmer.
The noise of an LED light source can be caused by an incorrectly selected dimmer. For example, if you use an unsuitable dimmer for incandescent lamps. Then the LED element will hum. To eliminate the defect, you should replace the regulator with an LED dimmer.
Incorrect installation of lamps.
In principle, hum is inherent in all dimmable light sources. Under normal conditions it is inaudible. However, the hum may be amplified by parts of the ceiling structure. For example, if the lamp is closely adjacent to a metal profile, then the hum may resonate throughout the entire room. So it's worth checking that your light fixtures are not touching any structural components. If this is the case, then it is enough to replace them with models with different dimensions.
Poor quality LED lamps.
Often the sound appears due to poor sealing of the LED lamp design. Or due to the use of a low-quality driver: too high frequencies of the stabilizer cause noise. In this case, it is worth replacing the light source.
Blinks even without a backlit switch
What to do if your switch is not backlit, but the lamp still blinks? When the switch is turned off, the long power wire of the lamp can act as a kind of antenna. And if many parallel energized wires are laid next to it in one groove, then in the disconnected wire of the light bulb, they will begin to induce their electric field.
As a result, a potential is formed that can charge the filter capacitor in the fluorescent lamp power circuit.
What to do about it? You can still bypass the lamp with a relatively small resistance, a capacitor, or use the methods described above.
Operating principle of LED lamp
Flickering not only creates a certain discomfort for the human vision and nervous system, but also negatively affects the lamp itself, significantly reducing its service life . To fix the problem, you need to know the design of the LED lamp.
The most popular driver is a device designed to convert alternating current with a voltage of 220 V, which is supplied to its input, into direct current with specified parameters, depending on the specific type of lamp. For this, a diode bridge and an electrolytic capacitor located after it, which acts as a smoothing filter, are used. The output voltage is smoothed and stabilized, for which a corresponding electronic circuit is provided in the driver design. Next, voltage is supplied to the LEDs.
Reason 1 – simply bad light bulb
In supermarkets and various fixed prices you can find LED lighting sources made in China for less than a hundred rubles. We do not claim that all products made in China are a priori of poor quality. But products that cost 3-4 times cheaper than conventional LED lamps will not work properly - you have to come to terms with this. The thing is that instead of LED drivers, which stabilize the incoming current and provide continuous illumination, cheap lamps have low-capacity quenching capacitors. They perform the same function as drivers, but they exhaust their resources much faster. There are even disposable LED lamps in which the capacitor fails after several hours of operation.
The solution to this problem is also trivial - do not buy cheap light bulbs, which in fact turn out to be not so cheap. It is more profitable to purchase a reliable and high-quality product once than to spend 50–100 rubles every week on a new light bulb. And if you consider that there is usually more than one in the house, senseless expenses increase significantly.
High-quality LED lamps will not flicker
Conclusions.
Thus, almost any flicker can be eliminated. Although it is more practical to prevent its occurrence in advance. An important factor in this case is the choice of high-quality light sources and control equipment. In this case, the possibility of humming and flashing is minimal.
- Related Posts
- Lighting in the kitchen: tips and ideas
- Types of lamps with g4 socket, comparison, popular manufacturers and models, selection of drivers for g4 12V lamps
- LED warehouse lighting: selection, calculation and installation