Added February 12, 2016 at 18:00
Save or share
This article will help you get started with Arduino and includes a description of the different types of Arduino, how to download the Arduino software development environment, and describes the various boards and accessories available for Arduino that you will need to develop Arduino projects.
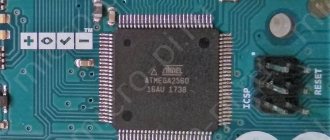
Arduino is an open source single board controller that can be used in many different applications. This is perhaps the simplest and cheapest microcontroller option for hobbyists, students and professionals to develop microcontroller based projects. Arduino boards use either an Atmel AVR microcontroller or an Atmel ARM microcontroller, and some versions have a USB interface. They also have six or more analog input pins and fourteen or more digital input/output (I/O) pins, which are used to connect sensors, actuators, and other peripheral circuits to the microcontroller. The price of Arduino boards, depending on the set of functions, ranges from six to forty dollars.
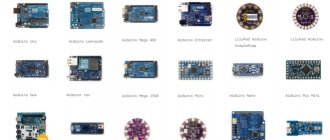
Types of Arduino boards
There are many different types of Arduino boards, as shown in the list below, each with their own set of features. They differ in processing speed, memory, I/O ports and connectivity, but the core functionality remains the same.
- Arduino Uno
- Arduino Leonardo
- Arduino Due
- Arduino Yun
- Arduino Tre
- Arduino Micro
- Arduino Robot
- Arduino Esplora
- Arduino Mega
- Arduino Mini
- LilyPad Arduino
- Arduino Nano
- Arduino Fio
- Arduino Pro
- Arduino Ethernet
You can look at the variety of Arduino boards and their technical descriptions in the “Arduino” subsection of the “Buy” section of this site.
Arduino instructions for beginners. First steps.
Introduction. This is the first time I've seen this.
Hello friends, my name is Alexey, and on behalf of and on behalf of the Giant4 team of professionals, I decided to write a short course of articles - instructions for using the Arduino Nano board and the so-called address strip, based on ws2812b LEDs.
Let's first talk about what Arduino is in general. This understanding is simply necessary, especially if you are new to this business. In this series of articles, we aim to provide a simple and painless start for a beginner, so I intend to provide simple and easy-to-understand terms and definitions. So, let's go!
Arduino
First, we need to understand what Arduino is. If you read on the Internet, you will find many different definitions, but I will give you mine, which is fundamentally different from the others. Arduino is a platform designed for simple and straightforward development. Arduino will make it easy to develop your own devices without having the slightest idea about the architecture of a microcontroller (MCU), without any serious programming skills, or even knowing the basics of electrical engineering. Arduino is not a program for writing code, not an interpreter, not a compiler, not a programmer, and not even the board itself on which the microcontroller is located. Arduino is all of the above, but at the same time something much more. This is a whole system, this is a philosophy, this is what unites the coolest ideas of the world's leading engineers. This is a complex of software and hardware solutions. But with all this, Arduino is considered a children's toy that even a first-grader can handle. Arduino is something that may seem unreasonably expensive and something that competes with world leaders in the development and production of electronics, both in terms of cost and functionality. And what Arduino will be in your hands depends only on you.
Perhaps I wrote a lot of big words and confused you a little. However, everything written above is extremely important, and if you continue to develop electronics with Arduino, you will definitely understand this. For now, let's go back to the beginning and formulate a clear definition. Arduino is a platform for electronics development that allows you to program MCUs with minimal cost and effort.
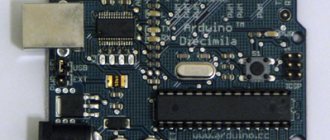
Arduino Nano
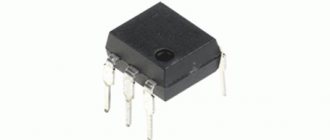
The photo shows the same board for which we are writing instructions, it is called Arduino Nano. This is a ready-made board based on the ATmega328 MK, as well as all the necessary hardware that turns the popular microcontroller into a full-fledged, independent device. Here we have a quartz resonator that allows the microcontroller to operate at a stable frequency, a voltage stabilizer, and a microcircuit that connects the computer and the device (for programming it). There is also a program reset button and LED indication. Well, and a few simple radio components, without which the device will not work. In general, everything is organized in such a way that you can simply connect the board to your computer (via a USB cable) and start working. In my opinion, this is very cool, considering that the Nano has a small size and leads designed for soldering combs with contacts into them. Having these contacts and wires for them, you don’t even have to use a soldering iron.
Fake or original
Next, I should mention that the board that is lying on my table is not entirely original, it is a Chinese replica, or one might even say a fake. It is much cheaper than the original. But it is worth treating this information objectively. Firstly, all functionality is the same as in the original. Secondly, the ease of working with this board is not lost. Thirdly, the Italians really charge too much for the original and you can’t help but think about their excessive appetites. If you are interested, compare the cost of an Arduino Nano from China with the cost of the same board from the official Arduino store, and you will understand everything yourself. In general, the meaning is simple: if you have the opportunity and desire to overpay, then you can support the platform developers, after all, they gave the world a truly cool solution. But if you want to save money, you have nothing to lose. Also, if you read articles by other authors, you can often see mentions of this kind in them: “China, of course, is cheap, but they are constantly buggy, break and require “dancing with a tambourine.” You need it? If you take the original, then there will be no problems...” And you will be confused and think: “Why do opinions differ? Why do they explain it differently? The answer, as a rule, is very simple: in these same articles you will come across links leading to the official Arduino store, that is, these articles were not written by the authors, but by sellers participating in the referral program. As a rule, these articles are partially or completely copied from real authors and you should not trust them, since there is a high chance that they will only confuse you.
Connecting
Arduino
Nano
Let's figure out how to connect our board in order to use it. First of all, you should pay attention to the fact that all pins on the board are labeled. Let's start with power supply. The easiest way to connect the Arduino Nano is to connect it via USB cable to your computer. In this case, the board will be immediately powered and there will be a connection with the computer for programming it. But this method is used, as a rule, only for programming and debugging. Agree, it will not be convenient to carry a computer after the MK.
But on our board there are special pins for powering the MK from an external source. They are signed as: “+5”, “VIN”, “GND”. If the power source is from 4.5V to 5.5V, then feel free to use “+5” and “GND”; if the power source is from 7-12V, then use “VIN” and “GND”. I would like to make a reservation right away: many articles indicate that the supply voltage at “VIN” can be supplied at 6-20V, but I would not recommend connecting more than 12V, since the step-down stabilizer may not cope. Since we will consider Arduino in conjunction with the address strip, we won’t need more.
Now let's talk about the other pins on the board. And immediately a remark: we will not talk about all the possibilities, but we will talk only specifically about those that we need. There are 14 pins on the Arduino Nano starting with the letter "D". These are digital inputs and outputs. Depending on our program, each of these pins can be either an input or an output.
I'll explain what this means. If, for example, pin “D4” is declared as an output, then with our program we can apply voltage to it (+5V) or remove the voltage, and it will be common (GND). It will not be possible to completely physically disconnect the output (in slang - “leg”), since we do not have a switch inside, but we don’t need this.
And if pin “D4” is declared as an input, then the program can determine whether voltage is applied from outside or not. This can be used for external board controls, such as buttons.
I also want to say that for ease of understanding, within the framework of this course, we will not operate with the conclusions “D0” and “D1”; there are nuances there that will only confuse us at this stage.
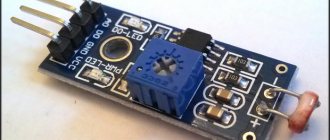
WS2812
B
And finally, it’s time to talk about addressable LED strip based on ws2812b LEDs. The point is that you can light any individual LED on this strip, in any color. The LEDs are controlled quite quickly and with the proper skill, you can organize entire light shows.
We will call each LED in the strip a pixel. Because one pixel has 3 LEDs of different colors inside it: red, green, blue. And, of course, the pixel “dances” from the RGB (red, green, blue) color coding system. Also, each pixel has a microcircuit that controls the brightness level of a particular color using PWM. That is, three PWM signals from a chip located inside the pixel control the brightness of each LED individually. Each of the three PWM signals can take 0 to 255 values, that is, 8 bits. From this we can conclude that each pixel on the tape is encoded with 24 bits, and this, in turn, is 16,777,216 different colors that can be obtained from one pixel. From our point of view, this is very cool?
Now here's a little disclosure: the pixels in an addressable LED strip don't actually have addresses. This name came rather from the people. It works something like this: a pixel, starting from the first, receives a packet of 24 bits, starts working according to the instructions, and after receiving the second packet after the first, passes it on to the next pixel, and so on until the end. To interrupt this cycle and start filling from the beginning, it is necessary to maintain a temporary pause, and this pause is very short, and the bits themselves are sent at a fairly high frequency. But to be honest, we will not work with bits directly; the software library will do all the work (of which, by the way, there are a huge number for Arduino).
Our LED strip has three contacts: “+5V”, “GND” and “D”. Moreover, on one side of the LED we are marked “DO”, and on the other “DIN”. “D” is exactly the line along which the teams walk. Teams can only go in one direction. "DIN" - discrete input, "DO" - discrete output. And, as a rule, the direction of commands is marked with arrows.
Conclusion
In this introductory article, we introduced, in general terms, what we are going to work with in the future. As I said, now we have a general idea and in the next article we will begin to practice with more confidence and understanding of the matter.
Software (IDE)
The software used to program the Arduino is the Arduino IDE. The IDE is a Java application that runs on many different platforms, including PC, Mac and Linux systems. It is designed for beginners who are not familiar with programming. It includes an editor, compiler and loader. The IDE also includes code libraries for using peripherals such as serial ports and various types of displays. Arduino programs are called "sketches" and are written in a language very similar to C or C++.
The simplest projects using Arduino
There are many examples of simple projects with Arduino, for example, you can:
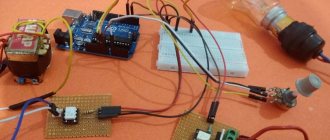
- Create a light sensor that will adjust special LED lamps to the brightness needed in the room.
- Automation of any things in your home. For example, turning lights on and off, opening doors, etc.
- Greenhouse automation.
Although this sounds quite scary, most of these projects, thanks to the abundance of information on them on the Internet, you will not spend much time and effort on.
Programming
Arduino programming is easy: you first use the IDE's code editor to write a program, then compile and upload it with one click.
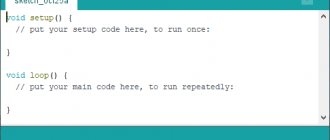
The Arduino program includes two main functions:
- setup()
- loop()
You can use the setup() function to initialize the board settings. This function is performed only once, when the board is turned on.
The loop() function runs after the setup() function completes, and unlike the setup() function, it runs continuously.
Expanding capabilities on Arduino
One of the capabilities of a smart home is visualization of the state of automation and processes occurring in the system. To do this, it is recommended to use a separate server that provides state processing (the Node.js program can be used).
The mentioned software technology is used to solve Internet problems, therefore, to visualize the “Smart Home”, the Java Script language is used (it is with its help that the processor and server are created). The results can be seen on your computer or PC screen.
To implement your plan, a laptop, a regular PC or a Raspberry Pi will be suitable. The use of such a system allows you to increase its capabilities. So, if the Arduino board has a small amount of memory, there are no such restrictions on the server. The program is written in such a way as to provide full control of the platform.
If desired, you can set an algorithm that will record the fact that a person is in the house and collect this information. If the owner returns around 5:30 pm every day, the boiler or heating devices can be turned on an hour before. Upon arriving home, a person finds himself in a warm building with hot water.
The program can remember the time when the owner goes to rest and turn off the water heating. There are many such nuances that, if necessary, are introduced into the program. It is the presence of an external PC that gives great opportunities to the Arduino controller.
Program functions
Below is a list of the most commonly used functions when programming Arduino:
- pinMode – sets the pin to input or output mode;
- analogRead – reads the analog voltage at the analog input pin;
- analogWrite – writes analog voltage to the analog output pin;
- digitalRead – reads the value of a digital input pin;
- digitalWrite – sets the value of the digital output pin to high or low;
- Serial.print – writes data to the serial port in human-readable ASCII text.
Communication with Arduino
To know what actions to perform, the processor must receive the appropriate command. Communication is carried out using a special language, which is adapted for working with Arduino and is quite simple. If desired, it is easy to work with even without programming skills.
Formatting and sending a message to the controller is called programming. To simplify the process, the Arduino IDE has been developed, which includes many programs. Studying them allows you to get a lot of useful information about working with Arduino.
Arduino libraries
Arduino libraries are collections of functions that allow you to control devices. Here are some of the most widely used libraries:
- EEPROM – reading and writing to “permanent” storage;
- Ethernet – to connect to the Internet using the Arduino Ethernet Shield board;
- Firmata – for communicating with applications on a computer using a standard serial protocol;
- GSM – for connecting to the GSM/GRPS network using a GSM card;
- LiquidCrystal – for controlling liquid crystal displays (LCD);
- SD – for reading and writing SD cards;
- Servo – for controlling servos;
- SPI – for communication with devices using the SPI bus;
- SoftwareSerial – for serial communication through any digital pins;
- Stepper – for controlling stepper motors;
- TFT – for drawing text, images and shapes on Arduino TFT screens;
- WiFi – to connect to the Internet using the Arduino WiFi shield board;
- Wire – two-wire interface (TWI/I2C) for transmitting and receiving data through a network of devices or sensors.
Project development
There are many Arduino devices on the market today, with different configurations. But there is no universal solution “for all occasions”. Depending on the task at hand, each kit is selected individually. To avoid mistakes, project development is required.
What projects can be created on Arduino?
Arduino allows you to create many unique projects. Here are just a few of them:
- Solving a Rubik's cube (the system solves it in 0.887 s);
- Controlling humidity in the basement;
- Creation of unique paintings;
- Sending messages;
- Balancing robot on two wheels;
- Sound spectrum analyzer;
- Origami lamp with capacitive sensor;
- Robotic arm controlled by Arduino;
- Writing letters in the air;
- Flash control and much more.
Drawing up a project for a smart home
Let's consider a situation where it is necessary to make automation for a house with one room.
Such a building consists of five main zones - an entrance hall, a porch, a kitchen, a bathroom, and a living room.
When drawing up a project, it is worth considering the following:
- PORCH. The lights are turned on in two cases - when the owner approaches the house at night and when the doors are opened (when a person leaves the building).
- BATHROOM. The boiler has a power switch that turns off when a certain temperature is reached. The boiler is controlled depending on the availability of appropriate automation. When entering the room, the hood should be activated and the light should come on.
- HALLWAY. This requires the lights to turn on when it gets dark (automatic), as well as a motion detection system. At night, a low-power light bulb turns on, which eliminates discomfort for other residents of the house.
- ROOM. The light is turned on manually, but if necessary and with a motion sensor, this manipulation can occur automatically.
- KITCHEN. The lights in the kitchen are turned on and off manually. Automatic shutdown is allowed in case of prolonged absence of movement around the room. If a person begins to cook food, the hood is activated.
Heating devices perform the task of maintaining the required temperature in the room. If there are no people in the house, the lower temperature limit drops to a certain level.
After people appear in the building, this parameter rises to its previous value. Air recovery is carried out when the system detects the presence of the owner. The duration of the process is no more than 10 minutes per hour.
It is worth noting that if you plan to install smart sockets in your home, then to control them it is better to use applications on mobile devices, WIFI or via SMS messages.
Visual programming for Arduino can be done using a special application FLProg, which can be downloaded from the official website https://flprog.ru/.
Arduino Setup Steps
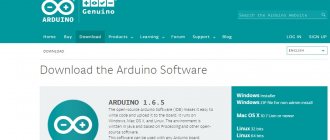
- First, install the IDE. You can download the IDE from the Arduino website.
- Install the software on your computer.
- Now run the Arduino IDE .exe file. The IDE looks like this:
- Write your program in a code editor and upload it to Arduino. To do this, you need to connect the Arduino to your computer using a USB cable.
- In the IDE, select the Arduino type you are using from the Tools → Boards menu.
- Now test your code by clicking on the "daw" icon at the top of the IDE window, then click on the adjacent "right arrow" icon to compile and upload the code to the Arduino.
Note: You may need to install drivers if your system does not detect the Arduino.
How to set up Arduino?
One of the main advantages of the designer is its safety regarding user settings. Key settings that are potentially harmful to the Arduino are protected and will not be accessible.
Therefore, even an inexperienced programmer can safely experiment and change various options to achieve the desired result. But just in case, we highly recommend reading three important materials on how not to damage the board:
- How to protect Arduino and other boards from crooked hands
- 10 ways to “kill” an Arduino microcontroller
- How to safely connect external devices to a microcontroller?
The classic Arduino program setup algorithm looks like this:
- IDE installation, which can be downloaded below or here or from the manufacturer’s website;
- installing software on the PC you are using;
- launch Arduino file;
- entering the developed program into the code window and transferring it to the board (using a USB cable);
- in the IDE section you need to select the type of constructor that will be used. This can be done in the “tools” - “boards” window;
- check the code and click “Next”, after which the download to Arduino will begin.
| 1.8.7 | Windows Windows Installer | MAC OS X | Linux 32 Bit Linux 64 Bit Linux ARM | Code on Github |
| 1.8.6 | Windows Windows Installer | MAC OS X | Linux 32 Bit Linux 64 Bit Linux ARM | Code on Github |
| 1.8.5 | Windows Windows Installer | MAC OS X | Linux 32 Bit Linux 64 Bit Linux ARM | Code on Github |
| 1.8.4 | Windows Windows Installer | MAC OS X | Linux 32 Bit Linux 64 Bit Linux ARM | Code on Github |
| 1.8.3 | Windows Windows Installer | MAC OS X | Linux 32 Bit Linux 64 Bit Linux ARM | Code on Github |
| 1.8.2 | Windows Windows Installer | MAC OS X | Linux 32 Bit Linux 64 Bit Linux ARM | Code on Github |
| 1.8.1 | Windows Windows Installer | MAC OS X | Linux 32 Bit Linux 64 Bit Linux ARM | Code on Github |
| 1.8.0 | Windows Windows Installer | MAC OS X | Linux 32 Bit Linux 64 Bit Linux ARM | Code on Github |
| 1.6.13 | Windows Windows Installer | MAC OS X | Linux 32 Bit Linux 64 Bit Linux ARM | Code on Github |
| 1.6.12 | Windows Windows Installer | MAC OS X | Linux 32 Bit Linux 64 Bit Linux ARM | Code on Github |
| 1.6.11 | Windows Windows Installer | MAC OS X | Linux 32 Bit Linux 64 Bit Linux ARM | Code on Github |
| 1.6.10 | Windows Windows Installer | MAC OS X | Linux 32 Bit Linux 64 Bit Linux ARM | Code on Github |
| 1.6.9 | Windows Windows Installer | MAC OS X | Linux 32 Bit Linux 64 Bit Linux ARM | Code on Github |
| 1.6.8 | Windows Windows Installer | MAC OS X | Linux 32 Bit Linux 64 Bit | Code on Github |
| 1.6.7 | Windows Windows Installer | MAC OS X | Linux 32 Bit Linux 64 Bit | Code on Github |
| 1.6.6 | Windows Windows Installer | MAC OS X | Linux 32 Bit Linux 64 Bit | Code on Github |
| 1.6.5 | Windows Windows Installer | MAC OS X | Linux 32 Bit Linux 64 Bit | Code on Github |
| 1.6.4 | Windows Windows Installer | MAC OS X | Linux 32 Bit Linux 64 Bit | Code on Github |
| 1.6.3 | Windows Windows Installer | MAC OS X | Linux 32 Bit Linux 64 Bit | Code on Github |
| 1.6.2 | Windows Windows Installer | MAC OS X | Linux 32 Bit Linux 64 Bit | Code on Github |
| 1.6.1 | Windows Windows Installer | MAC OS X MAC OS X Java 7+ | Linux 32 Bit Linux 64 Bit | Code on Github |
| 1.6.0 | Windows Windows Installer | MAC OS X MAC OS X Java 7 | Linux 32 Bit Linux 64 Bit | Code on Github |
| 1.5.8 BETA | Windows Windows Installer | MAC OS X MAC OS X Java 7 | Linux 32 Bit Linux 64 Bit | Code on Github |
| 1.5.7 BETA | Windows Windows Installer | MAC OS X MAC OS X Java 7 | Linux 32 Bit Linux 64 Bit | Code on Github |
| 1.5.6-r2 BETA | Windows Windows Installer | MAC OS X | Linux 32 Bit Linux 64 Bit | Code on Github |
| 1.5.5 BETA | Windows Windows Installer | MAC OS X | Linux 32 Bit Linux 64 Bit | Code on Github |
| 1.5.4 BETA | Windows Windows Installer | MAC OS X | Linux 32 Bit Linux 64 Bit | Code on Github |
| 1.5.3 BETA | Windows Windows Installer | MAC OS X | Linux 32 Bit Linux 64 Bit | Code on Github |
| 1.5.2 BETA | Windows | MAC OS X | Linux 32 Bit Linux 64 Bit | Code on Github |
| 1.5.1 BETA | Windows | MAC OS X | Linux 32 Bit Linux 64 Bit | Code on Github |
| 1.5 BETA | Windows | MAC OS X | Linux 32 Bit Linux 64 Bit | Code on Github |
Components and accessories
Below is a list of all the components and accessories commonly used in conjunction with Arduino for development projects:
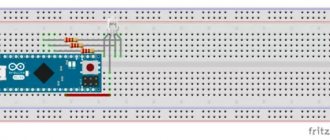
- Bread board
- USB cable
- 9V battery
- LEDs
- buttons
- capacitors
- voltage regulators
- sensors (IR, temperature, etc.)
- Jumpers
- Resistors
- Potentiometer
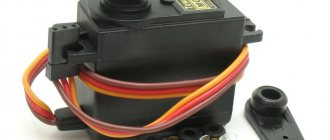
- Motors (DC motors, servos, BLDC)
- LCD
- 4x4 matrix keyboard
- Arduino expansion boards
You can find everything you need for layout in the Layout subsection of the Buy section of the site.
Original article:
- Editorial Team. Beginner's Guide to the Arduino
Setting up Temboo and Dropbox accounts
Before we start developing the application, we need to set up accounts in the web applications that we will use.
The first application in which you need to create an account is Temboo. Temboo will be the link between your Arduino Yun and Dropbox. Link to Temboo service.
You will be prompted to create an account and your first application. Write down your account name, application name and your API key. They will be useful to you in the future. One more thing you'll need from the Temboo website: the Temboo Python SDK. A little later we'll use it to upload photos to Dropbox. .
After downloading, unzip the archive to your microSD card. Now let's go to your Dropbox account. Go to the Dropbox website.
After creating an account, you need to create an application that will allow Arduino Yun to upload pictures to a folder in Dropbox. To create an app, go to the developer section of Dropbox.
After that, click “Create app” and select what type of application you want to create (in our project it will be Dropbox API app):
After that, select “Files and datastores”:
Now we need to get all the keys that are related to your Dropbox application, so that in the future you can use them in our project. At this point, you need an App Key and an App Secret, which are displayed on the same page as your project.
After this, we need to get the Token Key and Token Secret key. To get to them, you need to go to InitialiseOAuth Choreo on the Temboo website.
Here you need to enter the App Key and App Secret. As a result, additional information such as callback ID and temporary token secret will be generated. You will also be prompted to visit Dropbox to confirm authentication. At the end you are taken to the FinalizeOAuth page. You will be asked to enter your App Key, App Secret, callback ID and temporary token secret.
After this you will receive the final Token Key and Token Secret. Write them down, they will be useful to you in the future.
You will also need a Google account to stream Youtube videos. To do this, simply create it on this page.
Conclusions and ideas for further development
In this guide, we figured out how to connect a USB camera to your Arduino Yun and implement two interesting and useful projects. The first is a security camera that automatically uploads photos to Dropbox when it detects movement within the motion sensor's detection range. The second project is to stream video from a camera to Youtube in real time, so you can monitor the condition of your yard/house/room, etc. From anywhere in the world.
Of course, other cool applications can be developed based on this project. For example, you can not use a motion sensor, but simply configure the system in such a way that the camera will take photos at certain, set intervals and upload them to the cloud. You can expand the project by adding more Yuns and video cameras and create a complete monitoring system for your home!
Leave your comments, questions and share your personal experiences below. New ideas and projects are often born in discussions!