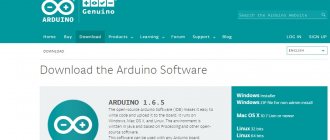
We decided to save you a couple of clicks and host the latest versions of the Arduino IDE, because sometimes the devil can’t help but find the right link on the official website. Where to download the Arduino IDE is your choice: the distribution files are absolutely identical. The stable version of Arduino IDE 1.8.19 (release dated 12/20/2021) and release candidate 2.0 RC (2.0.0-rc3 dated 12/22/2021) are now available.
Download for Linux
- Linux x86 64 bit
- Linux x86 32 bit
- Linux ARM 64 bit
- Linux ARM 32 bit
To install from an archive, in general, you need to run the following commands.
# Unpack the archive and go to the directory $ tar xvf arduino-latest-*.tar.xz $ cd arduino-1.* # Install (only for the current user) $ ./install.sh # Add rights to use USB ports $ sudo usermod -a -G dialout $USER
On some Linux distributions, it is easier to use the install command from the packages.
# Arch Linux $ sudo pacman -S arduino # Fedora Linux $ sudo dnf install arduino # Debian, Ubuntu, Mint Linux $ sudo apt-get install arduino
Using Arduino IDE
The program is very easy to use. In order to make sure that everything works correctly, let’s upload our first sketch to the microcontroller. To do this, we use the standard example with a flashing LED. There are many ready-made examples in the development environment. This is what we will use.
Examples in Arduino IDE
Then click the “Download” button and wait for the sketch to finish loading. After booting, the built-in LED should start flashing immediately. This means that everything works as it should. Now you can write your own firmware or use ready-made ones. A description of the functions of the Arduino programming language is on the page of my website Programming
How to switch language
Arduino IDE selects the default system language during installation. If you need to switch the interface to another language, this can be done in the general program settings.
- Go to the main menu and select “File → Settings”.
- Select the desired language in the “Editor language” drop-down list.
- We restart the environment.
Installing Arduino IDE
If you downloaded the archive, simply unzip it and run Arduino.exe.
If you downloaded the installation file, then you need to perform a standard installation. The installation process is very simple and will not take much time, but for the sake of completeness of the article I will describe it in detail.
Run the installation file. We agree to the terms of the license agreement (after reading, of course).
We agree to the terms
Select the necessary program modules. The first two must be marked. The rest is up to you.
Selecting Arduino ide components
Next, specify the folder in which we want to install the program. It is desirable that the path to this folder does not contain Cyrillic characters.
Selecting the program installation path
During installation, a window may appear prompting you to install a USB-to-serial driver. We agree and wait for the installation to complete. This completes the entire process. All that remains is to set up the development environment and you can create.
Supported boards
Arduino IDE works out of the box with all original AVR architecture boards and their direct analogues.
- Original Arduino controllers
- Iskra Uno (similar to Uno)
- Iskra Neo (similar to Leonardo)
- Iskra Mega (similar to Mega 2560)
- Iskra Mini (analogue of Mini)
- Uno Slot (a hybrid of Uno with the Troyka Slot platform)
- Strela (analogous to Leonardo with motor drivers)
Third-party boards and controllers on other architectures are also supported: SAM, SAMD, Cortex-M. They are added to the environment in separate packages. Below are examples of installation of some of these boards.
- Aduino Due
- Arduino M0 Pro
- Arduino MKR GSM 1400
- Arduino MKR Vidor 4000
- Wi-Fi Slot
- Troyka Wi-Fi module
- ESP32 DevKit v1
- ESP8266 (ESP-01)
- STM32 controllers
- Teensy controllers
Arduino IDE setup
After installation, you need to configure the program. This is very easy to do:
1. First, connect your Arduino to your computer using a USB cable.
2. Then go to “ Start >> Control Panel >> Device Manager ”. There you need to find “COM and LPT ports”. This list will indicate your arduino and the port to which it is connected (COM2). Remember this value.
If your microcontroller is not in the list, or it is shown as an unidentified device, then the driver is installed incorrectly, or you have a Chinese board with a CH340 chip. It's not a problem. You just need a different driver. I described where to download it and how to install it in this article.
3. Now launch the Arduino IDE and immediately go to the “ Tools >> Port ” menu. There you need to select the COM port that you remember.
Selecting a COM port
4. Next you need to select a board. To do this, in the menu " Tools >> Boards " select the model of your board.
Selecting an Arduino board
This completes the setup. Don't forget that these settings will have to be changed if you connect the board to a different USB port or use a different board.
Write without libraries?
Many people believe that effective code should be written without libraries, as a blank canvas. This is complete nonsense because:
- Modern microcontrollers have enough memory so that the developer can save time and use ready-made tools. Moreover, serious development is done using real-time operating systems, which themselves are a huge heavy library. Nobody writes assembly language, it’s not 1980 outside.
- Modern compilers “write” and optimize code at a very high level.
- If you write a large project with pure bare code, it will be a canvas of tens of thousands of lines, which will be impossible to understand. The program is divided into files - essentially the same libraries. Some algorithms and parts of the program are initially convenient to wrap in a class and use as a library for several projects. So it’s basically impossible to write without libraries, no matter whether you download it from the Internet or write it yourself.
- The library most often contains a convenient class that implements ready-made tools for working, for example, with a button. If you have one button in your project, it makes no difference whether you describe it manually or use a class. But as soon as two or more identical buttons appear, from the point of view of the amount of memory it is much more efficient to use the library, because the same functions will not be duplicated. We will return to this in the lesson about creating large projects.
- If you are a beginner, then in 99% of cases a library from the Internet will be written and optimized many times better than your code.
Arduino Home, smart home on Arduino, Part #2
July 29, 2018
Making a smart home using Arduino: where to start?
Creating a smart home with your own head and your own hands is a very entertaining process. While you are developing and configuring it, you will have to expand your knowledge base in many areas: electronics, circuit design, programming and many others.
Read the first part of a series of articles here
If you are a jack of all trades and an excellent self-taught person, then the process will go faster, but if not, then you will have to sweat a little.
The very idea of basing a smart home on a microcontroller platform is not new and not as complicated as it might seem at first glance. This series of articles is not intended to teach you how to repeat the same project at home, but aims to tell the basic principles on which a smart home is built with all its components: controller, actuators, switching modules, etc.
All existing smart home systems have their own controllers and their own functions, emphasizing their difference from competitors, but the principle of operation always remains approximately the same.
This way, you will be able to repeat this project yourself, and in the future you will do it on another platform, since often the power of Arduino alone will not be enough for you, and you will begin to consider other options.
Depending on the controller you choose, the level of knowledge required to configure and interact with each other of all system components will change (this means the programming language in which the code for loading into the controller will be written).
Officially, the very first smart homes appeared back in 1978, and their very first function was the ability to control lighting: smoothly change the level of illumination in light bulbs depending on the time of day or type of activity. All this was done using voltage regulators - dimmers. Thanks to their widespread use, energy efficiency in homes has increased (energy savings reached 20-30%).
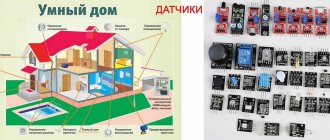
Later, many sensors appeared that made it possible to control various quantities and processes in the house, for example, temperature, humidity, and the content of harmful substances (dust or carbon dioxide).
Sensors perform a monitoring role. Signals from them are transmitted to the controller, where the received information is processed and the corresponding commands are sent to actuators (valves, timers, relay modules, drives).
A simple example here is the climate control system: a temperature sensor has detected that the temperature and humidity in the room exceeds the permissible value - a signal with this information is transmitted to the controller, which decides to turn on the actuator responsible for turning the fan on/off. The fan will operate until the data from the temperature sensor returns to normal.
A smart home has a lot of capabilities and functions, and it’s up to you what exactly will be in your own system.
Answering the question “Where to start?” you need to decide what set of functions you will use for your needs and purposes.
After this, you need to make a list of components that need to be purchased.
For convenience, we divide them into several groups:
1. Controller
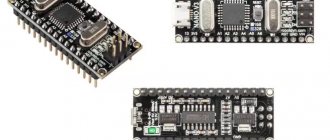
We have already decided on this - we will use Arduino. For beginners, this is an ideal option: an open development environment, many examples and sources in the public domain, libraries that simplify development, and a simple programming language (Arduino uses wiring, which is a simplified C++. How easy it is to understand is evidenced by the fact that Even elementary school students in robotics schools study Arduino).
2. Server
What this is has already been discussed in the first part of the series. Let us repeat - the server connects the controller with actuators, ensuring the exchange of signals between them. Of course, a server may not be needed if you use a wired communication method between all system modules.
A server is required to control a smart home via remote access.
The Arduino platform cannot directly work remotely with other devices (in other words, it cannot transmit information at a distance), so it needs an addition that works with the Internet.
An excellent option is to connect an Ethernet Shield expansion board (Internet shield) to the Arduino board. The connection occurs via the UART interface. For beginners, it will be quite easy to work with it, since it has a built-in library that simplifies writing code and working with the shield. Another, but slightly more complex option would be to interface Arduino with a separate Wi-Fi module based on ESP8266.
3. Monitoring and analysis devices
As mentioned earlier, the number of this type of device depends on what specific tasks your smart home will perform. Let's look at a few examples.
- Controlling optimal temperature conditions
For this purpose you will need good temperature sensors. I can recommend the Dallas DS18B20 sensors. They have sufficient accuracy for room conditions (more precisely than sensors of the DHT family), speed and are able to display temperature in both Fahrenheit and Celsius. They will read information about the current temperature and transmit the data to the Arduino.
- Carbon dioxide content in the room.
Use gas sensors to monitor air quality conditions.
4. Actuators
The name speaks for itself. In smart homes, they are intended to execute commands received from the controller. An example was also given on the pages of this article: if the temperature exceeds the norm, then Arduino (in our case) gives a command to the actuator (in this case it could be a solid-state relay) to turn on the air conditioner or fan to set it at a given level.
Also, depending on what tasks you want to entrust to your smart home, your purchase of the appropriate actuators also depends. Again, I’ll write as an example: various drives can be used to automatically open windows, and valves can be used to regulate the water supply level.
5. Components for switching (ensure the interaction of all components of a smart home)
These include various wires, jumpers, fuses, switches and much more.
Therefore, before you start developing a smart home, carefully consider what components you need, on the basis of which controller you will implement it, and whether you will fit into the budget.
This concludes the second part of our series of articles about smart homes. Thank you all for your attention, to be continued...
This article is the property of Amperkot.ru. When reprinting this material, an active link to the original source, not closed for indexing by search engines, is required.
What does Arduino control?
Thanks to the large number of pins on the printed circuit board, it is possible to connect many different devices to Arduino, namely:
In addition, a set of sensors is connected to Arduino depending on the tasks assigned to the system. As a rule, sensors for light, smoke and air composition, magnetic field, humidity, temperature and others are installed.
Thanks to this feature, Arduino becomes a universal device - “a brain device with the ability to be configured taking into account the tasks at hand.
Start
Creating a project on Arduino consists of 3 main stages: writing code, prototyping (breadboarding) and firmware. In order to write code and then flash the board, we need a development environment. In fact, there are quite a few of them, but we will program in the original environment - Arduino IDE. We will write the code itself in C++, adapted for Arduino. You can download it on the official website. A sketch is a program written on Arduino. Let's look at the code structure:
main(){ void setup(){ } void loop(){ } }
It is important to note that the Arduino processor creates the main() function, which is required in C++. And the result of what the programmer sees is:
void setup(){ } void loop(){ }
Let's look at the two required functions. The setup() function is called only once when the microcontroller starts. It is she who sets all the basic settings. The loop() function is cyclic. It is called in an endless loop throughout the entire operating time of the microcontroller.
