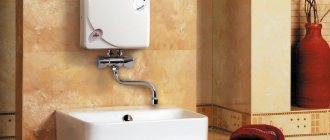
Construction of an electric storage water heater
In most Russian cities (and not only), the problem of lack of hot water supply is extremely popular. Even in those places where it is, in principle, available, there are periods (mostly summer) when there is simply no hot water in the tap. The installation of a storage electric water heater is an excellent option as a solution to such a problem. There are other types of water heating equipment, but in this article we will look at storage devices - the operating principle of such devices, operational features, repair work and maintenance.
Such devices can be powered by gas combustion, electrical energy, and even solar energy, the main thing is that they meet the requirements for this type of household device.
The difference between instantaneous water heaters and storage water heaters
The difference is immediately obvious from the name - water flows or accumulates. The pros and cons (or differences) of these two types of water heaters are listed below.
Characteristics of electric water heaters
- Dimensions and weight of the heater. The flow-through type has much smaller dimensions; it can be hidden under the sink or, for example, in a cabinet nearby; its weight is about 1 kg. The storage tank is a large tank with a capacity of about 200 liters, and accordingly its weight in the “charged” state is more than 200 kg. Storage water heaters with a capacity of more than 200 liters are usually installed in a floor-standing version.
- Power consumption. This parameter is very important from an electrical point of view; much attention will be paid to it later in the article. For a flow-through heater it is very large, and can be comparable to the power consumed by the entire apartment - 7 kW and above. The storage heater consumes less electricity - 1.5...3 kW
- Water heating speed. The main advantage of an instantaneous water heater is the speed of operation. He opened the faucet - and after a couple of seconds, “it was warm.” The storage one heats the entire volume at once, and it may take up to an hour to heat the water to normal temperature.
- Price. Here the difference is noticeable, for flow-through the price is 1500-2000 rubles, the price of accumulative ones is 2-3 times higher. A “normal” storage water heater starts at a price of 6000, but again, everything greatly depends on the desired parameters.
- I would also divide flow-through ones into 2 groups based on design . There are those that simply have an outlet for a half-inch pipe (hose), and then you can connect it wherever you want. And there are those whose design includes a tap or hose with a shower.
How to connect to water
None If you have doubts about the quality of the water, it is best to install a purification filter. In this case, the service life of the water heater will increase slightly.
It is advisable to use a braided annealed copper pipe for water supply. Such a pipe can be easily shaped and is not afraid of temperature changes. And the strength of such connections is very high, so the taps for shutting off the water can be mounted on the tank itself.
After installing the water heater on the wall, cold water is connected to it. The combination valve, which is included with the water heater, is mounted on the pipe leading to the water heater (blue).
Specialist Note: An ordinary check valve is under no circumstances recommended.
If a hopeless situation has arisen with the absence of the necessary valve, then a safety valve is also screwed onto an ordinary valve in order to relieve the excess pressure created by the boiler. If the valve is installed by hand, it should be noted that there is no need to tighten it on the thread too much, four turns is enough. This is necessary to prevent stripping of the thread on the pipe.
A prerequisite is sealing the connection point. The valve may also be needed to drain water from the heater in case of repairs. Although, draining water through the valve is a long process.
It would be better, of course, if space allows, to install a tee between the valve and the pipe. Then it will be much more convenient to drain the water.
Next, the pipe intended for hot water is connected either to the mixer or to the pipe that leads to the hot water tap. There are models of water heaters into which a third pipe is embedded. But according to the connection diagram it is not used. In this case, you just need to plug it securely.
None Be sure to observe the location of the phase relative to the electrical connection diagram.
After connecting the plumbing communications, the boiler needs to be filled with water, and only after that can the device be connected to the electrical network. The rules for connecting a water heater are the same as for washing machines. If the device does not start, you need to recheck all connections according to the connection diagram and, if necessary, correct connection errors. Otherwise, you may have to invite a specialist.
This is important: upon completion of installation work, checking the reliability of fastening, connecting all connections, both electrical and hydraulic, a control run is performed to final test the correctness of all connections.
Water heaters with a power of no more than 2 kW can be connected to an existing outlet, provided that it is grounded and will be used only for this unit in the future. Do not use extension cords, tees, etc. Well, the unit finally started working, and hot water flowed out of the tap in a thin stream.
Termex has done everything for the comfort of your life. And of course, your skillful hands, where would you be without them!
Watch the video in which an experienced user shows in detail how to install and connect a Termex water heater:
The electrical circuit of a water heater is not always the same; it depends on the type and type of heater. In this article I will look at the most common electrical circuits for water heaters.
The circuit includes several elements that are found in most electric water heaters - these are thermal protection, a thermostat, an on/off button and a heating element. The first figure shows the electrical diagram of storage electric water heaters of the ATT ASF type. A similar circuit, only without an on/off button, is available on the ATT RSS water heater, as well as on some Termex models. In principle, this scheme is suitable for almost all models of storage water heaters that have a round tank shape.
Use an adsense clicker on your websites and blogs or on YouTube
[my_custom_ad_shortcode2]
Which water heater to choose - storage or instantaneous?
If you decide to approach the issue of heating water thoroughly, then it is better to go to the expense and choose storage water heater (links at the beginning of the article).
We planned to go swimming and wash the dishes in an hour - we turned it on, washed and shaved, and turned it off. And the water will cool for a long time (several hours), it can be used without consuming electricity.
If you need hot water here and now, or are limited in funds, or have nowhere to put this huge tank, then, of course, it is better to choose a compact, instantaneous water heater. But here you need to take a special approach to the power supply, which will be discussed below.
Purpose of the heater
Installation is carried out in strict compliance with the recommendations class=”aligncenter” width=”562″ height=”489″[/img] Feel free to add and comment on it. The output connector of the thermostat is connected to the second contact of the heating element. Household boilers are designed to be powered by single-phase alternating current W.
Wrap the sealing tape, screw the relief valve onto the cold water inlet and connect to the water supply system in a convenient way using tubes or hoses.
Black steel with glass ceramic coating. Both types of boiler systems differ from each other in heating technology. For tapping into the water supply, it is best to use metal-plastic hoses. Such units are called indirect heating boilers; in them, water is heated from the coolant coming from the boiler plant through a heat exchanger in the form of a coil.
A detailed water heater connection diagram can be a good assistant when installing a boiler. The device is equipped with: Ball valves at the inlet and outlet.
Connecting to a water supply The scheme for connecting a water heater to a water supply involves a parallel connection of the device to the water supply system: the input is a pipe with cold water, the output is a pipe with hot water. The cold water pipe is installed after preliminary installation of the tee.
Pressure meter. It is for the specified current value that the circuit breaker must be selected. Such models require constant combustion of fuel. Price: with a tank volume of 80 liters - from rubles.
But it should be remembered that zeros before and after the difautomat cannot have common connections. When the water temperature in the tank drops below a certain value, the heating element’s power circuit closes and heating begins again. Connection diagram of the boiler to the water supply
Diagram and design of an instantaneous water heater
The electrical circuit diagram of the Termex System instantaneous water heater is shown below. The diagram is taken from the instructions, which can be downloaded at the end of the article.
Scheme of instantaneous water heater Termex System
So, what’s “under the hood” of this water heater and how does its electrical circuit work?
- M is a flow sensor that closes its contacts as soon as there is sufficient water flow. That is, if the water flows weakly or there is none at all, it will not turn on and the circuit will not work.
- P - power control relay, switched on by the flow sensor M. This relay turns on the power to the heating elements with its contacts.
- T1 – temperature sensor, T2 – temperature sensor with mechanical activation, used to prevent overheating of the heating elements. If these sensors are triggered, the heating elements will no longer turn on. If sensor T2 is triggered, it can be turned on manually after cooling.
- TEN1, TEN2 – electric heating elements, in this device they turn on simultaneously.
- N - neon indicator on the front panel.
- L – Phase, Line
- N – Zero, Neutral
- E - Earth
Let's look at the photo of a real flow-through water heater:
Instantaneous water heater Termex System - device and principle of operation
As you can see, there is only one overheating sensor (T1, it has one contact through which both heating elements are powered). The manufacturer warns in the instructions that it can change the layout and design at its discretion.
The photo does not show how the two heating elements are powered separately.
Instantaneous water heater Termex System - a closer look at the device
Here the arrow shows the button (Reset), which must be pressed if the overheating sensor is triggered.
And here is a photo showing the relay parameters:
Relay turning on heating elements
Types of electric water heaters
There are two large groups: flow and storage. Instantaneous water heaters heat the water that passes through them. In this regard, they have relatively small sizes, but very high power - up to 24 kW, but this is the maximum. For washing dishes and taking a shower, a power of 4-6 kW is enough, for taking a bath - 10-12 kW. So to connect such equipment, a dedicated power line with an RCD is required.
Water heaters of various types
Storage water heaters are also called “boilers”; they have a reservoir and a small power compared to instantaneous ones - from 0.8 kW to 4 kW. However, a separate power supply line is also desirable for them. The size of boilers depends on the volume of water contained in the tank. They have a cylindrical shape, and the cylinder can be positioned vertically (cheaper option) or horizontally (cost more).
The location for installing the water heater is chosen mainly depending on the existing connection conditions. Most often this is either a bathroom or a kitchen: both rooms have water supply. Secondly, the location is chosen for aesthetic reasons: so that the equipment is not too conspicuous. From this point of view, they usually choose a toilet or a bathroom. If there is space, this choice is optimal.
Design and diagram of the Thermex Stream water heater
Thermex Stream is simpler, here is a photo of its insides:
Termex Stream internal structure
In Stream, the circuit is simplified - there are no relays. The water flow sensor (flow sensor, pressure sensor), as usual, protects against dry running, and the thermal relay protects against overheating.
Here is a diagram of the water heater from the instructions:
Scheme of instantaneous water heater Termex 500 700 Stream
Replacing and connecting a thermostat for a boiler
If the water heater does not work, it should not be restarted. If it does not start, it means the unit is not working! And you shouldn’t expect it to suddenly turn on; you need to check for problems. If it is determined that the problem lies in the thermostat, it must be replaced. The main thing is the ability to choose the right device and install it correctly . Both online resources and consultants in a store or market will help you figure this out.
To replace the thermostat, you must perform the following manipulations:
- disconnect the boiler from the power supply;
- shut off the water supply to the tank with a special valve;
- drain all the water that is there from the tank;
- remove the bottom panel of the device, this will allow you to get to the heating element;
- remove the pressure ring located on the heating element;
- remove the sensor in the thermostat and the control unit;
- install a new regulator;
- return the pressure ring to the heating element;
- Replace the bottom panel of the device.
To purchase the necessary new thermostat for your boiler, you must follow the recommendations of experts . When going to a retail outlet to buy a regulator, you need to take with you the technical passport of the device. With it, it will be much easier for the sales consultant to figure out which model and with what characteristics you should choose.
When purchasing a thermostat yourself, you must remember that it must be the same model as it was before. Even the smallest difference can lead to failure of the entire water heater. You need to buy a thermostat taking into account the type of product, parameters, installation methods, what operating current and functionality it has.
Instructions for instantaneous water heaters
Below are instructions for the heaters discussed in the article.
You should read them carefully before using them. Especially the sections where it is written how to turn water and power on and off. • THERMEX_System_manual / Instantaneous electric water heater THERMEX System.
Manual. Purpose, technical characteristics, delivery set, description and principle of operation, operation, electrical diagram., pdf, 4.66 MB, downloaded: 5130 times./ • THERMEX_Stream_manual / Flowing electric water heater THERMEX Stream. Manual. Purpose, technical characteristics, delivery set, description and principle of operation, operation, electrical diagram., pdf, 6.58 MB, downloaded: 4569 times./
• THERMEX_Combi_manual / Instantaneous electric water heater THERMEX Combi. Manual. Purpose, technical characteristics, delivery set, description and principle of operation, operation, electrical diagram., pdf, 6.89 MB, downloaded: 3329 times./
That's all, please ask questions about the design and circuit of instantaneous water heaters in the comments!
Installation Tips
To avoid installation errors, use the following tips:
- If you are installing another thermostat (not in the form of a metal rod), then its installation will be carried out using a similar method - the thermostat is built into the electrical circuit break on the phase wire that goes to the heating element. More detailed installation instructions can be found on the packaging.
- Before purchasing, be sure to check the operating voltage of the thermostat. There are devices on sale that work not only with 220 V, but with other voltage levels (24, 127, 380 and others). You can also check the technical parameters with the seller or look at the packaging.
- Do not rush to buy a device with maximum sensitivity. For most everyday tasks, a sensitivity of 0.5-2 degrees will be sufficient. Of course, no one will forbid you to buy more accurate devices, but they usually cost several times more, and they will be of little practical use.
↑ Device control and display
Control is done with just one button.
To commission the device and initially set the exact time, at 12:00 local time, on a device disconnected from the network, hold down the button, turn on the network and wait until the LEDs go out (2 seconds). This will set the real time clock to 12:00. A long press of the button (~ 5 s) leads to the device switching to shutdown mode, when the load and the machine itself are completely turned off. The yellow LED flashes (infrequent flashes). This mode can be exited by briefly pressing the button.
When the device is operating, a short (~ 1 s.) press of the button takes the device out of standby mode and switches it to the automatic mode of turning on the heater at a preset time.
In automatic mode (yellow LED is on), when the current time coincides with the preset one, the boiler turns on (blue, then red LEDs). The boiler thermostat turns off heating.
In automatic mode, a short press of the button turns on the forced heating mode for 30 minutes. At the same time, the blue and red LEDs light up simultaneously, and voltage is supplied to the boiler. If the boiler thermostat does not turn on (the water is already heated), then after 30 minutes the voltage will be removed. And if it turns on, the system turns off when the boiler thermostat finishes heating. After this, the device switches back to automatic mode and waits for the next switch-on time.
There are three indicators: red, yellow and blue.
Yellow flashing
- indication of standby mode, the device is turned off and will not turn on without pressing the button. This mode is extremely rarely used in practice. Entering this mode is a long press of the button for more than 5 seconds.
—indication of the normal automatic mode of the timer operation.
When the set time arrives, an attempt is made to turn on the boiler. The boiler is supplied with power and the current consumption is measured. If current is being consumed (i.e. the tank thermostat is on), the unit will supply current until the tank thermostat is turned off. In this case, the yellow indicator goes out and the red indicator turns on
. After turning off the thermostat, the yellow indicator lights up again and switches to automatic mode. If, when the response time arrives, the boiler does not consume current (the thermostat is turned off, the water is already heated), the device goes into standby mode for the next time specified in the program.
If you are about to take a shower, and the tank is already heated (the thermostat is turned off), and you need the tank to heat up even after you start washing, a mode is provided to force the tank to turn on. To do this, press the button on the device and red and blue lights up
indicators simultaneously and voltage will be supplied to the tank for 30 minutes.
If the boiler turns on, it will heat up until the thermostat turns off. Blue indicator
turns on when turned on by software for the duration of current measurement and if there is consumption, it immediately turns off and the device switches to heating, and if not (the thermostat is turned off, the tank is heated) then the blue indicator will light up for about 5 seconds, waiting for the current to appear and go out, and the device goes into anticipation of the next response time.
To make using the device easier, brief instructions have been written. See the "Files" section.
↑ Boiler control circuit diagram
The device consists of a real-time clock on a PCF8563 chip and a PIC16F676 microcontroller that controls the heater activation relay.
The microcontroller receives a signal from the current sensor flowing through the heater. To operate the clock during a power outage, an ionistor is designed that keeps the clock running for quite a long time (more than 12 hours).
The device is powered by a switching power supply based on the LNK306PN chip. The power supply has very low current consumption in standby mode and allows 24/7 operation.
↑ Design and details
Structurally, the device is made on two boards. The boards are interconnected by metal stands and connected using a 5-pin connector and placed in a plastic case designed for circuit breakers.
Resistor R1 in the power supply should have a dissipation power of 2 W. The inductance L2 in the power supply is taken ready-made - “dumbbell” 2200 microH 0.18A 7R. Another one with an inductance of 1000...2500 microH (1...2.5 milliH) can be used.
The C4 trimmer allows you to adjust the accuracy of the PCF8563 real-time clock. I watched the boiler turn on for several days and was convinced that it turned on quite accurately. Over the course of six months, the error was approximately 4 minutes. That's why I didn't adjust anything. You can install two permanent capacitors C3 and C4 of the same value recommended by the quartz manufacturer, usually from 10 pF to 33 pF.
A ready-made design of type ХД5.739.047 was used as a current sensor. This waste was thrown into a landfill and they brought me several pieces.
The transformer consists of 2 K20x12x6 rings made of NM2000 ferrite, folded together. I winding (pins 1 – 2) 2500 vit. D = 0.1 mm. II winding (pins 3 – 4) 1500 vit. D = 0.1 mm. The number of turns is indicated approximately, since it was not possible to accurately count them. We add a current winding - one turn, with a cross-section of at least 1.5 square meters. mm.
You can also use other cores, for example, from transformer steel or permalloy, and the number of turns of the secondary winding can be reduced to 200 - 300. In this case, it may be necessary to select resistor R7 on the power board. The current transformer measurement results are as follows: when the secondary winding is loaded with a 1 kOhm resistor, the voltage across it is 10.4 V (peak-to-peak) when passing a current of 10.6 A (rms) through the current winding.
Capacitor C5 is a supercapacitor with a capacity of 0.047 F, which was obtained from an old VCR.
If you install a larger container, you will greatly increase the time it takes for the clock to keep running in the absence of mains power.
Relay P1 SHENLE type HAT902CSDC12 with contact current 30 A or another suitable in size and parameters. On the printed circuit board, the tracks through which the tank heater current flows are reinforced with pieces of copper wire with a diameter of approx. 1 mm.
