How to check the battery
When learning how to measure battery capacity with a multimeter, you need to consider the procedure for a vehicle battery.
A full check of the autonomous power source will allow you to avoid problems in the vehicle’s electrical network and extend the life of the battery. First, the battery must be disconnected from the machine system. It is allowed to disconnect only the “minus” contact. Next you need to turn on the multimeter. The test mode is set to the range from 0 to 20 V.
The multimeter probes are connected to the battery contacts. A red wire is connected to the positive terminal, and a black wire is connected to the negative terminal. If this procedure is performed correctly, the measurement result will appear on the device screen.
Measurements while the engine is running
Place the car on a level surface, open the hood, put the handbrake on and start it. When the engine is running, the generator and voltage regulator operate, which charge the battery. Therefore, the voltage at the terminals should be within 13.5-14 volts. In some cars, when the battery is discharged and the air temperature is low, the electronics automatically increases the voltage to speed up charging. In this case, it should fall smoothly as it charges. If this does not happen, the electrolysis process is activated in the banks. The electrolyte will begin to boil away rapidly. Overcharging is especially dangerous for modern gel batteries with limited gas emissions.
A voltage of less than 13.4 volts is a sign of undercharging. Operating in such conditions promotes sulfation of the plates and shortens battery life.
When measuring voltage, you need to turn off all powerful consumers: headlights, heater, audio system. Otherwise, the power of the generator when idling will not be enough to maintain the optimal voltage level.
There are several possible reasons for low voltage at the terminals:
- Poor contact.
- Generator failure.
- Voltage regulator malfunction.
You cannot operate a machine whose battery is in undercharge mode. The cause of the failure must be immediately localized and eliminated. If the voltage at the terminals and the output of the generator is very different, you need to clean the contacts on the battery with sandpaper or a file.
After checking without load, you need to turn on the headlights and other powerful energy consumers, add engine speed and repeat the measurements. If at high speeds under load the voltage drops to 13.4 volts or lower, diagnostics of the generator system and control unit is required.
How to test a battery with a multimeter with the engine turned off?
The average indicator, when checking the battery with a multimeter, with the engine not running, should be in the range of 12.5–13 V, with the upper value indicating 100% charge, and the lower value indicating 50%. The numbers are approximate, but the general picture is easy to understand. Also, do not forget that you should take readings immediately before the trip, and not after it, as soon as you have turned off the engine. It is especially good to carry it out when the car has not been used for some time, for example, in the morning after a night in the garage. This shows how well the battery can hold a charge.
Now you understand how to check the charge of a car battery with a multimeter. This device is worth purchasing for every motorist. Some rely on the on-board computer, but it does not provide sufficient accuracy. The built-in voltmeter is connected to the circuit of devices that consume energy, and not directly to the battery, therefore, part of the electricity is consumed “on the road”.
How to measure battery leakage current with a multimeter
Any battery has leakage current. It is important to ensure that the value does not exceed approximately 80 mA. The fact is that energy, at least a little, is consumed even with all consumer parts of the car turned off. It is also worth considering that energy supports the functioning of the alarm system.
If the leak is too large, then diagnostics are required.
How to measure a battery with a multimeter for current leakage:
- Turn off the engine.
- Turn off the ignition.
- Wait 15 minutes.
- Turn off absolutely all consumers.
- Remove the negative from the battery.
- Set the multimeter to DC current test mode.
- Select range up to 10 A.
- Connect the positive cable of the multimeter to the positive cable of the battery.
- Connect the negative battery to the removed negative terminal.
- Record the indicators.
If there is no leak, you will see zeros. If there is a leak, you will understand from the values how big it is. You can find out where the problem lies: you need to turn off and turn on the fuses one by one.
It’s so easy to figure out how to measure a battery with a multimeter on a car for current leakage.
Now you know how to measure amperes on a battery with a multimeter, how to check battery charging with a multimeter, how to test a battery with a load with a multimeter, and much more. And for such testing you will need a regular multimeter, and you do not need a load fork.
We wish you to measure the battery with a multimeter correctly and safely!
How to Visually Check a Car Battery Case and Cables
Now it's time to check the physical condition of your battery. A damaged battery case can not only prevent the battery from working properly, but can ultimately kill it. To check it, you need to remove it from your car.
Disconnect the cables first, starting with the ground terminal and then the positive terminal. Now unscrew the clamping mechanism to remove the battery from the tray. Make sure the holding mechanism works. If it doesn't exist, install it. This equipment prevents the battery from rebounding and becoming damaged while the vehicle is in motion.
Place it on a work surface or similar surface. Carefully inspect the battery case for possible damage. Check for a bulging side or cover, cracks around the housing, or damaged terminals. If your battery is damaged, replace it. Overcharging and internal short circuit will cause the battery to swell as the acid turns to gas. So if you notice signs of a bulge, check the charging system as well.
Now check the cables. Check the insulation around the cables and the condition of the cable threads for wear, cracks or fraying. Replace them if necessary. Make sure the clamp mechanism on your battery is working.
How to check the battery
Procedure for removing the battery from the car.
Before starting tests, you need to visually assess the condition of the power source. For example, a damaged housing can cause its failure.
For a better assessment, it is better to remove the battery from the socket. Disconnect the cables in the following sequence: first the ground terminal, that is, “minus”, then “plus”. To remove the battery, just unscrew the clamping mechanism. There is also a holding mechanism and this should be in working order as it prevents the battery from shaking.
The serviceability or malfunction of the battery can be determined by external signs. If bulges are visible on the side or on the cover, cracks, or damage to the terminals, the power supply has probably become obsolete. If it's just the cables, they're worn out or cracked, replacing them is much easier.
What parameters can be checked?
Using a multimeter, you can measure voltage with high accuracy. By the magnitude of the electrical voltage, you can determine whether the battery is charged or the element needs to be charged with direct current.
Using a multimeter, you can check the voltage not only of acid batteries, but also of cell phone batteries. To check the mobile phone's battery charge level, the device is switched to the mode for measuring direct current up to 20 V. In this mode, the digital device allows you to measure voltage with an accuracy of hundredths of a volt.
The screwdriver battery can also be easily checked with a multimeter. The rated voltage of the device, in this case, can be found out from the documentation of the power tool, and if the voltage is less than this value, then the battery must be charged.
The battery capacity can also be checked with a multimeter. For this purpose, you can use several methods.
You can check current leakage using a multimeter. If it is necessary to measure this parameter on a car, then in addition to the current leakage on the body, the leakage in the vehicle’s on-board network is also checked.
In this way, you can prevent rapid discharge of the battery and increase its service life.
How to check battery charge with a multimeter?
Determining the condition of a lithium-ion (the most common type of modern battery) battery is quite simple if you follow these instructions:
- Disconnect the energy storage device from the car and wait 5-6 hours.
- The multimeter should operate in the “voltage” mode (voltage test).
- A standard lithium battery produces current in the range of 12.7–13.2 volts. The switch is set to 20 or closest to it. This is how the voltage is measured from this value and below.
- The wires coming from the device are connected to the battery: red to the positive terminal, black to the negative terminal. If the wires are the same color, then you should focus on their markings and connect them to opposite charges, minus to plus and vice versa.
What is a multimeter and how does it work
A multimeter is a device that can be used to measure battery voltage at home. And based on the voltage value, it is easy to determine whether it is charged or needs recharging.
Typically, the device measures voltage, but it can also be used to find out:
- about the fact of current leakage;
- energy intensity;
- internal resistance;
- current or amperage.
By the way, the need to measure voltage sometimes arises not only if you have a car battery, but also a power source for a smartphone or any other device.
Of course, batteries are sold with an indicator that shows the charge. But such models cost 20–30% more than regular ones. By acquiring a multimeter and learning how to use it, you can really extend the life of your battery.
Using a hydrometer to check battery fluid
- Remove the caps from the top of the battery.
- Immerse the tip of the hydrometer into the first cell of the battery and squeeze out the hydrometer bulb.
- Release the bulb so that the electrolyte enters the hydrometer needle.
- Read the specific gravity of the electrolyte as indicated in the instructions on the tool packaging.
- Record your values and perform the same test on the remaining cells.
- Compare your results with the results of the tool manufacturer's instructions.
Basically, if your readings fall between 1.265 and 1.299, your battery is charged. When your readings drop below 1.265, your battery will not be sufficiently charged. In most cases, a slow or fast charge will help restore charge and improve the chemistry in the battery. However, a difference between 25 and 50 points or more (the point is 0.001) between any of your readings indicates that the battery is sulfated and you need to replace it.
Checking the electrolyte level in the battery.
The next step, after checking and eliminating the self-discharge of the car battery, is to check the electrolyte level in it. Of course, this only applies to serviceable batteries.
The electrolyte level is checked using a special glass level tube, and the electrolyte level should be within 10-12 mm above the battery plates.
A level tube is an ordinary glass tube with divisions in millimeters marked on it. In order to measure the electrolyte level, you need to place the tube in the battery filler hole until it comes into contact with the separator mesh, pinch the upper end of the tube with your finger and pull out the tube. The upper electrolyte level in the level tube will correspond to the electrolyte level in the battery.
Basically, a low level is a consequence of the electrolyte “boiling away”; in this case, the electrolyte level is adjusted by adding distilled water.
Topping up the battery directly with electrolyte is done only when you are sure that the drop in level was due to a spill of electrolyte from the battery.
Before proceeding with further testing of the battery, it is necessary to assess the degree of its charge and carry out further testing of the battery after it is fully charged.
The degree of charge can be determined in two ways: either measure the density of the electrolyte in the battery, or measure the voltage on the battery.
How to check the battery charge using the indicator
Many maintenance-free batteries have charge indicators that allow you to visually determine the condition of the battery. This option first appeared on Japanese products and quickly gained popularity due to its convenience and accessibility.
The hydrometer, as the indicator is called, is a transparent window on the battery cover. The color of the window changes depending on the condition of the battery:
- Green —full charge.
- Gray or white - need to be charged.
For some indicators, the window turns red when capacity is lost.
The principle of operation of the device is based on changes in the density of the electrolyte at different charge levels. It works like this:
A tube with a green float is attached to the window.
- When charging the battery, the density of the electrolyte increases and the float rises, approaching the window.
- If the battery is discharged, the density drops and the ball sinks in the electrolyte. As a result, the indicator window changes color to gray or black.
Some indicator models have a red ball that floats up when the density of the electrolyte decreases. This provides a red indication of the discharge.
When the electrolyte level drops, not the ball, but the electrolyte itself will be visible through the window. To prevent the destruction of the plates, you need to add distilled water to the jars and charge the battery.
The advantage of the indicator is that the device allows you to determine the condition of the battery without the use of special instruments. This is convenient when purchasing a battery or in road conditions when you need to quickly check the condition of the battery. However, indication using a float does not always allow one to draw accurate conclusions about the performance of the battery. Therefore, when in doubt, you should use a multimeter or a load fork. They are also useful when you need to check a battery that is not equipped with an indicator.
Methods for diagnosing a car battery
Let's consider the main methods for checking the technical condition of a car battery:
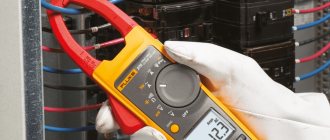
- Terminal voltage. A multimeter is a device for measuring current and voltage. Can be used at home.
- Diagnostics using a Postolovsky oscilloscope. USB Autoscope is a professional device for checking electrical signals in the engine and additional equipment, including the battery. For this purpose, Andrey Shulgin has developed a special ElPower script that can detect battery faults and charge level.
- Checking with a load fork. The most informative device for measuring voltage under load.
- Checking the electrolyte level. It should be 10-15 mm higher than the plates.
- Electrolyte density measurement. A hydrometer is used for this.
- Check battery capacity. On the case there is information about its capacity. The year of issue is written in the passport.
The average check price varies from 300 to 500 rubles, depending on the make of the car.
Battery diagnostics using a Postolovsky oscilloscope
Check the car battery charge with a multimeter
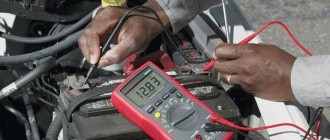
If the starter turns poorly or the car does not start, the first thing you need to do is check the battery charge. This service is available at a car service center, but to do this, the car will have to be transported on a tow truck. If you have a tester at hand, you can check it yourself at home.
A multimeter is a universal device. It is used to measure leakage current and battery voltage. We set the regulator knob to 20 Volts DC voltage and measure the health of the battery. Red probe for the positive terminal, black probe for the negative terminal. The readings should be from 12 volts when the car is not started and up to 14.7 volts while the engine is running. Depends on the brand of the car, and accordingly on the generator and the general layout of the installed equipment. The charge level is checked an hour after stopping the engine.
Checking the battery on a car using a load fork
The load fork is a unique device for measuring the charge, voltage, and load of a car battery. Consists of: voltmeter, spiral, probes.
Load plug for battery testing
It has a simple design and low price. Can be purchased at any automotive store. Let's look at how to use the load fork:
- Measurement without load. Connect the black alligator clip to the negative terminal. Angular contact with the inscription “B” to the positive one. Measure the voltage.
- Measurement under load. Disconnect the battery from the vehicle completely. Touch the plus with contact “H”. Take the measurement for 5 seconds, but no more.
Below is a table of plug readings when checking the battery:
Table of percentage of charge versus voltage
The table shows that a value under load of <9 V already indicates a high battery discharge. The plug consists of metal plates that, when heated, consume a current of 100 to 200 Amperes. This is practically the starter current when starting the engine. After a five-second test, the voltage should drop by at least 10.2 V and recover to 12.4 - 12.7 volts. This is normal. If the reading is greater than 9 volts, and the voltage is restored to 12.4 volts, then the battery requires recharging. If it is not restored, then sulfation of the plates has occurred, destruction of one or more cans, or a short circuit in the can. Thus, with this device you can find out the performance of the battery.
Battery capacity: how to check, test device
The capacity of the battery is the time during which it provides energy to operate the car. The unit of measurement for amperes is hours (Ah). Has nothing to do with battery charge. For example, a glass is a container, and water is a charge.
In most cases, battery capacity is needed when purchasing and selecting for your car. Each brand needs its own capacity, which depends on many factors:
- Type of engine installed in the car: volume, power.
- Type of starter and its current consumption.
- Generator: the power of the supplied charge.
- Amount of additional equipment: alarm system, radio, various comfort systems.
The fundamental factor in choosing a battery based on capacity is the engine. The larger its volume, the more powerful the starter is installed, and accordingly a larger battery capacity is required.
It is not possible to check the battery capacity with a tester or multimeter. There are special tests for this, which are based on the discharge of the battery and determining the time during which it will discharge.
At home, you can take a car lamp as a load and time the battery discharge time by clock. The method is not accurate, since as the discharge progresses, the voltage drops and the current decreases. Accordingly, it will not be possible to determine how much current the battery will produce over time. Also, you should not completely discharge the battery, as this can lead to complete breakdown, beyond repair.
Below is a diagram of the capacity testing method. You can assemble it yourself or entrust it to a professional. The circuit includes a specific load selected for the brand of battery. The measurement duration is about 20 hours.
Battery capacity testing circuit
There are special battery capacity testers. The test is done using probing pulses processed by a microprocessor. Next, based on the data received, the tester determines the battery capacity. One such device is SKAT-T-AUTO. Takes a measurement within 15 seconds. Fully automatic.
Thus, having measured the readings, we compare them with the nominal value indicated in the passport or on the battery itself; if the value is about 50%, replace the battery.
SKAT-T-AUTO
Checking the electrolyte density in the battery
The density in a battery depends on the concentration of sulfuric acid in the electrolyte. Measured in g/cm3. The concentration of sulfuric acid depends on the degree of charge, temperature, and the presence of defects in the jars. When the battery is discharged, part of the solution penetrates the plates and the density decreases.
The test can be carried out at home at a temperature of 25 ° C and a fully charged battery. The electrolyte density should be 1.28±0.01 g/cm3. The dependence of density on voltage, charge and temperature is presented in the table below.
Electrolyte density at different temperatures
Before checking the density, you need to look at the electrolyte level in the battery. It should be 15 mm higher than the separators.
Method for checking electrolyte level
To measure the density of the electrolyte in the battery, a special device is used - a hydrometer. The verification process consists of several stages:
- Unscrew all the lids from the jars.
- Squeeze the hydrometer bulb.
- We lower the battery into the jar and collect the electrolyte.
- The float on the scale will indicate the density of the electrolyte.
The density value in all battery banks should be the same. If the total value is lower, then this indicates low charge. With different densities in jars below 0.10 g/cm3, we can talk about a short circuit in one of the plates.
Hydrometer readings
How to Test Battery Terminals Using a Multimeter
Dirty, corroded or loose terminals will lead to starting or no-starting problems and are one of the main reasons people think they have a "dead battery". Sometimes such problems are difficult to detect with a simple visual inspection.
Here you will use a voltmeter (or multimeter set to voltage) to check the battery terminals for voltage drop so you can understand the status of your battery connections.
First turn off the ignition system. Do this by temporarily disconnecting the ignition coil or removing the fuse, or the fuel pump relay (if necessary, find your vehicle's owner's manual or your vehicle's repair manual to locate the coil or fuse). This will prevent your engine from starting.
Use the red positive wire to touch the positive terminal of the battery and hold. Touch the black wire (negative) of your meter to the terminal of the negative wire that goes onto the battery. Have a helper crank the engine. If your meter registers more than 0.5 volts, you will need to clean or check the physical condition of the terminal and terminals.
Now check the other battery terminal. This time, however, use the black probe of your meter to touch the negative terminal of the battery. Now touch the red probe of your meter to the cable terminal connecting to the same battery terminal. Have your helper start the engine and check the voltage reading on your meter. If it exceeds 0.5 volts, you need to check the battery terminal for damage or clean it.
Checking the density of the electrolyte in the battery (for serviced batteries)
A device for checking the density of electrolyte in a battery is called a hydrometer .
To measure the density of the electrolyte in the battery, it is necessary to place the hydrometer in the filler hole of the battery, use a bulb to draw the electrolyte into the flask so that the float floats freely and take the density reading on the hydrometer scale in accordance with the upper level of the electrolyte.
The density value for a 100% charged battery will depend on the temperature operating conditions of the battery.
Table 1. Determination of electrolyte density for various climatic zones.
Moreover, you should know that a decrease in density by 0.01 g/cm3 from the nominal value corresponds to a battery discharge of 5-6%.
Table 2. Degree of battery discharge at different electrolyte densities.
However, the values given in the table will be correct if you checked the density at an electrolyte temperature of 20-30 ° C. If the temperature differs from this range, then a correction should be added (subtracted) to the measured density value according to the table.
Table 3. Correction to the hydrometer reading when measuring density at different temperatures.
Typically, in car batteries that you can buy in a store, the electrolyte density is 1.27 g/cm3. Let’s say that when checking the density of the electrolyte in the battery, the hydrometer showed a value of 1.22 g/cm3 (that is, the density dropped by 0.05 g/cm3), this means that the battery was discharged by 30% of the nominal value.
In this case, the battery must be charged. After this, if the battery is in good condition, the electrolyte density will be restored to the nominal value. The most important thing is not to let the battery discharge by more than 50%.
It should be noted that its freezing temperature depends on the density of the electrolyte.
Table 4. Freezing point of electrolyte of different densities.
Therefore, the low density of the electrolyte in winter leads to its freezing, rapid loss of battery capacity, and sometimes even to physical deformation and the appearance of cracks.
How to check the “amperage” of a battery with a multimeter?
To determine the current that your battery produces, you will need to create a circuit with a load. Its role is played by any device or equipment that consumes electricity. To take measurements you will need to take the following steps:
- The device is set to ampere measurement mode, and the switch on it is set to alternating current, which is designated by the English letters AC.
- Disconnect the positive terminal of the battery and replace it with the negative wire of the measuring device.
- To the equipment that acts as a load, connect the negative terminal of the battery and the meter probe with a positive charge.
- Depending on the design, look at the displayed number or count it on the instrument scale.
A serviceable and fully charged battery exhibits readings in the range of 12.6–13 V.
The feasibility of checking the battery amperage with a tester
Many motorists also ask whether it is possible to check the battery current. It is safe to say that the voltage and capacity level of the battery are more than enough to correctly assess the performance of the battery and the possibility of its safe operation in the near future.
It is important to remember that it is not practical to check the current indicator on the battery; moreover, with such tests there is a real danger of an accidental short circuit.
How to test a battery with a load fork?
This is the most accurate method to determine the state of charge and the ability of the battery to operate at full load. It is used by professional auto electricians in service centers.
A load fork is a device that combines a voltmeter and a load resistance. Advanced versions of the device are also equipped with an ammeter, which allows you to estimate the load current. The fork operates in two modes:
- battery voltage measurement;
- imitation of starter operation.
Before starting the test, you should turn on the voltmeter mode on the load plug and connect it to the battery. If the device shows less than 12.7 volts, the battery needs to be charged.
| Voltmeter readings under load | >10.2 V | 9.6 V | 9.0 V | 8.4 V | <7.8 V |
| Charge percentage | 100% | 75% | 50% | 25% | 0% |
Battery capacity tests
The concept of battery capacity means how long it can work with optimal output of a certain amount of charge at certain U values. Capacity is measured in ampere-hours, and each battery is usually marked with its nominal capacity. The most common way to check a battery's capacity level is to place a specific load on it.
It would be best to use the load by temporarily unscrewing the car headlight, because the headlight has a power of 35-40 watts that is suitable in all respects. This means that the headlight, when connected to the battery, will take the required half of the current so that you can find out whether the battery capacity is normal. If the headlight goes out quickly, it means that the battery capacity, unfortunately, is not enough.
In order to determine whether the battery capacity is normal, you need to do the following:
- disconnect the battery from the car's alternator;
- connect the headlight load;
- leave the battery in this position , let it work under load for about two minutes;
- disconnect the headlight;
- set the voltage measurement mode on the multimeter ;
- take measurements of indicators.
If the battery is in good condition and has sufficient capacity, U must necessarily exceed 12.4 V. This figure should be remembered. If the voltage of the battery being tested is 12.4 V or less, this is an alarming signal that with such indicators the battery will not work for a long time and may fail at any time.
You can also check to see if the battery capacity is normal using a method called test discharge. This means that the battery needs to be charged and the load must be applied to it in such a way as to provide a current strength during discharge equal to that indicated in the technical data sheet of the battery.
To do this, we carry out the following actions:
- fully charge the battery;
- We carry out the load in accordance with the indicators indicated in its data sheet;
- connect a multimeter to the circuit - it will show the amperage level;
- monitor the multimeter reading and note the time during which the amperage decreases by 50 percent or more;
- compare the data obtained with the current data in the battery data sheet.
If the differences between these indicators are small, the battery is quite suitable for further use, the capacity is in order. If the difference is large, this is a signal that it is either time to charge the battery or replace it if necessary. You cannot directly obtain numbers indicating the battery capacity using a tester.
Reinstalling the battery
After cleaning the case, terminals and tray, reinstall the battery.
- Carefully place it on the tray.
- Attach to tray using clamping mechanism.
- Connect the terminals. This time, start with the positive terminal and connect the negative or ground terminal last.
- After connecting the terminals, spread a thin layer of Vaseline around the top of the terminals and terminal posts. This prevents corrosion from accumulating around the terminals.
Purpose and differences of multimeters
A multimeter is an electrical measuring device that combines several functions. Measuring devices of both household and professional grade are available on sale. The significant difference between these classes lies in the accuracy of the results obtained, which ultimately affects the price of the devices. Household-grade devices allow you to measure various quantities over a wide range of values with low accuracy, while professional testers are more focused on a small group of measurements with a small error.
Based on their operating principle, meters are divided into two types:
You can measure battery parameters with any of these types of devices, but a digital multimeter is more popular among car enthusiasts. This is due to the ease of use and a more visual representation of the measurement result, compared to an analog tester.
The operating principle of an analog tester is based on the conversion of the measured signal into current, followed by its visualization in the form of a needle deflection by a certain amount. A digital device, having microcontrollers in its device, converts the received signal into voltage, and after processing it, displays it on the display in the form of numbers.
Pointer type voltammeter
The main element of this type of device is the electromechanical head. Being made in the form of a frame with an arrow and being under the influence of an alternating magnetic flux, it converts the electrical signal that comes through the measuring probes and elements of the device into a mechanical deflection of the arrow. The strength of this deflection is related to the amount of current detected by the head.
The calculation error of this type of device depends on the sensitivity of the measuring head. The probability of a measurement error with a pointer tester is indicated by a number, for example, 0.1 or 2.0, and is called the accuracy class. Thus, a device with a measurement range from zero to 25 volts and accuracy class 1 will be able to determine the voltage value on a car battery with an error of 0.25 volts. The advantage of the analog type compared to the digital one is its inertia and poor sensitivity to external interference, which allows you to check the battery with a tester with good accuracy.
Digital view meter
The operation of a digital voltage meter is based on the use of an analog-to-digital converter (ADC) in its circuitry. This microcircuit is the core of the device, the quality of which largely determines the error of the result obtained.
In addition, the accuracy class depends on the parameters of the radio components in the device, the quality of the implementation of protection from the external negative influence of electromagnetic fields. The main characteristic of this type of device is its capacity. The higher the bit class, the greater the measurement accuracy will be.
For example, if you use a multimeter to test a car battery with a discharge value of 2, the error in the result will be about 10%. The average value for household class devices when measuring constant voltage is only about 0.3 percent.
An important characteristic of a digital tester is the display capacity. This characteristic indicates how many digits the device can display on the screen. For example, when the bit depth is 3 3/4, this means that the largest value of the measurement value will be 3999. It should be noted here that the accuracy of the multimeter does not depend on the bit depth of the screen, which characterizes the quality of the screen.
Quick battery check
In some cases, car owners have absolutely no time to disconnect the battery from the car, as well as “digging” with the lighting and dashboard. Such car owners determine the battery charge level without removing it, right under the hood.
The process looks like this:
- When the car freezes after turning off the engine, the multimeter is connected to the battery according to the scheme: plus to “+”, minus to “minus”, respectively. It is worth considering that the indicators will have minor deviations. 12.7 Volts is a normal indicator.
- Then the car starts. When the motor starts, the voltage will rise to 14.7 Volts.
- It is recommended to check it under load (external lighting, window heating, medium heater mode). In this case, the norm is 14.6 Volts.
Measuring the voltage of a car battery with a multimeter is a feasible task even for a novice car enthusiast. Not everyone can afford an expensive battery equipped with a special indicator.
A practical and universal option is to measure the battery charge with a multimeter. This device, with a talking prefix “MULTI”, allows you to measure not only voltage, but also current. In addition, the multimeter can be useful for other electrical equipment, including phones, laptops, and screwdrivers. Remember that it is better to purchase such a device from trusted manufacturers in specialized stores.
How to measure current with a multimeter on a battery
This is a question like how to check the amperage of a battery with a multimeter. Load is definitely needed.
It is pointless and even dangerous to measure the current strength on the battery itself.
A headlight lamp can act as a load element. Remember that the load cannot be higher than 120 W.
How to measure battery current with a multimeter:
- Set the meter switch to measure the required current.
- Select the Ampere limit (maximum is better first).
- Connect the positive probe to the battery positive.
- Connect a lamp to the minus gap. That is, the minus from the multimeter should be directed to the lamp, from which the circuit is closed on the battery minus.
- Check the values on the multimeter. Compare them with those indicated on the battery case.
Make sure that the contact of the probe with the battery lasts no longer than two seconds!
We learned how to use a multimeter to test the amps of a car battery. The main thing is to do everything quickly and accurately. And you can do this because you know how to check the current strength on a battery with a multimeter.
The video explains in detail how to check the battery current with a multimeter:
How to clean a car battery
- Cleaning the battery case
You can use a simple procedure to clean the battery case. To do this, you need to prepare a mixture of 8 ounces of warm water and one tablespoon of baking soda. This neutralizes the acid and helps remove dirt from the battery case and terminals.
Wear safety glasses and rubber gloves and, using a soft brush, apply the solution to the top of the battery and the sides of the case. If your battery uses compartment caps (serviceable batteries), do not allow the mixture to seep under the caps and mix with the electrolyte inside.
Wipe with the solution and a clean rag. Continue applying the cleaning solution until you see no signs of buildup.
- Cleaning the Battery Terminals
As with the battery, remove dirt and corrosion from the terminals using baking soda and a water solution.
To make your task easier, pour the mixture into a Styrofoam or similar disposable cup and submerge the battery terminal in it for a minute or two. Next, use a battery compartment cleaning tool to finish removing corrosion from the terminals. Repeat the procedure until you see that both cables are free of corrosion.
- Cleaning the battery compartment
Check the condition of the battery compartment. Make sure there are no screws, cracks, pieces of dirt or signs of corrosion. If necessary, use the same solution to remove dirt and corrosion from the pan.
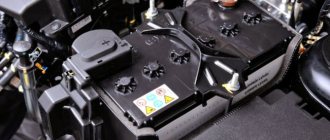
External inspection of the battery
You met the seller and have already walked around the car, seeing how clean and beautiful it is. It's time to look under the hood, you lift the lid and see the usual contents of the engine compartment, the engine and numerous systems that keep the car running.
In most cases, here, in the engine compartment, there is also a battery - a rectangular box with electrolyte inside, to which two wires are connected - positive and negative. These wires go to the distribution block, and from this massive electrolytic “battery” the entire machine and all its systems are powered with electricity.
Even if you don’t understand anything about cars and went for an independent inspection rather as part of a formality, you can still determine by the appearance of the battery what condition it is in.
During an external inspection, attention should be paid mostly to the integrity of the elements, and whether the battery itself and contacts are clean. There are a number of external factors, the presence of which immediately indicates the need to replace or at least clean the battery.
- Dirt on contacts. In order for the battery to work, both contacts connected to it by wiring must be clean. If the contacts are dirty, this indicates that the battery is not new, and dirt will interfere with the correct operation of the contacts.
- Oxidation of the terminals - foreign deposits can be seen on the battery terminals with the naked eye - this is oxidation, which in most cases is associated with electrolyte leakage. Electrolyte is an acid that is found inside the battery. If it spills and gets on the contacts, it can lead to poor battery performance and a reduction in the contact area.
- Cracks on the case - the battery itself should be intact. The plastic box containing the electrolyte must not be damaged. This is also clearly visible without additional equipment and in good lighting.
- Dirt, dust, electrolyte leaks - all this is removed with a rag, and the car should not be allowed to drive with a dirty battery, since the conductive deposit will contribute to its rapid discharge and deterioration of performance.
In addition to the external inspection, you can start the car engine. A cold start will be especially indicative if the engine has not been started for a long time and it is cold outside. If the car starts easily, the battery is in order, but if it does not start or starts with difficulty, the headlights shine dimly, and the instrument panel is also not brightly lit, then the battery should be changed. Or, at least, check it with instruments, which we will discuss below.
How to make a device with your own hands
When the necessary equipment is not available, you can make the device yourself by watching the video. It is necessary to take a voltmeter from ready-made instruments, and the remaining parts are constructed from improvised means. Difficulties will arise when calculating and creating internal resistance, which requires current.
A suitable material is nichrome wire, used to create heating coils in electric stoves. Nichrome elements can be replaced with a metal strip from other heating devices.
For a voltage of 12 V, the current indicator should be within 80-120 Amperes, and the resistance should be 0.1-0.15 Ohms. A device for measuring such resistance is difficult to find. For this reason, the length of one element is selected and the current that it passes is measured. After this, several similar parts are combined.
A homemade device is made sequentially:
- Select a nichrome wire or heating strip and measure the current up to 15 A with a multimeter. The element should pass 10-12 A.
- 10 such parts are connected, receiving a load of 100-120 A. The wire must be twisted securely.
- The resulting element is placed in a suitable housing and fixed in it. If the box is small, then the wire is bent several times so that the turns do not touch each other. The parallel connection must be reliable, which is ensured by insulating cylinders that are installed on the bends.
- The ends of the twist are soldered to the output contacts, and from the outside to the connecting wires.
- Connect a voltmeter.
- Clamps are attached to the ends of the connecting cable, which are then connected to the battery.
When the device is ready, you can take measurements at home.
What methods can you use to check the charge of a car battery when purchasing in a store?
Voltage
A simple test of a battery when purchasing involves measuring the voltage at its terminals. The actual figure allows you to judge the state of charge of the battery. It is quite clear that you only need to take the 90-100% charged version - then you won’t have to get acquainted with the desulfation procedure ahead of time or dispose of the battery after another season due to crumbling active mass.
You can relieve tension both under load and at rest. We offer two types of electrical appliances:
- Load fork. An electrical load simulating the connection of a capacious energy consumer (for example, a starter) for a short time. The case is equipped with a voltmeter.
- Multimeter. A multifunctional device that includes an electronic voltmeter that measures the potential difference without load.
Alternative methods for assessing battery health
When is knowing the number in Volts enough? When a battery that is no more than 6 months old is unpacked before our eyes and an initial voltage measurement is performed. The fact that the car battery is 100% charged confirms the low degree of self-discharge - you can safely take it.
It is useful to supplement voltage measurements with hydrometer readings if the body of the future investment object is covered with dust, and no traces of factory packaging are visible. This must be done because sellers periodically charge such batteries. A voltmeter alone is unable to determine whether the charging was carried out in good faith or whether the battery was only “driven” with high current for an hour.
What you definitely shouldn’t trust are color indicators. This toy is of little use: firstly, it shows the condition of only one can out of 6, and secondly, the white color is actually already critical.
Multimeter indicators
A multimeter is a popular tool not only for motorists. It is used in any area where it is necessary to measure current: voltage, resistance and its strength.
Its versatility is characterized by the fact that the device includes the following:
- Voltmeter.
- Ammeter.
- Ohmmeter.
The device is compact and can be easily carried and stored in a car. Thanks to constant use to check the condition of the battery, it can be maintained in working condition for a long time.
There are several versions of such a device.
When choosing it, it is recommended to pay attention to the following:
- measurements are carried out ranging from 0 to 200 mV, as well as 2 V, 20 V, 200 V, 1000 V.
- DC current can be measured within 2 mA, 20 mA, 200 mA.
- The alternating voltage ranges from 0 to 200 V, 750 V.
- Resistance can be measured from 0 to 200 ohms.
There are more complex versions of the multimeter.
Measuring the internal resistance of a car battery
The impedance value has a particular impact on car batteries. If the vehicle is used actively both in the city and on the highway, rural roads, impedance has a great influence on the battery life. Regular testing allows you to determine when the battery's suitability for operation is nearing the finish line.
Parameter description
Resistance is usually denoted by R. In a car battery, this is the sum of the ohmic and polarization resistances. In turn, ohmic R is composed of resistances that arise in the electrolyte, at the connections of the jars, at the contacts, electrodes, and separators.
Impedance appears in relation to the current inside the battery, whether it is discharging or charging. All battery elements have their own conductivity, which varies.
Related factors
The designs of the batteries and the materials used are different, so the performance is not the same. For example, a positive grid has R 10 thousand times less than that of the lead deposited on it. On the negative grid, the difference is imperceptible.
Electrode manufacturing technology also differs, which affects the performance. These include: quality of material, contacts, design, presence of alloying components.
The R of separators is affected by the thickness and porosity of the material. The resistance of the electrolyte depends on its temperature and concentration.
Resistance measurement
Accurate measurement of internal resistance is impossible without the use of discharge curve graphs. It is affected by battery charge, load, temperature. Car enthusiasts use a simpler method to judge the condition of the power source.
Use a lamp from a headlight, for example a 60 W halogen, and a tester. LED should not be used under any circumstances. The light bulb and multimeter are connected to the battery in series. Record the voltmeter readings. Disconnect the load and look at the voltage, which turns out to be higher.
Compare the readings of the measuring device. Calculation is carried out: if the difference does not exceed 0.02 V, the condition of the battery is good - the impedance is not more than 0.01 Ohm.
They use a voltmeter with a digital display: it is difficult to record accurate readings on a dial gauge.
Experience of car enthusiasts
Driver reviews vary. A small part prefers to have the battery checked in workshops. Others who understand the process and the importance of this parameter for the life of the battery take a few minutes to check regularly.
At the same time, car enthusiasts are advised to pay attention to the following points:
- You should not be blindly guided by absolute indicators taken from specialized literature or the Internet. It is more useful to compare old indicators with new ones.
- There are standards for each battery. They are taken from the instructions or original packaging.
- Regular impedance measurements allow you to monitor changes in the battery. In some cases, it is enough to find and eliminate the cause, in others - this is a signal about the need to replace the battery in the near future.
The parameter is important. If you measure it regularly, it will avoid many problems. This is what most car enthusiasts think, regardless of whether they take measurements themselves or turn to specialists.
Conditions under which battery performance is tested
Before checking a car battery with a multimeter (in order to determine what condition it is in), you will need to carry out preparatory operations. To do this, you must first disconnect the battery terminals and let it stand for about 5-6 hours. Then you need to prepare a complete set of tools used for testing. It includes:
- The multimeter itself with test leads.
- Load fork.
- Halogen lamps (2 pieces).
Upon completion of the preparatory operations, begin the measurements provided for by the battery test program with a multimeter. Depending on the readings obtained, a decision is made on the need for replacement or continued operation of this sample.