A heating element is a water heating device in a washing machine. Under the influence of various factors, it may stop functioning. To extend the life of the device, you need to know how to check the heating element on a washing machine and troubleshoot problems in a timely manner.
Where is
Find out the location of the machine's heating device from the instructions. Depending on the model, it may be located in different places on the device. If the instructions for the car have not been preserved, you can find the element at home yourself:
- The device must be placed on its side. The required element may be at the bottom.
- The location of the heating element is indicated by the large dimensions of the rear panel. To ensure that the device is located at the back of the appliance, the panel can be removed.
- The search for the heating element is also carried out through the drum. To make searching easier, you can use a flashlight.
Please take note
- When you install a new heating element or return the old one to its place, carefully ensure that all connections are absolutely tight. Make sure that the heating element is in the correct mount located at the bottom of the tank. Otherwise, the part will touch the drum during washing. Which, of course, will not have a very good effect on its future performance.
- Do not neglect preventive measures that will help extend the life of the heating element. Once every six months, run the wash in the standard cycle with an empty drum. Instead of washing powder, add a spoon or two of citric acid. This method will remove scale formed during operation. Read more about methods of dealing with scale on heating elements here.
Why does the breakdown occur?
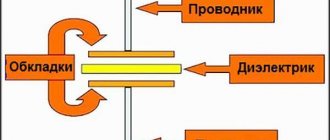
One of the most common causes of heater failure is scale, which occurs due to constant contact with water. The scale layer gradually turns into a heat insulator, preventing heat transfer. If the deposit is not removed in a timely manner, it will destroy the top layer of the heating device, leaving the electric coil exposed.
As a result, the machine will spend more time washing, which leads to increased energy consumption. Stains may appear on the laundry that were not there before washing. The device becomes dangerous for further use due to an increased likelihood of a short circuit.
To avoid damage, it is necessary to check the heating element. The electric heater should be periodically wiped with special descaling agents. It is advisable to control the chemical composition of the water. The greatest danger to the heater is calcium bicarbonate.
How to check the heating element of a washing machine without a device
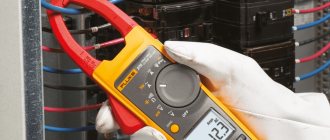
To check the functionality of the water heating element, it is not necessary to remove it. Experts use a tester called a multimeter.
However, if it is impossible to check the heating element of a washing machine with a multimeter, you need to monitor the operation of the device. The machine does not work properly if:
- It takes longer to heat up the water. The speed of the washing process in such cases is reduced.
- Damage appeared on the housing above the heating device. Damage includes darkening, swelling, and cracks.
- After washing, the laundry is cold to the touch. This means that the items were washed in cold water.
- During washing, a short circuit occurs and the running machine generates electric shock.
- A message appeared on the display stating that the water does not warm up during operation. If there is no display, special lights will indicate the malfunction. Washing will proceed as usual.
- The machine does not run the installed programs.
- The door of the operating appliance does not heat up.
- Washed items have a specific smell, but the dirt does not come off.
To find out when diagnostics of the heating element is needed, you need to run the device at full power and pay attention to the operation of the meter. If the rotation of the disk has increased, the element being tested should be considered operational.
Step-by-step instruction
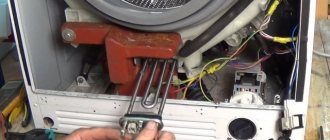
Before removing the heating element from the washing machine, you need to remove the front or rear panel.
To remove it, you must:
- disconnect the SMA from the network;
- turn off the water supply and disconnect the hose;
- remove the powder dispenser tray;
- remove the clamp securing the loading hatch seal;
- push the rubber part inside the drum;
- disconnect the wires from the control panel and the sunroof latch drive;
- Unscrew the screws in the upper and lower parts of the panel;
- lift the part and pull it towards you from the hooks.
After this, it is possible to replace the heating element of the washing machine.
How to remove a heating element from a washing machine
The heating elements in the SMA are secured using a sealing gasket, which expands after it is tightened with a nut. To replace the TEN you need to do the following:
- Disconnect the power wires by removing the terminals from the heater terminals. If a temperature sensor is installed on the element flange, then it is necessary to disconnect it and remove the grounding conductor.
- Unscrew the nut located on the stud in the middle of the flange by 4-5 turns.
- Press the pin into the drum. This will loosen the seal assembly. You don't need to use a hammer for this.
- Remove the heater from the tank. If it was not possible to get the heating element, then you need to move it with rocking movements and then pull it towards you.
There is no need to make excessive efforts to dismantle the element, because The seat can be damaged, and this will lead to a leak. After removing the heating element, you can remove the temperature sensor. It has no fastening, and tightness is achieved by a tight fit in the sealing rubber.
How to check the performance of the heating element
Before replacing the heating element in the washing machine, you need to find out the reason for its breakdown. It is impossible to visually find a defect, because almost the entire surface of the tube is covered with scale. Therefore, the cause of the breakdown is determined using a multimeter. To do this you need:
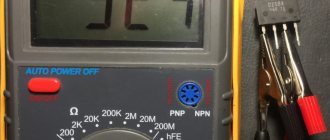
- Move the mode switch to the resistance measurement position in the 200 Ohm range.
- Connect the probes of the device to the heater terminals. For a working element with a power of 2 kW, the conductor resistance is 20-30 Ohms. If the device shows 1, then the spiral has burned out. This is enough to reject the part.
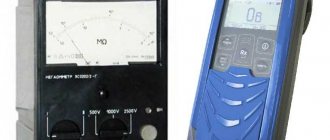
In the case when the multimeter shows the presence of resistance close to normal, check the breakdown on the housing. For this you will need a megohmmeter, because... the tester will not be able to measure exactly this value. The heater insulation resistance value should be more than 500 mOhm. If the device showed the value Riz. 50-100 mOhm, then a leakage current may appear in the element in a hot state. This indicator is a rejection indicator, so the heating element should be changed.
Installing a new
Before installing a working element, it is necessary to carry out the above measurements. If the heater has the required characteristics, it can be installed in its original place. In the case when the heating element has a curved shape, it is positioned so that the main part is closer to the bottom of the tank.
To ensure a tight seal, it is recommended to apply sealant to the surface of the rubber seal. The element must be installed without distortion so that the flange completely covers the hole. The nut pressing the seal is tightened until the heater cannot be moved. After this, the flange should not be sealed further, because it can be squeezed out.
After installing the heating element, install the sensor and connect the wires. The performance of the element and the quality of the assembly are checked by operating the SMA in a mode that provides for heating the water. If everything is done correctly, the machine is assembled and installed in place.
How to call
You can check the serviceability of the electric heater by ringing it with a tester.
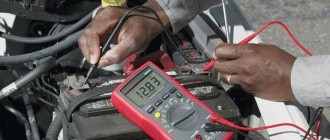
Before testing the heating element, the element must be heated by turning on the machine for 15-20 seconds.
Then you need to disconnect it from the network and disconnect the wiring. The multimeter switch is set to 200 ohms. The probes of the device are applied to the terminals of the device. Possible tester indicators:
- Zero or close to zero. The heater is not suitable for further use due to a short circuit.
- Unit. The heating element needs to be replaced.
- Value close to the calculated indicator. The device is ready for use.
How to change
Repair of household appliances and replacement of non-functional elements should be entrusted to a specialist. When carrying out repair work yourself, you must be careful. To replace the electric heater, the owner of the device should:
- Buy heating element. You need to choose a device that suits the brand of car.
- Disconnect the wires. To avoid mixing up the wires when installing a new element, you should first photograph the fastenings of the old heating element.
- Unscrew the nut located in the middle part of the heating device.
- Disconnect the heater. This must be done by prying up the heating element with a screwdriver, swinging the device from one side to the other.
- Clean the elements adjacent to the electric heater from scale.
- Attach a new heating element using photographs taken in advance.
- Attach the wires.
After this, you need to start the device to check the functioning of the new heater. If the newly attached device comes into contact with the drum, the element is not installed correctly.
Step-by-step instructions for replacing the heating element
We will consider a simple option - the heating element is located behind the drum.
Step 1: Drain any remaining water from the drum. To do this, open the bottom cover on the front panel of the case and remove the plug. Place a low container to collect water, otherwise it will spill on the floor. To drain completely, it is recommended to tilt the washing machine slightly and hold it in this position for several seconds until the liquid drains.
There should be no water left in the machine
Step 2. Place the machine in a free space, provide access to the rear. Unscrew the shield; it is secured with four screws. Remove the part and place it near the wall. Do not throw anything under your feet; all elements of the washing machine, electrical appliances and tools must be in order and in their places.
Remove the back cover to get to the heating element
Step 3. Find the heating element, it is screwed to the bottom of the drum. Has three terminals: phase, neutral and ground
Some models have temperature sensors on the body of the heating element; handle them very carefully, they do not respond well to impact forces
The heating element is usually located below the drum
Step 4. Remove the phase and neutral terminals, unscrew the grounding fixing nut, and remove the contacts connected to it from the screw.
Carefully remove the contacts and unscrew the nut
If the heating element is working properly, then there is no point in disassembling anything further; the cause of the breakdown is different. If you have enough technical knowledge, then you need to look for it in the control and automation system. If you have no experience, call a specialist. To make it easier to make the right decision, let us inform you that the cost of the control unit can be up to 50% of the price of the washing machine. And unqualified intervention in its work in most cases causes complete failure with the impossibility of further recovery. If the heating element is confirmed to be faulty, continue disassembling the machine.
You can check the serviceability of the heating element without removing it from the machine body
Step 5. Unscrew the locknut of the grounding screw, but not all the way, but to the length of the thread. This is done so that when tapping on the nut the thread does not jam. You need to knock until it sinks a little, thus weakening the expansion of the rubber gasket. The fact is that to seal the heating element, an internal plate is used, which, when the nut is tightened, is pressed against the rubber gasket and expands it.
With light blows of a screwdriver, loosen the fixation of the heating element.
Step 6. Using a screwdriver, carefully pry the heater body around the perimeter and slowly tear it off. The rubber has stuck a little, don’t rush, don’t deform the seats.
To pull out the heating element, you need to pry it slightly with a screwdriver
Step 7. Buy a new part from the store. Professionals strongly recommend taking an old heating element with you, this is the only way to guarantee that you won’t make a mistake with your choice. The fact is that manufacturers produce a new heater for each model; it may differ by only a few millimeters in length or width. This gives the right to assign a new series to the washing machine and, accordingly, sell it at a new price. And heating elements are no longer interchangeable.
The new heating element must have identical dimensions
Step 8. Clean the place where the heater is installed from calcium, there will be a lot of it there. Use any available items, check the quality with a flashlight.
The heating element installation site must be thoroughly cleaned
Step 9. Inspect the condition of the sealing rubber seat and, if necessary, remove carbon deposits from the surfaces.
The seal seat must also be clean.
Step 10. Loosen the grounding nut, insert the heating element into place
Pay attention so that it occupies a special niche
Insert a new heating element into the housing
Step 11. Tighten the nut and connect all the wires.
Connect everything in reverse order
Pour some water into the drum and turn on the heat for a few seconds, then turn off the machine. If the heating element is warm and there are no drips, great, screw on the remaining parts and place the unit at the place of use.
Replacing heating element in front position