Requirements
The electrical connection diagram for an air conditioner intended for domestic use has significant differences from the installation procedure for devices for industrial and semi-industrial use. The latter are connected to a three-phase network. Household ones operate on single-phase.
Connecting the air conditioner to the electrical network is done in two main ways:
- By direct connection to the power supply system via an outlet;
- By laying a dedicated line to the electrical panel.
For household air conditioners, the latter method is practically not used. They are usually connected via a socket. Before this, a number of preparatory work is carried out in compliance with the Installation Rules and a number of other regulatory documents. To avoid mistakes, it is worth figuring out how to connect the air conditioner to the electrical network using the chosen method so that the equipment lasts long enough.
Methods for connecting to an existing power line
To connect the air conditioner to an active power line, the wiring is laid along the wall (external) or inside the wall in grooves (internal).
External wiring
When laying external wiring, it must be tightened every half meter with plastic clamps and fixed to the wall with screws.
Advice! To make the new electrical line look aesthetically pleasing, it can be hidden in a cable channel, which is attached to the wall with self-tapping screws or glue.
Internal wiring
To lay the cable for connecting the split system inside the wall, the surface is first tapped to the required depth. Next, the wire is removed into a plastic corrugated pipe, placed in the prepared groove and secured with clamps. If the cable is hidden at a depth of two or more centimeters, the corrugated pipe may not be used. The grooves are plastered with construction plaster.
Important! It is forbidden to lay wires in bundles. The distance between them should be more than 3 mm.
General recommendations
The electrical circuit of an air conditioner for household services differs from the connection of a three-phase device, which is used in large offices for various purposes, business centers, and supermarkets.
It must be remembered that electrical installation is carried out in accordance with the Installation Rules and relevant regulations.
Before connecting the units to the electrical network, you should carefully prepare.
To do this you should:
- carefully read the diagrams and specifications for components and materials of the device;
- inspect the existing electrical supply system, including the location and cross-section of incoming cables;
- test the intended route with a detector for the absence of internal electrical wiring and metal elements of building structures;
- analyze the composition of the walls on the surface or inside of which electrical work will be performed.
Connecting the air conditioning system is impossible if there is old aluminum wiring in the house and there is no grounding.
Direct cable laying must be carried out taking into account the following requirements:
- the distribution box, switch, socket for a household air conditioner are located in an accessible place;
- the socket is installed at a distance of at least 50 cm from the floor and grounded metal elements (batteries, water and heat supply pipes);
- The wire is laid only horizontally and vertically;
- when laying horizontally they recede:
- from the cornice 5-10 cm,
- from the ceiling - 15 cm,
— from the baseboard – 15-20 cm;
- there must be at least 10 cm between the vertically stretched wire and corners, as well as window and door openings;
- laying parallel to gas pipes is carried out at a distance of 1 m from them;
- The electrical wire is protected from heating pipes with insulation.
In addition, the following rules must be observed for connecting devices to the electrical network:
- It is strictly forbidden to connect wires by twisting. Extension is carried out using terminal blocks or bolts;
- It is not allowed to connect a wire made of aluminum and copper due to their different electrical conductivity (for a copper cable this figure is one and a half times higher).
External wiring
If the method of laying on the wall surface is chosen, then the cables are fixed every 50-60 cm with plastic clamps, which in turn are secured to the wall with screws. When using boxes in which the wire is laid, they are secured with glue or screws.
Internal wiring
Cables hidden in the wall are laid in plastic corrugated pipes, having previously made a recess (groove) of the required length. Typically, the corrugated pipe is secured inside the wall with clamps. If the depth of the groove is 2 cm or more, then it is allowed to carry out work without a corrugated pipe.
Wires must not be laid in bunches and at a distance from each other of less than 3 mm.
Air conditioner installation steps
At each stage you will need tools and certain knowledge. Each split system comes with detailed instructions on how to connect the installation. You can look at it like a cheat sheet.
Stage one – electrical connection of the split system. Electrical wiring should always be separate; it is also better to allocate a separate circuit breaker for it in the electrical panel room. Any air conditioner is a fairly powerful device, so there is no 100% guarantee that old electrical wiring will cope.
Installation of an external air conditioner unit
In houses that are more than 20 years old, it is better to immediately change all the wiring, since previously laid wires were not initially designed for increased load.
Stage two – installation of the external unit of the split system. It is necessary to make holes for fixing the metal clamps. If the external unit is planned to be located on an unglazed balcony, then standard bolts are sufficient. If the balcony is closed or there is a desire to attach the device to the wall, then brackets will be needed. All experts note that this fastening device is capable of fixing and reliably holding weight greater than the weight of the air conditioning device. If the living space is on the top floor, the system can be installed on the roof.
If the home is on the ground floor, then it is better to hang it at a height of at least 2 meters and place it in a grid. Otherwise, unscrupulous people may steal it. It is also necessary to install a metal canopy. It will save the device from snow or falling icicles.
There are some points when installing an external unit, it is recommended to pay special attention to them:
- The supporting wall must be sufficiently solid and smooth;
- When installing, it is not advisable to bend the drainage pipes; freon operates through them. Otherwise, the compressor will stop pumping it.
Installation of the indoor unit of the air conditioner
Stage three - installation of the indoor unit of the split system. If the system is mounted on a wall, it is attached to the wall with screws; if it is ceiling-mounted, then you will need to first install the brackets into the wall, then fix the unit. We check the strength of the installation.
The case with a floor-standing indoor unit is the simplest. It does not require additional means of fixation. You just need to choose the right location for it so that it doesn’t blow too much and doesn’t get in the way. After completing all work with communications, it is not advisable to move it, so as not to disrupt the functioning process.
Places where the indoor unit cannot be located:
- Above the heat source, most often a battery. Otherwise, the air conditioning device will constantly function and cool, and therefore may quickly break down. In addition, the heat constantly rising from the thermal fluid means that the plastic casing may melt;
- In a room where work is carried out using devices emitting high-frequency vibrations. They disrupt the work of the processor running in the block;
- Above the bed, table or work area. A strong draft can lead to constant colds;
- In places where air circulation is difficult. The standard distance to any large objects should be at least 3 meters. If the distance is smaller, then the cooled air will be reflected from the obstacle and return back with the same initial temperature;
- If you have decided to connect the split system yourself, then you need to be very careful that the device “stands up” smoothly so that the water located there does not leak out.
Stage four - punching holes in the floor or wall. Immediately before starting the process of connecting the system to the electrical network, you need to make ceiling or wall holes to connect freon tubes and electrical wires.
If there is no desire or opportunity to ditch, then you can disguise the wires under the baseboard or place them in a decorative box.
Stage five - checking the correct connection of the split system using a testing program. To do this, the air conditioning device is switched on to test program mode. While she is checking the condition of the device, you need to carefully listen to extraneous sounds and see if the case is shaking.
Selecting a location
The presence of two or more units of climate control equipment requires a choice of location for each of them. Before starting installation work, you will need accompanying documentation.
Do I need permission to install an air conditioner?
Structurally, the air conditioner is a system with an indoor and outdoor unit, which is mounted on the facade.
Multi-storey building, on the basis of Art. 246 of the Civil Code is common property with the right of disposal by all owners. Installation of equipment without approval is a violation:
- the device makes noise, buzzes, disturbing the peace of the neighbors;
- condensation can damage the façade of the building or get onto the balcony below;
- the overall block blocks the view or view and windows;
- There are risks of wall cracking, wiring shorting and fire.
Based on paragraph 1 of Art. 25 LCD installation of a split system is considered as a reconstruction or re-equipment of the premises. Clause 3.5.8 of Resolution No. 170 states that it is prohibited to install an air conditioner without permission from the management company and neighbors. Consent or refusal can only be obtained after a meeting of the residents of the house.
Important! Residents of private homes can begin installation immediately after purchasing the device.
Permission is required if:
- installation work is carried out on the front part of the high-rise building;
- the user lives in a house that is valuable from a historical and cultural point of view;
- the split system is located above the pedestrian paths;
- There are no special fences on the window opening where the block is located.
Important! The management company does not have the right to remove air conditioners. Art. 330 of the Criminal Code considers such actions as arbitrariness. Dismantling of devices is carried out only by court order.
Choosing a location for the indoor unit
Installation of the internal air conditioner module is carried out with your own hands so that cold air flows do not cause discomfort. It can be placed above the head of the sofa, on the side and behind the workplace. Construction regulations define the order of location of the indoor unit:
- from the structure to the ceiling - at least 15 cm;
- from the module to the right or left wall - at least 30 cm;
- from the block to the floor - 280 cm, but for apartments on the ground floor, the external block is mounted at the same level or lower than the internal one;
- from obstacles to the movement of air flows - no less than 150 cm;
Advice! In a room with a sofa and TV, it is better to place the air conditioner above the sofa.
Where to locate the outdoor unit?
The outdoor module is placed near a window opening or on an open loggia. If the balcony is glazed, the block is placed on a fence with good load-bearing capacity or on the facade. Residents of the 1-2 floors need to determine a place for the outdoor module as far as possible from passers-by. On the 3rd or more floors, it is allowed to place the device under a window or on the side.
In a private house, the outdoor unit is placed on a wall with high load-bearing capacity. On ventilated facades, a special fastening is organized or the block is placed on the plinth.
Determining the distance between blocks
The maximum length of the intermodule route is 6 m; if it is exceeded, additional freon injection will be required. If the external and internal modules are placed at a distance of 1 m, the route should not exceed 5 m. The excess of the system is formed into a ring and placed behind the block.
Interesting to know! Manufacturers indicate different maximum distances between blocks. For Daikin equipment it is 1.5-2.5 m, for Panasonic - 3 m.
Basic mistakes
When connecting a split system, inexperienced users often make mistakes.
- One of the most well-known miscalculations is the laying of a highway with many kinks, often unacceptable. This significantly overloads the compressor and contributes to its rapid breakdown.
- It is prohibited to install the outdoor unit of the air conditioner on a glazed balcony or loggia. During operation, the device requires airflow and natural air movement.
- It is not allowed to install a split system near machines, welding machines or other devices that generate high-frequency electromagnetic waves.
- Blocks should be installed as level as possible. Otherwise, condensation will drain onto the floor of the room.
- It is not allowed to mount equipment above heating appliances or radiators.
On a note! If a draft is detected after installing the device, this is a minor problem. You can change the direction of the air flow by adjusting the position of the vertical and horizontal blinds of the split system.
So, installing an air conditioner and connecting to the network is a complex technical procedure that is best left to professionals. But if the user wants to do it on his own, he first needs to find the necessary tool, and then study the operation scheme. Its detailed description is contained in the operating instructions for the device, which can also be found on the Internet, connecting, for example, via Wi-Fi. In addition, there you can also find many useful videos about installing split systems, including how to connect to a smart home.
What is the procedure for connecting the air conditioner to the electrical network?
It should be borne in mind that if several switches are installed nearby, their performance deteriorates due to poor cooling. In conclusion, I would like to warn all users once again: electricity does not forgive mistakes and inaccuracies, so when connecting yourself, be adequate with your skills, so that later you do not have to worry about extinguishing the wiring and repairing expensive climate control equipment.
In this case, you should be guided by the numbers of terminals and wires. After connecting both units, you should carefully check that the work was done correctly. The air conditioner can operate at different powers, so the circuit breaker should be installed on the connection line and near the outlet.
As already noted, the air conditioner cannot be installed directly above the radiators. This is done directly into the outlet. The procedure for introducing the device into the apartment’s energy system is as follows. Connecting the evaporator In principle, the method for connecting the system modules is identical, with the exception of minor nuances, so we present a detailed method for connecting the internal module, and the external one by analogy with it. In this case, the permissible current can reach 18 A.
What not to do
Let us emphasize what basic requirements exist when installing an air conditioning device in a room:
- do not place the device next to large furniture - it will interfere with the correct movement of air flow
- negative decision - the location of the air conditioner is connected with the localization plane of a large number of people
- cold air should not be directed directly at a person - this will provoke the occurrence of colds
- You should not install the device above constantly operating heating appliances - it will wear out, which will negatively affect its service life
- The device also cannot be mounted in places with high-frequency operating devices - the commands and settings of the processor responsible for the operation of the cooling system may be lost
- do not install the device in areas with a difficult air circulation system, otherwise the required air temperature in the room will not be maintained: pushing off from an artificial obstacle, the air will return to the air conditioner, the automation of which will decide that the necessary thermal conditions have been achieved and will simply turn off the device
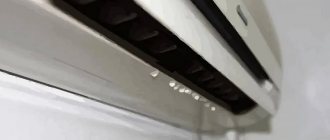
- The indoor unit of the climate control unit should be installed as level as possible so that the condensate flows through the tube into the street and does not drip onto the floor of the apartment
- if there is a canopy over the external structure, you should make sure that it is not an obstacle to the removal of exhaust air from the system
In general, there are three basic schemes for introducing an air conditioner into the electrical network. Which one to choose should be decided situationally, based on the living conditions of a particular room.
Please note that installing the device yourself and connecting it to power may negatively affect the functioning of the entire system. Sometimes it is better to spend a small amount and invite a specialist to at least consult with him about the installation process.
Guided by the recommendations given in the article, you can carry out competent installation of a climate control system in a residential area, correctly connect it to the electrical network, and also extend its service life for many years.
Do-it-yourself connection and connection of air conditioner interconnect cables
After installing the air conditioner, it is necessary to lay an inter-unit cable from the indoor unit to the outdoor one, and stretch another wire from the indoor unit to the electrical system terminals. The interblock cable is mainly used with 4-5 cores of different colors to prevent errors in connecting both blocks. The cross section is selected 2.5 mm2.
The essence of the connection in general terms is as follows:
- remove the front panel and the protective cover of the unit;
- stretch the cable and place it on the side of the module;
- strip the ends of the wires, insert into the terminals and tighten with screws;
- fix the cable at the outlet of the unit;
- close the module with the lid.
After connecting both units, you should carefully check that the work was done correctly. Next comes testing of the assembled circuit and a short-term start-up of the system.
Otherwise, the connection diagram for the air conditioner to the household electrical network is individual for each model, as is the case with powerful three-phase split systems. In this regard, connection details should be specified in the attached instructions.
Safety requirements
When installing and connecting the air conditioner to the electrical network, you must follow safety rules. It is especially important to take them into account when choosing a socket and cable.
Important! The desire to save on specialist services or materials can result in equipment failure or fire.
Cable Requirements
To understand which wire is needed to connect the split system, you need to refer to the user manual. It is very important to choose a cable recommended by the manufacturer itself. Usually, to connect household air conditioners, wires with a cross-section of 1.5 to 2.5 mm2 and a current strength of up to 18 amperes are sufficient - if the distance from the electrical panel to the equipment is up to 10 meters, a cable with a cross-section of 1.5 mm2 is sufficient, otherwise the thickness of the wire needs to be increased .
To make the connection reliable and safe, the cable must be copper. If the connection is single-phase, a three-wire wire is required, and for a three-phase connection, five wires are required.
Important! The wires must pass a meter or more from the heating or gas supply pipes.
Socket Requirements
There are several requirements for an outlet that must be met.
- A high-quality outlet must have grounding or a differentiated relay, and also fully comply with the requirements drawn up by the manufacturer and set out in the split system operating manual.
- The wiring that goes to the outlet must be copper. If an aluminum cable is installed, it must be replaced with the required one, taking into account the correct cross-section.
- The socket must be connected to the panel via a circuit breaker.
- All connection work must be carried out by a specialist, otherwise the manufacturer may refuse warranty service. If the user does everything independently, it is necessary to act in accordance with the requirements and very carefully.
What you need for self-installation
You probably know how much it costs to install an air conditioner by specialists. When asked where such prices come from, since the work only lasts 3 hours, they answer that the equipment is very expensive and its depreciation makes up a significant portion of the cost. This may be true, but most of this equipment may already be on the farm. The exception is a vacuum pump, but many teams do without it, since a normal one really costs a lot, and a bad one is of no use.
During installation, it is important to ensure that the blocks are installed horizontally. This requires a good construction level
Equipment
So, to install an air conditioner with your own hands you will need the following equipment:
- A hammer drill to make a hole in the outer wall into which communications are laid connecting the indoor and outdoor units.
- Drill for installing fasteners with a set of drills of different diameters.
- A pipe cutter for cutting copper pipes and a rimmer for removing burrs (you can get by with a file/nut file and sandpaper).
- Flaring machine for copper pipes.
Device for flaring pipes
For an ideal installation, a vacuum pump is needed, but usually there is nowhere to get one and on routes up to 6 meters they can do without it.
Materials
To connect and install two split system units you will need the following consumables:
- Cable for connecting power and connecting blocks. The brand and parameters of the cable depend on the manufacturer and are usually indicated in the passport in the installation instructions. Typically this is a 4-core cable with a cross-section of 2 mm2 or 2.5 mm2. The cable length is equal to the length of the route with a small margin.
- Copper thick-walled seamless pipes (not water pipes, but special ones for cooling and air conditioning systems). Pipes will need two diameters - larger and smaller. Specific numbers will be indicated in the manual, the length of each segment is equal to the length of the route plus 20-30 cm for reserve. Once again, please note that copper pipes are not for water supply, but for the refrigeration industry. They contain a different type of copper - softer, which will flare well and can provide the required tightness. Copper tubes must be transported and stored with capped edges to prevent dust from getting into them. It is very important.
Copper pipes need special, thick-walled, seamless soft copper pipes - Insulation for pipes made of technical rubber. Available in dark gray or black. The color does not affect the quality; it is supplied in two-meter lengths. The required length is equal to the length of the route. You need insulation for both pipe diameters - larger and smaller.
- Drainage tube. Experts advise installing a special corrugated hose with a plastic spiral inside. When installing it yourself, it is often replaced with a polypropylene pipe. The length of the drainage tube is the length of the route plus 80 cm.
- Two L-shaped brackets for mounting the outdoor unit. Their size must correspond to the dimensions of the block, and the load-bearing capacity must exceed its weight by 4-5 times. This reserve is necessary to compensate for wind and snow loads. It is advisable to buy them from companies that sell components for air conditioners. Regular brackets may not be reliable.
Brackets for air conditioners must withstand a heavy load - 3-4 times the weight of the outdoor unit - Bolts, anchors, dowels. The type, dimensions and quantity depend on the type of brackets and mounting plate for the indoor unit, as well as the type of walls on which the air conditioner is mounted.
- Plastic box 60*80 cm - so that the laid communications can be covered.
That's all you need to install the air conditioner yourself.
Interblock communications how to do
A hole in the wall for the passage of communications is drilled using a hammer drill with a drill with a diameter of 4-5 cm. If the interblock route includes a drainage pipe for condensate removal, then the channel must be made with a slope (5-10 degrees towards the street). It is advisable to hide the section of the route from the indoor unit to the point where it enters the wall in the wall. When gating, a lot of dust is generated, so if renovations have already been made in the room, then it is better to lay the route outside, subsequently covering it with a decorative box.
Interblock communications can be hidden in a decorative plastic casing
The inter-unit communication route includes copper freon pipes, power supply and equipment control wires, as well as a drainage pipeline (according to the rules, condensate from the indoor unit must be drained into the sewer system, but many simply drain it outside). The required length of wiring and pipelines is determined by measuring the total length of the route (plus a small margin of 30-50 cm).
To cut copper pipes, you must use a pipe cutter, not a grinder or a hacksaw, to avoid the formation of sawdust, which can subsequently lead to breakdown of the air conditioner. Before installation, the pipelines are placed in a heat-insulating shell; to prevent debris from entering, the pipeline openings are closed with plastic plugs. All components of the route are laid together, rewound with vinyl tape, after which the route is installed in place.
After laying the interblock communications, they begin to connect the wires and the freon line. The installation instructions for the air conditioner must contain a wiring diagram that must be followed during operation.
The length of the tubes is adjusted (we cut off the required size), then it is necessary to remove the burrs (we remove the chamfer using a reamer). After threading the nut, each edge of the tubes is flared by rolling. Then the edges are connected to the fittings of the indoor and outdoor units, tightening the nuts with a torque wrench (the connections must be absolutely tight).
After checking the tightness, air is removed from the line using a vacuum pump; a manometric manifold makes it possible to control the pressure
Having finished connecting the route, check the tightness of the line and “vacuum” it (remove moisture and air) using a vacuum pump. To do this, a vacuum pump is connected to the service port of the outdoor unit through a manometric manifold, which, by pumping air out of the system, creates a vacuum in it. This process lasts about 20 minutes (depending on the volume of the circuit). After turning off the pump, observe the change in pressure for half an hour; if the pressure gauge needle does not deviate, then the system is sealed. Only after a thorough check of the tightness is it possible to open the taps of the outdoor unit and fill the circuit with freon
Attention, a freon leak can cause a compressor breakdown, but more important is the extremely harmful effect of freon on the human body
So, the system is assembled and filled with refrigerant, all that remains is to connect the air conditioner to the electrical network and check its operation. The connection diagram for the air conditioner is simple; in most household split systems, the power supply is connected to the indoor unit; to do this, you just need to connect an outlet to it.
Now you have a general idea of how to install an air conditioner yourself. We were talking about installing a split system as the most efficient type of household air conditioners. The video instructions below will help you figure out how to install an air conditioner.
Installation of a mobile air conditioner does not require the intervention of highly qualified specialists: you just need to place the device within 2 m from the window (to remove hot air), and then connect it to the network.
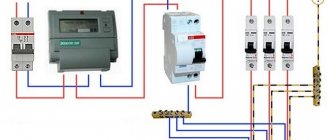
Connecting the air conditioning system
- the connection point is connected directly to the junction box. In this situation, they do without a socket and plug. But with this connection method, it should be taken into account that the electrical wiring used must withstand the load during the simultaneous operation of all household devices connected to it. The distribution panel is additionally equipped with a system that controls automatic shutdown in case of overload;
- If an air conditioning device is installed during general repair work, a closed structure is most often used during installation. A special channel is installed in the wall. It houses the cable. One end is connected to the distribution panel, and the other is secured to the outlet terminal. At the final stage, the channel is sealed. At the same time, the interior of the room does not deteriorate. The wiring is not influenced by external negative factors;
- Installation of the socket under the air conditioner can be done in an open way. This method is used if the repairs have already been completed and residents do not want to further damage the wall. One of the ends of the wiring is connected to the junction box. A socket is connected to the other end. The cable is located on the surface of the wall covering. It is placed in a decorative box.
What cable is needed to connect a split system?
The wire for the air conditioner must be made of electrical copper and three-wire (phase, neutral, protection). For low-power split systems less than 3 kW, a cross-section of 1.5 mm2 is sufficient; for a power of 3-5 kW, a cross-section of 2.5 mm2 is required. Air conditioning devices up to 8 kW are connected with a 4 mm cable.
Reliable power cable brand VVG, which has standard PVC insulation, is widely used. Its service life reaches 30 years. The marking is read using special symbols. The first two letters “B” stand for external and internal insulation made of polyvinyl chloride. "G" denotes the absence of armor.
The VVG cable under the air conditioner must be laid in such a way that it ensures not only safety, but also aesthetics. For communications hidden in the wall, the VVG-P flat cable is convenient. In walls covered with plasterboard, the wire is laid in a corrugated pipe. In this case, it is better to use VVG ng, which ensures stable non-flammability of the shell.
What kind of socket is needed for an air conditioner?
The main selection parameter is the rated load when connecting.
It is recommended to buy a model with a power reserve of at least 10%. Rated voltage 220 V, 16 A. According to the installation method, models can be external, overhead or hidden. The first ones are mounted on the wall surface. They are rarely used if it is not possible to make grooves. Overheads are similar in design, but are designed to connect to wiring coming out of the wall. Can be used as temporary or when it is impossible to form a recess for hidden installation.
Hidden - the most common models. Most of the body is located in a wall niche, the front part protrudes slightly flush. Installation is more complicated than the two described above, but these models have a better design and fit into the interior of an office or apartment.
Additional characteristics:
- must be connected to grounding;
- protection class – IP54;
- connection type – F or C.
The last parameter depends on the design of the plug (plug). If the air conditioner was produced for the countries of America, Asia, Great Britain or Switzerland, it is recommended to replace the plug with a standard European one. An alternative is to purchase adapters for your specific model.
Type “C” models are gradually going out of sale because they do not have a grounding function. To power a split unit, you need to buy “F” type models.
Installing an outlet
For high-power air cooling systems, it is recommended to purchase Euro sockets. After checking the maximum load on the outlet and the presence of a device for grounding it, you can proceed to the actual installation. Where to place the outlet for the air conditioner, and how to do it correctly?
The connection is made through an automatic switch. When choosing it, you need to take into account the starting current. After installation, the socket is checked for correct connection of air-conditioned systems. If the equipment does not work, this means that the outlet is installed incorrectly or is defective.
The mechanism for introducing the device into an existing power system
The specifics of how to connect an air conditioner to the electrical network have its own technical features.
The best solution to this problem is to connect a temperature-regulating device to a separate machine in the control panel. The amperage of the latter is selected based on the technical characteristics of the equipment, calculated using the following formula: the power of the air conditioner is divided by 220V voltage, the resulting number is increased by 30% (as a reserve).
Before you carry out the procedure for connecting the cooling system, you should correctly select the required wire cross-section. This is done this way:
- for current less than 18A, the cross-section should be 1.5 mm2
- 18-25A – 2.5mm2.
The procedure for introducing the device into the apartment’s energy system is as follows. The power line itself is drawn as close as possible from the distributor to the air conditioner. You should take care of the safety of others by laying wires either through a deep recess in the wall or by constructing a protective box. This will prevent unauthorized people from accessing bare, unprotected wires. The cable is secured using special clamps. In addition to the protective option, the box also performs an aesthetic function - it does not allow the prying eye to notice the wires.
The air conditioner housing is equipped with colored wires brought out from the outside, which are connected to the corresponding terminals.
It is best to install the device during repair work. The bottom line is that it is at this time that installers are required to ditch the wall in order to lay communication lines. In the apartment, the unit is placed in such a way that the cooled air is evenly distributed throughout the room.
Any kind of split system is designed from two blocks:
- external (attached to the wall from the outside)
- internal (located in the room itself)
The installation of the system is carried out in the following natural order:
- it is necessary to make a hole in the wall through which the condensate formed during the air cooling process will drain
- the external unit is securely fixed using brackets on the street part of the house
- the indoor unit is installed in the apartment
- the freon line connects both parts of the device to each other
- laying electrical wires
- the pipe with freon should be evacuated using a pump in order to reduce the overall load on the motor, as well as remove excess air from the system
Do I need a circuit breaker or RCD?
To understand the essence of the issue, you need to understand in detail the purpose of these protective devices:
- Regulatory regulations for design and construction, as well as PUE and GOST R 50571.8 states: connecting an RCD depends on the danger of electric shock and the type of device plugged into the outlet. It follows that not all sockets for air conditioning are connected via an RCD.
- These RCDs are installed to protect people from electric shock when the insulation is poor. But all the boxes of split system modules are made of plastic, that is, if a person directly touches the body, he cannot be harmed.
- The peculiarity of residual current devices is that they cannot protect a person from a short circuit: the RCD simply does not have time to turn off. After all, from the laws of physics it is known that the current speed in a conductor is 300 thousand km/sec, and the response time of any protective device, including an RCD, is 0.02-0.03 seconds.
- A circuit breaker is a protective device for wires that are selected according to the power of the equipment. And in the event of increased load on the network or a short circuit, the machine is triggered and saves one or another device from overheating and failure.
From all of the above, we can conclude that installing an RCD for climate control equipment is not so important, but circuit breakers for protection must be installed.
Flaring of copper tubes
We move on to the stage of preparing the tubes.
Error No. 5 You can cut them only with a special pipe cutter, no hacksaws or grinders!
When making a cut, it is necessary to hold the end of the copper pipe strictly downward in order to prevent any chips from getting inside.
The ends are processed with a rimmer.
Use the rimmer carefully to avoid scratching the skirt. The quality of rolling is one of the most important aspects in installing an air conditioner.
Flaring is carried out using a special tool with an eccentric. Don't forget to put the connecting nut on the tube before this step!
The width of the flare should be such that the connection eventually fits freely and unhindered into the nut.
The height of installation of the tube in the rolling clamp is strictly regulated.
The simplest and most proven old-fashioned way to determine the quality of rolling, at least at the initial stage, is to see your reflection in the “skirt”.
Flaring of the pipes of the outdoor unit will have to be done outdoors on weight. Otherwise, the line simply will not fit through the hole.
Error No. 7 Please note - if the installation does not take place on a hot, warm day, then when bringing copper pipes home from the street, close their ends and be sure to wait time for the copper to reach room temperature.
If you bring them in cold and open, then due to the dew point effect, condensation will form inside the tube, which, on a poorly evacuated air conditioner, can lead to dire consequences.
Connecting blocks
In general, there are no special secrets here. We connect the communications stretched through the hole in the wall to the appropriate connectors. There are no problems with connecting the cable - you connect wires of the same color to the terminals that are already connected to them. In this case, you definitely can’t go wrong.
If the height difference in the installation of blocks exceeds 5 meters, it is necessary to make a loop to catch the oil (we lay copper pipes in this way) dissolved in freon. If the difference is lower, we do not make any loops.
Laying a route between the indoor and outdoor units of the split system
Drainage
There are two ways to drain drainage from a split system - into the sewer or just outside, outside the window. The second method is more common among us, although it is not very correct.
This is the drainage outlet of the indoor unit (at hand)
Connecting the drainage tube is also easy. A corrugated hose is easily pulled onto the outlet of the drainage system of the indoor unit (a tube with a plastic tip at the bottom of the unit). To keep it securely, you can tighten the connection with a clamp.
The same applies to drainage from the outdoor unit. Its exit is at the bottom. Often they leave everything as is, and the water just drips down, but it’s probably better to also put on a drainage hose and remove moisture from the walls.
Outdoor unit drainage
If you are using a polymer pipe rather than a hose, you will need to select an adapter that will allow you to connect the air conditioner outlet and the pipe. You will have to look on the spot, because situations are different.
When laying the drainage pipe, it is better to avoid sharp turns and certainly not allow sagging - condensation will accumulate in these places, which is not at all good. As has been said more than once, the tube is laid out with a slope. The optimal is 3 mm per 1 meter, the minimum is 1 mm per meter. Throughout its entire length it is fixed to the wall, at least every meter.
Freon circulation system
It is somewhat more difficult to connect copper pipes. They are laid out carefully on the walls, avoiding kinks and creases. For bending, it is better to use a pipe bender, but you can get by with a spring bender. In this case, sharp turns should also be avoided, but in order not to bend the tubes.
The ports on the outdoor unit look like this. It's the same on the inside.
From the beginning we connect the tubes in the indoor unit. We unscrew the nuts from the ports on it. As the nuts are loosened, a hissing sound is heard. This is nitrogen coming out. This is normal - nitrogen was pumped in at the factory so that the insides do not oxidize. When the hissing stops, take out the plugs, remove the nut, put it on the tube, and then begin rolling.
Rolling
First, remove the plugs from the pipes and check the edge. It should be smooth, round, without burrs. If the cross-section becomes not round during cutting, use a calibrator. This is a small device that can be found in any store. It is inserted into the pipe, scrolled, leveling the cross-section.
The edges of the tubes are carefully aligned over a distance of 5 cm, after which the edges are flared so that they can be connected to the inlet/outlet of the blocks, creating a closed system. The correct execution of this part of the installation is very important, since the freon circulation system must be sealed. Then you will not need to refill the air conditioner soon.
Flaring copper pipes for air conditioner installation
When flaring, hold the pipe with the hole facing down. Again, so that copper particles do not get inside, but spill out onto the floor. It is clamped in the holder so that 2 mm sticks out. Exactly like that, no more, no less. We clamp the tube, install a flaring cone, and tighten it, applying considerable effort (the tube is thick-walled). Flaring is complete when the cone goes no further. We repeat the operation on the other side, then with the other tube.
This should be the result
If you haven’t rolled pipes before, it’s better to practice on unnecessary pieces. The edge should be smooth, with a clear continuous border.
Port connection
Connect the flared edge of the pipe to the corresponding outlet and tighten the nut. There is no need to use any additional gaskets, sealants, or the like (prohibited). This is why they take special tubes made of high-quality copper so that they provide sealing without additional means.
The principle of connecting a copper tube to an air conditioner port
You need to make a serious effort - about 60-70 kg. Only in this case will the copper flatten out, crimp the fitting, and the connection will become almost monolithic and completely airtight.
The same operation is repeated with all four outputs.
Connecting freon pipes
We move on to the stage of connecting communications.
Connect the flared tubes to the indoor unit of the air conditioner using adjustable wrenches.
If you have a torque wrench, it is better to use it.
Here are the recommended tightening torques for freon tubes of various diameters:
- 1/4 – 16-20Nm
- 3/8 – 35-45Nm
- 1/2 – 45-55Nm
Next, take the interconnect cable and twist it all into a single unit with the freon line using reinforced tape or vinyl tape.
Do not forget to stretch the insulation of the required diameter onto the copper tubes.
To prevent dirt from accidentally getting inside the tube, wrap its ends with electrical tape.
Error No. 8 Under no circumstances should the thermal insulation of the tubes be left unprotected.
Otherwise, from the street under the influence of UV rays, within several seasons it all turns into dust.
If your thermoflex is lightfast and not afraid of the sun, then think about the birds. Crows peck very well and take away such material for their nests.
Error No. 9 Also, do not leave any area indoors without insulation. Especially the junction points.
Condensation will gradually form here and eventually a neat trickle of water will appear on your wallpaper.
The line itself, wrapped with tape, is hidden inside the room in a plastic box.
However, if you have a short area and there are old wallpapers left, then instead of using a box, the highway can be covered with them. The result will be an almost invisible picture.
Next, pass the line through the through hole to the outside.
Connecting the air conditioner wiring
Depending on the power of the air conditioner, it can be built into the existing electrical network or a separate line can be connected to the air conditioner. It is imperative to install a machine, regardless of whether it is a separate line or a nearby outlet. Wires can be laid together with copper tubes in grooves or decorative boxes.
You need to start by determining exactly how the air conditioner will be connected to the electrical network at home.
There are only two options:
- connecting the air conditioner to the existing electrical network, that is, to the nearest outlet.
- connecting the air conditioner to a separate power line, which is connected to a separate machine.
You can connect to existing wiring in the location closest to the air conditioner if:
- This is a low power air conditioner
- is this a window or mobile air conditioner?
- at high electrical power of the network
- if the air conditioner is installed temporarily
- if on the same power supply line with the air conditioner there is no: washing machine, electric kettle, water heater, electric stove and other energy-intensive appliances
It is strictly forbidden to connect a split system to the existing network of a house or apartment if:
- electrical wires are made of aluminum
- electrical wires have a low cross-sectional area
- no grounding or protection
- Wiring is worn out or damaged
If the air conditioner is connected to the nearest outlet, the network must be equipped with an RCD and differential. automatic - the air conditioner consumes a lot of electricity over a long period of time. When connecting the air conditioner to the network, be sure to install a 20A or higher circuit breaker at the point where it is turned on.
A separate power supply line is a more preferable option for connecting air conditioners. This will protect the existing network and unit from overloads and voltage fluctuations. A separate line will allow the current to be supplied directly to the air conditioner, therefore this does not affect its location.
Drainage
Please note that the drainage hose must be located below the freon line.
Connect the air conditioner drain hoses.
For extensions, many use a regular metal-plastic pipe d-16mm. The factory drain tube is flared and metal-plastic is inserted into it, sealing the connection at the top with electrical tape.
However, over time, a fungus may form inside the metal-plastic material, which will not allow the water to drain away quickly enough.
Therefore, other installers use only corrugated pipes as drainage.
In addition, it is the corrugated drainage that allows you to connect directly to the bath without additional connections.
How to connect the air conditioner correctly
How to connect an air conditioner
When users ask this question, they may have two different meanings in mind:
- How to connect an air conditioner or how to connect split system units to each other;
- How to connect an air conditioner to the mains.
You need to know that there is an “interconnect” connection of wires and a “power” connection to the device. In this article we will examine both of these issues.
Answer to the first question:
In addition to the fact that the blocks need to be correctly positioned and secured, it is also necessary to correctly connect them to each other. In general terms, for a split system to work you need:
- Place the drainage where required (most often to the street, very rarely to the sewer). The indoor unit has a drainage outlet that needs to be “built up” and brought outside along with the main communications;
- Connect power to the desired unit (this will answer the second question);
- Connect two blocks with communications. Let's look at this in more detail below.
What communications are meant and what specifically needs to be connected:
- thin copper tube (in thermoflex);
- thick copper tube (in thermoflex);
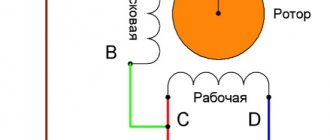
- interconnect cable. Most often this is a five-core cable. The essence of its connection is that the wires to the external unit are connected to the same terminals as to the internal unit. Usually the instructions for the air conditioner contain a detailed description. The figure below shows the connection of the wires of one air conditioner;
- Rarely does the air conditioner come with an additional interconnect (two-core) wire. It will also need to be connected accordingly.
Answer to the second question:
Connecting the air conditioner to the mains
To finish with the indoor unit, let's move on to connecting the power wires.
Having opened the front cover of the indoor unit, unscrew the plastic plug to connect the cable.
Having inserted the cable, connect it according to the electrical diagram. To do this, look for the following markings on the terminal block:
- L-phase
- N – zero
- grounding icon
Check on the power cable where you have phase and zero and connect the corresponding ends to your terminals.
When connecting a low-power air conditioner (up to 2.5 kW) directly from the switchboard without an outlet, you must have a three-core cable VVGng-Ls 3 * 2.5 mm2 in the groove.
A 16A circuit breaker is installed in the panel.
With a low-power condenser up to 1 kW, you can, of course, use a section of 1.5 mm2 + a 10A automatic, but 2.5 mm2 is a more universal option and will allow you to easily change the split system with a higher power in the future.
If the air conditioner will be connected through an existing socket, then use a wire with a 3*2.5mm2 PVA plug.
There is also nothing complicated about connecting the indoor and outdoor units. Here, as a rule, a 4*2.5mm2 or 5*2.5mm2 cable is used. The terminal markings on these blocks are the same.
Accordingly, throw a cable between them (not the PVS wire, but the VVGng cable!) and connect the wires of the same color to terminals L1 on the internal unit and L1 on the external one, N on the internal one and N on the external one, etc. Just follow the connection diagram and labels.
Sometimes the air conditioner itself in the room is powered not from the outlet, but from the outdoor unit (most often with inverter models). In this case, the exterior will have several more terminals.
This is phase-zero-ground. Then you lay the power cable from the outlet or diffavtomat in the switchboard outside, and not to the indoor unit.
Connecting the freon route pipes from the outside is similar to the room connection.
Power Line Requirement
Requirements for a separate power supply line:
- availability of a machine on the line
- presence of grounding
- only copper cables
- wire cross-section from 3 X 2.5 and above
It is also necessary to conduct power supply from the internal unit of the air conditioner to the external one. if possible, the cable can be laid together with the freon interconnect route.
When connecting the air conditioner, you must follow the operating instructions, which, among other things, indicate exactly how to connect the electrical wires. The instructions also provide a detailed wiring diagram for this specific model.
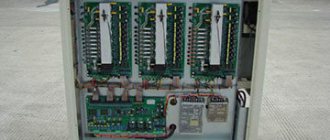
The second solution to obtain information for installing a specific air conditioner is the electrical diagram presented on the inside of the cover of the air conditioner units, or on the units themselves. It details how it is necessary to connect the air conditioner units to each other and how to connect the split system to the existing electrical network.
Let's look at the most common sequence for connecting a home air conditioner.
We connect the power wire to the mounting block. In the air conditioner mounting block, connect the power wire strictly according to the diagram on the cover.
The black wire that comes from the machine is connected to terminal L
Blue wire connects to terminal N
The yellow-green wire is connected to the ground of the air conditioner
The connection of the outdoor unit must be carried out following the user manual or the diagram located on the air conditioner. The split system units are connected to each other using a power cable with a cross-section no less than that indicated on the cover.
The cross-section of wires recommended for use with air conditioner power up to 4.6 kW is 3 X 2.5. Install a 20A machine. To connect the air conditioner, you must use only copper cables.
Carry out the electrical installation slowly and strictly adhere to the diagram. Lay electrical cables in grooves and decorative boxes, not openly; use a corrugated pipe of a suitable diameter. This will allow you to remove or replace the wires if necessary. If you place the drainage together with the cable, do not neglect to hide the cable in a corrugated tube.
Air conditioner vacuumization
But for the next stage of work you will need a vacuum pump. It is necessary for vacuum drying of the freon line.
Mistake No. 10 You can never guarantee that all the moisture will simply be driven out by the freon itself. The air contains this moisture. Without normal vacuumization, sooner or later your compressor will fail.
If you do not bleed the air, the pressure in the system will be affected (it will rise). In this case, the compressor’s performance may drop by about 30-35%, and it will operate under constant load.
And the moisture contained in the air affects the rapid decomposition of oil and an increase in its acidity level.
This further leads to two consequences:
- destruction of the varnish insulation of the windings on the electric motor by the acidic environment and its failure
- gradual “washing out” of copper from the tubes and its entry onto the working surface of the compressor with a decrease in gaps
Therefore, if the invited “specialist” came without a vacuum pump, then know that very soon you will see him again. And you will meet him very often.
The operating time of the vacuum pump depends on the length of the line. The minimum length is 2m. If you get less, then sooner or later the oil from the compressor will definitely get into the evaporator and your air conditioner will not work for a long time.
For a standard short section, vacuumization time is from 15 to 20 minutes. It is counted after the direct creation of a vacuum (reaching a pressure of 5 torr). This can be checked on the pressure gauge manifold, or heard by the changed sound of the pump.
When the sound almost disappears, start counting the time from that moment.
Requirements to be followed
Additional requirements for the procedure are:
- grounding the existing electrical panel
- The power line must be equipped with a circuit breaker to block overload
- the connected wiring must be made only of copper and have a diameter of 3x2.5 mm
Below, as an example, we will look at how to connect an air conditioner to a three-phase power supply network at home.
At the very beginning, you should install a machine specially purchased for this purpose in the panel. A black or brown wire should be connected to its output terminal. We connect the blue branch to the 0 bus of the electrical distributor. The yellow wire is connected to the system grounding element (if available).
If there is no possibility of grounding, in order to protect a person from electric shock, it is necessary to install a differential relay.
You can independently connect the air conditioner to the power supply by connecting the three-color wires of its indoor unit to the corresponding terminals.
For an external device, the connection diagram is identical to that contained in the instructions supplied with the device. The output circuit breaker in the panel must withstand a load of at least 20 A.
A special corrugated tube is what you need for proper wiring installation.
Checking pressure and sealing
Before pumping freon, be sure to check the drainage. To do this, having removed the filter, pour clean water onto the evaporator of the indoor unit, as if simulating the formation of condensation.
If the drainage is done correctly, the water will flow freely through the tube and will not overflow over the edge of the inner pan.
It is also advisable to check the pressure in the system before opening the freon line ports. The manufacturer, as a rule, fills 5 meters of refrigerant along the route, and reports this on the nameplate of the outdoor unit.
However, there are also half-empty copies (they save freon).
Next, the tightness of all connections is checked. Superprofessionals do this with nitrogen at a pressure of 38 bar at a reasonable price. But are you ready to pay money for such quality?
In the standard version, after disconnecting the vacuum pump, simply release a certain amount of refrigerant into the line (5-7 bar) and remember the pressure value.
Wait 20 minutes and check if the readings have changed. If the result is positive, using hexagons, the service taps of the air conditioner are fully opened and all the freon is released into the line.
Next, apply voltage to the air conditioner and test it in all modes. When cooling, measure the surface temperature of the evaporator with a pyrometer, or preferably a contact thermometer.
After reaching the operating mode, it should be at least +6C. If the temperature is higher, additional freon charging may be required.
In this case, a complete refill of the system is used more, rather than just refilling it, due to the complexity of the process.
If all installation stages are completed without any comments, you can enjoy the coolness and assume that your air conditioner is installed correctly.
Refrigeration circuit diagram
Below is a diagram of the air conditioner refrigeration circuit.
The diagram was taken not from a textbook, but from the manufacturer’s service documentation, therefore the designations are given in English.
Compressor - compressor, the “heart of the air conditioner”. The compressor compresses the refrigerant and pumps it through the circuit.
Heat exchanger - heat exchanger,
- outdoor unit - an external unit, that is, a condenser, cools the compressed freon below the condensation temperature
- indoor unit - indoor unit - evaporator, in which the working substance evaporates, lowering the temperature
Expansion valve - expansion valve
In other words, TRV is a thermostatic valve. Provides the required amount of refrigerant.
In simple air conditioners, its role is played by a capillary tube, without any adjustment; in inverter systems - an electronic expansion valve.
2-Way valve - a two-way valve, that is, a regular valve, with two positions - open and closed
3-Way valve - a three-way valve, in an air conditioner it is a service port to which a pressure gauge hose is connected for measuring pressure or refilling.
4-Way valve - a four-way valve that provides refrigerant reverse for operating the air conditioner in heating mode
Strainer is a filter, in this diagram it is a filter-drier, since it is installed before the expansion valve (and after, since the system can operate in reverse mode and the refrigerant changes the direction of movement).
Its task is to prevent moisture from entering the thin channel of the expansion valve - since moisture will clog it, preventing the refrigerant from passing through.
Muffler - muffler
The arrows indicate the direction of movement of freon along the contour:
- solid arrow - in cooling mode
- dotted arrow - in heating mode
Also in more complex and advanced air conditioners the following is installed:
- Pressure Sensors
- liquid separators
- bypass lines
- injection systems into the compressor
- oil separators