Wifi relays are indispensable assistants in a smart home. Due to their low cost, they continue to gain popularity. Typically, wireless relays are used as executable devices, the command for which is given by motion, light, water leakage, and lighting sensors. Independent work in the manufacturer’s applications allows you to configure their operation by launching on a schedule, cyclic timers, and one-time activations at a predetermined time. I consider the Sonoff wifi relay to be the leader in terms of price/quality ratio and use them everywhere.
Installation locations Wifi Relay for lighting
The small dimensions of wifi relays allow you to discreetly install them behind the ceiling space, hide them behind a suspended ceiling, or install them in the “dome” of a chandelier.
Installation is carried out after a conventional light switch. The switch is always in the "On" position, supplying power to the relay. Now the light can be controlled remotely or sent a command to turn on from motion sensors.
When driving, the light turns on. If there is no movement, it turns off automatically.
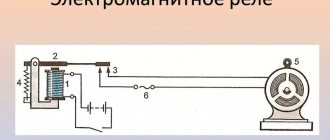
Connection diagrams
What are the differences between 3G and 4G networks: features, advantages and disadvantages
The standard scheme has already been given above. To control higher loads, contactors or high-power relays should be used. As has already become clear, the modules operate at a frequency of 433 MHz, which means they can work with radios, remote controls and switches. Below is a diagram of connecting a relay instead of a conventional chandelier light switch.
The first step is to dismantle the switch and close its phase wires. After this, connect the relay and the power supply and stick a radio switch with the binding completed on any wall. This will help you move it to new locations without chipping the walls.
Moving an inconvenient switch
We installed a switch, made repairs and put a sofa next to it, but not the one that we had originally chosen in the store. The switch was hidden behind the sofa.
We install the relay and purchase a wireless switch that will control the operation of the relay. You can carry the switch with you around the apartment or stick it to any surface with double-sided tape.
We manage any consumer from home anywhere.
Existing models
You should focus specifically on the manufacturer, which was indicated above, and move on to considering the solutions available to the buyer. At the moment, nine models of devices and other “smart” devices are popular on the official website: light bulbs, switches and switches, special sockets and din rails. The most popular models require separate consideration:
- 10A Basic. The simplest device, designed for a current of up to 10 Amperes and a maximum load of up to 2.2 kW. Voltage range - 90-250 Volts at temperatures from 0 to 40 degrees. The model supports standard Wifi b, g, and n;
- RF - the same characteristics, but with the ability to control the remote control at a frequency of 433 MHz. You can bind any suitable remote control;
- Dual - similar to the second model, but has two load connection channels;
- TH10 and TH16 - samples that include water and heat sensors;
- POW 16A. Connection occurs via a 3.5mm port. The difference is in the maximum load current: 10 and 16 Amps, respectively.
- 4ch PRO is the largest option, with four consumer channels of 10 Amps per channel.
Review and configuration of the D-Link Dir-320 modem
Pricing is as follows: the simplest has a minimum price of 3.5 dollars, and the most expensive - 20 dollars. Naturally, prices may increase over time.
Important! The number of devices connected to the relay depends not only on the electrical current consumed, but also on the number of available channels.
Break Wifi Power Circuit Relay
Sometimes you need to protect yourself by being able to remotely de-energize a device. In my case, the wifi relay is installed in the power supply circuit of the access control system (electromagnetic lock).
Even if I forgot the card (Rfid tag) or broke it on the way home, I still have the opportunity to remotely break the power circuit and get home. I was also afraid of a possible glitch in the operation of the controller, which is installed indoors.
If you turn off the power to the entire apartment, there will be no effect since the controller is powered by an uninterruptible power supply. The only option is to turn off the relay from the outside.
If you forgot your key and want to get home, it’s easy.
E-WeLink application
I'll tell you a little about the standard application.
If you do not yet have an account in E-WeLink, you will be prompted to create one. The first launch of the application is accompanied by tips that make it easier to explore its capabilities.
To add a device, you need to put it into pairing mode (after applying power to it, of course) by holding the button on it for 5 seconds.
Next, you need to enter the password for your Wi-Fi network, after which it will scan and detect compatible devices.
The next step is to come up with a name for the device and after that it will appear in the general list.
The principle is very similar - and it would be strange if it were not so - to similar systems from Xiaomi or Broadlink.
The main window of the control application contains a large round button - turn it on and off, and controls for all functions of the device.
The most useful and in demand will be the on timer; once you start it, you can forget about the need to turn the same boiler on and off every day. Countdown timer - convenient for random activation for a given period of time. A small settings menu allows you to rename the device, update the firmware, set the default status after a power outage, and enable the notification system.
Water supply control using Wifi Relay
A two-channel relay or two single-channel relays can control the water supply by installing an articulated valve. The faucet has three wires, one of which is ground.
We close one pair - we shut off the water, we close the other - we open the water supply. We receive an event about the presence of water on the floor from a leakage sensor or neighbors.
We don’t drown our neighbors and our property.
Advantages and disadvantages
A remote controlled light switch is convenient, modern and practical. Advantages of this class of devices:
- easy installation. There is no need to dismantle the trim, do gating and pull additional wiring;
- centralized control over all light sources within reach from one switch, remote control or computer/phone/tablet;
- possibility of remote control, including from outside the room/building;
- high operational safety. All devices consume minimal current and are not dangerous even in case of incorrect use or breakdown;
- for the most multifunctional models - additional features: work according to a schedule and triggers, remote access, integration into a “smart home”.
But there are also disadvantages:
- Battery-powered gadgets need to be replaced regularly;
- If a Wi-Fi connection scheme is used, the channel is very sensitive to the quality of the connection. A weak signal or a high level of interference (for example, a clogged airwave with many Wi-Fi gadgets) can seriously hamper the operation of the device and cause numerous “glitches”, even complete inoperability.
Heating control using wireless relay
The easiest option is to turn off heating electrical appliances or heated floors when the home reaches the required temperature remotely using a Wifi Relay. Start heating on time or when the room cools down.
It is better not to mess around with gas boilers in this way - this can damage their electronics (see product data sheet). This method is also suitable for the operation of recirculating sediments of solid-state boilers.
The pump cannot be turned off until the boiler has cooled down, but this does not prevent you from leaving and turning it off remotely in a couple of hours. You will have to connect the electrical device through the cut of the standard cable or take a whole regular extension cord for these, turning it into a smart one. Works in tandem with temperature sensor readings.
The load of heating devices should not exceed the maximum possible load on the wifi relay.
We arrive to a warm house that does not heat the street while we are away.
Rebooting the wifi router
How many times a week do you reboot your wifi router? If your wireless router constantly freezes, this is a reason to think about changing it or try to give it a second life with firmware. But even top models sometimes fail. Installing a wireless wifi relay will solve the problem. We install the power cable into the cut or make another smart extension cord.
The operating logic will look like this: If we only have a relay (in the absence of a smart home system), reboot the router every night, cutting off the power.
Or write a work script that will monitor the availability of Google or Yandex (using the Ping utility or Plugins). These search engines are always available.
If there is no response from them, break the power circuit for 10 seconds and reapply power. Thus, we will reboot the router and bring it into working condition.
We forget about the lack of Internet connection.
Operating principle and setting
All (according to unverified data, almost all) Sonoff Wi-Fi relays are based on the ESP8266 microcontroller, which provides connection to a wireless network. In addition to this, the board contains a power relay, power supply and terminal blocks. There are descriptions, codes and diagrams on the Internet for self-assembly of the device, but the rationality and cost of this idea is questionable.
The operating algorithm is as follows:
The Sonoff Wi-Fi relay connects to your router and communicates with the cloud server. You connect to the Internet from your smartphone and control electrical appliances. You can control the device in “local” mode by pressing a button on its body. And thanks to the simplest connection diagram, home automation does not require deep knowledge of electrical engineering.
Let's figure out how to connect Sonoff to a smartphone, it's not difficult. To connect you need:
- Download the eWeLink application from the Appstore or Play Market.
- Register in it.
- Apply power to the device; in this case, you need to press and hold the button on the relay body (or other connected device from this family) for a long time.
- When the LED indicator starts blinking, release the key.
- Click on the device search icon in the application.
- Specify wireless connection settings.
- Assign a device name and use it from your smartphone or by pressing a button on Sonoff itself.
Wireless control without internet works on RF and Basic models
Everything is quite simple, such work allows you to control devices from anywhere in the world, because communication occurs via the Internet, and not a local network. On thematic forums there is a description of how to untie all Sonoff products from the cloud and make them work over a network without the Internet.
Creating a microclimate for Pets using Wifi Relay
No, I’m not talking about cats or dogs, although they can also be used, but, for example, about exotic animals. The turtle requires a warming lamp and a UV lamp during the day. The lizard has a small background lamp during the day and a thermal mat; at night you need to lower the temperature by turning off the heating.
It is necessary to create a microclimate as close as possible to their natural habitat. This will be monitored by wireless wifi relays using pre-configured algorithms.
Creating a microclimate for exotic animals without human intervention.
In the article I outlined the main areas of application of wireless wifi relays. It will be interesting to read your application options in the comments.
WEB server programming
Here you can give free rein to your imagination and use any available means to create a service that will process requests sent by the switch and send requests to turn it on/off.
I used Yii for these purposes. I chose this framework for several reasons, I needed authorization (since the portal is available on the Internet) and role management (for future experiments), and I just like it. And now my management portal looks like this:
To control a light bulb within the reach of the network, the server itself on the ESP would be enough. But you want to have logs, logic and other devices in the future, so it’s better to use a separate server for control.
This is all about the portal, I think there is no point in writing more about it, but if you have any questions, I will be happy to answer them in the comments.
Some popular switches
The range of devices under consideration is quite large, and some of them are in deserved demand due to the combination of quality, price and functionality. Let's consider several such models.
Feron TM-75
This is a simple and reliable two-channel 220 volt light switch. It interacts correctly with spot “smart light bulbs”, lamps, floor lamps, sconces, chandeliers and other light sources. The set includes a remote control, holder and battery.
The range of the device is up to 30 meters.
Aqara WXKLG02LM
The Chinese remote-controlled circuit breaker from Aqara can be used both in standalone mode and in conjunction with the Xiaomi Mi Home smart home. The module has two buttons and is controlled via Wi-Fi and Bluetooth; it also has the ability to work via the Zigbee protocol.
In general, control is carried out using keys, but the gadget is also supported by the Mi Home application. It works in a Wi-FI coverage area; among the shortcomings, we note the need for the Internet to implement full functionality.
Feron TM-2334
Another wireless remote model from the manufacturer Feron. There is a two-channel radio module with a control panel. The device is capable of controlling spotlights, floor lamps, sconces and chandeliers. For the latter, any number of lamps is supported, but lamps are divided into groups according to the principle:
- three lamps - 1+2, the first is lit with one key, the second and third - with another;
- four - 2+2 or 3+1;
- five - 2+3, 1+4. Other options are possible - it depends on the firmware.
The stable signal radius is up to 30 meters, there is a delay function.
Hite PRO SN-R1
This wireless wall switch is a Russian development, characterized by a range of up to 25 meters, a three-year factory warranty and a declared 15 years of flawless operation.
Another important advantage is up to 7 years on one battery. Channel frequency - 865 MHz
Such capabilities allow you to use the switch in an apartment and at home, in a cottage, in suburban areas, and so on. But this is compensated by the cost of the device - if usually the price of switches does not exceed 1000 rubles, then for this sample they are asking about 1700.
Inted 220V
Chinese two-key switch designed to control two lamps or two lighting groups. The device is mounted on the supplied mounting hardware and supports a load of up to 1000 W; the main unit runs on one battery.
The gadget is considered reliable, despite only a year of warranty.
ZDK Z-Light 0287
Another two-key sample. It is interesting due to the absence of a battery: the design includes a microgenerator, which is sufficient to generate a signal at a frequency of 433 MHz. Another advantage is the possibility of implementation in smart home solutions from ZDK. For full operation, the Internet is required; after connection, control of the device from anywhere in the world through the application becomes available.
Among the disadvantages, we highlight the need to purchase a separate receiving radio module and the inflated cost.
Armalight AS-6M
This is a simple wireless pass-through switch with one key. Like the previous one, it does not require a battery: the built-in kinetic module converts the pressing energy into a current sufficient to send a signal. Distinctive features:
- operation at 433 MHz;
- declared resistance to high humidity and even the ability to function under water;
- device resource - 200,000 on-off cycles, or approximately 15 years without breakdowns;
- range of action - up to 70 meters.
But they ask for quite a lot for this - more than two thousand rubles.
Gritt Elegance
This radio switch comes complete with a two-line remote module. The control unit is supplied in one-, two- and three-key versions, which ensures the choice of the option required for a specific configuration.
The device is also battery-free and equipped with a kinetic microgenerator. Pressure force is converted into current to create a signal in the 433 MHz range. Resource - 200,000 clicks/15 years.
The switch is two-channel, one radio module supports two lighting lines. But its cost is high, more than 3,500 rubles.
How to flash firmware
Sonoff Basic is a wireless relay with DIY mode support. The abbreviation stands for Do It Yourself and means that the device can be flashed with custom software to implement custom projects. The gadget was built on the basis of the ESP8266 Wi-FI adapter.
Firmware process
The example discusses the method of uploading the popular Tasmota software. For it you will need:
- the Wi-Fi switch itself;
- USB-Serial adapter (for example, USB-UART converter CP2102);
- connecting wires;
- Tasmota firmware file;
- filling program. The convenient utility nodeMCU-flasher is suitable as such.
Once everything is prepared, the next step is to remove the cover from the relay by prying the latches that hold it in place.
Under the cover you will find a board with the necessary connectors (indicated in the picture):
A USB-UART module is connected to them.
Once Sonoff Basic and the adapter are assembled, the structure is connected to the PC. It is necessary to put the relay into firmware mode. For this:
- The Reset button is pressed;
- the device turns on;
- the button is released.
Next steps:
run nodeMCU-flasher;
- on the main page, select the COM port on which the system recognized the module;
- in the second tab, indicate the previously downloaded Tasmota file;
check the settings on the Advanced tab;
if everything is in order, you can return to the Operation menu item and click on the Flash button.
Once completed, the switch should be rebooted. If the firmware uploaded to Sonoff Basic is installed successfully, the diode will start blinking green. This means that the gadget is ready to accept Wi-Fi connections.
The wireless network will be open and have a name with the prefix “sonoff–”. All you need to do is connect to it and type the default address https://192.168.4.1 in any browser. The Wi-Fi settings page will open. There you can set parameters and save them.
Having set the network parameters, you can begin configuring the device - for example, the built-in implementation of the MQTT protocol. Sample configuration page:
Other gadgets from Sonoff are flashed in a similar way - the POW R2 switch and others, although there are nuances specific to different models. So, when flashing R2 firmware, under no circumstances should you simultaneously work with the device via the serial port and supply external power to it.