The most common failures of extension cords
Conventionally, all extension cord breakdowns can be divided into three areas based on localization:
- Faulty wire (cable) . Fractures and wire burnouts.
- Plug malfunction. The studs are loose, the wire at the connection to the contact burns out.
- There is a fault in the contact block. The plate burns out (rarely) or the contacts become loose.
Most often, the wire breaks or burns out at the connection to the plug or at the entrance to the socket block. This fault can be easily identified even visually and repaired.
It’s worse when the damage is somewhere inside the wire under the insulation, and it’s not visible visually.
If you have a long (10 m or more) coil or simple extension cord, then it’s a pity to throw away the wire, so it’s better to strain yourself and repair it.
Using an ordinary Chinese extension cord as an example, we will show how all these faults can be repaired. They just took what was at hand - of course, for 200 rubles. You shouldn’t waste a lot of time, but if you have a good extension cord of 30 meters, it’s frankly a shame to throw it away.
Troubleshooting and repair
To perform all the manipulations we will need:
- Plug, wire and socket block.
- Screwdriver.
- Pliers.
- Insulating tape.
- Heat shrink (you can get by if you have electrical tape).
- Knife.
- Multimeter.
- Three needles.
First, we disassemble everything and determine the faults. As you can see, our plug is not removable and its only problem is that initially the wire burned off at its base (we previously cut off the burnt area). Everything is fine in the block with the springs, but the wire at the input has also burnt out.
But the wire itself has broken somewhere and we need to find this section.
To search, we will need three needles and a multimeter. First, using the dialing mode, we check which specific core is not working. In our case, this is a brown vein. Now we need to find the breakdown location. To do this, we stick one needle into the core in the middle of the wire and two others into the middle of the “halves” of the wire. Now we call using a multimeter.
It can be seen that contact has been lost between the first and second needles, which means there is a breakdown there. Now we take out the third needle and stick it between them, and continue the procedure. So, literally, using the “poke” method, we find out the location of the damage (5 times was enough for us). Now we carefully cut the insulation and eliminate the fault by twisting it and then insulating it.
Now we cut the wires on the plug and connect our wire. We insulate it well so that there is no breakdown.
We strip about 4 cm so that we can wrap it around the plate. By the way, the plates can be pulled out freely, so we freely take one plate and attach the wire to it. We crimp the wire at the connection point with pliers. It should look something like the picture.
Let’s say right away that this is a backup option if you don’t have a soldering iron at hand. If we are repairing a thicker cable designed for a larger load, then we solder it. For final manipulations we need a multimeter.
Now we assemble the extension cord and check it: first by calling it, making sure there are no damaged areas, and then connecting it to the network and checking the voltage. Our extension cord is in working order.
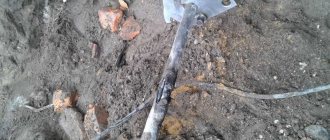
Finding faults in a two-core cable with thick insulation
In the case of coil extension cords, the “acupuncture” trick will not work, since the insulation is thick and you will simply be tired of poking at the wire.
You can use a regular probe tester, with which you can find damage to the wire in the extension cord, and even wiring hidden in the plaster.
To do this, you will need a device with a sound indication (or a screen where changes in readings are displayed) - the price is 100 - 150 rubles.
To find damage, you need to plug the extension cord into the outlet and set the tester to medium or high sensitivity. Now we run the tester along the cable.
Where there is voltage, the tester will beep, and where there is a break, the tester will be silent.
If we run the probe along the entire cable and the signal does not disappear, then we change the position of the plug in the socket and perform the procedure again - the tester responds only to the phase wire.
How to fix an extension cord: the main causes of failure, repairing a broken wire, disassembling and replacing parts
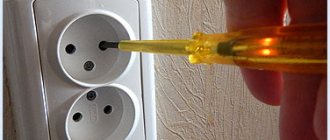
When using an extension cord, damage to this device may occur. Repairs are easy to do yourself. Before you repair an extension cord, be sure to unplug it.
Causes of extension cord failure and how to detect them
Such specimens have fragile wires that are easily susceptible to mechanical stress.
Conventionally, an extension cord consists of three parts - a housing with sockets, an electrical cord and a plug. There are two types of devices available for sale:
- With the simplest design. Such extension cords supply current to electrical appliances using two wires - zero and phase, and do not have a switch button.
- Models with additional parts that have a power button; the cable can be two- or three-wire (zero, phase and ground).
Inside the main block there are two current-carrying busbars (yellow metal plates that are inserted into the grooves of the housing). Their rounded areas are aligned with the socket connectors.
The three-phase extension cord has an additional grounding bus.
The reasons for device failure may be different. Most often, they are associated with mechanical stress and violation of operating rules.
In other words, over time, the wire breaks and breaks. Mechanical failures occur when the cord is squeezed, bent at an acute angle, or pulled sharply. This also includes deformation of the tires when the consumer device is repeatedly turned on and removed from the socket.
When several electrical appliances are simultaneously connected to an extension cord, the total power of which exceeds the permissible limit, the wires burn out. Intense heat causes the heat-resistant plastic to melt and then cause a short circuit.
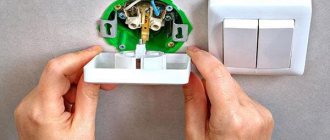
Models with a simple device can be easily disassembled with a regular screwdriver
If the extension cord stops working, it is necessary to determine the cause and location of the breakdown. To do this, you need to carefully examine the condition of the box, wire and plug:
- A cable break is found by checking the power supply. The plug is inserted into the socket and a low-power electrical appliance (for example, a table lamp) is connected. The wire is bent at every 4–6 cm interval. In the place where the lamp starts working again, there is a cable break point.
- Contact failure in the box is detected after removing the cover by burnt and blackened contacts, oxidized areas of the plates, and wire breaks.
- Damage inside the fork can be seen by disassembling it. Unfortunately, not all models can be disassembled.
How to fix the device yourself
When repairing an extension cord, it is necessary to disconnect it from the network
For repair you need:
- side cutters;
- construction knife;
- pliers;
- screwdrivers (Phillips and regular);
- insulating tape;
- fine-grained sandpaper.
All parts must be repaired: electrical cable, dismountable plug and housing.
Disassembling the extension cord: instructions
Disassembly includes the following steps:
- The bolts located in the lower part of the body and in the sockets for the plug are unscrewed from the box.
- The parts are carefully separated from each other so as not to damage the wires and clamps.
- To disassemble the plug, just unscrew one screw. The non-separable element is simply cut off and thrown away, replacing it with a new one.
Causes of breakdowns
A faulty switch can be determined by the following signs:
- when you press a key or turn the toggle switch, knob, or other actions, the light does not turn on,
- turning on or off operations require multiple repetitions, keys or other elements work with jamming,
- an increase in the temperature of the light switch housing is felt,
- after the circuit is closed, a cracking sound is heard or the lamp flickers,
- frequent burnout of light bulbs, regardless of their type (incandescent, LED, halogen, etc.),
- When the contacts in the switch are closed, a crackling sound is produced,
- The device does not connect to the network.
These problems may occur due to the following faults:
- Destruction of individual elements of the switch or melting of contacts.
- Violation of integrity and contact in the place of fixation of electrical wiring or terminals.
- The housing in the contact group is destroyed.
- The contact group is worn out.
Tip: The basic operating principle of any type of switch is that it closes to turn on the light and opens the contacts to turn it off. However, often in more complex switch configurations, breakdowns can be even minor, which will prevent the luminaire circuit from closing.
Repair of extension cord (carrying)
See several ways to repair an extension cord yourself.
Hi all! Article from the series - do-it-yourself electronics repair. In this article, you will learn five ways to repair an extension cord (carrying cable) with your own hands.
|
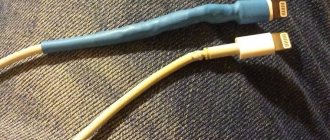
| Breakage of extension cord No. 1 Very often, the first thing in extension cords is the wire that breaks, that is, it is refracted partially or in half. Sometimes there is an open fracture as shown in the photo. In such cases, you need to act carefully and naturally. It is necessary to take one wire, for example blue, and connect it with the same blue one; the same operation must be carried out with another wire. Then wrap insulating tape first on one wire and then on the other. Finally, wrap the entire affected area very tightly. If you do everything correctly, the extension cord will serve for many more years. |
| Extension cord failure No. 2 Most often, a closed refraction of the wire is formed in the extension cord. In such cases, it seems that nothing can be done, but I convince you that there is always a way out. In this case, you need to start by looking for a breakdown, namely, find which conductor has broken off. A special device, a voltmeter or multimeter, will help us with this. You need to set the indicator for resistance, and attach one contact to the plug, and the other to the wire. If resistance is shown on the dial, it means that two contacts are closed through the conductor and the carrying wire is working, and if it was not shown, then the wire is broken. So, after finding a breakdown, it can also be repaired, as in the first case. |
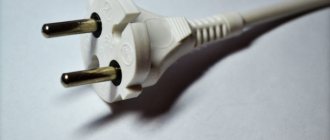
| Extension cord breakdown No. 3 I think the breakdown that is most easily fixed is a breakdown with the plug. To repair an extension cord, all you need to do is cut off about five centimeters from the plug and replace it with a new one. The cut wire also needs to be carefully cleaned and attached to the contacts of the plug. You will need to purchase not a disposable fork, as shown in the photo, but a fork that contains bolts. I must warn you that there is a very high voltage in the socket, so the wire to the plug must fit very tightly, since in case of accidental contact or short circuit, a short circuit or electric shock may occur. |
| Breakdown No. 4 The least common breakdown occurs in the box with sockets, but it is easier to fix. For example, a wire broke off from the main partition. In this case, you need to heat up the soldering iron and simply solder this wire. I also want to give advice to all this, you need to take a large piece of tin and rosin, moisten the partition and wire with rosin, and then solder it. A large piece of tin is needed for good soldering, so that this conductor holds well and does not have to be repaired over and over again. This is approximately what you see in the photo. If suddenly not one conductor, but two at once, breaks off, then you need to cut off 2 - 3 centimeters of the wire, strip about 1 centimeter and perform the same operation. |
| Breakdown No. 5 And here is the last, most difficult breakdown of all. This is a melting, it occurs exclusively during short circuit. It is difficult to fix it, because the entire wire melts. The only thing you can do with your own hands is to replace it. You can take a similar wire from another conductor, where, for example, the box broke, or from any device with a long wire. But be careful! 220 volts will pass through this wire, so the wire is needed no thinner than the one that was there before. Or in this only case, you can buy a new extension cord, as many people do. |
| See also: DIY socket installation |
| Copyright © by Do It YourselfCopying materials is prohibited. |
See more materials from this section:
One socket in the extension cord does not work, what is the reason, how to repair it?
Most extension cords and surge protectors have a simplified structure - all their sockets are made on three common buses - zero and phase and ground. And there are already three wires going to these buses. There is no need to run a wire to each outlet.
- In such models, the reason why one of the sockets does not work, provided that the others work, can only be weakening of the contacts of the plates, which do not create the proper crimp for the pins of the plug.
- In any case, in order to find out the reason, you will have to open the “patient” and it would be advisable to have a multimeter to test the individual parts.
- If we find such common busbars, then we can simply bend the loose contact of the corresponding socket.
There are extension cords with an autonomous shutdown for each outlet. In such cases, as a rule, one of the buses goes in common, the other contact goes through the switch.
Less often and in more expensive models, the switch “breaks” both phase and zero at the same time, and only “ground” goes directly.
When repairing such an extension cord (rather, it can already be called a surge protector - because such models are already necessarily equipped with protection against interference and a thermal fuse that prevents the total power from being exceeded.
Causes of congestion on the strip
A power strip can be overloaded for a variety of reasons, and while most people think it's simply the sum of the power consumption of the connected devices, it's actually a little more complicated than that. But yes, indeed, if you connect a PC and its peripherals and a vacuum cleaner that consumes 2,000 W to a power strip that supports up to 2,200 W, there is bound to be an overload (for this reason, we recommend that you never plug high-power appliances inside the power strip. than PC).
Believe it or not, if a strip has, for example, six outlets, it is designed to support six devices, and this is true even for security strips. If you connect a thief's plug to a strip, or even if you connect one strip to another in series, you can also cause an overload in that one, since they also have a maximum amperage limit supported per outlet, and that's what usually goes as well. indicated on the label.
For example, imagine you have a regular extension cord whose label says it supports up to 3,500 watts, but also states that it supports 250 volts and 16 amps; This amperage is maintained for each plug, and if you were to use a strip plugged into another outlet, or a rogue plug in the same outlet, and plug in devices that exceed that 16 amps, you would be causing an overload (which is why you should never plug one strip with another one , or you should use a socket thief on the extension cable).
Hardware geeks will now tell you that PC power supplies support much higher current ratings, and in fact some exceed 100A on their +12V rail, which in many cases is needed to power high-power graphics cards. Will this lead to overload? The answer is no, because the electricity from the plugs in our homes is alternating current, and those power supply Amps are the direct current that the PC needs to operate, and it is the power supply itself that generates that intensity. current from the alternating current coming from the wall outlet.
How to repair an extension cord yourself?
Such an indispensable item as an extension cord can be found everywhere: in any office, house or apartment. It is not possible to do without it. Of course, there are so many similar devices in our office that I even find it difficult to count them all.
And, of course, not a single piece of equipment is insured against breakdowns, and carriers are no exception. They break down with us, but this is absolutely no problem, because they can be repaired without much effort.
I know how to do it right and I will share some tips, as well as secrets, with you. And I want to immediately assure you that absolutely anyone can do the repairs; this does not require any special skills or an electrician’s diploma.
So, we have a seemingly insoluble problem: the electrical extension cord does not work.
First of all, you need to establish the cause of the malfunction.
There can be three possible places of damage:
- cable;
- fork;
- block with sockets.
The most common cause of failure is a broken core in the cord.
Method for detecting a broken cable section
A way to detect a possible break area is to use a device that will indicate that it is on or off. A radio receiver, any table lamp, and much more can serve as testing equipment.
We connect the selected device into the carrier and then, starting from the plug, every 5 cm we begin to bend the wire in different directions. When the wire is bent in a certain place, the device will turn on.
Therefore, this is where the cliff area was discovered.
Repair is very simple
. Unplug the extension cord from the outlet. Take a knife or scissors and cut out part of the wire in the break area. It’s better to indent it to be safe. Now you need to connect the wires. They can be closed with a soldering iron or simply twisted tightly. The insulating tape will help insulate each core, after which you will need to twist them together. When the break point is in the extension plug, you need to unscrew it, remove about 10 cm of wire and screw the plug back. We simply cut off the non-separable plug, buy a new one and screw it in place of the old one.
If after all the checks it turns out that the cord itself is intact, then it is necessary to check the block. First you need to disassemble it and see if there is contact between the wire and the copper plates.
If the cable itself is securely screwed, this means that there is no contact between the plates and the plug. If such a problem is detected, the contacts must be cleaned. Use a file and remove plaque from the metal. After cleaning, pay attention to the color of the plaque.
If it is green, this indicates that moisture has entered the power cord. Gray or black coating means that weak contact has been detected between the plates and the plug of the device.
To make it high, it is necessary to strip it to a copper shine and bend the copper plates one to the other. It is correct when the fork fits tightly into the block.
If there are through holes in the copper plates in the areas of contact with the plug, it is advisable to replace such a block.
These are all the subtleties of repair. As you can see, nothing complicated. Now you can repair
the extension cord yourself
, relying on your own strength, and not have to purchase a new one over and over again.
Recommendations
Many professional electricians advise you to adhere to the following rules when repairing switches, extension cords and other household electrical appliances:
- If old Soviet switches break down, it is best to replace them with new ones so that they fail less often and pose less of a danger.
- Most often, the main reason for contact burnout is the use of lighting with more power than the device can withstand. It is necessary to replace the lamps with LED or energy-efficient ones so as not to make regular repairs.
- Very often, the reason for failure or lack of contact may be hidden in weak fixation of the wires in the terminals. Therefore, it is best to tighten the screws well and check the operation. If the actions do not produce results, then the device is dismantled and repaired.
- It is convenient to use a camera and record your actions in a photo so as not to make mistakes during assembly.
Advice: The basis of working with electrical appliances that are built into a household network is safety, so it is necessary to turn off the power at the panel. Switches of any type can break or malfunction. To repair them, it is not always necessary to contact a specialist and spend a lot of time. It is enough to dismantle the device, disassemble it, find the fault, repair it and install it in place.
Electrical extension cord repair | Electrician in the apartment, repair of household electrical appliances
If suddenly your ordinary household electrical extension cord breaks down, do not rush to throw it in the trash. It is easy to repair it yourself, without having much knowledge in the field of electrical engineering.
Extension cord repair
Very often, in electrical extension cords, a core in the cord (flexible wire) breaks (breaks). In order to find the location of the wire break and repair the breakdown, you will need to connect any household electrical appliance to the outlet through this extension cord. The main thing is that you can clearly see or hear whether it works or not. Such a device could be a table lamp, a radio, a mobile phone charger, etc. Next, we do this: plug the extension cord with the connected electrical appliance into the outlet and begin to bend the wire in different directions, approximately every 3-4 centimeters, starting from the plug or the extension cord itself. If the problem is a broken wire, then you connect the break by bending the wire - your electrical appliance will turn on, for example, the red indicator light in the phone charger will light up. This means that it is in this place that the vein is broken.
Use an adsense clicker on your websites and blogs or on YouTube
In this option, if the wire breaks, you will need to unplug the extension cord from the socket, take a knife or scissors and cut out a section of the wire at the break point, to be safe, retreat 5-10 cm in each direction. After this, we strip the wires of insulation and connect them.
It is, of course, advisable to connect the wires using a soldering iron, but a good twist will do. More details about connecting wires can be found in this article - “Connecting wires“.
You need to insulate the connection using insulating tape, first insulating each core individually, and then the entire wire.
If the cause of the breakdown is in the electrical plug, then it must be untwisted; if the contact has oxidized, then we clean it; and if the wire breaks, then we cut off 10 cm of the wire from the plug, clean it and screw it back on. If the plug is not removable, then you need to purchase a new one and screw it in place of the old one.
If the cause of the failure is not in the wire or plug, then check the extension cord. To do this, we disassemble it and look for the presence of contact between the wire and the copper plates; if the wire is screwed well and securely, then there is no contact between the (consumer) plug and the plates themselves. In order to clean all contacts, you need to take a needle file and remove plaque from the metal. If the deposit is green, it means moisture has entered the carrier; if it is black or gray, it means there was poor contact between the plug (consumer) and the plates. For good contact, we clean everything to a copper shine, and bend the copper plates to each other, the plug should fit tightly into the block. If the copper plates have through holes in the places where the plug contacts the plates, it is best to replace such a block.
That's it for repairing an electrical extension cord!
Repair of light switches in an apartment
Do-it-yourself troubleshooting work on switches usually comes down to dismantling the device, disassembling it and cleaning the contacts, assembling and installing it in the same place. If you use the necessary tools and disconnect the switch from the meter, all work will be safe for humans. Using metal objects to reach the switch when the electricity is on in the house is strictly prohibited. This could be fatal.
Preparation
First, you need to make sure that no one in the household turns on the electricity, so you need to warn everyone about the ongoing repairs and ask them not to touch the switch. For work, you need to prepare a free, clean place without foreign objects or interfering objects. A clean table with a protective film is suitable so as not to damage the surface of the furniture with sharp screwdrivers, knives and parts of the switch itself. You need to prepare the following tools:
- fine grit sandpaper,
- marker,
- a slotted screwdriver with a tip of a suitable size,
- indicator screwdriver or multimeter.
Attention: If you have no experience in repairing electrical appliances or have doubts about reassembling the switch, then it is best to use a digital camera on a phone or other device. Using the photos taken during the repair, it will be possible to put everything back together and install all the parts correctly. It is better to carry out work during the day in good natural light or take care of additional artificial light. Before repairing, it is best to screw a working light bulb into the lamp in order to test the result of the repair.
Dismantling
The switch is removed from the wall according to the type of device: one- or two-key, old models. All work is performed in the following algorithm for each type. Removing the old model switch:
- On the front side of the device there is a pair of screws located below and above the key. They need to be unscrewed and placed in some shallow container.
- Remove the decorative panel, and you don’t have to remove the switch key; it shouldn’t interfere with repairs.
- To remove the switch from the socket, unscrew the screws of the clamps that hold the device in it.
- A special bracket is removed to remove the conductors from the holes.
Dismantling a single-key switch:
- Using the tip of a knife or screwdriver, pry up the key and remove it from the device. If such a part is held by a fixing plate, remove it too.
- Remove the decorative panel.
- The switch is secured with a pair of screws, so they must be unscrewed and left in the case or placed in a separate container.
- There are holes on both sides into which electrical wires are inserted. In single-key models there is only one wire that needs to be disconnected.
Removing the two-key switch:
- Use the tip of a screwdriver or knife to pry up and remove the decorative panel.
- Under the buttons there are screws that need to be unscrewed and placed in a container.
- To remove the device from the wall, unscrew the fasteners.
- Before removing the switch, you need to mark its location so that there is no inconsistency during installation after repair.
- The wire that is responsible for the voltage in the network and is connected to the main terminal must be marked with a marker.
Attention: The new type of switches has a recess for removing the panel, which allows you to remove the cover without additional tools. It is necessary to inspect the body and elements of the switch for defects, melting, and other flaws that affect its performance.
Cleaning contacts
The most common breakdowns are loose, burnt out or broken contacts. Therefore, for repairs, it is enough to clean the contact group from soot and oxidation with fine-grain sandpaper. If the wires are not clamped tightly, this can also cause the switch to malfunction. You need to check the fixing screw and tighten it. A breakdown that cannot be corrected is the destruction of the ceramic body or the melting of plastic elements. Then a complete replacement is required. To check the absence of voltage in the network, you must use an indicator screwdriver. The contacts must have a characteristic metallic sheen, otherwise they will not close, and current will flow in the circuit intermittently or not at all. If sandpaper does not completely remove carbon deposits, you can use the tip of a knife or a slotted screwdriver.
Assembly
All assembly steps must be performed in the reverse order to dismantling the switch. You can use photographs taken earlier, but the general procedure is as follows:
- The wires are connected to the corresponding holes and secured with screws.
- In the cavity of the socket box, the device is fixed with clamps, and adjustment is also made relative to the marks on the wall.
- When all the mounting screws are tightened, the decorative panel is installed in place.
- The keys are attached.
- The device is turned on to check the success of the repair.
How to repair an electrical extension cord
In order to repair an electrical extension cord, you do not have to be a certified electrician . Even without special knowledge, you can easily fix it. By taking 5 minutes to read this article, you will learn how to quickly identify and eliminate the cause of an extension cord failure .