Scotch tape, duct tape, etc.
On forums and other sites it is recommended to wrap the Lightning cable with tape or tape near the 8-pin connector and USB. It doesn't look aesthetically pleasing. But it will extend the life of the “lace” by years.
To protect the wire more, instead of having two areas of potential wear, wrap the cable from end to end. And as a replacement for adhesive tape or electrical tape, use thread and other similar materials.
Cable protection requirements
- When installing underground in a trench, you need to make a cushion of granulated slag or sand where the slabs will be placed.
- If the voltage is more than 35,000 V, the thickness of the slab for underground installation must be at least 50 mm. For lines with lower voltage, baked clay brickwork without holes is suitable.
- When laying power lines in the ground, you should not stretch the wire too much, but it should not dangle either.
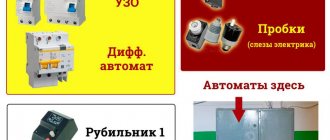
- If the line runs under the road, the cable is protected with a metal pipe; several wires cannot be placed in one pipe.
- For electrical networks with voltages less than 1000 V, the cable is protected only in places of possible damage.
Cable protection is a mandatory procedure that increases the safety of using electricity and increases the service life of the wiring. When choosing a method of protection, the characteristics of operation and terrain conditions are taken into account.
Heat shrink tubing will help
To make the first method aesthetically pleasing, use heat shrink tubing. Such devices are sold in a number of sizes in hardware stores. The price is minimal - a couple of tens of rubles per set.
Place the heat shrink tube over the potential break on top. And heat with a lighter, hair dryer or iron. The polymer will shrink in size and wrap around the cable. Choose a white tube to enhance the aesthetics.
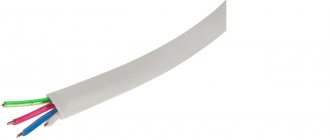
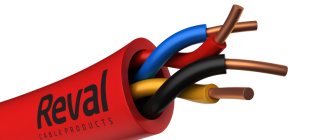
Cable Sheaths
The internal elements of cables (insulation, conductive cores, fillers, etc.) are reliably protected by protective sheaths from external influences of high humidity, acids, gases.
Depending on the type of cable, one or more protective sheaths are used. The sheath is an additional protective cover for the cable; it is installed on top of the conductive cores and can consist of several layers. A variety of materials are used as sheaths, depending on the type and characteristics of a particular cable.
Materials used for cable sheaths
For power cables, polyvinyl chloride plastic compounds (PVC) are usually used, which is obtained by adding various plasticizers and stabilizers to polyvinyl chloride, which guarantees high-quality insulating material. To increase resistance to aggressive environments, chlorine is also added to PVC. Thus, polyvinyl chloride is obtained. It has the advantage of low fire activity and low smoke and gas emissions. But if the normal operating conditions are not observed, it can harden and collapse.
In addition, protective shells are made of polyethylene, since it has high chemical and physical characteristics. Cross-linked polyethylene has become widespread. Its main advantages are low weight, increased moisture resistance, etc.
Another equally high-quality and reliable material is polyvinite. This is a granular polymer with excellent quality indicators of resistance to wear and significant temperature fluctuations. It is completely non-flammable.
Hose rubber is also used to make protective covers for cables. It has high strength characteristics under tensile and other mechanical stress. Its use increases the flexibility of cable products in low temperature conditions. Rubbers made from synthetic rubbers are characterized by lower strength compared to rubbers made from natural materials, but they are considered less susceptible to thermal aging.
The most popular and common type of shell material is aluminum. It is distinguished by good vibration resistance, tightness, and increased resistance to high loads.
Lead is also used in the electrical industry in the production of protective cable covers. In addition, it can serve as a screen or armor.
Regardless of the type of protective coating, its quality must be high in any case, ensuring effective protection of the wire.
Ballpoint pen spring and more
The silver metal spring made from a ballpoint pen looks aesthetically pleasing on the official Apple Lightning cable. But not every one will do. I advise you to visit a stationery store and take apart a couple of things to look for them.
Sugru is recommended as a replacement for this method on forms. It's like plasticine for fixing things around. Use it to seal potential cable breaks. And after drying, the substance will turn into a polymer a la rubber.
Creating new insulation from liquid (rubber) electrical tape
Damaged or worn cable insulation can be repaired using liquid electrical tape such as PlastiDip. Simply mold new insulation around the exposed wire and let it dry.
RELATED: 10 Horribly Designed Everyday Items That Need to Be Reinvented.
Careful use/carrying
Members of the iPhones.ru editorial team have been using Apple devices for years. And they agree on one opinion - to prevent Lightning cables from breaking for months, carefully use and carry each one in your pocket, bag, and so on.
I recommend that you roll the cable in a circle, as shown in the photo above. This will reduce the risk of breaking to a minimum. Avoid getting into mud and so on. And be prepared to be replaced. You can't avoid it.
Real renovation
It should be noted that many preventive measures with heat shrinking are used even when the cable already requires real repairs. That is, in fact, it’s not a good idea to put heat shrink on top of an already torn cable; this is not a very reliable measure, but this type of repair also has a right to exist. However, we are sure that if the insulation is already damaged, more serious repairs are needed and heat shrinking alone will not do. In this situation you will need:
- soldering iron and accompanying materials (rosin, solder)
- wire cutters
- sharp knife
- unnecessary old USB cable (it doesn’t matter which connector is on the other side)
- insulating tape
- heat shrinkage (well, yes, where would we be without it) of two diameters - minimal and 5-6 millimeters
- fire source
As you understand, the work will be serious. However, if you own a soldering iron, everything will be quite simple for you, but if you are just planning to make friends with this wonderful tool, you will have to work a little. So let's get started.
Preparing the USB cable
You can buy a USB cable, but we recommend digging through some old electronics at home. This cable is the most popular, and therefore there is a high probability that the search will be successful. We emphasize that it doesn’t matter at all what happens on the other side, because as soon as the necessary wire is found, we must take the wire cutters and cut off what is there. That is, we should get a cable with a USB connector on one side and a cut wire on the other. Next we will deal with the cut side:
Preparing the iPhone Charging Cable Connector
Good news! It doesn’t matter whether you have an iPhone 5 or an older model - this repair is universal for any cable - both Lightning and the one preceding it.
Connecting the USB cable and the iPhone to the iPhone charging cable
Well, all that remains is to connect the two prepared elements; to do this, you need to solder wires of the corresponding colors to each other - green to green, black to black, etc. But! Before soldering, you must first put heat shrink with a diameter of 5-6 mm on the cable and heat shrink of a minimum diameter on each wire.
When all the wires are soldered, we slide heat shrink over each contact and heat it.
Then, to be sure, we fasten the wires with electrical tape and stretch heat shrink of a larger diameter onto this structure and heat it.
That's all! The renovation is complete.
We tried to describe the process in as much detail as possible, without leaving any dark spots, but if something remains unclear, watch this video -
Installation
In practice, two methods are used for twisting wires using PPE caps. First method: without preliminary twisting. Second method: with preliminary twisting.
Pre-twisted installation
Often in practice, electricians install PPE on a pre-prepared twist of bare wires. To do this, you need to take the stripped wires and press them tightly against each other. The bundle should be fixed using pliers, stepping back a couple of millimeters from the exposed veins. In this case, you need to start twisting the bare ends of the electrical wires pressed against each other clockwise. For twisting, it is best to use another pliers. A small section can be twisted by hand, but if the wires are thick or there are many of them, then use a tool. Once twisting is complete, bite off the remaining exposed wire at a sharp angle.
Note!
Before using connecting clamps, you need to prepare the wires. To do this, they are cleaned using a stipper. If there is no stripper, then you can use a lineman's knife, but in this case, cuts perpendicular to the cable should be avoided.
Installation without twisting
PPE is installed on electrical wires without twisting (a more popular practice). To do this, you need to place the bare wires parallel so that the ends point in the same direction, insert the ends into the PPE and start screwing the cap manually (clockwise). Manual screwing must be done until the spring clicks. A click from the spring will indicate that the twist within the cap has been completed. Further, if the length of the bare wire does not extend beyond the clamp, then the work is finished.
Some electricians recommend exposing a longer section of cable to make the twist longer and more secure. In this case, it will extend beyond the cap, and after a spring click, you will need to tighten the connection using pliers or a screwdriver until the entire bundle of wires is twisted all the way to the insulating coating. After this, the exposed area must be insulated. The best way to do this is with heat shrink tubing and electrical tape.
Please pay attention!
Make sure that the wires do not stick out from under the cap. The documentation for some clamps indicates the required cut length (usually 10–12 millimeters); if there is no information, then preliminary measurements need to be taken. If you made a mistake in calculating the length of the exposed wires and they stick out from under the clamp, then you should additionally insulate them using insulating tape or varnished cloth.
It is also important that the conductors transmit current through the connection and not through the clamp spring. Since the spring is not predisposed to such loads, it will very quickly overheat and fail.
Important!
Immediately after installing PPE, you need to check the quality of the insulation. To do this, apply the maximum possible load to the line and hold it for thirty minutes. Then you need to check the temperature of the clamp. Functional PPE should not heat up; if your test shows otherwise, you should replace it and test it again.
Do not connect cables made of different metals
You also need to know that you cannot twist a combination of copper and aluminum cables together. Since in such cases, special devices (pads) with built-in metal adapters are used.
Choose the appropriate PPE size
If you choose the correct size of caps that matches the total cross-section of the wires, the twist will last a long time and the risk of overheating will be minimized.