A socket is not only a mandatory functional element of electrical wiring, used to connect electrical household appliances, but also a significant interior detail.
The trouble-free operation of the outlet, as well as its neat appearance, depend to a large extent on how well the installation is done, right? To make the correct installation, it is necessary to take into account a number of nuances that are present in this work, one of which is the correct installation of socket boxes.
Have you never installed a socket box and are afraid of making mistakes? We will help you understand all the features - the article discusses in detail the types of installation boxes and the intricacies of installing each of them.
Attention is also paid to the installation of socket boxes in common types of bases - concrete, plasterboard, tiled wall. The material is supplemented with visual photos and useful videos.
Basic rules for installing socket boxes
Before installing the socket box, you must select the location for its installation. But since the socket is a source of increased danger, its placement in some rooms is subject to special requirements specified in the “Rules for Electrical Installations” (PUE).
According to the PUE:
- there must be a distance of at least 50 cm from the electrical outlet to the pipe through which the gas passes;
- sockets in the bathroom can be installed at a distance of at least 60 cm from the source of splashes (sink, shower, bath);
- It is recommended to install switches on the side where the door handle is located, and the distance from the device to the floor should be up to 100 cm;
- You cannot install sockets in saunas, baths, or rooms where laundry is done.
There are no special rules for other premises. Sockets should be placed in such a way that their use is convenient for all family members.
It is also necessary to follow safety requirements and install devices taking into account the location of electrical appliances in the house so that their cords reach the outlets without the use of extension cords.
You may also be interested in information about the nuances of installing an outlet for a washing machine or an outlet for an electric stove.
Recommended installation locations for sockets and switches in the room from the point of view of practicality and convenience
Layout and location
It is done first. It makes no difference whether the power cable was laid before or not. Places for boxes are selected based on the intended purpose. If you plan to include large household appliances, for example, a refrigerator or washing machine, then the niche on the wall should be a meter high from the floor with a fine finish. For other electrical appliances, a height of 30 cm from the same floor will be sufficient. If the installation takes place above the surface of the furniture, then you should count 10 cm or more upward from it.
The only constant value is the distance between the centers of the boxes mounted in one row. For standard sockets it is 71 mm.
The distance from the corners and ceiling, floor and door frames is 15 cm or more. Sockets from radiators of the heating system can be located no closer than half a meter. The rules prohibit laying power cables and installing sockets on walls facing the street. A similar prohibition applies to installation above a stove or heating appliances.
Installing a box in hollow walls
Socket boxes designed for walls made of composite materials, in particular plasterboard, have a slightly different design than installation boxes for concrete and brick bases.
Fixing the glass in the wall is done without gypsum mortar, which makes installing the socket box into plasterboard much faster and easier.
To make holes, it is better to use a wood crown, as they are smooth and neat, which makes the process of installing the socket box easier.
At the top of the glass there are four screws arranged in pairs. Two of them protrude slightly outward and are intended for attaching a switch or socket.
The other two are slightly recessed into the socket body. On the bottom of each screw there is a metal or plastic tab, which, when the screw is turned, moves and fixes the box in the drywall.
Before inserting the glass into the wall, run the electrical wire through the pre-made hole in the back of the box
Before installing the socket box, make markings as described above. Making a hole in drywall is much easier than making a hole in a concrete wall. You can simply cut a circle with a knife or drill along the contour with a drill, and then cut it with the same knife.
However, when using these methods, the edges are not very smooth. In addition, drywall is a rather fragile material and can break.
It is best to do the job using a wood crown. After the hole is prepared, bring the wire out into it and insert the socket so that the screws are positioned horizontally. Secure the cup into the drywall by tightening the two recessed screws clockwise.
Image gallery
Photo from
Preparing a socket box for drywall
Features of mounting mounting cups
Rules for tightening clamping screws
Forming holes for wiring entry
How to install socket boxes before plaster
In general, it is easier to install using finished plaster, but install the socket boxes before plastering
no one forbids it. Another thing is that it is a little more complicated.
In order to properly position the installation boxes before plastering, it is necessary to have already installed plaster beacons. When substituting the rule for beacons, you need to control that the socket boxes do not protrude from the plane of the future plastered wall. It’s best to even deepen the boxes a little relative to the rule by 1-2 mm, then you probably won’t have any problems with pulling the plaster mortar through with the rule.
The smearing algorithm is practically no different from the one described above, the only difference is that the template is not attached to the wall tightly, but taking into account future layers. By controlling the plane using the beacon rule, a template bar is set. Some wedges are inserted between the template and the wall. After the fastening solution has set, the fastening screws are removed or sunk deeper, the protruding wires are neatly rolled up in the sockets themselves.
With this order of work, you need to carefully ensure that the top and bottom of the socket boxes do not protrude from the plane of the beacons. To solve this problem, it is better to use a wide strip for making patterns.
Installation of socket boxes in ceramic tiles
If it is necessary to install a socket or switch in a wall that is supposed to be tiled, marking and making holes in the concrete should be done before finishing work begins. Electrical wires are laid in advance in the resulting recesses.
After laying the tiles, markings are made again and holes of the required depth are drilled in it. It is best to drill the tile with a diamond core bit, periodically cooling it with water.
A gypsum solution is placed in the recesses, it is also applied to the back of the socket box, and then the box is pressed into the hole and leveled.
To install several sockets, a template is made in advance, according to which the wall is first marked, and then after facing it is applied to the tile, and holes are drilled along it
Installing a socket box (step by step instructions)
Let's consider how to install a socket box into a wall with your own hands? To drill an opening in concrete or brick, you will need to take a powerful hammer drill with a 6 mm concrete drill.
Mounted through the following steps:
- A hole is drilled with a drill for subsequent installation of the box. If you plan to install several, then you need to maintain a distance between the products of 7.1 cm. The drilling depth is 50 mm.
- The crown drills 5-10 mm of concrete. The center drill is pulled out. If you do not pull it out, then during operations with a hammer drill it may deflect and break off. When a diamond crown is selected, the drill will smooth the wall and become a hindrance.
- Complete drilling with a hole saw to the required depth.
- A vacuum cleaner removes dust and debris.
- Prepare the box, assemble those that form the block shield - double, triple, cut off the wire plugs. It is recommended to arrange the strobe not in the center, but on the left or right.
- Prepare the solution for installation. It is recommended to use gypsum or putty in a ratio of 2 to 3. This will allow it to dry in 10-20 minutes, so there is no need to rush the work process.
- The plane of the wall is wetted with a spray bottle for good adhesion of the composition.
- The prepared solution is placed in a niche.
- The socket box is being laid.
- Excess composition is removed with a spatula and grouting is done.
- After the solution has hardened, you can remove the excess from the inside.
- Socket mechanisms are inserted.
You should make sure that the box does not stick out, but is flush with the plane of the wall.
The choice of electrical outlets should be approached with the utmost seriousness and care, just like the purchase of electrical equipment. After all, the safe living of all residents in the premises depends on following the installation instructions.
The nuances of installing a multibox on a plinth
What should you do if your house has already undergone high-quality repairs, but you need another point to connect electrical household appliances?
In this case, it is not at all necessary to rip off the new wallpaper and ditch the wall; you can make a socket directly on the baseboard.
Multiboxes fit all types of standard single sockets. They can accommodate not only electrical, but also telephone sockets, as well as Internet cable connectors.
However, it should be noted that this method can only be used on collapsible plastic skirting boards with a cable channel. Before installing the socket box, it is necessary to lay the wire inside the baseboard.
To do this, remove the cover from the part where the socket will be located. This operation is performed from a corner or from a nearby plug; simply pry the cover with a screwdriver and carefully remove it.
Cut the baseboard so that there is a gap the width of which matches the size of the plastic trim. Insert the multibox into it, thread the wire through the hole in its body, and secure the socket box with dowels.
Functions of mounting boxes
Many owners doubt the advisability of using a socket box for concrete and believe that it is quite possible to do without it. They cite the fact that many sockets installed directly in a concrete wall serve well for a long time. However, in such cases there is always a certain risk and there is no complete guarantee of electrical and fire safety.
To resolve this issue in favor of mounting boxes, it is necessary to consider the purpose of these products and the functions assigned to them:
- The mounting box, fixed into concrete or into a brick wall, in turn, firmly holds the socket fixed in it.
- Ensuring electrical safety. Socket boxes, which must be installed in concrete, brick and plasterboard, have dielectric properties, preventing voltage from the socket contacts from reaching the metal wall structures.
- The socket itself is also protected from dust, moisture and small foreign objects getting inside the housing.
- A possible fire inside the socket is localized in the socket box and does not spread beyond the boundaries of the product.
- Standard sizes make installation of socket boxes more accurate. As a result, the socket cover comes into contact with a completely flat surface, without cracks or gaps.
Preparation for installation
Before you begin installing devices, you need to prepare tools and consumables. To fix the box in the wall you will need mortar and a pencil. Other helpers are power tools for cutting recesses with a set of bits.
- The role of video surveillance systems in security
- How to arrange a kitchen corner?
- Silicone tube. What it is?
Dimensions of socket boxes for concrete walls
The overall dimensions of the mounting boxes should be discussed in more detail. These parameters should be taken into account when choosing products for installation in concrete.
In practice they are defined as follows:
- Outer diameter of the box. This indicator can be found by measuring the distance between two elements located at the maximum distance from each other.
- Inner diameter. Determined by the maximum dimensions of the socket mechanism that can be placed inside. The most popular sizes are diameters ranging from 60 to 68 mm.
- Installation depth. Selected depending on the thickness of the wall and the possibility of drilling a hole for the box.
- Internal depth of the socket box. Determined by the maximum depth in the internal space of the box. This parameter determines the possibility of placing a certain number of components inside and creating a reserve for connected cables and wires. Many modifications are produced with a depth of 25 to 80 mm, but most often not very deep products of 40-45 mm are used.
Designation of sockets
A socket is a switching device that is part of a plug connection, works in tandem with a plug, and is designed to connect electrical appliances to the network.
The designation of sockets in the drawings is done in a semicircle, from the convex part of which one or more lines extend, depending on the type of switching device.
The video shows the main symbols of electrical equipment:
Sockets according to the installation method are:
- External (for open wiring). They are mounted on a wall surface. They are indicated by an empty semicircle that does not have any additional lines inside.
- Internal (for hidden wiring). They are mounted inside the wall; to do this, you need to make a hole and insert a special socket into it, reminiscent of a shallow glass in shape. In the schematic representation of such switching devices, the semicircle inside has a line in the center.
Double sockets are often used in household networks. They are a monoblock in which there are two plug connectors (that is, you can connect two plugs from two different electrical appliances) and one installation location (installation is carried out in one socket box). The designation of a double socket on the electrical diagram looks like a semicircle with two lines on the outer convex side:
In modern household networks, sockets with grounding are increasingly used; they guarantee long-term reliable operation of electrical appliances and the safety of people in terms of electric shock.
This wire goes to the general distribution panel, where it is connected to a special ground terminal. The designation of such an outlet on the electrical diagram is as follows:
As you can see, grounding is indicated by a horizontal line, which is tangentially adjacent to the convex part of the semicircle.
It is no longer uncommon for a modern home to be supplied not with a single-phase electrical network, but with a three-phase one. Some electricity consumers require a voltage of 380 V (heating boilers, water heaters, electric stoves). To connect them, three-pole sockets with protective grounding are used. Switching devices of this type have five contacts - three phase, one neutral and one more for protective grounding. A three-pole socket is indicated with three lines on the outside of the semicircle:
And this is what the symbols for double sockets with protective grounding look like:
Sometimes you can see the designation of a socket, in which the semicircle inside is completely painted in black. This means that the switching device is moisture-resistant; it is equipped with a protective cover that prevents moisture or dust from entering the socket. The degree of protection of such elements is marked with special symbols:
- The two English letters IP denote the very concept that the outlet has a certain level of protection.
- Then follow two numbers, the first of which indicates the degree of protection from dust, the second - from moisture.
In the diagram, sockets with degree of protection IP 44-55 look like this:
If they have a protective grounding contact, then another horizontal line is added accordingly:
If you make a wiring diagram in specialized programs, then the video shows an example of a drawing in AutoCad:
Varieties and classification
Depending on the material, shape, design features and parameters, there are different types of socket boxes.
Material of manufacture
Manufacturers produce several models:
- Plastic – convenient and practical products, resistant to fire. The non-flammability of the material allows it to be used on wood surfaces;
- Metal - when heated, they conduct electric current. At the moment, they are practically not used, with the exception of houses made of wood.
- Wooden - an intermediate option, acceptable for rough installation of open wiring.
Plastic socket boxes in plasterboard
Metal glass
Wooden socket boxes for open wiring
A wooden socket box is sometimes found on homemade wiring for bathhouses, garages, and outbuildings.
Manufacturing form
The socket box can have different shapes, most often it is:
- Round – suitable for collecting group switches and sockets. It is easier to make a groove under them.
- Square - accommodate 1-4 mechanisms, allow you to lay the wire with a reserve. They often contain elements of the “smart home” system and dimmers.
- Oval – roomy, designed for 1-5 mechanisms.
Round glass with rosette
Square socket box
Oval for two points
Installation of all products is carried out after gating the surface.
Depth separation
The letter N is used to indicate depth. Mounting boxes are recessed to 40, 42, 60, 45 and 62 mm. Models with a depth of 80 mm are intended for terminal blocks when the wiring is not equipped with junction boxes.
Differences in the fixation system
It is better to choose the socket box fasteners depending on the surface for installation (hollow or solid walls). According to the method of fastening the product, there are:
- with spacer legs - designed for installation inside hollow walls;
- with lugs for screws for fixing sockets and switches;
- with permanent connecting tunnels - for combining several parts into blocks.
The socket box is installed on alabaster without fasteners.
Concrete based
In this case, crowns with Pobedit drills and teeth are installed on the hammer drill. The diameter should not exceed 6.8 centimeters. Any type of socket box should easily fit into the hole.
Plastic options work well when mounted on concrete. If necessary, you need to notice the socket on a new sample. All this can be easily done with a simple screwdriver after the room has been de-energized.
Shape and material
Previously, boxes were made of plastic, wood and steel. For safety reasons, only plastic is currently used. There are 4 types of forms:
- Round. The most common type. It is easy to make a groove in the wall for them.
- Square. Round ones are less common on sale, but have greater capacity. This makes it possible to install additional wires, dimmers, and electrics for a smart home.
- Oval. We have absorbed all the advantages of glasses in the form of a square. At the same time, it is a little easier to install.
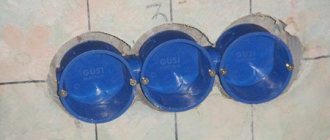
We will separately highlight double socket boxes, which are a composite block of two or more products. Each glass is attached to the adjacent one using connectors. This is very convenient when you need to install sockets for several devices.
Socket boxes for wooden houses
Socket boxes for wooden houses, although metal, cannot be welded.
When choosing socket boxes for a wooden house, you should choose metal products. In most cases, black galvanized iron is used for their manufacture. Taking into account the operating characteristics of the boxes, the use of copper or aluminum is not economically feasible.
In accordance with SNiP, for fire safety purposes, open wiring must be installed in buildings made of timber, logs and plywood panels. Based on this, it is planned to install external control devices of the overhead type. Recessing them when the cable runs along the walls is simply illogical.
A metal socket box for wood is installed in the following cases:
- It is necessary to remove the open cable from the next room to install adjacent sockets with a common supply. When installed on solid wood, the weight of the devices does not matter.
- The internal and external walls are panels made of plywood and basalt wool. This material does not burn and is an excellent dielectric. It is possible to lay communications of any power in it, since the cotton wool will protect both from open flames and from high temperatures.
- Cable laying inside solid wood. It is allowed to pass wires inside corrugated metal tubes. This is a very difficult and time-consuming work, but connoisseurs of aesthetics are ready to incur large expenses for it.
In all cases, non-combustible socket boxes must be installed, since they have direct contact with the wood, trim and finishing cladding.
Drilling holes in concrete
A grinder is suitable for drilling a concrete base. But the process will go faster if you use a hammer drill equipped with a crown with diamond inserts.
It is necessary to drill a crown drill into the center of the intended circle, pointing the body in the desired direction. The drilling depth is calculated by adding 1-1.5 cm to the height of the socket to lay the adhesive mixture.