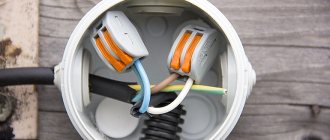
What is the essence of soldering
Soldering uses the ability of some metals in a molten state to effectively flow over the surface of others under the influence of gravity and moderate surface tension.
The connection by soldering is permanent: the two parts being connected are, as it were, enveloped in a layer of solder and remain motionless after it hardens. Since we will be looking at soldering specifically in the context of metal soldering, the most important parameters will be the strength of the mechanical connection and the conductivity of the electrical connection. In most cases, these are directly proportional values and if two parts are tightly grasped, then the conductivity between them will also be high. However, solder has a resistivity higher than even that of aluminum, so its layer should be as thin as possible and its hiding power as high as possible.
In order for soldering to be possible in principle, there are two conditions. The first and most important thing is the cleanliness of the parts at the soldering site. Solder attaches to the metal surface at the atomic level and the presence of even the slightest oxide film or contaminants will make reliable adhesion impossible.
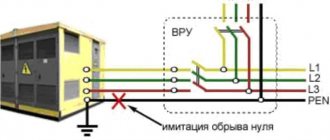
The second condition is that the melting temperature of the solder must be significantly lower than the temperature of the parts being soldered. This seems obvious, but there are solders with a melting point higher than aluminum, for example. In addition, if the actual difference in melting temperatures is not high enough, when the solder solidifies, thermal shrinkage of the parts may prevent the normal formation of the solder crystal lattice.
How to solder circuit conductors with a hand soldering iron?
The soldering procedure aimed at connecting wires is somewhat different from soldering on electronic board tracks.
It should be noted: only copper conductors or those built on alloys with a high copper content can be soldered with tin solder using rosin and similar fluxes.
How to solder wires with a hand soldering iron - correct tinning and correct contact time. The quality largely depends on the composition of the soldered conductor strands
Initially, it is necessary to prepare the ends of the conductors for soldering - strip them to a characteristic shine and twist them tightly (stranded). Then:
- The prepared end of the conductor is inserted together with the soldering iron tip briefly into the rosin.
- Next, grab the solder with a tip and apply it to the stripped end of the conductor, covered with a thin layer of rosin.
- Distribute the solder evenly with the tip until the entire area of the end of the conductor is completely covered.
When performing the last point, you should control the process so as not to overheat the wire insulation.
If the insulation begins to melt, you should remove the soldering iron for a while and repeat tinning a little later. Do a similar procedure with the other wire. Then place the ends one on top of the other and fill with solder.
You can also use another option:
- Clean the ends of the conductors until they are shiny.
- Twist the ends together.
- Dip briefly into melted rosin.
- Tin and fill with solder.
Where to learn to solder
You can train at home by soldering ordinary electrical wires. The main thing is to follow the safety instructions.
The work may require:
- soldering iron (according to professionals, to work with small wires in electronics and radio engineering, a tool with a power of 20-40 W will be sufficient);
- pliers;
- knife;
- scissors;
- set of files;
- sandpaper;
- insulating tape;
- rosin;
- solder.
The question “how to learn to solder” will be resolved after several training sessions. The beginner will gain confidence and experience. Step-by-step soldering instructions can help him with this.
Overview of equipment you may need
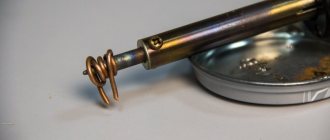
1. nichrome electric soldering iron with a power of 25W. This is an ordinary household soldering iron, which previously could be found in almost any amateur radio electronics technician. Now they are also common and are quite cheap, about 200 rubles. You can buy any soldering iron, including Chinese ones, they also last a long time - with constant use, up to 8 years. The simplest soldering iron consists of a tip, which is a copper rod, sharpened at an angle at the end, and a heater spiral. Handle made of wood or heat-resistant plastic. This is definitely a working tool, which is suitable in 90% of cases for use in domestic conditions, and even in some repair shops it is still used. 2. A 40-80W soldering iron with a tip sharpened to a wedge, reminiscent of a slotted screwdriver, for easy soldering of heavy elements. We do not recommend buying such a soldering iron for your home, although it is cheap. Some people buy it right away by mistake, but then problems arise: some components burn out, traces peel off from printed circuit boards because they overheat. For a home, 25-30W is more than enough. 3. Buy a gas soldering iron. Designed for soldering in the absence of an electrical outlet.
The equivalent (if converted into electrical power) is about 100W. 3 in 1 tool: • soldering iron, which is sharpened to a cone, the tip is durable, made not of copper, but of a special heat-resistant alloy. Suitable for garage work, car repairs. • the tip is removable and can be used as a hot air gun (heating up to 600 degrees). It is quite convenient to use if you need to warm up a heat-shrinkable tube or just a part. Large jobs cannot be performed with a hot air gun, since the air flow and gas pressure are small. • the nozzle is changed and the tool turns into a good working gas burner with a temperature of 1300 degrees. Thus, you can solder massive parts or simply heat something up as needed.
4. The latest type of soldering iron that is gaining momentum is
the ceramic soldering iron . If someone wants to start right away with the good stuff and not save money, we recommend buying it. Pros: very thin tip, suitable for precision (millimeter) work - soldering connectors on mobile phones, mounting or dismantling SOIC, QFP, PLCC, BGA components, etc. There is enough power for any work. It heats up quickly. If a nichrome heater takes 1.5-2 minutes to reach operating mode, then here heating occurs in 20 seconds. - and you can already solder. The ideal option is to have a soldering station attached to it and adjust the temperature from 200 to 480 degrees, adjusting it to the solders and soldering conditions. With its help, you can change parts on motherboards, video cards, and solder large wires. If you want to learn how to solder efficiently over time, we recommend that you start learning by purchasing a soldering station.
What tools and accessories are used when soldering?
The basis for soldering work is a relatively small number of tools and components:
- Electric (or other) soldering iron.
- Soldering iron stand.
- Solder.
- Flux (the simplest and most popular is rosin).
This is what a simplified version of the hardware and accessories for manual soldering looks like. However, with increasing skills of an electrician and increasing needs for soldering work, it is possible to expand the range when additionally required:
- Soldering Station.
- Device "Third hand".
- Set of solder, fluxes, soldering pastes.
What kind of electric soldering iron is it?
Hand tool - soldering iron, powered from a standard AC outlet (220V). There is a direct power tool and power supply via adapter. There are manual soldering irons for different power (10 - 100 W). However, for most soldering cases, a 25-40 W device is usually sufficient.
Hand-held soldering tool designs come in a variety of shapes and configurations. There are tools complemented by different tip shapes and auxiliary accessories
The main tool of the soldering process is available in different versions. For example, a simple one with a handle or in the form of a pistol.
The design of most soldering irons supports the interchangeability of soldering tips. Thanks to the mutual replacement of tips, different soldering methods are implemented.
Working with a hand soldering iron requires caution and compliance with operating rules, since a high heating temperature of 450-500ºC and a high supply voltage of 220 V are used.
What is the best stand for an electric soldering iron?
This accessory is optional, but recommended in any case. In principle, soldering can be carried out without a soldering iron stand, but this option is accompanied by a lot of inconvenience. Moreover, it is not recommended for novice electrical installers to work without a stand.
A stand for parking a soldering tool is an accessory that provides not only ease of use and soldering, but also safety for the electrician
Convenient work with a stand is seen not only in parking the soldering iron during work. Usually the stand is equipped with trays for solder and flux, which also adds to the comfort during soldering.
Therefore, if you intend to do soldering work, you should acquire not only a soldering iron, but also a convenient, practical stand.
What solders and fluxes are used?
There are many varieties of solder in relation to soldering conditions. This soldering accessory comes with:
- lead alloy,
- lead-free alloy,
- with the addition of flux,
- without adding flux.
Traditionally, solder is produced in wire form with a diameter of 0.8-15 mm, as well as rods. The wire version is considered the most common.
For soldering electronics, lead-free solder is most often used with or without the addition of rosin. The lead-free type of solder is based on an alloy of tin and copper.
Lead solder (60% tin, 40% lead) is practiced (much less frequently), but this option is considered harmful to health and is not recommended for use.
When using lead solder for soldering with a soldering iron, it is necessary to provide more active ventilation. After completing soldering work, be sure to wash your hands with laundry soap.
Integral accessories for soldering using a hand soldering iron are soldering rosin and wire solder. There are also solder pastes and rod-shaped solders.
Working with solder is accompanied by different types of flux. Among the options used, there is a soldering option where acid acts as a flux (soldering steel, stainless steel).
In this case, a separate “acid” soldering iron core is recommended, since the acid quickly “eats” the non-ferrous metal. “Acid” core can be found in specialized stores.
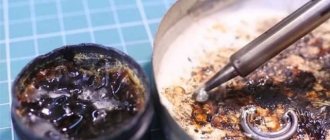
How to solder with a hand soldering iron and clean the tip?
Soldering requires periodic cleaning of the soldering iron core tip. In practice, a standard damp sponge is often used, thanks to which the tip of the soldering iron core can be kept clean and optimal for work.
The sponge also quite effectively removes oxidation that inevitably forms. The presence of an oxidation film on the tip of the soldering iron core covers the working layer of solder. A black film is formed, blocking active adhesion of solder and uniform distribution over the tip.
Using a regular damp sponge seems to be effective, but this method shortens the life of the tip due to the expansion and contraction of the copper. In addition, a wet sponge temporarily reduces the temperature of the tip. Therefore, the best alternative for cleaning seems to be the use of a brass “sponge”.
A convenient means for cleaning the soldering iron tip from oxides and residues of molten solder is a brass mesh. A better alternative to the traditional wet sponge
An accessory such as a brass “sponge” is a fine metal mesh made of brass, similar to that used for washing dishes. The only difference is that the washing mesh is made of steel or stainless steel.
Why do you need a soldering station and a “third hand”?
A more technologically advanced tool is a soldering station. A tool of this type is practical to use when there is a need for constant work associated with soldering.
The soldering station provides greater flexibility in operation, plus control of operation (automatic adjustment of heating temperature).
The advantage of a soldering station is the ability of the device to maintain the set temperature of the soldering iron. This approach contributes to high quality soldering work on a wide range of projects.
Soldering stations help create a safe workplace by incorporating temperature sensors, alarm settings, and even password protection.
A soldering station and a “third hand” are tools for professional use when it comes to large-scale work, as well as soldering of small electronic parts
In addition to the soldering station, professional electricians use another tool - the so-called “third hand”.
We are talking about a special holder equipped with a magnifying glass. With the help of such a holder it is convenient to solder miniature parts and work with electronic boards with small wiring.
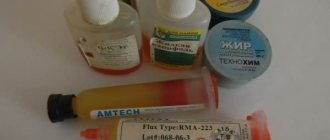
Fluxes and solders - how to choose the right ones
For the reasons described above, the correct choice of flux and solder is almost half the success in the soldering business. Fortunately, there are quite universal brands suitable for most tasks. The area of application of almost all fluxes and solders is clearly indicated on the labels, but some aspects of their use still need to be known.
Let's start with fluxes. They are used for etching parts, removing and dissolving the oxide film with further protection of the metal from corrosion. As long as the surface is covered with flux, you can be sure of its cleanliness, as well as that the molten tin will wet it well and spread.
Fluxes are distinguished by the type of metals and alloys of the parts being joined. Basically, these are mixtures of metal salts, acids and alkalis that actively react when heated with a soldering iron. Well, since there are quite a lot of oxide forms and contaminants, the cocktail must be specially selected for a specific type of metals and alloys.
Active flux for soldering
Conventionally, soldering fluxes are divided into two types. Active fluxes are created on the basis of inorganic acids, mainly chloric and hydrochloric. Their disadvantage is that they need to be washed off immediately after soldering is completed, otherwise acid residues cause quite severe corrosion of the connection and themselves have a fairly high conductivity that can cause a short circuit. But you can solder almost anything with active fluxes.
The second type of flux is created primarily on the basis of rosin, which can also be used in its pure form. Liquid flux is much more convenient to apply; it also contains alcohol and/or glycerin, which completely evaporate when heated. Rosin fluxes are the least effective when soldering steel, but for non-ferrous metals and alloys they are mainly used or other compounds of organic chemistry. Rosin also requires rinsing because in the long term it promotes corrosion and can become conductive by picking up moisture from the air.
Liquid and solid rosin
With solders everything is somewhat simpler. Lead-tin solders of the POS brand are mainly used for soldering. The number after the marking indicates the tin content in the solder. The more it is, the higher the mechanical strength and electrical conductivity of the connection and the lower the melting temperature of the solder. Lead is used to normalize the solidification process; without it, the tin may crack or become covered with needles.
Solder POS-61 with rosin inside
There are special types of solders, primarily lead-free (BP) and other non-toxic ones, in which lead is replaced by indium or zinc. The melting point of BP is higher than that of conventional ones, but the connection is stronger and more resistant to corrosion. There are also low-melting solders that spread already at 90–110 ºС. These include Wood and Rose alloys; they are used for soldering components that are sensitive to overheating. Special solders are mainly used in soldering radio equipment.
Alloy Rose
Solders and fluxes
Now it’s time to accurately select the working solder and flux for it, because... soldering, unlike half-solder, must not only adhere tightly to the base metal, but also be strong itself. A summary of information about solders and fluxes of widespread use from the old reference book is given in Fig. In relation to the present time, there is not much left to add to it.
Characteristics of solders and fluxes for wide application
Solders
Solders from POS-90 to Avia-2 are soft for low-temperature soldering. Only electrical contact is guaranteed. POS-30 and POS-40 solder copper, brass, bronze with inactive fluxes, and the same with steel, and steel with steel with active ones. POSSr-15 can be soldered galvanized sheets with inactive fluxes; other solders corrode the zinc to steel and the soldering soon falls off.
34A, MF-1 and PSR-25 hard solders, for high-temperature soldering. Solder 34A can be used to solder aluminum in a flame (see below, about soldering aluminum) with special fluxes, see ibid. MF1 solder is used to solder copper to steel with activated flux. “Low strength requirements” in this case means that the strength of the joint is closer to the strength of copper than steel. When soldered with a dry soldering iron (see below), PSR-25 is suitable for soldering jewelry, Tiffany stained glass, etc.
Fluxes
Soldering fluxes are divided into neutral (inactive, acid-free), which do not react chemically with the base metal or interact to an insignificant extent, activated, which chemically act on the base metal when heated, and active (acidic), which act on it even when cold. In regard to fluxes, our century has brought the most innovations; mostly still good, but let's start with the unpleasant ones.
First, technically pure acetone for washing rations is no longer widely available due to the fact that it is used in the underground production of drugs and itself has a narcotic effect. Substitutes for technical acetone are solvents 646 and 647.
Secondly, zinc chloride in activated flux pastes is often replaced with sodium teraborate - borax. Hydrochloric acid is a highly toxic, chemically aggressive volatile substance; Zinc chloride is also toxic, and when heated it sublimates, i.e. evaporates without melting. Borax is safe, but when heated it releases a large amount of water of crystallization, which slightly impairs the quality of soldering.
Note: Borax itself is a soldering flux for dip soldering, see below.
The good news is that there is now a wide range of fluxes on sale for all soldering occasions. For ordinary soldering work, you will need (see figure) inexpensive SCF (alcohol rosin, former CE, second in the list of acid-free fluxes in Table I.10 in the figure above) and soldering (etched) acid, this is the first acid flux on the list. SKF is suitable for soldering copper and its alloys, and soldering acid is suitable for steel.
SKF rations must be washed: rosin contains succinic acid, which destroys the metal with prolonged contact. In addition, accidentally spilled SCF instantly spreads over a large area and turns into an extremely sticky muck that takes a very long time to dry, the stains from which cannot be removed from clothes, furniture, or the floor and walls. In general, SKF is a good flux for soldering, but not for slow-witted people.
A complete substitute for SCF, but not so nasty if handled carelessly, is TAGS flux. Steel parts are more massive than is permissible for soldering with soldering acid, and more durable, they are soldered with F38 flux. The universal flux can be used to solder almost any metal in any combination, incl. aluminum, but the strength of the joint with it is not standardized. We'll come back to soldering aluminum later.
Note: radio amateurs, keep in mind that there are now fluxes on sale for soldering enameled wires without stripping!
Soldering tool
Let's consider the tool that you need to purchase to start amateur radio activities, for mounting/dismantling electronic components.
Nippers (side cutters) - they are required for work; they are convenient for molding excess leads, biting off and stripping excess leads.
Pliers – for crimping/pressing elements of radio electronics. If the pliers have an extended working part, they can be used as tweezers. It is very convenient if you need to pull something out from the board, tighten something, hold a nut or bolt. A technical scalpel with replaceable blades (some use medical or knives) for stripping wires, more expensive than varnish, cutting. A desoldering pump, which is a reverse-action syringe.
If the syringe squeezes out, then this one, on the contrary, retracts. For removing excess solder from contacts and contact tracks, desoldering elements. For the same purposes, you can use a special copper braid, which absorbs molten solder under the action of capillary forces. Braid is a disposable item that runs out and is thrown away (you can’t clean it). Unlike a desoldering pump, which can be disassembled and the solder can be taken out, screwed back on, and used again. Those. This is a universal, reusable tool. If you soldered something wrong, you can remove the soldering and re-solder everything again. There is an electric desoldering pump, which is somewhat reminiscent of a soldering iron and is powered from a 220W network. It is mounted on a pin soldered to the printed circuit board and, under its heat, melting the solder, draws it into its body. But for beginners, a braid and a regular desoldering pump will suffice. This set is necessary and mandatory for use to begin soldering work in amateur radio practice; you cannot do without it in any repair, especially when assembling your own construction kits and complex devices.
The third hand (mechanical hand, holder) is a kind of assistant, we recommend it for use. Consists of: • a tripod, which includes crocodile clips, in which you can clamp the conductor so as not to hold it with your hand. • a small bath in which you can put rosin or solder. • soldering iron holder The tripod of this hand is comfortable, rotates in all directions, and is adjustable in height.
What you might need for soldering
Soldering requires a heat source: an open flame, an electric coil or a laser beam. The latter method is suitable even if you need to solder with the purest metal material. At home, an electrical device is used that is intended for:
- various electrical circuits and in the case when you need to solder a radio component;
- repair of electrical equipment;
- tinning with solder metal products.
So, what do you need for soldering with a soldering iron? More on this later.
It is recommended to use a special stand for work
Soldering iron
The handheld device is used for:
- warming up the parts being connected;
- solder heating;
- applying liquid solder to the elements to be connected.
Important! To operate a household soldering iron, you need an electrical voltage of 12 and 220 V.
Solder
To operate the unit, the master may need solder - an alloy of tin and lead. It comes in both tube and wire form. Tubular solder is more convenient to use.
For domestic purposes, they solder with alloys with a lower percentage of tin. In addition, soft and hard solders are used. The former have a melting point of up to 450 degrees, the rest are classified as solid.
Flux
The process must be carried out under flux, which provides:
- maximum adhesion of the alloy;
- dissolution of oxide films.
Rosin, as well as the compositions in which it is included, are often used. To soften the material, a temperature of 50 degrees is enough; at 200 degrees it already boils.
Using flux, you can determine readiness for soldering.
Solder pastes
Solder pastes are also necessary for soldering. They are a mixture of solder and flux. Allows soldering in any place. The composition is applied to the component, and then it is heated with a sting.
You can prepare the composition with your own hands at home. To do this, you need to combine tin filings and liquid flux. The consistency should resemble a gel.
Important! You can store your own prepared solder paste for no more than 6 months.
Soldering iron stand
The tool stand is necessary primarily for safety. During operation, the device heats up to a maximum temperature, so during breaks between operations it should be placed on a stand. For powerful appliances, use a stand with two supports that can hold the appliance firmly.
Solder Removal Braid
Braided soldering is done when the job involves removing solder from a printed circuit board while dismantling parts. The principle is as follows: during the process, the mesh “accepts” solder due to capillary forces.
Before each use, the device must be checked for technical condition.
Choosing a tip and caring for it
Soldering iron tips are distinguished by shape and material. The shape is simple: the most primitive and at the same time universal is the awl-shaped sting. Variations are possible in the shape of a spatula, a cone with a blunt end, with a bevel, and others. The main task when choosing a shape is to achieve the maximum area of contact with a specific type of parts to be soldered, so that the heating is powerful and at the same time short-lived.
Copper soldering iron tips
In terms of material, almost all tips are copper, but they come with or without coating. Copper tips are coated with chromium and nickel to increase heat resistance and eliminate oxidation of the copper surface. Coated tips are very durable, but are slightly less wet with solder and require careful handling. To clean them, brass shavings and viscose sponges are used.
Nickel plated tips
Uncoated tips can rightfully be classified as consumables for soldering. During operation, such a tip periodically becomes covered with a layer of oxides and the solder stops sticking to it. The working edge needs to be re-cleaned and tinned, so with intensive use the tip wears off quite quickly. To slow down the burning of the tip, it is recommended to first forge it and then sharpen it to give the desired shape.
Soldering Accessories
To make using a soldering iron comfortable and, most importantly, safe for the worker, additional tools may be required. To determine what is needed for soldering with a soldering iron, you should understand what specific case and what devices are used.
Various accessories may be required for operation.
Soldering iron stand
The stand can be classified as an auxiliary item conditionally, since its role is significant during the operation of the unit. The soldering iron, during breaks between work, must be placed in its place, which is specially designated for this purpose on the desktop. This simple rule will allow the worker to protect himself from accidental burns while operating the device.
Important! It is recommended to choose a model with an additional sponge stand.
"Third Hand"
It is very convenient to use a “third hand” for work. The device received this name due to the reliable fixation of soldering objects in absolutely any position, for example, it could be a kettle, LED material or a pipe.
Using a soldering iron you can restore products from a wide variety of materials.
Tip cleaners
During soldering, the tip quickly oxidizes, so it must be regularly cleaned of oxides and carbon deposits. For this purpose, cellulose sponges and cleaning shavings are used.
Hand tool
Useful hand tools include:
- tweezers;
- wire cutters;
- soldering kit.
The use of tweezers makes it convenient to solder and dismantle electronic elements on boards. It is allowed to use both regular straight models and those with a curved tail.
When carrying out soldering, it is very difficult to do without wire cutters, since with their help the master can safely remove the remains of the legs of radio components when soldering them to the board.
The standard set of additional soldering tools includes clamps and holders of various types. Often, the kit includes brushes for cleaning boards and tape.
The device should be regularly cleaned of various contaminants.
What are the soldering steps?
The main objective of this technology is to connect two metal parts, most often conductors, with a low-melting alloy so that they hold firmly and pass electric current with the lowest possible resistance.
To do this, you need to perform a series of actions sequentially. Let's look at them using the example of soldering wires. This:
- removing insulation from the connected ends of the wire;
- mechanical stripping of metal cores to an ideal state of oxides;
- heat treatment with flux - tinning the ends with a thin layer;
- heating the solder and applying it to the soldering area.
The dielectric layer of the wire can be made of polyethylene, fabric, varnish or other similar material. It needs to be removed.
This work is best done with a sharp knife, placing its blade almost parallel to the axis of the metal core. This prevents cutting and deep scratches. They weaken mechanical strength and increase electrical resistance. This cannot be allowed.
Thin wires coated with varnish can simply be treated with an open flame of matches or a lighter. The same method is suitable for twisted pair and even thicker wires.
There are special pliers of various designs on sale for stripping insulation from the end of a wire of any diameter. They allow this work to be done professionally without damaging the core.
After removing the insulation, the condition of the metal surface is assessed. Pay attention to cleanliness, absence of dents and cuts.
Only pure metal can ensure a high-quality connection of parts when soldering. It is created by mechanical cleaning of the surface and chemical solutions.
First, they work with a knife blade, lightly pressing it against the contaminated metal at an obtuse angle. The core is pulled from the insulation layer to the bare end, rotating slightly in one direction. The metal will immediately lose its dullness and begin to shine.
Chemical cleaning involves treatment with solvents, alcohol, and FES flux.
The final cleaning of the metal surface of the conductor is carried out by heat treatment with flux, using a tinned soldering iron tip. The most popular and universal remedy is rosin. It is used in a solid state, dissolved in alcohol or jelly-like.
The sale allows you to purchase rosin in any form and provides a wide range of other fluxes.
For soldering parts of electrical circuits, it is not recommended to use fluxes containing acids . They are quite difficult to completely neutralize, and even minor residues quickly oxidize the metal and destroy its structure.
The sequence of tinning a wire core with solid rosin:
- Heat the soldering iron to the desired temperature. It can range from 180 to 240 degrees and depends on the solder and the metal parts being connected. To control the heating, the tips are touched with a tip of solid rosin. If it begins to rapidly form steam, then heating is normal.
- The cleaned conductor is placed on the rosin and touched with the tip of the soldering iron. The wire is rotated to coat it evenly with molten flux.
- The tip of a soldering iron melts the solder and applies it to the rosin-treated wire, evenly distributing it over the surface.
A solution of rosin in alcohol is applied with a brush to the surface to be tinned or simply dripped through a dropper tube.
Jelly-like rosin is squeezed out of a special syringe, which is very convenient to do.
The conductor treated with liquid or jelly-like rosin is heated with a heated soldering iron tip with a drop of solder, accelerating it over the entire contact area.
For soldering, after both contact pads are prepared for connection: cleaned of dirt and oxides, tinned.
The soldered ends are connected together. A piece of solder is placed on them with a heated soldering iron, ensuring that it spreads over both areas. After this, the tip is sharply retracted to the side, and the parts remain motionless until the tin completely hardens. This is judged by a slight darkening of its color.
Correctly performed soldering is distinguished by a strong connection of contacts and a smooth surface of the solidified solder, which is slightly shiny. Its quality is checked using a small mechanical tensile force.
If the surface of the solder has darkening and unevenness, then the soldering is unreliable and needs to be corrected.
Soldering from A to Z
For convenience, we will divide the process of soldering bga chips into several successive steps. The main ones:
- preparing the motherboard for soldering work
- desoldering the microcircuit
- preparing the contact area
- removal of compound
- chip reballing
- soldering the chip to the board
- soldering quality check
To get an idea of bga soldering, if you have not done this before, watch the video instructions. How a Bgacenter teacher performs the soldering process
Soldering bga/BGA soldering
Preparing the board
Before performing soldering work, carefully inspect the area to be soldered. Namely: which microcircuits are located nearby, are there any among them that are coated with a compound (we place heat sinks on them), which chips are located on the back of the motherboard.
If you solder the microcircuits, and on the other side there is a CPU or BB_RF; try to stretch the chip a little and not let the solder completely melt under the chip. This is the so-called cold soldering, which allows you to avoid heating the microcircuits located on the reverse side. In this case, we risk tearing off the nickels on the contact pad, but they can then be restored. In addition, pacifiers—unused contacts—come off more often.
It is important to consider the ambient temperature. That is, in winter, if the room is cool or there are drafts, the temperature must be raised a little higher by 20-30 degrees Celsius.
Soldering bga chips
After a visual inspection, it is necessary to determine the direction of the hot air flow. The general rule is to direct the hair dryer away from the microcircuits on the compound. Then we install the heat sinks of the microcircuit with the compound. Use tweezers to “fit in” to the microcircuit. How it will be grabbed, from which side the spatula should be inserted (we remove the chips on the compound with a spatula). If necessary, remove part of the strapping, then restore the strapping before soldering U.
Set the temperature on the hair dryer to 320 - 340 degrees Celsius. Air consumption is an individual value for each hot-air soldering station.
Point the hair dryer at the board for 5-7 seconds (pre-heat the board) and raise the temperature of the soldering area. To eliminate thermal deformation of the motherboard. And for uniform heating. The flux spreads and is evenly distributed over the required area.
Airflow. It's individual. A lot depends on how close you are soldering to the element. I solder close to the element, almost right next to it. And on a large flow. This reduces the time the board is exposed to hot air. The flow must be selected individually. There are two criteria:
- sealed chips and components (piping) so that they do not blow away from the board,
- Do not overheat the board; this means avoiding prolonged exposure to high temperatures. Why might this be critical for the board? Either nearby microcircuits on the compound are heated, or microcircuits installed on the other side of the board, especially those soldered on light-alloy paste, can spontaneously unsolder in the case of previously performed repairs. This is another very important point if you received the board already soldered, and this can be determined by external inspection; The chips can be soldered onto bga paste with a low melting point. Therefore, before performing soldering work, a visual inspection and coordination of risks with the client is mandatory.
Apply flux around the perimeter of the microcircuit, since the board is hot, it will immediately spread and flow under the microcircuit. Flux is necessary for uniform temperature distribution. Wind the hair dryer as vertically as possible. And we begin to warm up the microcircuit, constantly making circular movements for uniform heating.
The moment of removing the microcircuit. You can navigate by time (before, about 7 years ago - I counted the seconds in my head) or by a nearby capacitor. If the capacitor moves freely, I heat it up for another 5 seconds, then move it slightly horizontally to the side, and then lift it. If you immediately lift it vertically, the nickels may come off. I try not to let the heating last longer than 20 seconds. Some bga chips have a glass case and it is important not to damage it. If during soldering even a small chip or scratch appears on the chip body, I replace the microcircuit using a donor board.
Preparing the contact area
Using a fine-tip soldering iron, apply Rose alloy to each pin on the pad. This is necessary to lower the temperature of the factory lead-free solder. If you are afraid of tearing off the contacts (or when you have little experience) when working with a soldering iron, you can tin the braid with Rose alloy and then use the braid to tin the contacts on the contact pad. In this case, pay special attention to the wiring; you can very easily and imperceptibly “remove” the radio components and then you will need to restore them before installing the microcircuit.
Apply flux to the braid and, without pressing on the board (put the soldering iron down and pull the braid), collect the remaining solder from the contact pad.
Using a cotton swab or toothbrush soaked in technical gasoline BR-2 (or alcohol), wash the contact pad from flux residues. Before washing, lower the temperature of the board. How do I understand when it is already possible to wash with gasoline? I put my finger on the board, and if the finger tolerates it, then you can use gasoline to prevent damage to the board.
Removing compound
Set the temperature on the hairdryer to 240 - 250 degrees Celsius. Using a special spatula or tweezers, remove the remaining compound from the contact pad, from under the microcircuit, and be sure to clean the perimeter. Often very small components are installed around the microcircuits and filled with compound. Therefore, when cleaning the compound, special attention should be paid not to tear off the strapping along with the glue. To do this, it is recommended to warm up the board for sufficient time to soften the glue. And remove the compound layer by layer, and not all at once to its entire depth. Finally clean the soldering area.
When performing repairs, use diode testing mode to measure the voltage drop at each contact. Be sure to let the board cool down and only then take measurements. Hot capacitors can show a short circuit, but when their temperature drops, the short circuit will not show.
Chip reballing
Place the microcircuit on a special mat, on top of which place a napkin or piece of denim.
To restore the ball leads on the chip, it is necessary to remove the existing solder. Using a soldering iron, tin all the pins on the microcircuit with Rose alloy (for large NAND Flash or Wi-Fi chips, small chips can not be tinned with Rose, but immediately collect the solder with a copper braid). Be careful with glass cases, the pins are easily damaged and then not tinned.
Apply flux to the microcircuit and use a braided soldering iron to collect the solder mixed with Roze. If necessary, remove any remaining compound from the surface of the chip. Wash the microcircuit with a cotton swab or toothbrush.
Choose a stencil. First, evaluate the condition of the stencil under a microscope (the quality of the cut, contamination with paste or flux), and if necessary, wash the stencil with gasoline or replace it. Align the stencil with the microcircuit and press with tweezers. Using a spatula, apply a little paste to the stencil and rub the bga paste into the holes. Remove excess paste with a spatula and a cotton swab.
From this moment and during subsequent rolling, avoid horizontal and vertical displacements of the rolled microcircuit relative to the stencil.
Reduce the temperature on the hairdryer to approximately 250 - 270 degrees Celsius. The air flow can also be reduced compared to the flow during dismantling. Point the hairdryer at the stencil and heat it around the perimeter, performing circular movements. Evaporate the flux from the paste and finally form the leads on the chip.
Use a dental probe or tweezers to push the microcircuit out of the stencil (by pushing it into the corner contacts). This must be done while the chip is still warm, otherwise it will get stuck in the stencil.
Additionally, once again warm up the newly formed contacts with a hairdryer for the final formation of the balls.
Soldering the chip onto the board
If the harness was dislodged while lifting the microcircuit, first restore the harness, only then work with the microcircuit. Set the hairdryer to T = 280 – 320 degrees Celsius (depending on the paste used) and reduce the air flow compared to the flow during desoldering.
Apply a small amount of flux to the contact pad. if there is a lot of flux, the microcircuit will float in it.
Align the microcircuit by gaps and by key:
- dot or other mark on the chip body
- contact A1, look in ZXW or Wuxinji
Direct a stream of hot air onto the chip being soldered. If the microcircuit is blown off the board, use a hair dryer from above. In this case, the air will press down the microcircuit and it will not move. It can also blow away the microcircuit because the master forgot to add flux - . Under no circumstances should you put pressure on the microcircuit from above.
How to understand that the microcircuit is soldered:
- When the pulsations of flux coming out from under the soldered microcircuit stop
- Using a probe or tweezers, push the microcircuit horizontally to make sure that the microcircuit is soldered. Due to the surface tension of the solder, the microcircuit moves back. I always push; I’ve developed this habit over many years. Even when I do the “transfer” I also push the central processor, just to be sure.
Remove flux from the motherboard.
Checking the quality of soldering
Before checking, lower the temperature of the board. Do not connect to the LBP and supply power to the hot board immediately after soldering. Since there are lines, most often these are the main power lines of the processor and RAM, which have low resistance. And when voltage is applied to the hot board, the LBP can register a short circuit. Connect the board to the laboratory and apply voltage, starting from 0 volts and smoothly bring it to the working 3.8 volts. If the soldering is done efficiently, then the current consumption on the block will not show.
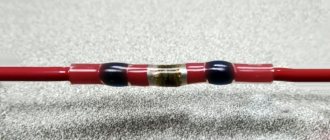
Features of soldering wires
In the preliminary connection of soldered parts, the most problems arise with the wires: to do this, you have to touch them with your hands, which causes the metal surface to become dirty, and the wire solders have to withstand mechanical loads more often than other soldered joints.
Twists of wires
Before soldering the wires, they must be twisted correctly. The main types of wire twists for soldering are shown in Fig. Each of them has its own purpose:
- Bandage twists are used to connect rigid (thick single-core) current-carrying wires, i.e. through which electrical power is transmitted. Especially – external wires. The band connection ensures sufficient electrical contact even if the oxidized junction is not soldered or overheated.
- Grooved twists are made on wires in low-melting insulation (plain PVC, polyethylene), when complete spreading of the solder with minimal heating is required. Grooved twists are heated only along the groove.
- Simple twists can be used to connect both single-core and multi-core wires that have just been stripped of insulation (shiny).
- Simple sequential twisting, so-called. straight British, or simply British, is applicable for connecting current-carrying wires of flexible cables with a cross-section of up to 1.4 square meters. mm, not subject to regular heavy mechanical loads, e.g. electrical extension cords or temporary sheds.
Electrical wires that experience regular and/or constant mechanical stress must be multi-core. They are twisted as shown in the figure below: the ends are marked, the “brooms” are pushed into each other and twisted in the British way. Soldered with high-strength low-melting solder, e.g. POSK-50 (see below) with activated flux that does not require removal of residues, also see below.
Parallel (dead-end) twists of wires with a cross-section of over 0.7 square meters. mm, it is advisable to solder by immersion in molten solder, see below. Otherwise, you will have to heat it either for a long time, or with a too powerful soldering iron, which will cause the insulation to creep and the flux to boil away prematurely.
Note: single-core tinned wires – leads of radio electronics parts – can be soldered end-to-end or with a crochet hook, see fig. on right.
What is soldered, but not soldered
Flexible coaxial cables and cables for computer networks such as twisted pair (“vitukha”) are not intended for connection by soldering. An experienced cable technician who has a complete understanding of the electrodynamics of signal transmission lines can, in exceptional cases, make a coupling on them. But when performed by an amateur, even if he is otherwise a qualified electronics engineer and installer, the throughput and noise immunity of the line will fall below the permissible level, up to complete loss.
How to clean and preserve the sting
The soldering iron tip is cleaned of solder residues by rubbing it against a soft porous or fibrous pad. Foam rubber is most often used, but this is not the best option: it burns and sticks to the sting. The best material for cleaning it is natural felt or basalt cardboard. But even better is 2-step cleaning, first with a sponge-tangle made of metal tape, and then with felt. After cleaning, turn off the soldering iron, insert an even hotter tip into the solid rosin and wait until it stops bubbling. Then the tip is removed and held with the end down so that the excess rosin drains off. Once it has cooled completely, the soldering iron can be stored.
Working with electronic components
Soldering electronics is the most extensive and complex topic that requires experience, skills and special equipment. However, even an amateur can replace a faulty element on a printed circuit board even with only a network soldering iron.
Lead-out elements (those with legs) are the easiest to solder. They are preliminarily fixed (plasticine, wax) with pins in the holes of the board. Then, on the reverse side, the soldering iron is pressed tightly against the tail to warm it up, after which a solder wire containing flux is inserted into the soldering site. You don’t need too much tin, just enough so that it flows into the hole from all sides and forms a kind of elongated cap.
If the lead element dangles and needs to be held by hand, then the soldering area is first moistened with flux. A very small amount is needed; here it is optimal to use bottles of nail polish, pre-washed with acetone. With this soldering technique, tin is collected on the soldering iron in a small amount and a drop of it is carefully brought to the terminal of the element 1–2 mm from the surface of the board. The solder flows down the leg, uniformly filling the hole, after which the soldering iron can be removed.
It is very important that the parts to be joined remain motionless until the solder has completely cooled. Even the slightest violation of the shape of tin during crystallization leads to the so-called cold soldering - crushing the entire mass of solder into many small crystals. A characteristic sign of this phenomenon is a sharp clouding of the solder. It needs to be reheated and wait until it cools evenly, completely still.
Poor quality, cold soldering
To maintain tin in a liquid state, it is enough for the soldering iron to contact the tinned surface of the tip with any point in the moistened area. If the soldering iron literally sticks to the parts being soldered, this indicates a lack of heating power. For soldering heat-sensitive semiconductor elements and microcircuits, regular solder can be mixed with fusible solder.
How to learn to solder boards
Before starting complex soldering, for example, working with diode strips, experts recommend that novice craftsmen acquire inexpensive budget boards. After practicing on them and mastering standard soldering techniques, after some time the beginner will learn how to solder microcircuits.
This type of soldering consists of successive steps:
- Preparatory. Before starting work, you need to ensure a strong connection and reduce resistance. For this purpose, the surface must be thoroughly cleaned of grease and dust. For degreasing, you can use napkins and soap solution. Acetone is used when you need to clean the surface of a circuit to a shine. Methyl hydrate is recommended as a safer solvent. It is as effective as acetone, but has a less pungent odor.
- Placement of board parts to be soldered. Before you learn how to solder circuits, you need to know the locations of all its elements. Flat parts must be soldered first. These are a resistor and a varistor. Then they move on to the capacitor, transistor, transformer, microphone and potentiometer. This sequence guarantees the safety of temperature-sensitive board elements.
- Heating the joint to improve the thermal conductivity of the metal. The soldering iron tip must be pressed against the circuit components for a few seconds. It is important to prevent it from overheating. This will be indicated by bubbles appearing on the surface. In this case, the soldering iron must be removed from the soldering area.
- Solder application. This is carried out until a slight elevation appears on the diagram.
- Removal of surplus. Performed after the solder has hardened and cooled. It is recommended not to rush, but to give the circuit some time to cool down. This is important because the connections made may be damaged and the work will have to be done again.
Every man should learn how to solder circuits. This will make it possible to repair plugs, modems, etc. yourself.
Soldering as a process is not limited to working with copper wires and microcircuits. Having mastered the ability to use a soldering iron on wires, you can move on to subsequent, more complex operations using various solders and various metals.
How to solder with a hand soldering iron - step by step process
Before you start soldering, you should prepare a soldering iron and all the necessary accessories.
- Prepare solder and flux.
- If the soldering iron is new, clean the tip with fine sandpaper until it has a copper shine.
- Heat the tip of the soldering iron core to operating temperature (not higher than 400ºC).
- Dip the tip in rosin and apply to the solder.
- Grab a small amount of solder onto the tip.
- Thoroughly tin the working surfaces of the tip with solder.
The procedure for tinning the tip is recommended to be performed on a copper surface of low mass. Ideally suited for tinning the wide traces of any defective printed circuit board. Having completed tinning, you can proceed directly to soldering.
The procedure for soldering installed electronic parts in itself is not particularly difficult. The quality of creating connections depends on the correct sequence of actions and skill
What should you do before soldering with a hand soldering iron on clean (never soldered) contacts of an electronic board? All soldering points need to be prepared - sanded with “zero” sandpaper to a characteristic shine. Next, perform the following steps:
- Insert the electronic component into the corresponding holes on the board.
- Set the component to vertical/horizontal levels.
- On the back side of the board (solder points), bend the component leads at 45º.
- Dip the soldering iron tip into rosin.
- Grab a small amount of solder.
- Touch the tip to the surface of the board at the soldering point.
The result of touching, as a rule, is a uniform spreading of molten solder around the lead of the electronic component.
Once the solder has filled the soldering point, the soldering iron tip should be removed to allow the applied solder to cure. Repeat the operation at the next point. In this way, soldering of any other points on the electronic board is carried out.
Soldering of massive parts
Finally, we'll briefly talk about soldering parts with high heat capacity, such as cable joints, tanks or cookware. The requirement for the immobility of the joint is most important here; large parts are pre-connected with clamps, small parts with lumps of plasticine; before soldering the joint, it is grabbed pointwise in several places and the clamps are removed.
Massive parts are soldered as usual - first, solder at the joint, then fill the seam with liquid solder. However, special solder is used for these purposes, usually refractory and capable of maintaining high tightness, as well as withstanding partial heating well.
When soldering like this, it is extremely important to keep the parts well heated. For these purposes, the soldering seam is heated with a gas burner immediately before the soldering site, and a massive copper hatchet is used instead of a conventional electric soldering iron. It is also constantly heated in the flame of a burner, simultaneously wetting it with solder, and then the joint is filled, partially melting the previous seam by a few millimeters.
A similar heated soldering technique can also be used when working with a regular soldering iron, for example, when soldering thick cable cores. The sting in this case acts only as an operational tool for carefully distributing the tin, and the main source of heating is a gas burner.
How to solder pipes
Copper pipes are soldered using a high-temperature method with any hard copper solder with activated flux paste, which does not require removal of residues. Next, there are 3 options:
- In copper (brass, bronze) couplings - soldering fittings.
- With full distribution.
- With incomplete distribution and compression.
Soldering copper pipes into fittings is more reliable than others, but requires significant additional costs for couplings. The only case when it is irreplaceable is a drainage device; then a tee fitting is used. Both soldered surfaces are not tinned in advance, but are coated with flux. Then the pipe is inserted into the fitting, securely fixed and the joint is soldered. Soldering is considered complete when the solder stops going into the gap between the pipe and the coupling (0.5-1 mm is needed) and protrudes outward as a small bead. The fastener is removed no earlier than 3-5 minutes after the solder has hardened, when the joint can already be held by hand, otherwise the solder will not gain strength and the joint will eventually leak.
How pipes with full distribution are soldered is shown on the left in Fig. The “distributed” soldering holds the same pressure as the fitting one, but requires additional pressure. special tools for unrolling the socket and increased solder consumption. Fixing the soldered pipe is not necessary; it can be pushed into the socket with a twist until it jams tightly, so soldering with full distribution is often done in places that are inconvenient for installing the clamp.
Soldering copper pipes
In home wiring made from thin-walled pipes of small diameter, where the pressure is already low and its losses are insignificant, soldering with incomplete expansion of one pipe and narrowing of the other may be advisable, pos. I on the right in Fig. To prepare the pipes, a round stick made of hard wood with a conical tip of 10-12 degrees on one side and a truncated-conical hole of 15-20 degrees on the other, pos. II, is sufficient. The ends of the pipes are processed until they fit into each other without jamming for approx. by 10-12 mm. The surfaces are tinned in advance, more flux is applied to the tinned ones and they are connected until they jam. Then they heat until the solder melts and prop up the narrowed pipe until it jams. Solder consumption is minimal.
The most important condition for the reliability of such a joint is that the narrowing must be oriented along the flow of water, pos. III. Bernoulli's school law is a generalization for an ideal fluid in a wide pipe, and for a real fluid in a narrow pipe, due to its (liquid) viscosity, the maximum pressure jump shifts opposite to the current, pos. IV. A component of pressure force arises, pressing the narrowed pipe against the distributor, and the soldering turns out to be very reliable.
Bottom line
Despite the abundance of theoretical advice, only practice will help you learn how to solder correctly. Take a faulty circuit board from any electronics, remove and solder the components several times. The same applies to splicing wires. A couple of meters of used wiring is enough to get practical experience. Then start the real work.
Sources
- https://www.rmnt.ru/story/instrument/kak-pravilno-pajat-pajalnikom-instruktsija-dlja-chaynikov.1256556/
- https://FB.ru/article/253821/kak-nauchitsya-payat-poshagovaya-instruktsiya-osobennosti-i-rekomendatsii-professionalov
- https://svarka-master.ru/pajka-dlya-nachinayushhih-ot-a-do-ya/
- https://HouseDiz.ru/kak-payat-payalnikom-pravilno-instrukciya-dlya-novichkov/
- https://vopros-remont.ru/elektrika/pajka/
- https://ProFazu.ru/elektrooborudovanie/samodelki-oborud/kak-pravilno-payat.html