In order to assemble and install a satellite television set at home on your own, without any practical knowledge, you need to follow a certain step-by-step sequence of work.
Let's look at the main points that you should pay special attention to when assembling the plate, wiring diagrams, and also focus on common mistakes that inexperienced installers make.
Installation materials
Let's start with the necessary materials. For assembly you will need:
- the plate itself
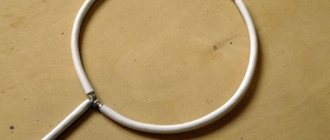
- multifeeds – fasteners for heads
Without them, if you have several heads, you will end up with a tree like this.
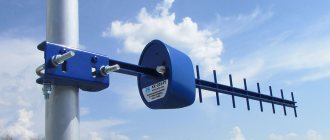
- mounting bracket - “leg”
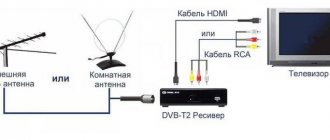
- TV tuner or receiver
- RF coaxial cable with a characteristic impedance of at least 75 Ohms (RK 75 or Western analogue RG and SAT) + F connectors for it
- converters or heads - usually from one to 3 pieces (when assembling the so-called “Gorynych”)
- Diseqc switch – it switches the signal from one head to another when there are several of them
- multiswitch
You will need it if you want to simultaneously connect several TVs from one dish.
Multiswitch connection diagrams
The multiswitch itself must be selected depending on the number of cables and TVs in your home. The wiring diagrams for the most popular satellites are as follows:
- For the Amos 2/3 4.0w satellite, one SAT cable is enough. The connectors are connected to the ports as shown in the picture below:
- Astra 5.0E will require two cables. Connection ports:
- for Eutelsat 36.0E, where the NTV+ channels are located, two cables are also needed. Their connection diagram:
- for Eutelsat 36.0E, but with channels from Tricolor you can get by with one cable. It connects to the H, Hi input.
If you also have a regular television antenna, then the multiswitch must have a TerrTV input.
Connection diagram for the ABS-2A satellite via a multiswitch to receive a package of channels from MTS:
Keep in mind that when using a multiswitch, Daisik=Diseqc is no longer needed.
General information about satellite broadcasting
Broadcasting satellites are located in geostationary orbit, at an altitude of 35,786 km above sea level in the plane of the Earth's equator. The orbital speed at this altitude is equal to the speed of rotation of the Earth, so the satellite hangs over the same point on its surface. The location of the satellite in geostationary orbit is called the station point.
In reference manuals, satellite locations are designated by their geographic longitude: angular distance from the prime (Greenwich) meridian. This must be taken into account when orienting the antenna and a correction must be given: from a given point, the Greenwich meridian is “visible” at an angle opposite to the longitude of the location. How some stationary satellites are visible from Greenwich is shown in the figure.
Example 1: the longitude of the center of Voronezh is 39 degrees 15 minutes east. The position of the Eutelsat II F4 satellite is 7 degrees to the east, i.e. from Greenwich this satellite is visible at 7 degrees to the east. If Eutelsat II F4 hovered exactly above the prime meridian, the antenna would have to be rotated 39 degrees 15 minutes towards Greenwich to receive it, i.e. west. And since Eutelsat II F4 is already “shifted” by 7 degrees towards Voronezh, the antenna needs to be turned west by 32 degrees 15 minutes.
From Earth, the stationary orbit is “visible” in the sky in the form of the so-called “Clark Belt”. It should not be confused with the celestial equator. The angular height of the celestial equator varies throughout the year, and the Clarke Belt is “visible” as an arc of a curve that degenerates from a circle at the poles to a straight line at the equator. The Clark Belt “rests” on the horizon exactly in the east and west, regardless of location.
At a particular geographic location, the highest point of the Clark Belt is located exactly in the south, and its angular altitude is equal to the inverse of the geographic latitude of the place: 0 at the poles and 90 degrees at the equator. Therefore, at high latitudes, reception of satellite television is difficult or completely impossible: the Clark Belt “lies” on the horizon, and the satellite signal, even if it “shines” here, “stalls” in the atmosphere.
Example 2: the geographic latitude of the center of Voronezh is 51 degrees 20 minutes north. The highest point of the Clark Belt is seen from here at 90 degrees minus 51 degrees 20 minutes = 48 degrees 40 minutes due south.
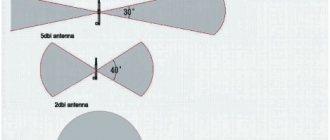
Satellites do not emit signals in all directions; that would be too wasteful. The transmitting antennas of satellites are directional and, as a rule, “illuminate” the territory of the owning country, or the region to which the broadcast is carried out. Therefore, it is impossible to “catch” all the satellites visible from a given place: it may be visible, but it “shines” in the other direction.
If the satellite “shines” directly downwards, then, in principle, it can broadcast to the entire hemisphere below it, having an antenna with a radiation pattern with an aperture of just over 10 degrees. However, at a distance of 36,000 km, this requires a transmitter power of more than 10 kW, solar panels of the appropriate area, and the entire satellite must be launched into orbit by a heavy carrier. Therefore, there are not so many broadcast satellites.
Video: Basic Points of Satellite Dish Direction
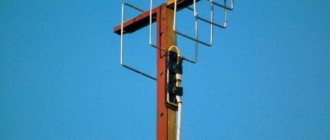
Satellite dish assembly
The assembly tool usually requires a pair of open-end wrenches for 10 and 13, plus a Phillips screwdriver. To mount it to the wall you will need a hammer drill and anchor bolts.
When you have decided on the package, first of all you need to correctly assemble the plate itself. There are several nuances here.
For example, when assembling the traverse, pay attention that the transverse bar, which is attached to the mirror of the plate itself, should be placed on top of it.
If you screw it on the other side, and this is physically possible, then:
- first, you will have poor hole alignment
- secondly, the opposite end of the traverse, where the heads cling, will go out of focus
As a result, it will initially be difficult to catch at least some signal. In addition, the mount that goes to the bracket, when setting up satellites above the horizon (relative to your geographic residence), must cling with the adjustable part down.
And for satellites located below the horizon - on the contrary, with the adjustable part up.
Since in this case, you will no longer need to raise, but lower the mirror.
How to choose the right place and direction
The success of the setup is influenced not only by the quality of the equipment, but also by the correct location of the antenna itself. Therefore, before installing a satellite dish yourself, you need to choose the optimal location. To enjoy watching satellite channels without interference, you must follow these rules:
- The direction to the satellite must be open, free from any interference (buildings, trees, billboards). Obstacles in the signal path will block the reception. If you cannot remove the obstacle, you need to increase the diagonal of the mirror.
- The size of the satellite antenna is selected based on the signal coverage (for a specific area) and its characteristics. Care must be taken that the plate does not interfere with the installation of other devices and is accessible for service.
- The fixation site must be safe. We are talking about the likelihood of icicles or snow layers falling from the roof.
- In open space, gusts of wind are possible, and the larger the diameter of the antenna, the higher its windage, and the more important the reliability of the fastening.
Source: your-master.tv
- You can simplify the task of setting up your equipment if you place the rest of the equipment as close as possible to the mounting point of the dish.
- Plates are often mounted on the wall of a building on the outside of a balcony (loggia), or next to a window. It is prohibited to mount the antenna inside the balcony, even if it is not glazed.
The direction of the dish is selected towards a specific satellite. For Russian regions, the standard satellites are Sirius, Hotbird, Amos, broadcasting Russian-language channels, but options are possible. Directions can be found on specialized websites, in literature or from a sales consultant.
How to collect a multifeed
Assembling a multifeed also involves some special features. The collapsible kit initially comes with two unequal “ears”. One is more, the other is less.
The small one is put on a tube assembled with plastic.
The large one is attached to the central crossbeam. In this case, both ears can be positioned relative to each other in two different ways.
At the same level or in different planes. Most installers place them exactly in one plane.
Although if you do the opposite, this will make it easier to perform the very initial setup of the satellite dish and will save time when searching for additional side satellites.
The assembled heads will be at different levels, one higher, the other lower.
Actually, the satellites themselves fly across the horizon.
But this is of course true if your converters pick up three different satellites. When two heads are picking up the same satellite, for example Eutelsat 36E, but with different software packages, then place them in the same plane.
But mount the third head as described above. The spacing between the converters also depends on the diameter of the mirror. The smaller its size, the closer the heads will be located relative to each other.
After the bar is screwed on, try, at least by eye, to position the head so that the central axis of the plastic (where the two halves of the casting meet), and this very attachment to the traverse, are at an angle of 90 degrees. Further, everything will be regulated relative to this initial position.
The order in which multifeeds are interleaved also matters. The first and closest to the dish should be the multifeed whose satellite position is closer to your place of residence.
For example, if you live beyond 40 degrees, then Eutelsat 36.0E should appear on your dish first, then Hotbird 13E, and lastly Astra 5.0E. The same is true for other satellites.
After fixing the dish to the wall or roof, lay coaxial cables from this place to the tuner or switch.
Label each end with which head it comes from.
If you have a Dysec, there will be one output cable.
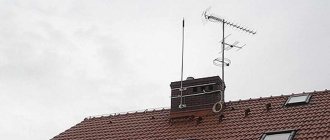
Installing a satellite dish and laying cables
In stores that sell equipment for satellite TV and satellite dishes, you can buy various types of antenna holders that are attached with brackets to the wall or antenna mast.
- Select the bracket that suits your installation location.
- Attach it as firmly as possible to a rigid base. Installing a satellite dish using brackets
- Buy a quality cable of suitable length. It is best to take a section with a margin of at least 3 meters (a cable longer than 30 meters requires a signal amplifier), which will connect the antenna kit to the HD decoder.
Satellite cable - Route and secure the cable so that there is no risk of tripping over it or accidentally damaging it (avoid sharp bends).
- Cut the cable after installing it. .
- If the converter is equipped with a water guard, place it over the cable before inserting (draw-out converters do not require a guard).
- F-type connectors should be screwed tightly to the coaxial cable, using wire cutters if necessary (it is better to use a special wrench). It is important to carefully prepare the cable and ensure that the metal braid of the coaxial cable does not touch the center wire.
Important: in houses equipped with a lightning protection system, the mast must be connected to it with a copper cable with a cross-section of 50 mm² or 80 mm², and external wires must be connected to the mast with a cable with a cross-section of 40 mm². But these requirements are not mandatory if the antenna is located less than 2 meters above the roof and closer than 1.5 meters to the wall from the house, that is, on the balcony.
Choosing the right place to install a satellite dish is the first task
Installation instructions: choosing a location, calculating elevation angle, azimuth
Russian satellite TV operators are divided into two categories - southern (which includes NTV-plus and Tricolor TV) and eastern (Telekarta, MTS). In this case, we will give an example of installing a south antenna.
Read more about setting up a satellite signal from MTS in our material.
Map of satellites - you can start from it when setting up the satellite dish for the first time
Correct installation of a satellite dish depends on the correct setting of four parameters:
- azimuth is the angle between north and the desired direction;
- angle of inclination/elevation – angle of orientation of the plate in the vertical plane;
- elevation angle – a horizontal angle corresponding to the rotation of the plate left-right;
- converter rotation - the angle at which the antenna looks in a given direction of the world.
Adjusting the Azimuth Angle Using a Compass
Azimuth for different cities
Tilt adjustment:
If the converter has a scale or you have a protractor, turn the converter to the value in the table above that corresponds to your city.
The azimuth is set with a compass and measured in a clockwise direction. The antenna direction angle (azimuth – 180º) is measured from the south clockwise.
- use mounting bolts to secure the converter in the bracket;
- attach the antenna to the mast and adjust the angle;
- screw the wires to the converter and to the receiver;
- Connect the set-top box to the TV according to the instructions and launch it.
Installation, connection and self-tuning of a satellite dish - video instructions:
You can fine-tune the position of the satellite dish based on the measurement results of the received signal. You don't need a special counter for this. Modern decoders have sufficient functionality to measure the signal received from the satellite.
Calculation of elevation and azimuth when installing a satellite dish
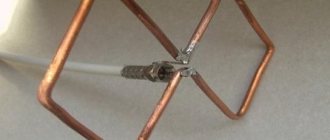
F connector connection
To connect coaxial cables, you need to strip them and put F-connectors on them. There are two ways to do this.
Method 1 – cut off only the outer sheath of the cable with a knife at a distance of 20-25mm. The screen must not be damaged.
Carefully bend all the wires onto the shell.
Now you need to remove the insulation from the central core. It should protrude from the screen by a maximum of 2mm.
After this, screw on the F connector.
Shorten the excess stock of the central core, leaving no more than 5mm from the plane of the connector.
Method 2 is easier. Take the utility knife again. Step back approximately 1cm from the edge of the cable and cut off all the insulation. Including external and internal, up to the central core.
Then, retreating 3mm, cut off only the outer braid.
Make sure that no lint or wires get between the braid and the central core.
There is no need to remove any more insulation or bend anything. Just insert and screw on the f connector from above.
Next, you lay out cables throughout the apartment in all the rooms where you have TVs. You sign them all too.
At the same time, it is much safer to run the cable directly into the device rather than connect it through a satellite TV outlet. This may be associated with either a loss of quality or a complete loss of signal.
The wiring diagram when using a multiswitch may look like this:
Diseqc connection
If you only have a dashcam, connecting and configuring satellites is carried out in the following sequence.
Remember that any self-respecting store of satellite equipment and similar systems always sells tuners already programmed for certain channels and satellites. Otherwise, competitors will simply drive him out of the market.
At the same time, when purchasing, be sure to ask the seller to write you the Diseqc ports of the switch, since they were set by him during the settings. It is through these ports that you will have to make all cable connections.
When installing, you first connect the cables to the heads, and then run them to the dashik. Just on it, it is advisable to connect everything initially with the “factory” tuner settings.
If you have any satellite in the receiver configured to the first port, then accordingly it should not go to port No. 1. If it is on the second one, then port No. 2 is also used in the switch, etc.
All input ports are always signed. The central single connector is the output to the tuner itself.
How does satellite TV work?
In space, at the level of the Earth's equator, television satellites rotate, which send a signal to the planet, where it is received by special devices - antennas, and then this signal is decoded on a TV set-top box and transmits an image.
Satellite in outer space
In this case, the satellite antenna acts as a kind of lens that collects radio waves into one beam, amplifying it for stable reception. Moreover, the further the satellite is located from the equipment, the larger the dish diameter required.
Accordingly, without high-quality receiving equipment, the signal will not reach the TV. Therefore, it is important to choose the right dish, the signal from which enters the convector, then is converted and goes to the receiver, and only then hits the screen.
Connection diagram for an apartment building
The receiver is installed close to the TV. The number and clarity of transmitted channels depends on the power and quality of this equipment. The installed software allows you to “catch” and recognize a huge number of TV programs. By updating the receiver's firmware version, you can gain access to new channels. It is such affordable and high-quality television that gives rise to the question of how to set up a satellite dish yourself, and then TV channels.
Search for satellite and channels
Setting up and searching for a satellite can be done without fancy devices using the receiver itself.
True, you will have to drag the tuner itself + some small TV onto the roof.
Unless, of course, you install a motorcycle suspension.
This setup can also be done by two people. One person on the roof moves a plate, another uses a cell phone to control the house's TV signal.
If you are not satisfied with either one or the second option, you can buy a cheap portable device from the Chinese for setting up and analyzing the satellite signal - here or here.
Then setting up will not be difficult at all. By the way, it will be useful in the future if after a strong wind your signal deteriorates or you want to add a satellite over time, or maybe even change the heads. Configure satellites with MTS and Tricolor, instead of Amos, Astra, etc.
Start setting from the central head. Initially, place the plate with a slight rise towards the horizon. To find your bearings, look at your closest neighbors.
Nowadays, you will clearly no longer be a pioneer, and finding a couple of tuned cymbals will not be difficult. Sometimes there are so many of them that they interfere with each other.
As a last resort, you can use programs on smartphones - Satellite Director or SatFinder.
You install the program, launch it and start turning your smartphone in different directions in search of the desired satellite. The coordinates of most of them are already entered into the program and there is no need to search for anything.
An icon marked with a circle or cross will indicate the correct direction for the satellite dish. Refer to it.
Turn on the tuner, select a satellite from the central converter and look for at least some signal from this head. The search is performed by raising, lowering and rotating the antenna itself.
The signal quality is indicated as a percentage scale and is located at the bottom of the screen. You want to achieve the highest possible value.
To do this, very, very slowly begin to turn the plate in different directions. The mirror itself cannot be covered.
If there is no signal, or it is of very poor quality, the dish drops slightly. Then the process of turning around is repeated. As soon as a good quality signal is found in height, the dish is preliminarily fixed vertically.
After which, you can again turn it left and right to find the highest possible quality. There will never be 100%, just look for the highest possible figure - 68-75%, etc.
Having found the best position, finally clamp the rotating mechanism to the right and left. Just don’t fully tighten one bolt at a time, otherwise the plate will move to the side a couple of degrees. Tighten the nuts evenly, like on car wheels or an engine head.
When the corners are all set, it is necessary to again adjust the entire structure in height. Having loosened the fasteners, you begin to raise or lower it vertically, all the time monitoring the signal.
Remember that the maximum is always found using the downward method.
If you found it and went further, in the direction of decrease, raise the plate back a little higher and reach the point where the maximum signal is just beginning.
Why is this needed and what does it give? During long-term operation under the weight of snow, wind, and rain, the dish will still go down a little, worsening the signal.
You need to put it on a stretch, as it were. This will preserve the signal quality for a long time.
Keep in mind that the plate must initially be fixed level to the wall or roof.
If this is not observed, then having found the horizontal maximum of the signal, you will begin to look for the vertical maximum. And in the process of this, the horizontal position will go away. You will have to adjust the horizontal-vertical several times.
Next, proceed to the next stage of setup - scrolling around its axis of the central converter clockwise or counterclockwise. Here you can also achieve a signal improvement of several percent.
This way you have adjusted the plate itself and the central head. Let's move on to setting up side converters from other satellites.
Switch the tuner to the next satellite and call up its information line. Thanks to the multifeed, the converter of this satellite can also be rotated up and down, brought closer or further away from the dish.
Just like with the middle head, first look for the maximum on the vertical, and then move the side converter closer or farther towards the central one. At the end of the settings, rotate it around the axis.
When setting up satellites from the side converters, pay special attention to where you stand relative to the dish. On the side heads, the signal from the satellite arrives at the center of the mirror and, reflected like in a billiard, hits the converter.
So, in order not to block this signal with your body, you should be located on the nearest side of the tuning head, and not on the opposite side.
After searching and setting up a satellite from all three converters, the process can be considered complete. Hide and seal the cable from rain and precipitation, and securely secure the satellite cables with clamps to prevent them from being blown around by the wind.
Software and programs for PCs and smartphones for setting up satellite television
Satellite Antenna Alignment
Using this free PC program, you can easily and easily calculate the azimuth and elevation angle for installing a satellite dish. The program is very easy to work with.
After launching the program, simply enter the latitude and longitude of your home in the “Coordinates of the antenna installation” section (you can find out by opening Google maps and entering your address). The left side of the screen will display the azimuth angles and locations for all possible satellites. Find the satellite you need and use the obtained coordinates. The program can be downloaded completely free of charge here: https://satellite-antenna-alignment.ru.uptodown.com/windows.
Advantages:
- many settings;
- completely Russian-language;
- works in all parts of the world.
Disadvantages: outdated interface.
SatFinder
A similar free smartphone app is called SatFinder. It allows you to configure a satellite dish using GPS navigation and operates in two modes:
- In camera mode.
- In "sight" mode.
In the first case, the location of the satellites is automatically displayed on the phone screen in the form of a special arc. All you need to do is point the antenna correctly.
In aim mode, the app will guide you using coordinates and arrows that will change as you move the antenna. If it is aimed exactly at the satellite, the arrows in the application will turn green. The application can be installed for free from the Google Play store https://play.google.com/store/apps/details?id=com.esys.satfinder&hl=ru&gl=US.
SatFinder program interface
Advantages:
- two satellite search modes;
- instant location determination via GPS;
- convenient interface.
Disadvantages: none found.
Dishpointer Pro
A good alternative application for a smartphone. It's not free, but it's considered one of the best satellite dish tuning apps in the world. It can be purchased for Android from the Google Play store https://play.google.com/store/apps/details?id=satellite.finder.comptech&hl=ru&gl=US.
Advantages:
- high-precision satellite identification;
- finding the user even in conditions with a poor GPS signal (using mobile operator data).
Flaws:
- the application is paid;
- menu in English.