Melting point and other properties of tin and lead based solders
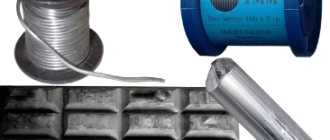
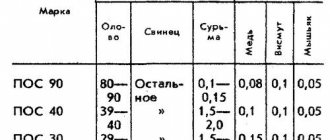
The table shows the melting point of solders of common brands based on tin and lead, as well as their thermophysical and mechanical properties.
The properties of solders are given at room temperature. The table shows the following properties: melting point of solders (solidus and liquidus) in degrees Celsius, solder density, electrical resistivity, thermal conductivity, tensile strength, elongation, impact strength, Brinell hardness, HB.
The melting point of solders (liquidus - the liquid state of solder) based on lead and tin is in the range from 145 to 308 ° C. It should be noted that the melting temperature of the solder, equal to 145°C, corresponds to POSK 50-18 solder, which belongs to the category of low-melting solders. At a temperature of 308 degrees Celsius, POSSu 5-1 solder is in liquid form.
The properties of the following solders are considered: POS 90, POS 61, POS 40, POS 10, POS 61M, POSK 50-18, POSSU61-0.5, POSSU 50-0.5, POSSU 40-0.5, POSSU 35-0, 5, POSSU 30-0.5, POSSU 25-0.5, POSSU 18-0.5, POSSU 95-5, POSSU 40-2, POSSU 35-2, POSSU 30-2, POSSU 25-2, POSSU 18 -2, POSSU 15-2, POSSU 10-2, POSSU 8-3, POSSU 5-1, POSSU 4-6.
According to the table, it can be seen that the density of solders varies from 7300 to 11200 kg/m3 . The solder with the minimum density is tin-lead solder POSu 95-5. The heaviest of the solders considered is POSSu 5-1 solder - the density of such solder is 11200 kg/m3.
The thermal conductivity of solders in the table is given in kcal/(cm·s·deg). Solders with maximum thermal conductivity are POS 90 and POSK 50-18 - their thermal conductivity is 0.13 kcal/(cm s deg).
Soldering with a soldering iron
Soldering with a soldering iron is one of the most common and simplest soldering methods, but it has two significant limitations. Firstly, a soldering iron can only be soldered with low-melting (soft) solders, and secondly, it is impossible (or, in any case, difficult) to solder massive parts with a large heat sink - due to the impossibility of heating them to the melting temperature of the solder. The last limitation is overcome by heating the part to be soldered with an external heat source - a gas burner, electric or gas stove, or some other method - but this complicates the soldering process. Before you solder with a soldering iron, you need to get everything you need. The main tools and materials without which soldering is impossible include the soldering iron itself, solder and flux.
Soldering irons
Depending on the heating method, soldering irons are “conventional” - electric (with a spiral or ceramic heater), gas (with a gas burner), hot-air (heat is transferred by air flow), and induction. Massive hammer soldering irons can be heated not only with electricity, but also in the old fashioned way - with an open flame.
An antique hammer soldering iron heated, for example, over a fire
An antique hammer soldering iron heated, for example, over a fire
You can learn how to use such a soldering iron from the descriptions of the technology of tin work, which is where they were used most often. Nowadays, electric soldering irons are usually used due to their availability and ease of use. But the first soldering irons were heated over an open flame.
Vintage soldering irons heated over an open flame
The main parameter by which a soldering iron is selected is its power, which determines the amount of heat flow transferred to the parts being soldered. Devices with a power of up to 40 W are used for soldering electronic components. Thin-walled parts (with a wall thickness of up to 1 mm) require a power of 80-100 W.
Electric soldering irons
Homemade gas soldering iron
For parts with a wall thickness of 2 mm or more, soldering irons with a power above 100 W will be needed. These are, in particular, electric hammer soldering irons that consume up to 250 W and higher. The most energy-intensive soldering irons include, for example, the Ersa Hammer 550 hammer soldering iron with a power of 550 W. It is capable of heating up to a temperature of 600°C and is designed for soldering particularly massive parts - radiators, machine parts. But it has an inadequate price.
Hammer soldering iron Ersa Hammer 550
In addition to the massiveness of the part, the required power of the soldering iron is also affected by the thermal conductivity of the metal being soldered. As it increases, the power of the device and its heating temperature must be increased. When soldering parts made of copper with a soldering iron, it must be heated more than when soldering a part of the same mass, but made of steel. By the way, when working with copper products, a situation may arise when, due to the high thermal conductivity of the metal, during soldering, desoldering of previously completed areas will occur.
Solders
When soldering with electric soldering irons, low-temperature tin-lead (POS-30, POS-40, POS-61), tin-silver (PSr-2, PSr-2.5) or other solders and pure tin are used. The disadvantages of solders containing lead include the harmfulness of the latter, and the advantages include better soldering quality than that of lead-free solders. Pure tin is used for soldering food utensils.
Solder POS-61
Fluxes
It is generally accepted that tin, silver, gold, copper, brass, bronze, lead, and nickel silver can be soldered well.
Satisfactory - carbon and low-alloy steels, nickel, zinc. Bad - aluminum, high-alloy and stainless steels, aluminum bronze, cast iron, chromium, titanium, magnesium. However, without disputing these data, we can say that there is no poorly soldered metal, there is poor preparation of the part, incorrectly selected flux and incorrect temperature conditions. Choosing the right flux for soldering means solving the main problem of soldering. It is the quality of the flux that primarily determines the solderability of a particular metal, the ease or difficulty of the soldering process itself, and the strength of the connection. The flux must correspond to the material of the products being soldered - in its ability to destroy its oxide film.
Acidic (active) fluxes, such as “Soldering Acid” based on zinc chloride, cannot be used when soldering electronic components, as they conduct electricity well and cause corrosion, however, due to their aggressiveness, they prepare the surface very well and are therefore indispensable when soldering metal structures, and the more chemically resistant the metal, the more active the flux should be. Residues of active fluxes must be carefully removed after soldering is completed.
Effective fluxes for soldering steel are an aqueous solution of zinc chloride, soldering acids based on it, and LTI-120 flux. You can use other, stronger fluxes, of which there are plenty on the market.
Soldering fluxes
The main difference between soldering stainless steels with a soldering iron and soldering carbon and low-alloy steels is the need to use more active fluxes, which are required to destroy the chemically resistant oxides with which stainless steels are coated. As for cast iron, it needs to be soldered with high-temperature soldering, and, therefore, an electric soldering iron is not suitable for this purpose.
For stainless steel, phosphoric acid is used. Specialized fluxes, such as F-38, also cope well with chemically resistant oxide films.
Fluxes for soldering stainless steel
For galvanized iron, you can use a composition containing rosin, ethyl alcohol, zinc chloride and ammonium chloride (LK-2 flux).
Auxiliary materials and devices
You can do without some devices and materials used for soldering, but their presence makes the work much more convenient and comfortable.
Soldering iron stand
serves to ensure that the heated soldering iron does not touch the table or other objects. If it does not come with a soldering iron, you can purchase it separately or make it yourself. The simplest stand can be made from a thin sheet of tin, cutting grooves in it for storing tools.
Soldering iron stands
With a damp viscose or foam sponge
, placed in a socket to prevent falling out, it is much more convenient to clean the tip of the soldering iron than with a regular cloth. Brass shavings can also serve for the same purposes.
Soldering iron stand with cavity for metal shavings
Excess solder can be removed from the surface of parts using a special suction
or braids. The first one, in appearance and design, resembles a syringe equipped with a spring. Before use, it must be cocked by recessing the rod head. By bringing the nose to the molten solder, the spring is released by pressing the release button. As a result, excess solder is drawn into the removal head.
Soldering iron with suction
Solder Removal Braid
It is a braid of fluxed thin copper wires. By placing its end on the solder and pressing it on top with a soldering iron, thanks to capillary forces you can collect all the excess solder in it like a blotter. The tip of the braid, saturated with solder, is simply cut off.
Solder Removal Braid
Removing solder from copper braid with other braid
A very useful device is called the third hand.
(Third-Hand Tool). When working with a soldering iron, sometimes there are catastrophically “not enough hands” - one is occupied with the soldering iron itself, the other with the solder, but you still need to hold the soldered parts in a certain position. The “third hand” is convenient because its clamps can be easily installed in any position relative to each other.
Third hand soldering holder
The parts being soldered are heated to high temperatures; touching them can cause you to get burned. Therefore, it is advisable to have various clamping devices that allow you to manipulate heated parts - pliers
,
tweezers
,
clamps
.
Preparing the soldering iron for use
When you turn on the soldering iron for the first time, it may start to smoke.
There is nothing wrong with this, the oils used to preserve the soldering iron simply burn out. You just need to ventilate the room. Before using a soldering iron, you need to prepare its tip. Preparation depends on its original form. If the tip is made of bare copper, the tip can be forged into a screwdriver shape, this will seal the copper and make it more resistant to wear. You can simply sharpen it with sandpaper or a file, giving it the required shape - in the form of a sharp or truncated cone with different angles, a tetrahedral pyramid, an angular bevel on one side. Nickel metal coatings are used to protect copper from oxidation. If the soldering iron has such a coating, then it cannot be forged or sharpened to avoid damaging the coating layer.
There is a standardized range of tip shapes, but you can, of course, use any shape suitable for the particular job.
Tips (tips) for soldering iron
When soldering massive parts, the contact area between the soldering iron and the part should be maximum to ensure better heat transfer. In this case, angular sharpening of a round rod (2 in the photo above) is considered the best. If you plan to solder small parts, then a sharp cone (4), knife or other shapes with small angles are suitable.
Instructions for working with a soldering iron that has an uncoated copper tip contain one mandatory requirement - tinning the “tip” of the new soldering iron in order to protect it from oxidation and wear. Moreover, this should be done during the first heating, without delay. Otherwise, the “tip” will be covered with a thin layer of scale, and the solder will not want to stick to it. This can be done in different ways. Heat the soldering iron to operating temperature, touch the “tip” to the rosin, melt the solder on it and rub the solder on a piece of wood. Or wipe the heated tip with a rag moistened with a solution of zinc chloride, melt solder on it and rub it over the tip with a piece of ammonia or rock table salt. The main thing is that as a result of these operations, the working part of the tip is completely covered with a thin layer of solder.
The need to tin the tip is caused by the fact that the flux gradually corrodes, and the solder dissolves the tip. Due to loss of shape, the tip has to be sharpened regularly, and the more active the flux, the more often, sometimes several times a day. For nickel-plated tips, nickel blocks access to copper, protecting it, but such tips require careful handling, they are afraid of overheating, and it is not a fact that the manufacturer has made a sufficiently high-quality coating, for which they require an overpayment.
Preparing parts for soldering
Preparing parts for soldering involves performing the same operations regardless of what type of soldering (low-temperature or high-temperature) is performed, and what heating source (electric or gas soldering iron, gas torch, inductor or something else) is used.
First of all, this is cleaning the part from dirt and degreasing. There are no special subtleties here - you need to use solvents (gasoline, acetone or others) to clean the part from oils, fats, and dirt. If there is rust, it must be removed by any suitable mechanical method - using an emery wheel, wire brush or sandpaper. In the case of high-alloy and stainless steels, it is advisable to treat the edges being joined with an abrasive tool, since the oxide film of these metals is particularly strong.
Soldering temperature
The heating temperature of the soldering iron is the most important parameter; the quality of soldering depends on the temperature.
Insufficient temperature manifests itself in the fact that the solder does not spread over the surface of the product, but forms a lump, despite the preparation of the surface with flux. But even if the soldering was successful in appearance (the solder melted and spread over the joint), the soldered joint turns out to be loose, matte in color, and has low mechanical strength. The soldering temperature (temperature of the parts being soldered) should be 40-80°C higher than the melting temperature of the solder, and the heating temperature of the tip should be 20-40°C higher than the soldering temperature. The last requirement is due to the fact that when it comes into contact with the parts being soldered, the temperature of the soldering iron will decrease due to heat dissipation. Thus, the heating temperature of the tip should exceed the melting temperature of the solder by 60-120°C. If a soldering station is used, the required temperature is simply set by the regulator. When using a soldering iron without temperature control, its actual value, when using rosin as a flux, can be assessed by the behavior of the rosin when touched by the soldering iron. It should boil and release abundant steam, but not burn instantly, but remain on the tip in the form of boiling drops.
Overheating the soldering iron is also harmful; it causes combustion and charring of the flux until it activates the junction surface. Overheating is indicated by a dark film of oxides that appears on the solder located at the tip of the soldering iron, as well as by the fact that it does not stay on the “tip” and flows off it.
Soldering technique with a soldering iron
There are two main methods of soldering with a soldering iron:
- Supply (drain) of solder onto the parts to be soldered from the tip of the soldering iron.
- Supplying solder directly to the parts to be soldered (to the pad).
With any method, you must first prepare the parts for soldering, install and secure them in their original position, heat the soldering iron and moisten the joint with flux. Further steps differ depending on which method is used.
When feeding solder from a soldering iron, a certain amount of solder is melted on it (to keep it on the tip) and the “tip” is pressed against the parts being soldered. In this case, the flux will begin to boil and evaporate, and the molten solder will move from the soldering iron to the soldering joint. The movement of the tip along the future seam ensures the distribution of solder along the joint.
Applying solder to a soldering iron tip
Solder on the jelly may be sufficient if the tip has simply acquired a metallic sheen. If the shape of the tip has noticeably changed, there is too much solder.
Too much solder applied to the soldering iron
When applying solder directly to a junction, use a soldering iron to first heat the parts to soldering temperature, and then apply solder to the part or to the joint between the soldering iron and the part. As the solder melts, it will fill the joint between the parts being soldered. You should choose exactly how to solder with a soldering iron - the first or second method - depending on the nature of the work being performed. The first method is better for small parts, the second for large parts.
The basic requirements for high-quality soldering include:
- good heating of the soldering iron and parts being soldered;
- sufficient amount of flux;
- entering the required amount of solder - exactly as much as required, but no more.
Here are some tips on how to solder correctly with a soldering iron.
If the solder does not flow, but is smeared, it means that the temperature of the parts has not reached the required values, you need to increase the heating temperature of the soldering iron or use a more powerful device.
There is no need to add too much solder. High-quality soldering requires the presence of a minimum sufficient amount of material in the joint, at which the seam turns out to be slightly concave. If there is too much solder, there is no need to try to attach it somewhere at the joint; it is better to remove it with suction or braiding.
The quality of the junction is indicated by its color. High quality - the solder has a bright shine. Insufficient temperature makes the structure of the junction grainy and spongy - this is a definite defect. Burnt solder looks dull and has reduced strength, which in some cases may be quite acceptable.
When using active (acidic) fluxes, be sure to wash off their residues after soldering - with some detergent or ordinary alkaline soap. Otherwise, there is no guarantee that after some time the connection will not be destroyed by corrosion from remaining acids.
Tinning
Tinning—coating a metal surface with a thin layer of solder—can be either an independent final operation or an intermediate, preparatory stage of soldering.
When this is the preparatory stage, successful tinning of the part in most cases means that the most difficult part of the soldering job (joining the solder to the metal) is done; soldering the tinned parts to each other is usually no longer difficult. Wire tinning
. Tinning the ends of electrical wires is one of the most common operations. It is carried out before soldering the wires to the contacts, soldering them together, or to ensure better contact with the terminals when connecting with bolts. It is convenient to make a ring from a tinned stranded wire, which ensures ease of attachment to the terminal and good contact.
Wires can be single-core or stranded, copper or aluminum, varnished or not, clean new or acidified old. Depending on these features, their servicing differs.
The easiest way to tin is single-core copper wire. If it is new, then it is not covered with oxides and tins even without stripping, you just need to apply flux to the surface of the wire, apply solder to the heated soldering iron and move the soldering iron along the wire, slightly turning the wire. As a rule, tinning proceeds without problems.
Flux application
Wire tinning
If the conductor does not want to tinker - due to the presence of varnish (enamel) - regular aspirin helps. Knowing how to solder with a soldering iron using an aspirin tablet (acetylsalicylic acid) can be very useful in some cases. You need to put it on a board, press the conductor to it and heat it for a few seconds with a soldering iron. At the same time, the tablet begins to melt, and the resulting acid destroys the varnish. After this, the wire usually tins easily.
If there is no aspirin, vinyl chloride insulation from electrical wires, which when heated, releases substances that destroy the varnish coating, also helps to remove the varnish that interferes with tinning from the surface of the conductor. You need to press the wires to a piece of insulation with a soldering iron and drag it several times between the insulation and the soldering iron. Then tin the wire as usual. When removing varnish using sandpaper or a knife, cuts and breaks of thin wire strands are common. When stripped by firing, the wire may lose strength and break easily.
It should be taken into account that melted polyvinyl chloride and aspirin release substances harmful to health into the air.
Also, for varnished (enamel) wires, you can purchase a special flux that removes the varnish.
Flux for soldering enameled wires
New stranded copper wire can be tinned just as easily as solid copper wire. The only peculiarity is to rotate it in the direction in which the wires will twist and not unwind.
Old wires may be coated with oxides that prevent tinning. The same aspirin tablet will help to cope with them. You need to untwist the conductor, put it on aspirin and heat it for a few seconds with a soldering iron, moving the conductor back and forth - and the tinning problem will disappear.
To tinning an aluminum wire, you will need a special flux - for example, the one called “Flux for soldering aluminum”. This flux is universal and is also suitable for soldering metals with a chemically resistant oxide film - stainless steel, in particular. When using it, you just need to remember to clean the connection from flux residues afterwards to avoid corrosion.
Soldering aluminum
If, when tinning the wires, excess surf has formed on them, you can remove it by placing the wire vertically, end down, and pressing a heated soldering iron to its end. Excess solder will flow from the wire onto the soldering iron.
Tinning a large metal surface
Tinning the surface of the metal may be necessary to protect it from corrosion or for subsequent soldering of another part to it.
Even if a completely new sheet is tinned, which looks clean in appearance, there can always be foreign substances on its surface - preservative grease, various contaminants. If a sheet covered with rust is tinned, then it needs cleaning all the more. Therefore, tinning always begins with thorough cleaning of the surface. Rust is cleaned off with emery cloth or a wire brush, fats and oils are removed with gasoline, acetone or another solvent. Then, using a brush or other tool that matches the flux, flux is applied to the surface of the sheet (this may not be a paste-like flux as in the photo below, but, for example, a solution of zinc chloride or another active flux).
Surface coating with flux before tinning
A soldering iron with a relatively large flat tip surface is heated to the required temperature and solder is applied to the surface of the part. It is advisable that the soldering iron power be about 100 W or higher.
Soldering iron with suitable tip and tinning solder
Then apply the soldering iron to the solder on the part with the largest plane and keep it in this position. The heating time of the part depends on its size, the power of the soldering iron and the contact area. The achievement of the required temperature is indicated by boiling of the flux, melting of the solder and its spreading over the surface. The solder is gradually distributed over the surface.
Tinning body metal with a soldering iron
After tinning, the metal surface is cleaned of flux residues with alcohol, acetone, gasoline, and soapy water (depending on the chemical composition of the flux).
Cleaning the body from flux after tinning
If the solder does not spread over the metal surface, this may be due to poor cleaning of the surface before tinning, poor heating of the metal (due to insufficient soldering iron power, small contact area, insufficient time to warm up the metal of the part), or a dirty soldering iron tip. Another reason may be the wrong choice of flux or solder.
Failed attempt at tinning metal
Tinning can be carried out by applying (draining) solder from a soldering iron and distributing it with a “tip” over the surface, or by supplying solder directly to the pad - the solder melts upon touching the heated metal of the part.
Overlapping sheet metal soldering
When repairing car bodies, all kinds of tin work, there is a need for overlay soldering of sheet metal.
There are two ways to solder sheet parts overlapping each other - by pre-tinning them, or by using soldering paste containing solder and flux. In the first case, the overlapping areas of parts after mechanical cleaning and degreasing are pre-tinned. Then the parts of the connection are applied to each other with tinned surfaces, fixed with clamping devices and heated with a soldering iron from different sides to the melting temperature of the solder. Evidence of successful soldering is the flow of molten solder from the gap.
In the second method, after preparing the parts, the contact area of one of the parts is covered with solder paste. Then the parts are fixed in the desired position, tightened with clamps and, as in the first case, the seam is heated with a soldering iron on both sides.
When purchasing solder paste, you need to pay attention to its purpose, because... Many solder pastes are designed for soldering electronics and do not contain active fluxes that allow you to solder steel.
Connecting metal sheets by soldering: applying solder paste and joining parts
Connecting metal sheets by soldering: heating the joint with a soldering iron
Soldering metal sheets together
When using the content of this site, you need to put active links to this site, visible to users and search robots.
Literature
Melting temperature of solders and low-melting alloys
The table shows the melting temperatures of solders and low-melting alloys based on mercury Hg, cesium Cs, potassium K, bismuth Bi, thallium Tl, indium In, tin Sn, lead Pb, cadmium Cd, Wood's alloy, Rose alloys, gold Au , magnesium Mg, zinc Zn, silver Ag.
The melting temperatures of solders and alloys in the table are given starting with the most fusible alloys and range from -48.2 to 262°C. In alloys with a negative melting point (from minus 48.2°C), the content of mercury and alkali metals predominates. Low-melting alloys with a melting point from 200 to 260°C have a predominant content of bismuth and thallium in their composition.
Note: eut - eutectic alloys or close to them; For non-eutectic alloys, solidus temperatures are given.
Solder Material Selection
One of the main criteria for choosing an alloy for creating a solder joint of metal parts is its melting point.
That is, the filler material must melt earlier than the base material. But this is not the only condition for choice.
The liquid melt should well wet the surface of the base metal. In addition, certain strength requirements are imposed on the soldered joint.
The correct selection of filler material for soldering allows you to bring the strength of the connection closer to the strength of the base metal.
It is for this reason that when soldering any metal product, they try to use an additive based on the same metal as the metal of the product.
At the same time, the lower melting temperature of the solder is ensured by the additional components included in its composition.
However, it should be noted that it is never possible to equalize these characteristics when soldering. That is, during mechanical fracture tests, fracture will always occur at the joint.
In some specific types of soldering, the strength of the connection does not play a major role. For example, when soldering jewelry, the main thing is the aesthetic part of the work. Therefore, products made of gold, silver and platinum are soldered only with solders based on the same metals, and of the same standard.
Density of solders and babbits, their thermal conductivity and thermal conductivity
The tables give the thermophysical properties of some solders and babbitts (anti-friction bearing materials) at room temperature. Properties such as density, coefficient of thermal expansion and thermal conductivity are presented.
The properties of the following solders and babbitts are indicated: POS-30, POS-18, PSr45, POTs70, POTs60, 34A, eutectic silumin; babbits, B83, B16, BKA, B88, B89, B6.
It should be noted that the density of solders, coefficient of thermal expansion (CTEL) and thermal conductivity of solders and babbitts have similar values, with the exception of solder 34A and eutectic silumin, which are 2-4 times lighter.
Composition and thermal conductivity of solders and babbitts at different temperatures
The table shows the composition and value of the thermal conductivity coefficient of aluminum antifriction alloys, babbitts and solders at temperatures from 4 to 300 K (from -269 to 27 ° C).
The following solders and bearing materials were considered: AN2.5, AO6-1, BKA, B16, B83, B88, POS61, POS18, POSSu18-2, POSSu40-2, Wood's alloy, Rose's alloy, PSr25, PSr44, PSr70.
The most thermally conductive antifriction alloy, according to the table, is the AO6-1 alloy - its thermal conductivity is 180 W/(m deg). Silver solder PSr70 (based on silver and copper) has the highest thermal conductivity among the considered solders - the thermal conductivity of this solder is 170 W/(m deg).
Sources:
- Physical quantities. Directory. A.P. Babichev, N.A. Babushkina, A.M. Bratkovsky and others; Ed. I.S. Grigorieva, E.Z. Meilikhova. - M.: Energoatomizdat, 1991. - 1232 p.
- Chirkin V.S. Thermophysical properties of nuclear technology materials.
- Tables of physical quantities. Directory. Ed. acad. I.K. Kikoina. M.: Atomizdat, 1976. - 1008 p.
- Non-ferrous metals. Directory. - Nizhny Novgorod: "Venta-2", 2001. - 279 p.
How to choose solder
The main task for the master is to create a high-quality, reliable fastening that will last for a long time. Solder selection is based on the following parameters:
- Materials that are processed. It is necessary to accurately familiarize yourself with the characteristics of the materials being soldered. There is a temperature threshold for melting fragile elements, transistors, capacitors, etc. Radio amateurs use fusible substances.
- The composition of the solder is selected according to the parameters of thickness and purpose of the product. When soldering wires and other large elements, it is possible to use refractory elements.
- Some cases require choosing the optimal conductivity. The resistance of tin is lower than that of lead; more expensive brands of solder are used on high-frequency boards.
In any situation, it is necessary to be scrupulous about the compliance of soldering parameters and the product. High-quality products are used for soldering, the price is not high, and the choice on the market is huge.
