Asynchronous electric motors are more common than others in production and are often found in everyday life. With their help, various machines are set in motion: lathes, milling, sharpening, lifting mechanisms such as an elevator or crane, as well as various types of fans and hoods. This popularity is due to the low cost, simplicity and reliability of this type of drive. But it happens that even simple equipment breaks down. In this article we will look at typical malfunctions of squirrel-cage asynchronous electric motors.
Types of malfunctions of asynchronous motors
Malfunctions can be divided into three groups:
The shaft does not rotate or does not rotate normally;
In this case, the entire engine body or some specific place on it may become hot. And the electric motor shaft may not budge at all, may not develop normal speed, its bearings may overheat, make sounds that are abnormal for its operation, or vibrate.
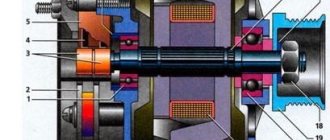
But first, refresh your memory of its design, and the illustration below will help you with this.
The causes of malfunctions can also be divided into two groups:
Most faults are diagnosed using current clamps - by comparing phase currents and rated current, and other measuring instruments. Let's look at typical faults.
The electric motor does not start
When voltage is applied, the motor does not start to rotate and does not make any sounds and the shaft does not “try” to move. First of all, check whether power is supplied to the engine. This can be done either by opening the motor board and measuring where the power cable is connected, or by measuring the voltage at the power switch, contactor, starter or circuit breaker.
However, if there is voltage at the motor terminals, then the entire line is normal.
By measuring the voltage at the beginning of the line - automatically you will only know that voltage is supplied, but it may not reach the end user as a result of cable breaks, poor connections along its entire length or due to faulty contactors or magnetic starters, as well as low-current chains.
If you are convinced that voltage is coming to the engine, its further diagnosis consists of testing the windings for a break. You need to check the integrity of the winding with a megohmmeter, so you can also check for breakdown on the housing. You can test the windings with a regular test, but such a test is not considered accurate.
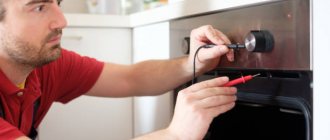
To check the windings without ringing them or opening the motor board, you can use current clamps. To do this, measure the current in each phase.
If the motor windings are connected by a star and two windings are broken, there will be no current in any of the phases. If there is a break in one of the windings, you will find that there is current in two phases, and it is increased. When connected according to a delta circuit, even if two windings burn out, current will flow in two of the three phase wires.
If there is a break in one of the windings, the engine may not start under load, or it may start, but rotate slowly and vibrate. Below is a device for measuring engine vibrations.
If the windings are working properly, and the current during measurement is increased and the machine is knocked out or the fuse blows, the shaft or the actuator driven by it is probably jammed. If this is possible, after turning off the power, try to turn the shaft by hand, and you need to disconnect it from the driven mechanism.
When you determine that it is the motor shaft that is not rotating, check the bearings. Electric motors are equipped with either plain or rolling bearings. Worn bushings (sliding bearings) are checked for the presence of lubrication; if the bushings do not have external defects, it is possible to simply lubricate them, having previously cleaned them of dust, chips and other contaminants. But this rarely happens, and this repair method is more relevant for low-power engines of household appliances. In powerful engines, bearings are often simply replaced.
Problems with low speed, heating, shaft immobility and increased bearing wear can be associated with uneven load on the shaft, its misalignment, deformation and bending. If the first two cases can be corrected by correct installation of the shaft or actuator, as well as by reducing the load, then deformation and sagging of the middle part of the shaft requires its replacement or complex repairs. This occurs especially often in powerful electric motors with long shafts.
Electric motor malfunctions: causes and solutions
To quickly determine electric motor malfunctions, why the electric motor failed and which components failed, we suggest you familiarize yourself with the list of the most popular malfunctions. Below are typical electric motor malfunctions, their causes and how to properly eliminate them.
The electric motor makes a loud noise when starting, does not pick up speed, or does not start at all.
Reason: Open circuit of the stator, open circuit of one of the phases (tip, cable, contactor), burnt out protective insert. Solution: Restore the power circuit, check and replace the fuse.
Cause: Broken stator winding. Solution: Rewind the stator.
Reason: Break in the phase rotor circuit (cable, rheostat, brushes). Solution: Restore the rotor chain.
Cause: Loss of contact between the rods and rings in the squirrel-cage rotor (smoke and sparks). Solution: Rotor repair.
Cause: Jamming of the motor shaft or drive. Solution: Clean the engine or its mechanism from possible contamination.
Cause: Low starting torque, which does not allow the rotor to gain speed. Solution: Replacement with a similar motor with a higher starting torque.
Cause: Star connection instead of triangle Solution: Check the correctness of the connection diagram, reconnect.
Intense heating in plain bearings.
Cause: Lack or insufficient amount of lubrication. Solution: Lubricate the bearings properly.
Reason: The oil contains impurities and mechanical particles. Solution: Change the lubricant.
Reason: Wear of coupling half parts, ring defect, broken shaft journal, etc. Solution: Repair the mechanical part of the engine.
Strong heating in rolling bearings.
Cause: Lack or insufficient supply of lubricant, excess lubricant. Solution: Lubricate the bearings properly, monitor for possible leaks, and remove excess grease.
Cause: Bearing defects, expressed by extraneous noise. Solution: Replace the bearing.
The motor housing becomes very hot during operation.
Reason: Poor performance of the forced cooling system. Solution: Cleaning channels and technological openings.
Cause: Ventilation ducts allowing cold air to pass through are clogged. Solution: Blow with compressed air.
Cause: Increased current load. Solution: Reduce the load or replace it with an electric motor of higher power.
Sparking during ED operation and the appearance of smoke.
Cause: The rotor is in contact with the stator surface. Solution: Engine repair.
Cause: Incorrect operation in the protective or ballast system. Solution: Diagnostics of the protective or ballast system and elimination of defects.
Increased vibrations during ED operation.
Cause: Wear of connecting couplings Solution: Disconnect the couplings and check the ED without connecting to the mechanism.
Cause: The alignment of the engine and mechanism is disturbed. Solution: Check and tighten fasteners and frame mounts.
Cause: Bearing wear, rotor imbalance, mutual displacement of the rotor and stator positions. Solution: ED repair.
Fluctuations in the current consumption of the EM stator during its operation.
Cause: Poor connection in the circuit - for a wound rotor, for a squirrel cage rotor - poor connection between the rods and rings. Solution: ED repair (for large fluctuations - immediately, for small fluctuations - the sooner - the better).
Sparks from the commutator-brush assembly. Strong heating and burning of the corresponding fittings.
Cause: Brushes are not sanded well. Solution: Sand the brushes.
Cause: Insufficient clearance for free movement of brushes in brush holders. Solution: Set the permissible gap within 0.2-0.3 mm.
Cause: Contaminated slip rings or brushes. Solution: Clean up and eliminate the source of contamination.
Cause: The slip rings have grooves and irregularities. Solution: Grind and grind the rings.
Reason: Weak brush pressure. Solution: Adjust the pressing force.
Cause: There is no uniform distribution of current between the brushes. Solution: Adjust the pressing force of the brushes and their free movement in the brush holders, check the condition of the Traverse contact group, and assess the condition of the conductors.
The active steel of the stator overheats evenly over its entire surface.
Cause: Increased supply voltage. Solution: Organize additional cooling of the electric motor and reduce the mains voltage to the standard level.
Strong heating of the stator active steel in a separate place at idle speed at normal network voltage.
Cause: Local short circuit between individual active steel sheets. Solution: Clean and sand the area where the sheets come into contact, and coat them with dielectric varnish.
Cause: The insulation in the places where the active steel is tied is broken. Solution: Restore insulation in these areas.
When loading, an electric motor with a wound rotor does not reach the nominal speed.
Cause: Poor quality connection in the rotor slip ring solder. Solution: Check soldering reliability visually and with a “voltage drop test”.
Cause: Poor contact of the rotor winding with the slip ring. Solution: Check and restore current-carrying connections.
Cause: Weak connection in the brush assembly and the rotor short-circuit mechanism. Solution: Grind and adjust the pressing force of the brushes.
Reason: Weak connection of contact wires in the starting equipment. Solution: Restore the integrity and reliability of contacts in the relevant area.
A motor with a wound rotor starts with an open rotor circuit, and under load cannot reach the nominal mode.
Reason: short circuit in the armature winding, connecting clamps of the frontal connections. Solution: Insulate the contacting clamps, eliminate the short circuit and replace the damaged armature winding.
Reason: Short circuit of the rotor windings in two sections simultaneously. Solution: Eliminate the short circuit and replace the winding of the faulty coil.
Malfunction: The engine with a squirrel-cage rotor does not pick up the normal number of revolutions.
Reason: The thermal relay has worked, the fuses or circuit breaker have failed. Solution: Check and eliminate these faults.
When the electric motor starts, the electric arc covers the slip rings.
Cause: There is dust and dirt in the brush assembly or on the slip rings. Solution: Clean.
Reason: High humidity in the area where the ED is used. Solution: Apply an additional layer of dielectric or replace the ED with another suitable for operation under current conditions.
Cause: Break in the contact connections of the rheostat or rotor. Solution: Carry out diagnostics of all connections and eliminate faults.
Loss of one of the phases of the circuit (Star)
Loss of one of the phases of the circuit (Star)
Loss of one of the phases of the circuit (Triangle)
Loss of one of the phases of the circuit (Triangle)
Short circuit to the housing at the exit from the groove
Short circuit to the housing at the exit from the groove
Phase damage due to voltage imbalance
Phase damage due to voltage imbalance
Winding damage due to overload
Winding damage due to overload
Winding damage due to jammed rotor
Winding damage due to jammed rotor
Winding damage due to voltage surge
Winding damage due to voltage surge
link:
Pre-repair tests
For electric motors undergoing repair, pre-repair tests should be carried out whenever possible.
The scope of tests is established in each case depending on the type of repair, the results of the analysis of inspection cards and the external condition of the electric motor. The work of substantively identifying machine malfunctions is called defect detection. Before testing, the electric motor is prepared for operation in compliance with all requirements of the technical documentation rules; measure the dimensions of bearing clearances and air gaps, inspect accessible components and parts and evaluate the possibility of their use during testing. If possible, unusable parts are replaced with serviceable ones (without disassembly).
In asynchronous motors at no-load, the no-load current is measured, its symmetry is monitored, and all parameters that are subject to monitoring during operation are assessed visually or using instruments.
In electric motors with wound rotor and DC motors, the performance of slip rings, commutators, and brush apparatus is evaluated. By loading the electric motor to an acceptable extent, they evaluate the influence of the load on the operation of its main components, control the uniformity of heating of accessible parts, vibration, determine malfunctions and establish their possible causes.
Possible malfunctions of the washing machine motor and how to eliminate them
Electric motor from a washing machine
The rotation of the drum of any washing machine is ensured by an electric motor. In older units, the conversion of electrical energy into mechanical energy is carried out using belt drives that are attached to the drum and cause it to rotate.
Modern models use other types of engines. But regardless of design, they can break. The article will tell you what possible malfunctions of the electric motor of a washing machine are and how to eliminate them.
Types of engines
Before troubleshooting a washing machine motor, you need to determine the type of unit.
For this purpose, three modern types of engines are produced, their features are presented in the table:
| Engine type and photo | Peculiarities |
The motor design includes:
| |
| The motor design consists of a stationary stator and a rotor that causes the drum to rotate at speeds of up to 2800 rpm. Most often, the engine malfunction is a weakening of the torque, because of this the drum will sway from side to side without making full revolutions. | |
| A brushless, inverter or direct drive motor was developed by the Korean concern LG. Its device, like an asynchronous one, has only a rotor and a stator. But its operating principle is different. The drive is directly connected to the drum. This eliminates the use of connecting elements, which are the most vulnerable parts of the motors. A tachogenerator or Hall sensor is mounted in the housing, which counts the number of revolutions. The motor is protected from overheating by a thermal fuse. The unit is secured with four bolts on the rear side of the tank. |
Major breakdowns of the commutator motor
Before determining a malfunction of the electric motor of washing machines, you should carefully inspect the components. But first you need to start the engine and see whether it will work or not.
To start the engine, you need to connect the stator and rotor windings in series, and then connect an alternating current source with a voltage of 220 Volts to the remaining connectors. If the engine starts to rotate, then everything is fine. At this time, you can determine how silently it works and identify sparkling brushes.
The main causes of failure of electric motors of commutator-type washing machines are:
- Worn brushes. If the washing machine is more than 10 years old, the brushes will be very worn, as indicated by strong sparks from the engine. When the brushes wear out, they will become small in size, this can be seen immediately. The whole part is long enough, without cracks or chips. A worn element should be replaced. It is better to choose original brushes for replacement, which will increase the service life of the engine after repair. This is not a complicated process, you can do it yourself;
- Breaks in stator and rotor windings. The best option to eliminate the problem is to replace the rotor or stator. The cost of rewinding a motor may be higher than the cost of a new element. This is due not only to rewinding, but also to the need to center the unit in order to eliminate its runout;
- Malfunction of the collector lamellas due to wear or short circuit in the windings. It is easy to diagnose the wear of the lamellas, as well as the brushes. In this case, you need to inspect the manifold after removing the rotor from the engine. The motor brushes begin to spark due to peeling of the lamellas, breakage of the supply contact, and the presence of burrs. Peeling of the lamellas occurs when the rotor jams or an interturn short circuit occurs. This leads to overheating of the unit. If the contact breaks at the junction with the lamella, it is quite difficult to return the wires.
- Bearing wear. If, after checking, runout is visible, increased vibration of the housing during operation of the device, the bearing should be replaced. The most unpleasant thing is when the armature touches the stator. In this case, you will need to change the armature, or replace the stator and armature at the same time.
Asynchronous motor malfunctions
There are several causes of malfunctions and their diagnosis for an asynchronous motor, which are combined in the table:
| Deviations in engine operation | What to do |
| The engine does not run at low speed. | Measure the resistance of the windings; check the capacitor. |
| The engine does not run at high speed. | Measure the resistance of the windings; check the capacitor. |
| The engine does not run at any speed. | Measure the resistance of the windings; check the capacitor. |
| The engine does not run stably, its thermostat switches and turns off. | After turning off the engine, measure the winding resistance. |
| Knocks out the machine gun. | Check for leakage on the housing; check the resistance between all motor contacts and its housing. |
| Loud engine noise |
|
| The engine does not turn over and hums. | Check the capacitor. |
Malfunction of the electric motor of the Indesit washing machine Malfunction of the electric motor of the Zanussi fe 804 washing machine
How to replace brushes in a washing machine
Before you start replacing the brushes, it's worth watching the video.
Even a reliable and durable Ardo washing machine requires regular inspection and replacement of worn parts. After 5 years of operation, it may be necessary to replace the motor brushes, which may lose full contact.
If a malfunction is detected in the electric motor of an Ardo 1000 washing machine associated with replacing the motor brushes, you must purchase the following set of tools and accessories:
- New brushes.
- Multimeter.
- Screwdrivers.
- An ordinary vacuum cleaner.
Instructions for replacing motor brushes:
- The washing machine is de-energized;
- This frees up space near the rear wall of the unit for ease of work;
- The back wall is removed after unscrewing the screws holding it;
To determine the placement of the electric motor in a washing machine, you need to locate the drum pulley, and then the motor and the drive belt that connects them. The belt is removed after prying it off with a screwdriver and turning the pulley.
- Before removing the engine from the car, disconnect the power connector from it and unscrew the screws;
- The motor is removed;
- The engine is wiped or vacuumed, which may become covered with graphite dust, interfering with further procedures;
- The engine is tested for leaks and short circuits to the frame. The most convenient way to do this is with a multimeter;
- Remove power from the contacts of the brush holders by pressing on them;
- The contacts are pulled out of the motor housing;
- Brush wear is determined by the size of the graphic area: if its size is less than 5 mm, replacement must be done;
- The new brush is ground into the commutator by placing sandpaper on it and turning it a few turns;
- The same procedure is repeated with the second brush;
- The engine is vacuumed again;
- The motor is completely assembled and installed in the Ardo washing machine;
At this stage, a drive belt is not needed. The machine simply starts in washing mode. This must be done so that the brushes rub well into the engine commutator.
- The drive belt is put on the engine pulley, and then on the drum pulley;
- The washing machine is completely assembled;
- The back wall is installed and secured.
In the same way, faults in the electric motors of tl washing machines are eliminated.
Break and short circuit of stator and rotor windings
When the engine power decreases, a short circuit may have occurred between the turns of the winding. In this case, the machine drum may stop rotating or rotate slowly.
When the engine stopped, most likely there was a break in the stator windings. This can happen when the motor housing heats up too much, which is caused by a short circuit in the motor windings. When the engine heats up to a temperature above 90ºС, a special protective thermostat is activated.
Tip: The optimal temperature for operating the electric motor should not exceed 80ºC.
To check for an open circuit in the windings, you can use a tester in ohmmeter mode connected to adjacent lamellas. In different positions of the shaft between the lamellas, the resistance of adjacent elements should be the same - from 0.1 to 0.4 Ohm.
A short circuit in the motor winding may occur if the insulation is damaged. In this case, you will need to change the entire motor, or create the winding again, but this is very difficult. A short circuit in the engine can also cause other problems.
Conclusion
Having the desire and some skills in repairing household appliances, you can fix the malfunction of the electric motor of the Atlant washing machine, or any other unit yourself. If you are absolutely sure that the cause of the car breakdown is a malfunction of the engine, you need to remove it from the car and then carry out repair work.
In this case, it all depends on the specific motor in the washing machine, where different types of units can be located.
Factors affecting hum level
How much noise a transformer makes depends on:
- degree of workload;
- overall dimensions;
- physical characteristics of the material from which the magnetic circuit is made.
An overloaded transformer will hum louder than one operating at rated load. And the characteristic noise that occurs when large power converters operate in substations is normal.
Reasons for the occurrence of side sounds in a transformer:
- When the coil is loosely wound, under the influence of a magnetic flux tending to move the windings of the device relative to the core, vibration occurs, accompanied by a hum.
- During operation, if the core plates are poorly adjusted and gaps form between them, vibration occurs, accompanied by metallic ringing, and subsequently noise.
- If the integrity of the winding wires is damaged, the coil may spark. The process is accompanied by popping sounds. With powerful discharges the sound is more intense.
- A poorly secured transformer and its parts also vibrate and hum.
The pumping station hums but the motor does not turn
- 1 Do-it-yourself pumping station repair video
- 2 Reason for water supply station not turning on - All about insulation and energy efficiency
- 3 The pumping station hums but the motor does not turn
- 4 Why the water pump does not work: does not pump water, gets hot, hums, makes noise
Repairing a pumping station with your own hands will allow you to save not only money, without the help of specialists, but also time (there is no need to look for where to repair the equipment and place an order with a service company, coordinate the time of a technician’s visit or go on your own, postponing current affairs during the visit) . Recommendations from specialists will help you navigate the situation, determine the type of malfunction and eliminate the defect. By following the advice exactly, you can cope with the problem that has arisen, but carelessness in work can lead to more complex damage.
Main types of faults and ways to eliminate them
Malfunctions of the pumping station and their elimination will not become a serious problem if the system is accurately diagnosed before starting work. In most cases, this does not require special equipment. The type of breakdown can be determined by external signs and with the help of elementary measurements, for which the devices installed in the system are used.
Pump rotation without pumping water
If the pump seems to be working properly at first glance, but there is no water in the tap at the same time, the way to correct the situation is determined by the cause of the problem. To detect it, you will have to check some parameters and operating conditions.
- Determine the condition and performance of the check valve , which is located inside the well or well. Debris or sand trapped in it can prevent it from opening, and a closed valve prevents fluid from rising to the pump.
- Check whether the section of pipeline between the pumping unit and the source is filled with water . Sometimes, due to equipment failure, power outages or other disturbances, this gap remains empty, which prevents the pump from pumping liquid. The discovered void can be filled through a special hole.
Pumping station in a house with a pipeline connected to it from a water source
- The most difficult situation is the presence of a large amount of insoluble impurities in water with an abrasive effect. Often, there is a large amount of wear between the housing and the impeller of the unit. “Out-of-work” water supply pumping stations for a private home require expensive repairs. In this case, it will be necessary to replace the equipment (casing and impeller, if you can find components identical to the existing ones on sale, or the entire pump).
- The lack of water in the well can also cause water to not enter the system when the pump is running. One of the simplest solutions is to immerse the supply hose or pipeline deeper (but within the limits specified in the operating instructions).
- jamming of the impeller due to its “sticking” to the body during long-term storage of the pumping unit without use (the situation can be corrected by moving the impeller from its place manually and turning it several times),
- capacitor failure (replace),
- change in the parameters of the supply network (voltage is significantly lower than the nominal voltage).
Jerk mode of pump operation
The jerk mode is the frequent switching on and off of the pumping unit in automatic mode.
In this case, you should start checking the system by determining the pressure in the air chamber of the accumulator. You can determine the pressure using a car pressure gauge. If it is low, try pumping air into the chamber.
Wait a while and measure again. If the pressure drops again, look for and eliminate the place of depressurization . The easiest way is to eliminate depressurization of connections.
If a hole has formed in the body (for example, due to corrosion), you can use “cold welding”.
If the pumping station operates jerkily, the reason may lie in damage to the diaphragm . To eliminate the defect, it must be replaced.
Frequent switching on and off may be the result of a malfunction of the pressure switch .
Pressure instability
If, when the pump is working properly, water comes out of the tap in pulsating jerks, it means that air is leaking . All communications between the well (well) and the pump should be checked for leaks.
Particular attention must be paid to the water level in the source and the correspondence of the pipe diameter to the suction height. The smaller the diameter, the smaller the height should be.
For example, a pipe diameter of 25 mm (or 1 inch) corresponds to a suction height of about 9 meters.
The pump runs without stopping
If the automatic shutdown of the pump does not work, such a water supply system cannot be operated. Emergency operation can lead to premature wear or destruction of equipment.
The reason for the non-stop operation of the pump is the incorrect operation of the pressure switch or its failure. In most cases, repairing a pumping station pressure switch comes down to adjusting the device and setting the on and off parameters using nuts on the springs under the device cover.
Pressure switch device - nut P is responsible for setting the lower pressure level in the accumulator, nut Δ P is responsible for setting the difference between the upper and lower pressure levels
Another possible violation is blocking of the relay by salt deposits when the quality of the water in the source is low. In this case, it is necessary to remove the relay and clean the hole that comes into contact with water.
The pump does not turn on
In most cases, failure to turn on the pump is associated with a break in the electrical circuit . A tester will be required to thoroughly check and detect the break.
First of all, you should check the supply lines and pressure switches.
In the latter case, pay attention to the condition of the contacts - a layer of oxide may form on them, which can be removed by cleaning using a needle file or fine-grained sandpaper.
If no breaks are found in the section from the source to the entrance to the pump, you will have to conduct a thorough check of all components of the pumping unit:
A burnt-out engine can be restored by rewinding, but in some cases it will be necessary to purchase a new unit.
To repair a pumping station with your own hands with such “symptoms”, you may also need to
replace a failed starting capacitor .
If the rotating parts of the pump do not move when turned on, and a characteristic hum appears, then the reasons for this phenomenon may be:
Rotor rotation estimation
Troubleshooting an AC motor involves various manipulations of the rotor. Often the ability to assess the degree of rotation of this moving element is complicated by the connected drive. For example, the power unit of a vacuum cleaner can be unscrewed by hand without any problems. And in order to rotate the working shaft of the hammer drill, you need to make some effort. But if the shaft is connected to a worm gear, then in this case, due to the peculiarities of this mechanism, it will not be possible to turn it at all.
It is for this reason that rotor rotation is checked only when the drive is turned off. But what can make it difficult to rotate? There are several reasons for this:
- The sliding contact pads are worn out.
- The bearings are missing grease or the wrong compound has been used. In other words, ordinary grease, which is usually used to fill ball bearings, thickens at strong negative temperatures. This may cause the electrical mechanism to start poorly.
- The presence of dirt or foreign objects between the stator and rotor.
Typically, the cause of a motor bearing failure is not difficult to determine. The broken part begins to make noise, which is additionally accompanied by play. To identify this, it is enough to shake the rotor in a vertical or horizontal plane. You can also try moving the rotor in and out along its axis. It is worth considering that a slight backlash is the norm for most power unit models.
Expert advice
Everything does not end with just installing an electric motor, which is confirmed by many experts. All necessary measures must be taken to extend the life of electric power plants.
In particular, the staff must:
- Provide protection for electric motors with special devices.
- Install a soft starter for the electric motor. This will increase the service life of not only the power unit, but also its drive.
- Install a thermal relay. With its help, you can avoid thermal overloads, which is very important for electric motors.
- Prevent moisture from entering the engine housing and its cavity. This way you can ensure its performance, since this factor negatively affects the internal components of the electric motor.
- Regular maintenance is required. This includes cleaning the engine itself from contaminants, lubricating bearings, and tightening contacts.
- Do not repair power electrical installations without proper experience and skills. It is better to entrust this work to specialists.
In addition, it is important to promptly detect a motor malfunction and eliminate it, since this affects the delay in production. And, as you know, it is worth its weight in gold, if not even more valuable.
