A properly functioning power supply is the basis for proper computer operation. If it is faulty, the software will not be able to function normally. Therefore, it is important to know how you can test the power supply with a multimeter. A more serious study of the problem involves disassembling the device and checking its circuitry. This is recommended to be done when the person is an experienced specialist in this field.
Why do you need a power supply?
With its help, several types of alternating voltage are converted into direct voltage, designed to ensure the operation of the computer. Regardless of the brand of power supply used, its parameters at the device outputs must comply with standard indicators. If in at least one case the output voltage in the power supply does not correspond to the standard, this may cause a computer malfunction.
The initial check should include determining the magnitude of all types of output voltage. It should differ from the stated one by no more than 5%. When making a power supply with your own hands, you need to control what output voltage it provides.
Tips for proper use of power supply
You should also adhere to certain rules after purchasing a power supply. The most important rule is that the power supply must be securely and firmly secured. You should also make sure that conductor and semiconductor components will not overheat as a result of increased load on the power supply.
The user must also ensure that the AC voltage is constant and protected against accidental switching off. For these purposes, it is enough to install an uninterruptible power supply unit.
Regular preventative maintenance allows you to eliminate the occurrence of the most common malfunctions in the operation of power supply units. It consists of constant monitoring of fan operation. This small component ensures cooling and operation of the power supply. For preventive purposes, it is also recommended to systematically clean and change the lubricant in the power system.
Blue screen of death, also known as BSOD and blue screen of death, is Windows’ reaction to critical errors in the computer’s operation. Let's look at the main reasons for BSOD and how to solve the problem.
It often happens that we, without taking care of our gadgets, find them in the water. There are quite a few ways in which you can get rid of this problem.
The operating system is a key characteristic when buying a gaming tablet. The games are different for each OS, although you may find a video game available for multiple operating systems.
AIDA64 is a popular PC monitoring solution. The program is paid, for a single check you can use the trial version of the product. If the load is too high, the test will stop. Recommended for owners of laptops and weak PCs.
OCCT is a completely free program in Russian. It is possible to specify the testing time and select a video card if there are several of them. Data is displayed in real time. The program puts a lot of load on the power supply, so during long tests with low-power power supplies you should be careful, they can burn out.
If everything is fine with the power supply, try using computer diagnostic programs. Also optimize your computer.
This material is a private post by a member of the Club.CNews community. The CNews editors are not responsible for its content.
How to check laptop charging without going to a service center
We tell you how to check the Android charging cable for functionality. As a bonus, we explain how to make your phone charge faster.
Expert opinion
It-Technology, Electrical power and electronics specialist
Ask questions to the “Specialist for modernization of energy generation systems”
How to check if your Android charging cable is working properly However, other factors can also affect the drain rate, such as app updates in the background, Wi-Fi or cellular signal strength. Ask, I'm in touch!
How to start checking
Before you check the computer's power supply for functionality, you need to inspect its appearance. If there are torn or burnt wires, they must be replaced. When there is dirt and a thick layer of dust inside, cleaning is required. If there is a smell of burnt silicon, it is necessary to check the serviceability of diodes and transistors.
If the power supply is working, then before checking it with a multimeter you need to start it, but you should know that modern power supplies use a 24 pin connector. Older models mostly use 20 pin. It is necessary to check the voltage to ensure compliance with standard values.
What diagnostic methods for computer power supplies still exist?
Checking the power supply with a multimeter and a paper clip is enough to identify its malfunction in about 70-80% of cases. If you do not plan to repair it in the future, then you can limit yourself to this. In professional diagnostics of power supplies, not only these, but also other methods are used to localize the defect. Including:
- Checking the output voltage ripple using an oscilloscope. This is a rather expensive device, so it is unlikely that anyone will decide to buy it for a one-time job.
- Disassembly, inspection, checking voltages and resistances of printed circuit board elements for compliance with standards. It is dangerous to do this without special training, since power supplies accumulate household voltage in some parts. Accidentally touching any live part may result in electric shock.
- Current measurement. This is done using an ammeter built into the tester, which is connected to the break in the line being tested. To create a gap, board elements are usually desoldered.
- Testing on stands with specially selected equipment in various operating modes.
In short, there are quite a few methods for diagnosing power supplies, but not all of them are applicable or advisable at home. Except for research purposes, if, of course, the owner is interested in it.
Functionality check
When checking the power supply, you need to make sure it is working. If you connect it to the network, then the standby voltage should be equal to 5 V. Otherwise, you need to carefully inspect the wire used to connect to the power source. You need to check it with a multimeter.
You need to check that the power button is working correctly. To do this, connect the PS-ON and COM contacts. Their location can be seen in the diagram. The first wire is green, the second is black. To close the contacts, you can use a paper clip or other tool, for example, tweezers. If the power supply is working properly, it should turn on immediately after connecting.
Checking the environment
If for some reason the laptop stops charging or does not turn on, do not rush to lament and take the laptop to a service center.
First check the following points:
- is there voltage in the network? It often happens that the lights are turned off or the voltage level is not enough to charge the laptop. To do this, simply turn on the light in the room;
- Find out if the outlet the adapter is plugged into is working. Connect it to an accurately working device (tablet, hair dryer or mobile phone).
- Another option is to plug the laptop into another, probably working, outlet. For example, where the TV is usually turned on.
If all of the above is in order, and the laptop is not charging, proceed to a serious inspection of the power supply.
Checking the output voltage of the power supply
The 24 pin output connector uses wires of different colors. Each of them must have a strictly defined voltage:
- on blue -12 V;
- orange +3.3 V;
- yellow +12 V;
- gray +5 V;
- red +5 V;
- white -5 V;
- violet +5 V;
- the black wire is ground.
Each wire must be checked to ensure the correct voltage is being used. The most common values are shown here. Depending on the manufacturer and model of the power supply, they may differ. Before you begin the inspection, you must read the technical documentation.
To check the power supply with a multimeter, you need to do the following:
- Turn on the computer. It must be assembled in accordance with the usual configuration. You need to wait 30 minutes for the power supply to warm up sufficiently.
- Next, you need to launch an application on your computer that will load it almost completely, for example, a test program or a game. This step will allow you to check the power of the power supply, whether it will be enough to fully supply the computer with energy.
- You need to prepare a multimeter for work. The mode switch should be set to the position corresponding to checking the constant voltage. This is necessary in order to check the output characteristics of the device.
- You need to select the measurement range where 20 V is indicated. It is suitable for all output voltage measurements.
- The black probe needs to be connected to the black wire that corresponds to ground. Connect the red one to the colored wire on which the voltage needs to be measured. Thus, the voltage test is performed in relation to zero.
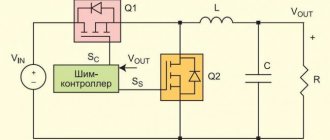
- When checking the microcircuits used in the power supply, for example, a PWM controller, special skills will be required. It is better to entrust this part of the work to specialists.
- Now you need to see the device readings. For example, if the voltage on the yellow wire is measured, then it is known that its nominal value should be +12 V. If the value shown by the multimeter deviates by no more than 5%, then this output is working properly. If the measurement shows 9 V, then the power supply is faulty.
The voltage must be measured on all output wires. If its deviation does not exceed 5%, you can be sure that the power supply is working properly.
Method 2. Checking the power supply with a multimeter
To check with a multimeter, we will need fairly thin probes so that we can reach the contact in the wire from the back of the connector.
We do not remove anything from the case. We carry out diagnostics with the power connector in the motherboard and the power supply connected to the network.
We look at the connector diagram and compare it with measurements on a multimeter.
24-pin power supply connector diagram
- Black – earth (aka minus or mass);
- Yellow – 12V, deviations of +-5% from 11.4-12.6 Volts are allowed;
- Red - +5V, tolerance 4.75-5.25 Volts;
- Purple (standby voltage) – 5V, standard deviations 4.75-5.25V;
- Orange - 3.3V, limits 3.14-3.47V are allowed;
- Blue is -12V, tolerance +-10% voltage can be from -10.8V to -13.2V.
Turn on the multimeter in constant voltage mode in the range of 20 volts. We put the black probe in any black wire on the large connector.
Step 1. Checking the voltage of the purple wire (duty)
Using the end of the red probe on the multimeter, we call PIN 9 (Purple, +5VSB) - it should have a voltage of 5 volts ± 5% within the normal range of 4.75-5.25 Volts.
This is a redundant power interface and always works when the power supply is connected to the network. If there is no voltage or it is less/more than normal, then this means serious problems with the circuitry of the power supply itself.
On my power supply the duty is normal = 5.1 volts.
Measurement of the duty +5V line (purple wire) and any black
Step 2: Check Green Wire Voltage
Next we call PIN 16 (Green, PS_On). It should have a voltage of around 3-5 volts. If there is no voltage, then disconnect the power button from the motherboard. If the voltage rises, then the button is to blame.
The computer is turned off - the voltage on the green wire is 3.5 volts
We still hold the probes on the black and green wires and turn on the computer with the button. The voltage on the multimeter should drop to 0.
The computer is turned on - the voltage on the green wire has dropped to 0
If there are no changes, then the problem is in the motherboard, processor or power button on the computer case.
To check the power button, disconnect its connector from the connector on the motherboard and short-circuit the 2 pins on the motherboard with a touch of a screwdriver.
Step 3. Check the gray wire voltage (Power_OK)
With the computer turned on, check the PIN 8 gray wire, it should have a voltage of 3-5 volts. This means that the outputs on the +12V +5V and +3.3V lines are within the permissible voltage and hold it for a sufficient time, which gives the processor a signal to start.
After turning on the computer - the voltage on the gray wire is 4.84 volts
Step 4: Check the voltage on the yellow wire
- We place one probe on the black wire.
- We place the second probe on the yellow wire.
I got 12.26 volts, which is within the permissible value from 11.4 to 12.6 volts.
Measuring +12V line (yellow wire) on the computer power supply
Step 5: Check the voltage on the red wire
We measure the red wire in the same way, it should be in the range of 4.75-5.25 Volts. Shows normal 5.06 V.
Measuring the +5V line (red wire) on the computer power supply
Step 6: Check the voltage on the orange wire
We measure the orange wire, it is used to supply power to expansion cards, and is also present on the SATA connector for connecting hard drives. My multimeter shows 3.34V, which is within the permissible value of 3.14-3.47V.
Measuring +3.3V line (orange wire) on the computer power supply
Step 7. Test the power supply for breakdown
- Turn off the computer.
- We wait 1 minute for the residual current to go away.
- We put the multimeter in resistance measurement mode Ω 200 or 2000 Ohms.
- We take out the large connector from the motherboard.
We hold one probe on the metal part of the case, and with the second probe we call any black wire in the connector. The resistance should be 0, taking into account the error of the multimeter.
Close the multimeter probes and see what number it shows, this will be a zero value with an error.
Measuring resistance for breakdown of power supply - zero resistance
Then we leave one probe on the body, and connect the second one to the middle contact on the power plug, which is the ground.
Checking the grounding of the power supply - zero resistance
In both cases, the resistance should be zero; if this is not the case, then the power supply must be replaced.
Step 8. Checking resistance in power circuits
We place one probe on the body or on the middle contact of the plug. Using the second probe, we check the resistance on all colored wires: red, orange, yellow.
Values must be greater than zero. If the value is less than 50 Ohms, this means a problem in the power circuits.
Checking the resistance in the power circuits - normally more than 50 Ohms
Using a Multimeter When Testing a Power Supply
Understanding the operation of the device, you will need to carry out various types of measurements with your own hands, so working with the device circuit requires appropriate knowledge and skills.
In each case, you must be able to adjust the multimeter accordingly. You may need to perform the following procedures:
- Voltage measurement. If you have a device diagram, the voltage value at certain points is usually indicated. In this case, you should set the device to the desired scale. For a working power supply, the values indicated on the diagram must correspond to those being measured.
- If you test the circuit, you can determine the presence of a contact or short circuit on the board. In this way, you can also detect a broken contact track on the board.
- Before measuring amperes, you will have to unsolder one end of the part to make the multimeter part of the electrical circuit.
An experienced technician, having a good understanding of what he is doing, can take measurements of the computer's power supply in its working condition. It is better for a novice specialist to unsolder the radio components before checking their serviceability. If the user does not feel confident enough to check the operation of the circuit in detail, it is better to turn to professionals to perform this part of the work.
Method 3. Checking the power supply with a tester without a computer
Using the tester, you can check the performance of the power supply without the help of a computer and a multimeter.
I bought myself such a tester. When they call for an application and say that the computer does not turn on at all, I take the tester with me to diagnose the power supply.
Computer power supply tester
You can buy a power supply tester using this link
I connect the power supply to the tester, as in the photo below. I plug the cable into the socket and look. If the power supply burns out, then the screen on the tester will not light up. If the tester beeps and the screen with readings lights up, then the power supply is working, but you still need to check the readings.
Checking the power supply with a tester
We look at the readings on the tester from left to right:
- -12V - 11.8
- +12V2 - 12.3
- 5VSB - 5.0
- PG - 280 ms, this is the turn-on delay time
- +5V - 5.0
- +12V1 - 12.3
- +3.3V - 3.3
And compare it with the table of acceptable values.
Power supply - table of permissible values
- +12V1 (yellow wire) - used on the main 24-pin connector for the motherboard.
- +12V2 (yellow) - used on the 4-8 pin connector for the processor.
- +5V (red) - serves to supply voltage to hard drives, optical drives, floppy drives and other devices.
- +3.3V (orange) - used to supply power to expansion cards, present in the SATA connector for connecting hard drives and SSDs.
- -12V (blue) - not used on modern computers.
- +5VSB (purple) - standby voltage.
As can be seen from the table, all tester readings are normal.
For the sake of difference, I filmed how using this tester you can determine whether a new power supply is defective. But at the same time, the power supply itself works, the computer turns on. I checked the power supply with a tester, the PG (Power Good) value blinks - 0 and beeps. On working power supplies, the PG value should show 100-300ms.
They recognized it as a defect and changed the power supply quite quickly, since less than 2 weeks had passed from the date of purchase. Without a tester, within a week I would hardly have noticed that the power supply was defective.