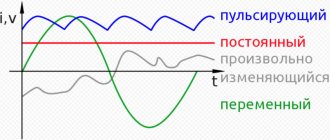
Concept of voltage drop (operating)
A light-emitting diode (aka LED) has one important characteristic - operating voltage or drop voltage. This value shows how many volts the voltage will decrease when passing through the LED in a series connection.
For understanding, it’s worth giving a small step-by-step example:
- The diode has a drop of 3.4 V, and the supply voltage is 12 V.
- After powering the first diode, 8.6 V will remain from 12 V (12-3.4 = 8.6).
- On the second, another 3.4 V will be lost, and 5.2 V will remain (8.6-3.4 = 5.2).
- After the third we get 1.8 V (5.2-3.4 = 1.8).
The final value is less than the voltage drop of the light-emitting diode, which means that it will not be possible to power more of them.
The operating voltage is influenced by the material from which the LED is made. According to operating voltage they are divided into:
- LED with voltage from 3 V to 3.8 V: blue, white, blue-green.
- LED with voltage from 1.8 V to 2.1 V: red, yellow, orange, green.
How many volts are there?
The operating voltage of an LED can be determined not only by its appearance and characteristics, but also by the color glow of the LED. To do this, check out the table below.
| LED color | Voltage, V |
| Red | 1,63 ― 2,03 |
| Yellow | 2,1 ― 2,18 |
| Green | 1,9 ― 4,0 |
| Blue | 2,48 ― 3,7 |
| Orange | 2,03 ― 2,1 |
| Infrared | up to 1.9 |
| Violet | 2,76 ― 4 |
| White | 3,5 |
| UV | 3,1 ― 4,4 |
How color affects brightness
To understand this aspect, you need to know what happens inside the diode and what affects the color type.
The internal structure of a semiconductor LED consists of two semiconductors designed for different levels of conductivity. An electric current passes through the first semiconductor due to a physical phenomenon that ensures the movement of free electrons. Current moves through the second conductor due to the movement of “holes”.
A “hole” is a place where an electron is missing.
At the junction of semiconductors, the stage of recombination of “holes” and electrons begins. An electron flies to the place of the “hole”, which makes the atom neutral - a photon is emitted, that is, color appears.
Color can change if it is influenced by the following factors:
- what type of semiconductor the LED was made from;
- what impurities were used at the points of contact between two semiconductors;
- width of the forbidden zone (recombination site);
- parameters and magnitude that influence the current strength in a section of the electrical circuit.
The color change occurs due to an increase or decrease in electrical current. When referring to Ohm's law, it must be remembered that the higher the voltage, the greater the current. This means that the photon's energy will also increase, thereby moving towards a cooler (blue) and brighter glow.
Brief technical specifications
When manufacturing lighting fixtures, manufacturers are guided by several characteristics:
- board dimensions;
- number of crystals;
- voltage and current;
- light flux;
- temperature of the operating environment.
Table of the most common SMD LEDs:
| SMD type | Number of crystals | Dimensions (mm) | Power, W) | Current (mA) | Luminous flux (lm) | Ambient temperature |
| 3528 | 1 | 3.5x2.8x1.4 | 0.02 or 0.06 | 20 | 5-7 | -40 – +85 |
| 5050 | 3 or 4 | 5x5x1.6 | 0,02 | 60 or 80 | 18-20 | -40 – +60 |
| 5630 | 1 | 5.6x3x0.75 | 0,2-0,4 | 150 | 58 | -25 – +65 |
| 5730 | 1 or 2 | 5.7x3x0.75 | 0.5 or 1 | 150 or 300 | 50 or 158 | -40 – +65 |
| 3014 | 1 | 3x1.4x0.75 | 0,1-0,12 | 30 | 9-13 | -40 – +85 |
| 2835 | 1 | 2.8x3.5x0.8 | 0.2, 0.5 or 1 | 60, 150 or 300 | 20, 50 or 100 | -40 – +85 |
These bulbs can be single, double or multi-colored. From them you can create rigid and flexible modules of any shape (round, rectangular, linear, with a base). A round radiator is used in floodlights.
Reference! The number of diodes in the module is gradually decreasing due to the advent of high-voltage SMDs (15 and even 45 V).
How to find out how many volts it is rated for
Using a power supply
One quick way to determine LED voltage is to use a regulated power supply. The power supply must be regulated from scratch and at the same time make it possible to control the current, or even better, limit it.
To measure, follow these steps:
- Connect the LED to the source, observing the polarity.
- Gradually increase the voltage to 3-3.5V.
At a certain moment, the diode will light up at full strength - this means that the voltage level corresponds to the operating current (it can be read using an ammeter). If the device does not have a built-in ammeter, the current must be monitored using an external device.
When the voltage rises, you cannot cross the 3.5 V line. If the LED does not light up at these levels, check the polarity of the device connection.
By appearance
The approximate strength of the operating voltage can be assessed by the appearance, markings and color of the LED. To determine by color spectrum, use the table that was written about earlier in the article.
There is no standard labeling; each manufacturer indicates its own parameters on it. Marking is usually indicated on packaging containers (boxes and bags). If you purchase LEDs that are wound into a reel, ask the seller for the packaging container to find out the LED markings.
Multimeter
To measure the operating voltage of an LED with a multimeter, follow these steps:
- Turn on the multimeter and set the rotary switch to the “diode test” position.
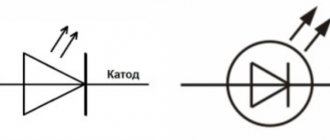
- The LED has two terminals and polarity: short (negative terminal), long (positive terminal). Connect the positive (red) probe of the multimeter to the positive terminal of the LED, and attach the negative (black) probe to the negative terminal.
- If the LED is working properly, the light will light up.
Method 1
A small fragment of PCB, literally a piece, but always with double-sided foil. A “spot” of solder must be applied to each so that in the future you can easily fix the wires and leads of the device for testing the LED. Probes from the multimeter, from which you should cut off (or unsolder, and then restore everything) the plug. The free ends need to be cleaned and tinned, that is, prepared for soldering. Paper clips – 2 pieces. They are given a shape that is clearly visible in the figure below. These will be the terminals of the device (analogous to plugs) that are connected to the multimeter. Although this is not the only option. Instead of paper clips, you can use flexible steel wire by cutting a couple of pieces of the required length.
LEDs.
The main thing is that these leads are slightly cushioned, then it will be much easier to connect them to the multimeter socket. Soldering acid. Using traditional pine flux is futile. The paper clips are made of steel, so the usual method for securely fixing them on PCB is of little use. Soldering iron. Power – at least 65 W. Trying to secure a paper clip to the board with a mounting tool (24, 36 W) is a waste of time. You will need to lay the melt in a relatively thick layer, and a low-power (miniature) soldering iron is useless in this case. Multimeter. These household appliances are available in several modifications. Their main difference is in functionality, that is, the ability to measure certain parameters of the circuit and parts.
It will be interesting➡ How to make a charger for a car battery with your own hands
You will need a multimeter that can test transistors. In principle, everything you need to make a simple device for checking an LED with a multimeter is always at hand. In the end it should look something like this. In order not to be confused with the polarity of connecting the probes to the LED, the terminals of the device should be slightly shifted from the center line. Then it’s easy to remember where the conditional “+” and “–” are. Checking the LED You need to insert the “contacts” of the device into the plug for testing Tr (anode terminal - to connector E, cathode - to C), put the multimeter switch in the “Transistor measurement” (hFE) position and attach the probes to the board at the points where they are soldered legs of the device (from the front or back, whichever is more convenient). If it is working properly and the polarity is correct (plus to the anode), it will begin to glow.
How to determine current
Finding out what rated current an LED has without using special reference books is not so easy. By appearance, the current strength can be determined by the diode bulb: the larger it is, the greater the current. If during the test you cross the acceptable line, the color of the diode will change. For example, an initially yellow color may turn into a white or blue tint.
Most standard LEDs are rated at 20mA.
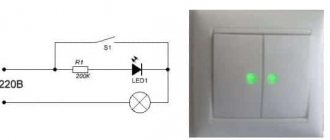
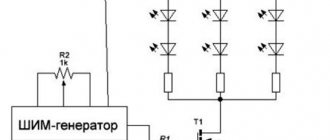
Modern technologies make it possible to supplement the device body with new components. The most commonly used are quenching resistors. In this way you can get an LED with a voltage of 5.12 or 220 V.
In addition, the rated current of the LED is determined by the same multimeter. When the light comes on, pay attention to the device screen; the voltage will be displayed on it; knowing it and Ohm’s law, you can easily calculate the LED current.
After watching the video, you can understand how to test different types of LEDs using a multimeter.
LED lamp voltage
Modern LED lamps, manufactured for home use and industrial purposes, are designed for an alternating supply voltage of 110 - 220 V. This figure is achieved by combining several chips. In this case, the driver built into each lamp is responsible for lowering the voltage and obtaining a constant current.
The LEDs themselves in the lamp are designed for a lower DC voltage. Most lamps use SMD 5050 or SMD 2835 LEDs. Chinese Corn lamps use SMD 3014 LEDs. All these LEDs are designed for an operating voltage of 2-3.2 V (DC), the more accurate value depends on the emitted color, the voltage drop also Everyone is different, from 1.8 V to 3 V.
Types of LEDs
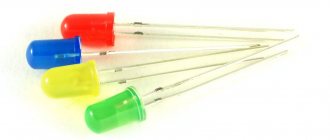
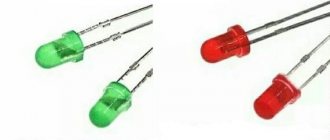
- Through-hole LEDs: These are available in a variety of shapes and sizes, and the most common are 3mm, 5mm, and 8mm LEDs. These LEDs are available in various colors such as red, blue, yellow, green, white, etc.
- SMD LEDs (Surface Mount LEDs): Surface Mount LEDs are special packaging that can be easily installed on a PCB. SMD LEDs typically vary depending on their physical dimensions. For example, the most common SMD LEDs are 3528 and 5050.
Bi-color LEDs. The next type of LED is bi-color LED, as the name suggests, it can emit two colors. Bi-color LEDs have three terminals, usually two anodes and a common cathode. Depending on the wire configuration, the color will be activated.
RGB LED (Red - Blue - Green): RGB LEDs are the most loved and popular among hobbyists and designers. Even computer assemblies are very popular for implementing RGB LEDs in computer cases, motherboards, RAM and so on.
High Power LEDs: An LED with a power rating greater than or equal to 1W is called a high power LED. This is because normal LEDs have a power dissipation of several milliwatts. High-power LEDs are very bright and are often used in flashlights, car headlights, floodlights and so on.
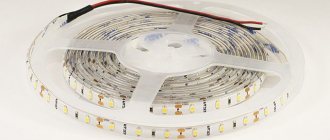
LED strip voltage
LED strips use the same LEDs as lamps, so everything written above also applies to them, i.e. The operating voltage for the strip LED is 2-3.2 V.
To summarize, it is worth noting that each LED has its own individual characteristics, including voltage. In order to find out exactly how much a particular light-emitting diode is designed for, you need to read its manual, the so-called Datasheet.
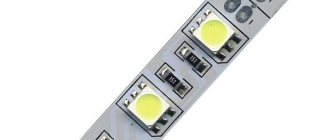
SMD 5630 and 5730
SMD 5630 marked a new stage in technology development. Other materials are used in production to increase power and luminous flux; RGB products are available. 60 pieces are mounted in tapes per meter, 72 pieces in metal rulers.
SMD 5730 is structurally similar to 5630, the main differences are increased light flux and only 2 contacts. The modification with a current of 300 mA can operate in pulse mode, the crystal temperature can reach +130°C. To increase power, SMD 5630 and 5730 are installed on a metal board that effectively removes heat.