A handmade craft is filled with the incredible positive energy of the master, his mood and good thoughts. This means that a home refrigerator magnet, made with your own hands, will become an emitter of warmth, kindness and positivity. They make it funny for a friend, for parents - with words of gratitude, for a loved one - with a declaration of love.
But not everyone knows how to make a refrigerator magnet with their own hands at home. It’s easy to make, the main thing is to have the desire and follow some rules.
How to make a magnet with your own hands
First, you need to come up with a theme and idea for the future magnet. Next, decide on the choice of magnet holder:
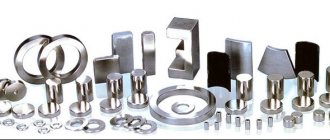
- ferrite - a hard magnet, round or square, will last 10 years, suitable for products made of light materials;
- vinyl – soft, produced in the form of a flexible plate on which a thin layer of glue is applied; used for small weight crafts;
- neodymium - withstands loads, does not lose its properties for decades, suitable for crafts with filling.
In order for the product to hold well, the adhesion force of the magnet must be 2-2.5 times the weight of the souvenir. It is not necessary to buy a magnet; you can use an old one.
Required tools:
- brushes for glue and paints;
- glue intended for gluing plastic and wood;
- scissors.
Additionally, you may need a glue gun, a knife, and a measuring tape. If you need to sew parts onto a craft, you will need a needle and thread.
Armed with the necessary tools, they get to work. Then everything depends only on the imagination of the master: you can make an exclusive thing from any available material. You can work in any direction, knowing the basics of making crafts.
Advice! Crafts made in the same style look better.
Methods for demagnetizing a magnet
Loss of the ability to attract metal objects can occur both naturally and during a number of actions. Subject to the rules of operation and storage, the qualities of neodymium elements are maintained for 100 years or more, and ferrite analogues continue to attract metal for 8-10 years. Degaussing neodymiums naturally is not practical if the procedure is to be performed on a new item.
Product heating
This method is used both in industrial and domestic conditions: if the magnet is made of a standard alloy of neodymium with boron and iron, it will lose its properties when placed in water boiling at 80 degrees Celsius or in case of contact with a surface heated to the specified temperature. If we are talking about a product with increased resistance to thermal shocks, it is unlikely that it will be possible to perform the procedure at home: the demagnetization temperature of neodymium magnets with such properties is 200 degrees Celsius. To carry out the procedure in such cases, special industrial equipment is used.
"Live" magnet made from cork
Make a hole in the wine cork with a knife, being careful not to damage the walls. A magnet is glued to the cork.
When the glue has dried, dry soil is poured into the hole and a small shoot of the plant or its seed is planted and watered.
Hang the magnet on the refrigerator on the sunny side. When there is not enough space for the plant, transplant it into a pot, and a new seedling is planted in its place.
Advice! Lately, growing microgreens has become fashionable. It is convenient to germinate wheat, lentils and barley in a cork.
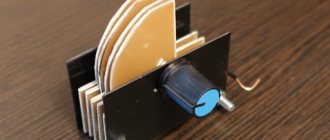
Strengthening the electromagnet
To understand how to increase the strength of a magnet, you need to understand the process of magnetization. This will happen if the magnet is placed in an external magnetic field with the opposite side to the original one. An increase in the power of the electromagnet occurs when the current supply increases or the turns of the winding are multiplied.
You can increase the strength of a magnet using a standard set of necessary equipment: glue, a set of magnets (you need permanent ones), a current source and an insulated wire. They will be needed to implement the methods of increasing the strength of a magnet, which are presented below.
Flower bouquet
In a craft store they buy flowers, leaves, curly branches and make a composition:
- Option 1. A frame for a future basket is cut out of a small calendar. Corrugated cardboard is glued onto it and painted with acrylic paint. A bouquet is created on the basket by attaching decorations. Foamiran is glued to the back side, and magnetic vinyl is placed on it.
- Option 2. Instead of a basket, a tree trunk is cut out of cardboard, painted with acrylic paint and varnished. The crown of the tree is decorated with flowers and leaves. When the glue dries, glue a strip of magnet onto the craft. If the bouquet turns out to be heavy, use a ferrite or neodymium magnet.
Flowers are also made independently. Using stamps, cut out petals and leaves from polymer clay or salt dough. After drying, the dough products are painted and varnished. Polymer clay is selected according to the desired color.
Master Class. 1. Hook magnets made from branches
You can hang keys, towels, ladles and other things on these branch hooks.
Materials and tools:
- A dry small but strong branch with a branch;
- Hand saw or jigsaw;
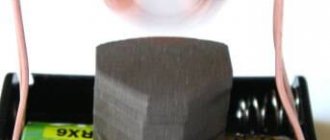
- Small neodymium magnets;
- Glue;
- Drill and drill bit equal to the diameter of the magnets;
- Acrylic paint (optional).
Instructions:
Using a saw, cut the branch so that it looks like a hook. Then cut the branch lengthwise so that the back side is flat as shown in the photo below on the left.
In this flat back of the branch, drill a recessed hole the size of your magnet.
Glue the magnet into the resulting cell.
If desired, paint the craft and cover it with matte varnish. Ready!
Magnets from caps and discs
CDs that are no longer needed will find a second life as decoration. A picture with a still life is glued to the surface of the disk, and a vinyl magnet is glued to the back side. You can paint the disc yourself. To do this, clean the surface with sandpaper, paint and draw.
Tin lids and crown caps are excellent materials for decoration. A photograph, landscape, words are inserted inside the lid. A magnet is glued to the back side, and the lid is varnished or painted.
If you glue the lid with the convex part up, first drawing cute faces on the surface, they will amuse others with their cool appearance.
What does N52 on a magnet mean?
Brief information about what kind of brand of neodymium magnets N52 is this. The letter N means that these magnets can be used up to a temperature of 80 degrees Celsius. Number 52 - indicates magnetic energy (fourth column of the table). ... Accordingly, the larger the surface of the magnet, the greater its strength.
Interesting materials:
How to seal a door with plasticine? How to seal a safe with plasticine? How to describe the color red? How to describe a social project? How is sick leave with code 09 paid? How is cash on delivery paid? How is leave paid after sick leave? How to pay 1% to the pension fund? How to pay the state fee for obtaining a license through government services? How to pay a receipt through VTB mobile bank?
Magnetic bags
A nice bag is made from thick fabric, filled with filling for volume, and tied with a ribbon. There is no need to glue the magnet to the bag; it is placed inside. The outer side is decorated with applique, beads, or a coin is glued on. This refrigerator magnet can be used as a talisman or to attract wealth.
Master class 3. Magnets from tin caps (crown caps)
The idea of recycling soda or beer bottle caps as refrigerator magnets will appeal not only to environmentalists, but also to decorators. After all, they cost nothing at all, but provide a lot of opportunities for decoration.
So, for example, you can paste family photos or just nice paper (card scraps, magazine clippings, etc.) inside the lids.
Homemade photo frame magnets
You can paint the lids, fill the insides with hot glue or cork, and then glue magnets to them.
Sometimes bottle caps don’t need to be decorated at all.
Instead of beer caps, you can use larger caps, such as Nutella jars or baby food caps, to make refrigerator magnets.
Materials and tools:
- Scissors, or better yet, a hole punch for scrapbooking for cutting out circles with a diameter of 2.5 cm (sold in craft stores and costs 200-300 rubles);
- Epoxy resin, a container for preparing the solution and a stirring stick;
- PVA glue, as well as superglue;
- Small magnets;
- Photos that are suitable in size or any other pictures, for example, from a magazine;
- Beer caps (it's best to use bottles with screw caps rather than pop caps).
Instructions:
- Using a hole punch or scissors, cut round fragments with a diameter of 2.5 cm from the photographs. Of course, if you use scissors, you must first make a marking using one of the caps (or a plastic cap from a plastic bottle) as a template.
- Glue the pictures to the inside of each lid using PVA glue (the glue must be applied on top of the picture as well). Let the glue dry completely (!).
- Following the manufacturer's instructions, prepare the epoxy resin in the quantity you need. To find out exactly how much resin you will need, pour water into one of the lids, then multiply the resulting volume by the number of lids. Line your work surface to protect it from spills, then fill each lid to the brim. Let the crafts dry overnight.
- Glue magnets to the blanks. Ready!
See also: Crafts from bottle caps for adults and children
"Coffee" magnets
There are countless ideas for creating a magnet from coffee beans and it’s easy to make. The basis is fabric, paper, wood or polymer. Cut out the desired part and glue coffee beans onto it.
As an option, they make an animal figurine, a heart model, or a photo frame.
Master class on creating the simplest “coffee” magnet:
- A heart template is cut out of cardboard. If made from plain paper, several layers are glued together.
- Glue the magnet in the center of the figure.
- Wrap the heart in fabric, gluing its edges.
- The product is tightly covered with coffee beans and covered with a layer of varnish.
The original “coffee” magnet is decorated with a bow and a beautiful souvenir is ready. For a friend who can't imagine a morning without a cup of coffee, this would be a great gift.
How to strengthen a magnet
Since at the same time they will repel, so they need to be glued together.
- When a certain temperature is reached, the magnetic properties of a permanent magnet disappear. This point is called the Curie point. But cooling the magnet to a temperature significantly below the Curie point does not increase its strength, since this transition is phase, that is, abrupt.
- An electromagnet is a core made of electrical steel with an insulated wire wound around it. Increase its magnetic power in two ways. The first is to increase the current supplied to the winding. In this case, the magnetic induction of the field will increase in proportion to the increase in current strength in the magnet winding. But if the current in the winding exceeds the value of the short circuit current, it will burn out, then the electromagnet will fail. Therefore, it is necessary to increase the current supplied to the electromagnet very carefully. The current is increased by increasing the EMF of the current source.
- If this is not enough, strengthen the electromagnet in another way - increase the number of turns of the winding without increasing its length. To do this, apply a second row of wire, and if necessary, a third. The magnetic induction of the field will increase in proportion to the increase in the number of turns on the electromagnet coil.
Wooden magnets
After your baby enjoys the ice cream, there is no need to throw away the stick. Once you have a few of them together, you can make a nice little house.
Sequence of making a house:
- Cut out the desired piece of cardboard. It is better to take cardboard, which is used in scrapbooking. If this is not the case, take regular cardboard, cover it with colored paper and paint it with paints.
- The roof, body and pipe are cut out separately.
- Cut out a window of any shape.
- Glue all parts of the house onto a paper base and paint it several times.
- A fence is constructed from wooden sticks and glued to the body of the house.
Finally, decorate the façade of the house to your liking and glue a magnet to the back side.
You can make a simpler wooden magnet. An image of any silhouette is applied to a piece of wood of any shape through a stencil. A black lacquered silhouette will look interesting against a light wood background.
Strengthening a regular magnet
Many questions arise when ordinary magnets cease to perform their direct functions. This often happens due to the fact that household magnets are not such magnets, because, in fact, they are magnetized metal parts that lose their properties over time. It is impossible to enhance the power of such parts or return them to their original properties.
It should be noted that it makes no sense to attach magnets to them, even more powerful ones, since when they are connected with reverse poles, the external field becomes much weaker or is completely neutralized.
This can be checked using an ordinary household mosquito curtain, which should be closed in the middle using magnets. If you attach more powerful magnets on top of weak initial magnets, then as a result the curtain will generally lose its connection properties through attraction, because the opposite poles neutralize each other’s external fields on each side.
How to make cool refrigerator magnets with your own hands
When creating cool magnets, the main condition is observed - they must be positive, amuse others and lift their spirits.
In a craft store they buy a small figurine, insert a funny inscription into its hands, attach it to a magnet and hang it on the refrigerator. You can sew the figurine yourself by cutting out the parts and filling them with cotton wool. It is not necessary to adhere to anatomical proportions; the funnier it is, the better.
This set of grannies will bring a smile to everyone who sees them. Each figure is given a facial expression according to their imagination. They are made from salt dough, painted and varnished. A “flock” of grannies is glued onto a flat surface, and a magnet is attached to the back. They can be hung in any order, then a magnet is attached to each grandmother.
How to reduce adhesion force?
Here it is easier to reduce the adhesion force of a neodymium magnet in two ways. 1) Increase the distance between the magnet and the object being affected; the further the magnet is from the magnetized surface, the weaker the attraction effect.
2) The principle of this method is similar to the previous one, but here you can not increase the distance, but while maintaining a certain distance, lay a non-magnetic material between the magnet and the object.
The power of the magnetic field in this case will be determined by the degree of magnetic conductivity of the magnetic screen used.
The specialists of our online store will help you choose the magnet of the required power.
The manufacturing process of neodymium magnets includes a magnetization stage. At this stage, the workpiece is exposed to a powerful magnetic field. As a result, a powerful neodymium magnet is born with a high coercive force and an equally high adhesive force. The service life of neodymium magnets is extremely long - theoretically, they can work for hundreds of years. Demagnetization of a neodymium magnet occurs very slowly, at a rate of 0.1% per 10 years.
How to magnetize a neodymium magnet if it has become demagnetized? This operation is impossible, since it would require a very powerful magnetic field. If we take as an example a magnetic disk 70x50 mm with an adhesion force of 295 kg, then we can imagine what kind of magnetic field was necessary to magnetize it. Thus, it will not be possible to magnetize a neodymium magnet at home - you will have to buy a new magnet.
How to demagnetize a neodymium magnet so that it loses its strength? To do this, you can use a strong blow or heat. The properties of neodymium alloy are such that it cannot withstand strong impacts and heating to high temperatures. If you hit a magnet with a hammer, it has every chance of losing its magnetic force. The magnetic field will also weaken if the neodymium magnet is heated above +80 degrees. These properties are characteristic of many brands of neodymium alloy, but there are exceptions - some brands can withstand heating up to +200 degrees.
Neodymium magnets must be handled extremely carefully - this will allow you not to think about how to magnetize a neodymium magnet if it loses its magnetic field. They should not be allowed to overheat or receive strong shocks. If a neodymium magnet becomes demagnetized, you should simply throw it away. Also, the alloy should not be subjected to any deformation. Attempts to change its shape can lead not only to demagnetization, but also to burns - sawing the alloy can cause a fire.
Magnetic board for refrigerator
Some people not only want, but don’t even know what it is – a magnetic board. Moreover, they don’t know how to make a magnetic board for the refrigerator with their own hands.
A magnetic board on a refrigerator is a stylish fashion accessory that will not only complement the interior, but also has practical value. They write messages to each other, reminders, wishes on it. It becomes an indispensable element in the house, since family members communicate through it without being able to be together often. This board is also suitable as a gift.
It’s easy to do and the work won’t take much time. You can choose any template for the board - from a classic rectangle to the most bizarre patterns.
For production you will need:
- a large sheet of thick paper (whatman paper will do);
- vinyl-based magnet (it is sold by the meter in printing houses or advertising companies);
- transparent plastic (sold in the same place as the magnet).
Draw and cut out the desired template on a sheet of Whatman paper and paste it onto a vinyl magnet. If a human or animal figure is cut out, draw eyes, nose, and mouth with a marker. If necessary, paint in the desired color. Plastic is glued onto the paper; it is better to do this with tape along the edges of the figure.
That's the whole simple process. The finished board is hung on the refrigerator, written on it with markers, and erased with a regular flannel cloth. To erase records, a special sponge is sold that is attached to a magnet.
You can also make a world map board and hang all the magnets you purchase on your travels on it.
Making decorative magnets has many advantages:
- there is where to use your “golden” hands;
- joint creativity brings the family closer together;
- allows you to make changes to the interior at any time, you can do it every day.
The main thing is that the process is exciting, there is freedom for imagination and you can feel like a real designer.
DIY FRIDGE MAGNETS | PHOTOMAGNETS
Watch this video on YouTube
Magnet basket/DIY gift/March 8/Basket Magnet/DIY
Watch this video on YouTube
Do you want to understand better than others?
- Do-it-yourself magnets: how to decorate a household refrigerator - Refrigerator magnets are one of the most common ways to diversify the appearance and add personality to kitchen appliances. The souvenir shops offer a large…
- Is it possible to hang magnets on a household refrigerator? Many people, when traveling to other cities, buy magnets with images of various attractions or their photographs. Such souvenirs became widespread due to...
- How to keep lemons fresh at home - Thanks to the piquant taste of lemon and the presence of many beneficial micronutrients in its composition, it is a common ingredient in various dishes and drinks. Many even grow...
- How to prepare beets for the winter at home - Freezing is perhaps the most rewarding way to prepare vegetables for the winter. Firstly, it is very simple and quick (as opposed to conservation, which involves standing at the stove for a long time)….
- 13 unusual but effective ways to remove stickers from a refrigerator - Removing stickers from a new refrigerator is not as easy as it seems at first glance. Sometimes it takes a lot of effort to get rid of glue. We will share with you...
Application of neodymium magnet
These products are available in various shapes and sizes and are used for the following tasks:
- Creating a clamping effect, fixing metal elements to each other. Using neodymium magnets, you can attach an antenna, license plate, plate, other metal part, device or entire mechanism.
- Filtration of oil systems in cars and other equipment: neodymium magnets allow you to easily and quickly remove metal shavings.
- Creation of magnetic locks and fasteners used in industrial sectors and household purposes.
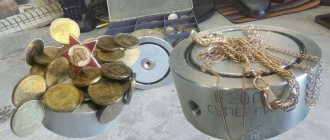
- Search work related to the search for metal objects (search for treasures, historical values, weapons, mine clearance work, etc.).
- Restoring other magnetic elements: using a neodymium element, you can create a magnetic field that will return the product to its ability to attract metal.
- Deleting information recorded on floppy disks, disks, flash drives and other electronic media for security purposes.
- Creation of devices for universal use (hangers, stirring devices, compasses, etc.).
- Construction of current generators that can be used as experimental models or devices suitable for domestic use.
- Making jewelry: Neodymium can come in different shapes and sizes, and beads made from this material are often given a chrome finish and can be painted in different colors.
- Treatment of water using magnetic influence, as a result of which the formation of scale is reduced, and the liquid itself acquires an improved taste and smell.
- Fuel conditioning, which allows you to reduce fuel consumption for cars and motorcycles.
- Sorting small metal items that need to be removed from a variety of non-metal items.
Conclusion
Neodymium magnets are products that are widely used in commercial, industrial and household applications, they are characterized by high load capacity, excellent attractive properties and durability. Before demagnetizing neodymium magnets, it is important to make sure that you have the necessary equipment: this requires either an industrial installation or a device for heating to at least 80 degrees. Magnetizing products that have lost their quality is rarely advisable, but if necessary, you can order the procedure by contacting the manufacturer.
Master class 2. Magnetic storage jars
If you have some cute tin or glass jars, put them to good use by turning your refrigerator door or magnetic board into an organizer.
Glass baby food jars are great for storing spices on the refrigerator or hood.
Materials and tools:
- Small aluminum cans (cans like those in our master class can be ordered on Aliexpress for 300 rubles/10 pcs.). You can replace tin cans with glass jars or small plastic containers;
- Paint of the desired color (it is more convenient to use spray paint) and matte varnish (not necessary, but desirable to protect the coating);
- Neodymium plate magnets (especially if you want to use large jars and store heavy items in them) or 0.6mm thick magnetic vinyl self-adhesive sheets;
- Superglue “Moment” (needed if you use neodymium magnets).
Instructions:
- Make sure the prepared jars are clean and dry. Paint them, as well as their lids, in 2-3 layers, allowing each layer to dry thoroughly. Next, coat the jars with varnish, if any.
- If you are using jars with a glass insert on the lid, you will need to remove it or seal it with masking tape before painting.
- Cut circles from a magnetic sheet; their diameter should be slightly smaller than the diameter of the cans. If you use neodymium magnets, then glue them with superglue.
- Glue the cut out circles to the bottom of the jar, removing the protective backing.
- If desired, the lids of the jars can be further decorated. For example, as shown in the photo below.
Main points
- Permanent magnets are made from magnetized material and produce stable magnetic fields.
- Magnetized materials, as well as those that attract, are called ferromagnetic.
- In contrast to them, there is an electromagnet, which is magnetized only when an electric current passes through it.
- Magnets always have a north and south pole. If you break it into two parts, then both again have two poles.
- Permanent magnets are made of ferromagnetic materials, which are subject to pressure from a magnetic field and heat. This makes them difficult to demagnetize.