Modern ceiling coverings provide consumers with not only excellent parameters for a flat and smooth surface, but also the ability to install all kinds of lighting systems. A distinctive feature of modern lighting fixtures is their compactness in relation to the general background - LED strips and light cords merge with the structure, and spotlights are easily hidden inside the ceiling. And if we discussed questions about installing spotlights earlier in the previous article, today we will look at how to remove a spotlight that has already been installed and operated by you.
How to change a light bulb in a spotlight on a suspended ceiling
Depending on the type of socket, light bulbs are removed differently. Let us consider in detail the replacement process for each type of base. Before starting work, it is better to turn off the power supply at the panel, otherwise there may be an electric shock.
G5.3
It is not very convenient to remove light bulbs of this type from spots, since the outer part is recessed into the lamp body and is located above the plane of the stretch ceiling. In the lampshades they are held in place using a special retaining ring or a wire clamp with antennae at the ends. Such lamps are compatible with LED and pin-type halogen elements.
To change a light bulb with a G5.3 socket, you need to squeeze the two antennae and pull out the fixing bracket. If a retaining ring is used as a retaining part, it is simply unscrewed. The lamp falls out. Then you need to disconnect it from the contacts by pulling it towards you. After this, a new lamp is connected, inserted into the lamp body and the fixing ring is installed in place.
Sometimes the retaining ring does not fit back in after replacing the light bulb. This happens for several reasons:
- the body is deformed - it will have to be replaced;
- the ceiling is fixed too high and the base rests on the concrete base - you need to purchase a lamp of exactly the same size, a difference of 1 mm can cause a problem;
- The fasteners are the wrong size - this happens if you had to unscrew several light bulbs and the rings were mixed up.
GX53
In luminaires with a GX53 base, the lamps protrude beyond the ceiling by 3-4 mm. On their back side there are two contact pins that are inserted into the corresponding grooves on the body of the lighting fixture. Dismantling is carried out by turning the lamp counterclockwise until it clicks, then it is simply pulled out.
Replacement is very easy; there is no need to install fixing parts or disconnect wires. Simply insert the new lamp and turn it clockwise.
G4, G9
The design feature of such lamps is that the body protrudes beyond the plane of the ceiling. LED and halogen pin-type models are available with G4 and G9 sockets. To dismantle the lamp, just pull it down. Then simply insert the new one into the groove. There is no need to rotate the lamp. In some models, you first need to disassemble the spotlight, namely, unscrew the decorative diffuser.
E14, E27
Such lamps are changed in the same way as in a regular chandelier or sconce.
Holding the flask, carefully unscrew it counterclockwise. Then screw the new one in until it stops, but without effort.
Sometimes the light bulb is difficult to grasp with your fingers, in this case you can use masking tape.
https://youtube.com/watch?v=qFUdEj7JWs0
This is interesting: Tikkurila wall paint - features and benefits
Types of socles
Lamps for ceiling lamps differ from each other not only in the light source, but also in the type of base. The following variants of the latter are common:
- Screw - most often used in incandescent lamps, it is a thread for screwing in the device;
Lamp with screw base Source asutpp.ru
- Bayonet is a variation of the previous type, here protrusions are used on the base, which are placed in the corresponding grooves of the cartridge;
Bayonet type base and cartridge Source elektrik-a.su
- Pin is the most modern type, which is installed on halogen and LED devices. There are a large number of its forms and variations.
Light bulbs with a pin base Source oboiman.ru
Reasons for replacing a light bulb in a suspended ceiling
Modern designers unanimously believe that stretch ceilings are one of the best inventions. It not only refreshes the room, but also serves as a decoration for the room. The advantage of this type of ceiling covering is the wide variety of lamps suitable for it. You can hang a classic chandelier, or you can opt for a fashionable LED strip. Some people choose lamps of different sizes “scattered” in a chaotic manner. The shapes of lighting fixtures can be different.
Stretch ceiling is a modern design solution that can decorate any interior. When choosing lighting, there is a lot of room for imagination - from a chandelier, LED strip to spotlights of different sizes and shapes.
The need to replace light bulbs in a suspended ceiling is determined by several factors:
- The lamp may break. Most often, cheap lighting devices fail. Therefore, it is better to spend money once on a high-quality lamp than to buy it every three months. If the device is reliable, then it will not have to be changed often.
- When the design of a room changes, previous lighting fixtures have to be dismantled. To save on new light bulbs, you can purchase special covers that are installed on spotlights. They change the appearance of lighting fixtures. If there is a chandelier hanging in the room, then there is an opportunity to “play” with the lampshades. They can be replaced with new ones or decorated with old ones.
- When a suspended ceiling is completely changed, the lamps built into it inevitably change. Some people mistakenly believe that they can leave the lamps on while dragging the ceilings. This is impossible, since a suspended ceiling is an integral system, and lamps are built into it.
Useful tips
In the process of dismantling soffits and removing a chandelier, specialists often encounter various difficulties, which can be completely avoided if you familiarize yourself with the following recommendations:
- If incandescent light bulbs were initially installed in the spotlight, then they should be replaced with LED lamps - this will significantly save money on room lighting.
- If you are installing halogen light bulbs, remember that they should never be touched with bare hands, otherwise they will stop lighting.
- If the retaining ring does not fit into the groove, you need to check the correct placement of the lamp; perhaps it is not fully seated. The body of the lamp could also be deformed - it needs to be removed and the unevenness removed or the hole in the hanging structure made larger.
- If you install a new soffit in place of the old one, make a hole with a small margin relative to its diameter - this will significantly simplify dismantling next time.
Rice. 10. Choosing the diameter for the soffit
- If you need to change the chandelier to a spotlight, you can use its output, but you will have to remove the hanging hook. Bend it is extremely dangerous, as it can damage the drywall or film.
- Before removing the spotlight, it is advisable to remove excess glass beads, decorative caps and rings - this will preserve the integrity of fragile parts.
Rice. 11. Soffits with bugles
- After removing the retaining ring, the lamp will fall out of the soffit, so you should also hold it with your hands.
Low frequency flickering of LED lamps
The amplitude of the alternating mains voltage changes with a frequency of 50 times/sec and has the form of a sinusoid. The luminescence of the matrix is provided exclusively by positive and negative half-waves passing through the LED. If a light source equipped with LEDs blinks, this may be the reason for significant savings on the power supply by the manufacturer.
In inexpensive models of such lighting equipment, a single-bridge rectifier is often used to reduce its cost, designed to convert AC voltage to DC. A certain number of oscillations are cut off after the diode bridge, and by adding a capacitor to the electrical circuit, ripple is reduced. Such a scheme allows you to observe the pulsation of the light flux with a frequency of 25 times/sec.
The capacitor, as a rule, accumulates charge at the amplitude maximum and returns it to the load at the minimum. At the output, the average voltage amplitude decreases, and the ripple becomes significantly less. If the resource capacity is insufficient, the capacitor is not enough to recharge the LED elements, whose brightness changes with each half-wave. According to sanitary standards, the pulsation of the light flux should not be more than 10 percent of the nominal intensity.
Safety precautions
Before performing any electrical work with lamps, it is necessary to de-energize the ceiling lighting system of the room - always from the apartment panel.
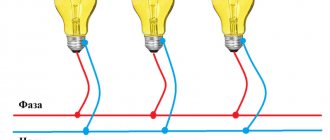
Modern wall switches work to open both wire strands - phase and neutral. But in sale and operation there are still switches of an outdated design that disconnect one conductor - according to the rules, it should be a phase conductor (“minus”). We cannot exclude the possibility that just such an outdated device is installed in the apartment, and its connection was made with an error in phasing - then in the “off” position it will open “zero”, and the lamp socket will remain energized. After turning off the “machine” on the panel, the electrical safety of the work will be ensured.
In most cases, light bulbs in ceiling lamps are replaced from some elevation - a stepladder, a stool.
The support used must be strong and stable in order to minimize not only the risk of a worker falling, but also the likelihood of stumbling at height - suspended and tensioned structures can easily be damaged if you grab onto them when you lose balance.
Features of replacing an LED lamp in a suspended ceiling
p, blockquote 7,0,0,0,0 –>
LED lighting is very popular these days, because it is economical and convenient, it shines brightly and consumes little electricity. However, this type of lighting also expires and needs to be replaced.
p, blockquote 8,1,0,0,0 –>
This process occurs as follows:
- Make sure the lamp is working properly using a tester.
- Turn off the electricity in the apartment.
- Take care of autonomous lighting in advance or carry out such work during the day.
- Remove the mount from the damaged lamp.
- Strip the insulation from the wiring and disconnect the wires.
- Carefully read the instructions for the new lamp and install it based on this information.
- Connect all wires and insulate.
- Replace the LED light cover.
p, blockquote 9,0,0,0,0 –>
Even though LED lights need to be replaced periodically, they are still beneficial due to their cost-effectiveness.
How to replace an LED light bulb in a suspended ceiling
Before purchasing a new LED lamp, it is recommended that you first check that it is working properly while still in the store. You can use testers for this.
If during operation it becomes necessary to replace the LED light source, you will need to perform the following work:
- Remove the existing fasteners from the LED lamp.
- Remove insulation from electrical wires. Carefully disconnect the wires.
- Replace the LED lamp according to the attached instructions. Connect the wires to the light source.
- Restore electrical insulation. Hide the wires and replace the lamp cover.
If lamps in the same lamp burn out quite often, then it is worth checking the serviceability of the base, since in most cases this may be the problem.
How to remove a light bulb from a suspended ceiling
Point spots are attached to the main ceiling base, and only the decorative part of the illuminator is fixed in a special hole in the tension fabric or suspended structure. The cartridge can be attached to a frame or electrical wire.
To remove a spotlight from a suspended ceiling, it is recommended to follow these rules:
It is necessary to use stable stands (chair, table, etc.) or a ladder. Do not rest your hands on the surface of the stretch ceiling. Ceiling lighting fixtures use removable stoppers to secure the lamp, without which they will fall out
Therefore, the lamp must be disassembled carefully so that the fastener does not get lost. You need to unscrew the light bulb from the spotlight without any effort so as not to damage the plasterboard or polyvinyl chloride surface of the ceiling. Manufacturers include instructions for installing and operating the lighting equipment for each model of ceiling lighting fixture.
It is recommended that you familiarize yourself with it before starting work. Halogen lights quickly fail when exposed to oily stains. Therefore, replacing light bulbs in spotlights of this type should only be done while wearing gloves. It’s better to replace them with similar LED elements.
Replacing MR16 GU5 3 lamps
In MR16 GU5.3 devices, the lamp is secured using a locking bracket or ring.
The lamp must be dismantled in this order:
- Power outage. It is recommended to do this on the electrical panel that supplies electricity to the entire apartment or building. The phase wire is not always broken by a wall switch placed in the room.
- Remove the lamp, if the device has one.
- Removing the fastening element holding the light bulb. It is necessary to squeeze the antennae with your fingers and carefully remove the ring (bracket).
- The base is held with one hand, and the lamp is pulled out with the other. But do not pull the wire on which the lamp hangs, it can easily come off.
- Remove the light bulb on the suspended ceiling, install a new one, and secure the device.
When reassembling the illuminator, the mounting ring may not return to its proper place. The reasons for this nuance may be the following:
- when replacing several lamps at the same time, the retaining rings were mixed up;
- the body of the new light bulb is made to different standards or it was not fully inserted.
Replacing lamps type GX53 tablet
GX53 models are available in a round shape, which is why they are also called tablets. Replacing the lamp in this lamp is easier than in the GU5 3 model. It is fixed to the socket with two pins of different diameters. The smaller diameter pin is located closer to the lamp, and the larger one is 2 times closer to the edge. To remove a spotlight from a suspended ceiling, you do not need to disassemble the lighting equipment.
Sequencing:
- You need to grasp the bulb with one hand, and hold the frame of the lighting equipment with the other.
- The light bulb rotates 20° counterclockwise and comes out of the socket freely.
- Then you need to insert the work lamp and turn it all the way in the opposite direction.
- Check functionality.
Replacing light bulbs with E14 E27 sockets
For spotlights, E14 (E27) bulbs are rarely used; pin ones are more common. In such devices, you just need to unscrew the burnt-out light bulb and screw in the whole one.
Lamps that use lighting lamps with a threaded base are available in different designs. In some devices, the light bulbs are fixed using corkscrew brackets (rings). And other illuminators have to be removed from the suspended ceiling.
In plasterboard ceilings, spotlights are held by special arms with springs, which are placed on opposite sides and directed in different directions. The lamp must be pulled with a slight force, and the arms will close in the opposite direction. After this, the device can be easily removed from the ceiling structure and the lamp socket can be replaced.
How to remove a recessed ceiling light
A special feature of installing spots in a suspended ceiling is that the device is attached not to the film itself, but to a special structure - a mortgage. This part is located behind the canvas and serves as a load-bearing base. It is from this that you need to remove the lighting device. The lamp itself is attached to the mounting platform using two spring clips.
The dismantling process consists of several simple operations:
- Turn off the automatic switch responsible for the corresponding group of devices.
- Pull the lamp body slightly so that a small gap is formed.
- Slowly remove the lighting fixture, first from one side, then from the other, until your fingers can reach the fasteners.
- The latches are pressed and held firmly with your hands, and the lamp body is carefully removed from the ceiling.
All actions must be careful. Do not allow the latch holding the device inside the mortgage to hit the PVC film
Such carelessness can lead to damage to the finish.
There are other problems too. Often the spring latch hits your fingers. Therefore, it is necessary to hold the clamps securely while removing the device. If you do not de-energize the circuit on which dismantling is being carried out, when disconnecting the contacts, electric shock may occur.
Instead of the old device, insert a new one of the same size. Installation is carried out in reverse order. Sometimes dismantling is necessary to replace light bulbs.
Dismantling is carried out in exactly the same way, only even easier, because there is no risk of damaging the material, as is the case with a thin stretch fabric. To remove the built-in lamp from the suspended ceiling, you can use a screwdriver, this makes it easier to pry up the ring and reach the spring.
Required Tools
It is not always possible to carry out basic work of replacing lighting fixtures on a suspended ceiling with bare hands - you need tools and devices:
- a sliding ladder (stepladder) will help you reach the ceiling and work in comfortable conditions (if you don’t have one, you can use a table);
- An indicator screwdriver will help to check the presence of voltage in the wiring of the lighting fixtures being replaced - a break in the electrical network by an electrical switch often leaves the red wire energized, since it is not a phase that has passed through the switch, but a zero;
- pliers will help remove the retaining rings (the task will be especially simplified if they have pointed jaws);
- two flat screwdrivers will help pull the light source with a spring fastening system out of the socket;
- a Phillips screwdriver is needed to unscrew the terminals when changing the cartridge;
- a stationery knife will help to strip the wires of the purchased lamp;
- A terminal block will be required if the wires were connected by twisting before replacing the socket.
This is interesting: Lighting in the kitchen with a suspended ceiling - ceiling lights for suspended ceilings in the kitchen, options, chandelier, spot lighting, spots, how to arrange, location, LED lighting
Reasons for replacing light sources
Replacement of lighting devices can be planned or unscheduled. Planned replacements are prepared in advance and are related to the owners’ desire to change the interior of the room. During such work, recessed spotlights (their appearance and design), pendant single light sources, chandeliers and overhead lamps may change.
Unscheduled work is related to the need:
- replace a burnt out light bulb;
- dismantle all light sources due to the need to remove the canvas - this occurs mainly due to flooding by neighbors above;
- wipe the lampshade from dust.
The ceiling panel must be dismantled.
Replacing the LED lamp
When working with lighting devices, the first thing you need to do is turn off the power to the apartment. To do this, turn off the required element in the power supply branch
Do this with due care and caution, following safety rules. It is also better to take a chair and any other stand with which it will be convenient for you to do your work. Be careful with the stretch ceiling fabric, any sudden movement can damage it
Be careful with the stretch ceiling fabric, any sudden movement can damage it
Now proceed to directly replacing the lamp
Be careful with the stretch ceiling fabric; any sudden movement can damage it. Now proceed to directly replacing the lamp.
To begin, unlock the lamp in the mounting system. A special fixing ring is responsible for this. Be careful, the ring can easily slip out of your hand. Next, slowly unscrew the old lamp. Inspect it and select a new lamp with the appropriate characteristics: size and power. After replacing the lamp, return the retaining ring to its place and secure it in proper condition.
Here are some tips on how to remove a light bulb from a stretch ceiling:
- If the ceiling requires the installation of LED lamps, but you definitely don’t have enough power, use a little trick: instead of the usual, standard yellow color, buy white. With this simple replacement you will increase the brightness of the lightening without affecting the power consumed.
- To achieve a harmonious effect of transmitting light into the suspended ceiling of one room, it is better to mount lamps of the same model. This way you will get an aesthetic and attractive appearance. If for any reason you cannot find the lamp you need, replace everything in the room. To do this, always purchase a couple more light bulbs so that you can quickly replace them at the right time.
- To make the lamp last longer, do not screw it into the lamp with your bare hands. Use gloves or a dry cloth.
- Do not forget that a suspended ceiling will not withstand an overly powerful lamp. It is better to purchase it with a power of no more than 35 W to avoid possible damage to the material.
How to replace a lamp in a luminaire?
If desired, you can only replace the light bulb. This will allow you not to remove the device and guarantee efficiency of action. The first thing you have to do is turn off the power supply to the branch that is connected to the device itself. This will allow you to protect yourself when replacing the light bulb. The next step is to find the required stand. It will make sure that the installation of the new light bulb is quick and comfortable.
Attention! It should be remembered that the work must be carried out carefully and accurately. If you ignore these expert tips, there is a high chance of tissue damage
This should not be allowed, so you should use only screwdrivers and not other sharp objects.
The work algorithm is presented in the following stages:
- The light bulb is unlocked in the product body. For this purpose, a fixing ring made of calcined wire is provided.
- When unlocking, hold the ring, as it can spring and slip out of your hands.
- After this, begin to unscrew the light bulb.
- They look at the power on the unscrewed product and purchase a similar new version.
- It is mounted into the lighting fixture itself.
- Finally, the fixing ring is installed in place and fastened.
Changing a chandelier on a suspended ceiling
You will say: the suspended ceiling is installed by specialists, so let them deal with replacing the lamp. But this is not entirely true for two reasons:
- First of all, it is not in their competence.
- The second reason is even simpler: for simple electrical installation work they will charge you decent money.
Therefore, we read the instructions, prepare the necessary tools, purchase materials - and go ahead!
The first thing you need to think about in advance before replacing a chandelier (or installing a new one) on a suspended ceiling is to determine exactly where it will be located. This determines whether additional wiring is needed.
The selection and purchase of a chandelier must be made before installing the tension fabric. This will allow you to decide on the installation option and correctly carry out the preparatory stage. Here are some simple recommendations that will allow you to choose the right chandelier for tension structures:
- The lamp bowl should not have sharp edges or protrusions (the canvas may be damaged);
- It is optimal if the base is made of non-metallic material. This will allow you not to worry about deformation of the canvas if the base heats up;
- It is advisable to choose a model in which the shades are directed away from the canvas;
- If you plan to use incandescent lamps, then the length of the suspension should be at least 20 cm (distance from the ceiling to the light source).
Preparatory stage
Once you have purchased the chandelier and decided on the type of mounting and its location, you can begin installing the electrical wiring and installing the base.
Extend the wire
In terms of electrical wiring, it is most often necessary to extend the wire, even if the chandelier is not portable. The fact is that the luminaire is mounted on a suspended ceiling slightly lower (depending on the evenness of the base, profile thickness and other factors). Sometimes, if the ceilings in the room are high, they are specially lowered by 10–15 cm. Naturally, the length of the old wires is not enough: it is necessary to increase them. To do this, use terminals to connect a piece of cable of the required length to the old wires.
If the lamp is moved, the length of the cable increases and a corrugation is put on it. To prevent the corrugation from sagging, it is fixed to the base of the ceiling using plastic clamps.
Installing the fastener
Depending on the design of the chandelier, several installation methods are used. Let's look at them in more detail:
- Mounting hook. All pendant chandeliers are attached to such an element. For installation on a suspended ceiling, metal hooks of various lengths are used. They have a convenient spring latch, thanks to which they are fixed in the hole of the plate. A thread cut along the entire length of such a hook allows you to precisely adjust the height of the chandelier. To install the hook, simply drill a hole in the floor slab and insert a fastener into it. You can also use the old hole by first removing the old hook from it;
- Profile mounting. Some lamps are mounted on a longitudinal profile (slats) using studs. To secure the profile, so-called embedded structures are used. A suitable piece of board or thick plywood is used as a mortgage. A hole is made in the embed for the outlet of the wire for the chandelier. A piece of board or plywood is attached to the ceiling using dowels. If the mortgage needs to be lowered down, then installation on a U-shaped profile made of galvanized steel is used.
Now you can invite specialists to install the tension structure.
Chandelier installation
After the canvas is stretched, the installation of the chandelier begins. To do this, you will need a thermal ring, which is available in various diameters. When mounting on a hook, choose a small ring, and when mounting on a profile, choose the width of the decorative bowl.
The procedure for installing a chandelier on a suspended ceiling is as follows:
- By touch you can find the place where the hook or mortgage is installed;
- The thermal ring is glued to the canvas. To do this, it is better to use cyanoacrylate-based glue;
- When the glue has completely set, the fabric inside the ring is carefully cut out with a sharp knife;
- Wires are pulled into the hole, and the chandelier is hung on a hook;
- If a profile is used, the metal strip is screwed to the mortgage using self-tapping screws, and the chandelier is attached to mounting studs;
- After the lamp is installed, the electrical connection is made according to the attached diagram and the decorative cover is installed.
How to remove a lamp from a stretch ceiling
For dismantling you will need a small set of tools.
What you need for work
- Tester
- Indicator screwdriver set
- Pliers
- Insulating tape
The procedure itself is simple, but you must strictly follow safety rules. Before starting work, the line leading to the device must be de-energized. It is advisable to make sure that this is indeed the case and check the presence of voltage with a tester or an indicator screwdriver. Then dismantling begins. We offer step-by-step instructions on how to remove a spotlight from a stretch ceiling.
Dismantling instructions
- We remove the decorative grille or lampshade glass, if there are such parts.
- Remove the light bulb from the socket. Depending on the type of base, this is done differently. It is taken out or unscrewed, helping yourself with a flat screwdriver.
- Take the second screwdriver and place it in the small gap that has formed.
- Carefully unscrew the housing. We try to do this evenly. Twist until you can freely place your fingers in the gap formed.
- Find the spring latches on the body and press them out with your fingers. We do this very carefully so as not to tear the ceiling film.
- We remove the device from its mounting socket.
- Unscrew the screws that are located on the terminal block. We release contacts.
The body is now removed from the tension structure. You can carry out all the necessary manipulations with it.
The video shows the process of removing the lighting fixture. It also shows how to insert it back, but we will return to this issue later.
Types of lamps for suspended ceilings
To replace a failed product on a lighting device, you need to understand the types of lamps that can be used in them.
Incandescent lamps
This is the very first source of artificial lighting, which people have been using for more than a century. Such elements for devices located on suspended ceilings are considered ineffective, since only 2% of the energy consumed is converted into light. Another significant disadvantage is associated with the strong heating of the case. High temperatures generate significant heat, which enters the unventilated space between the underlying ceiling base and the surface of the decorative structure.
Due to the strong heating, incandescent lamps cannot be installed on suspended ceilings, since the PVC film will quickly melt. Therefore, they can be used here only in classic chandeliers, located at a distance from the decorative canvas.
Also, such lamps have significant dimensions, and the length of the elements can reach 15 cm. Therefore, they are not the best option for suspended ceilings. Among such a variety of disadvantages, only two advantages can be identified: budget cost and the ability to operate uninterruptedly in rooms with high humidity or low temperatures.
Halogen
Before suspended ceilings gained popularity, these lamps were installed only in spotlights and vehicle headlights. However, over time they have proven themselves well, and are now very often used to illuminate suspended ceilings. They have the following advantages:
- have a long service life (up to 10 years);
- immediately gain power after switching on;
- wide color range;
- a special spectrum of lighting that saturates the rays;
- possibility of adjusting the lighting angle.
Using halogen lamps on PVC film ceilings you can create an amazing design.
However, such devices also have their disadvantages:
- consume a lot of energy;
- generate a large amount of heat;
- require installation of additional ventilation in the room;
- are quite expensive.
But all the shortcomings are compensated by a long service life, during which you do not have to worry about the lighting source failing and replacing it.
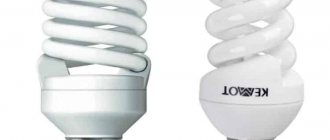
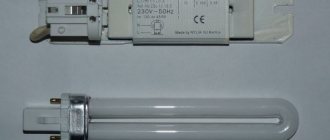
Energy saving
Their name speaks for itself. The main advantage of such elements is the consumption of a small amount of energy during operation. Such sources include fluorescent lamps.
They have the following advantages:
- efficiency;
- compactness;
- variety of designs.
The main disadvantage is fragility, which decreases in proportion to the number of times the light bulb is turned on and off. The more such manipulations are carried out on it, the sooner it will become unusable. Frequent voltage surges, which negatively affect their performance, are also undesirable for such products. However, with proper operation, the uninterrupted operation life of the element reaches 5 years.
These lamps are not recommended for installation in luminaires for lighting rooms with high humidity.
LED
The newest source of artificial lighting, which in a short time managed to gain recognition and popularity among consumers, thanks to the following advantages:
long service life (more than 10 years); efficiency
According to this indicator, LED lamps correspond to fluorescent elements; the light emitted by them does not irritate the eyes; special controllers, which are included or purchased separately, allow you to adjust the lighting intensity and change its shades; Using LEDs, you can organize directional lighting in a room, focusing attention on a specific area. The main disadvantage is their high cost
The main disadvantage is their high cost
The main disadvantage is their high cost.
Such lamps can be made:
- in the form of an independent device completely ready for use. Then, if the LED fails, you will have to completely change the device, since it will not be possible to insert a new light bulb;
- in the form of a cabinet lamp, in which it is possible to replace a faulty light source.
Separately, it is worth mentioning the LED strip, used as decorative lighting or for additional lighting of a specific area in the room.
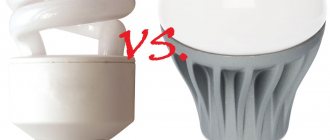
Thus, for spotlights on a suspended ceiling, it is better to use halogen, fluorescent or LED bulbs.
Types of light bulbs used
LED lamps Point light sources are used both as main and as auxiliary devices to focus attention on individual elements of the interior. A characteristic feature is the limited radiation angle. The light turns out to be directional. This makes it possible to use special design techniques, combining the number and characteristics of lamps to give the house an original look.
Products with traditional filament are becoming a thing of the past. Production is being limited; in the coming years, their market share will be measured at several percent. LED and halogen lamps have become the most popular.
Halogen lamp
Unlike an old-style lamp, where a vacuum is created in the bulb, modern products contain additional substances that improve the quality of the device and its efficiency. If iodine or bromine are used in production, the models are called halogen. They are not fundamentally different from traditional products.
Fluorescent lamps are gas-discharge devices where a phosphor begins to glow in mercury vapor under voltage. The LED is a semiconductor element with high efficiency and low operating temperature.
When comparing halogen and LED lamps based on their totality of characteristics, several features can be noted. Halogen models require a high temperature of up to 500 °C for optimal aperture, while LED analogues need a value of 60-100 °C. Many experts believe that halogen is more pleasing to the eye, similar to daylight and produces high-quality lighting.
How to change a light bulb in a spotlight
As practice shows, you can remove the light bulb from a spotlight and change it yourself, without resorting to outside help. The algorithm of actions is similar as with other types of lighting devices. In this case, it is important to turn off the electrical energy for safety reasons. As soon as the current supply is stopped, you can remove the cover of the lighting fixture, remove the glass bulb and install a working light fixture in its place.
How to unscrew a light bulb from a spotlight
If you need to remove a light bulb from a spotlight, you need to start unscrewing it clockwise. If this cannot be done, it is recommended to use a plastic bottle that is placed on a glass flask. You will first need to cut out the bottom of the bottle and, with some effort, try to unscrew the flask.
If the lighting fixture does not give in this time and does not move away from the base part, then the plastic bottle is pressed as tightly as possible to the socket and the bulb is broken using a hammer. After this, all that remains is to remove the base using construction tools.
How to insert a light bulb into a spotlight
If we take into account that spotlights have several mounting methods, then you can insert a light bulb into a spotlight in different ways. There are 2 options:
- right-hand thread - relevant for lamps with standard sockets; replacing the bulb is quite easy and simple;
- fastening - several pins are taken as a basis, which have guides with clamps; in this case, the work must be performed as accurately as possible;
- with immersion in the cartridge - in this case, a rotation of 90 degrees must be made so that the bulb is fixed.
If you know what type of fastening is used, the work will be completed without any problems.
How to replace small lamps with large ones
Sometimes the lighting scheme is poorly thought out and there is not enough light in the room. Then there is a desire to install larger lighting fixtures. Let's look at how to do this.
The first step is to dismantle the spot. Then a thermal ring of the required diameter is glued onto the stretch ceiling fabric, so that the old tread ring is inside. After the part is firmly fixed, the film is cut out, creating a large hole.
Then the embedded platforms are adjusted to the diameter of the base of the new lamp. To do this, you need to carefully cut out the excess plastic rings with a knife so that the device body fits freely into the hole. When the site is ready, the lamp and light bulbs are installed.
You can replace lighting fixtures yourself, without the help of specialists. But if you have doubts about your own skills and knowledge, it is better to entrust this work to the specialists who installed the suspended ceiling. After all, careless actions lead to damage to the material, and improper handling of electrical appliances results in serious injuries.
no comments yet.
We will send the material to you:
The ceiling can get its sophistication and attractive appearance not only thanks to various unique shapes and colors, but the multi-colored illumination on it will look no less impressive.
The most popular option is spotlights. They are installed in a certain number on the ceiling: usually more than a couple of pieces. To add beauty and install lamps, you need to know how to mount them correctly.
What types of lamps are there for suspended ceilings?
Halogen lamps
One of the best choices for lovers of maximum convenience. This type of light bulb will provide comfort and the greatest safety for vision, since the eyes perceive its light much better than light of other types.
In addition, such lamps have other advantages. For example, you can place them in rooms with high humidity levels.
However, it is worth taking into account sudden voltage surges. Halogen lamps quickly fail if they are constantly overloaded
During installation, experts recommend additionally installing a voltage stabilizer.
Energy-saving lamps
This type of lamp is suitable if you need to save as much money as possible on electricity. But it must be remembered that their service life is lower compared to other types of lamps.
It depends on how often they are turned on and off, so if you want to get the greatest possible benefit from installing energy-saving lamps and not change them too often, we recommend turning them off not very often.
Classic incandescent lamps
The simplest and most famous type of light bulbs, replacing which will not cause difficulties even for a person without repair experience.
How to change fiber optic light bulbs in a suspended ceiling
Today, fiber optic light sources are the most reliable; their service life can exceed 10 years. Due to their high level of strength, they can be used in any room, regardless of humidity levels and temperature conditions.
Since fiber optic lighting devices are small in size and, if necessary, they can change the color of the glow to any shade, they are most often used to create a starry sky in suspended ceilings.
Many experts consider such light bulbs to last forever, since they are less likely than other types to burn out. If one of the lamps burns out, it must be immediately removed through the existing hole in the suspended ceiling and a new one installed in its place.
Components of the structure
Before replacing a lamp that has become unusable, you need to familiarize yourself with the design of this element.
The main components, regardless of the type of lamp, are the following:
- a housing that includes the lamp socket and wires;
- a clamp with which the device is fixed to a suspended structure;
- a protective cover, the basis of which can be either plastic or glass;
- rings for fixation.
Knowing what components the design of shelf lamps consists of, it will be much easier to replace an element that has become unusable.
The most popular element for modern suspended ceilings is a spotlight. They differ from other types of lighting fixtures in their wide variety of design designs, and they can work with any type of light bulb. With the help of such lamps you can perfectly complement the interior and highlight its features. Over time, it becomes necessary to completely remove the lamp from the ceiling. And the most common reason for this is replacing a light bulb. Now we will learn how to change a light bulb in a spotlight yourself. You need to seriously prepare for this, because working with electrical appliances is very dangerous and can lead to disastrous consequences.
Tools you will need for the job
Spotlights are very convenient, compact, and most importantly, they shine brightly, but, like all other lamps, they burn out. Most often, you just need to replace the light bulb itself, but sometimes the lighting fixture itself burns out, and then you need to remove it completely to replace it with a new device.
To easily remove the lamp from the ceiling without damaging it, use the following tools:
- network voltage tester;
- screwdriver with indicator;
- two regular flat screwdrivers;
- pliers;
- terminal block;
- Phillips screwdriver;
- drill with a long drill bit suitable for working with concrete.
Experienced craftsmen do not recommend using electrical tape to connect wires; the result can be very disastrous. It is much better and more efficient to use a terminal, and you do not need to have any special skills or be good with electricians.
PHOTO: ellektrik-sochi.ru If you cannot determine the model of light bulbs, take them with you to the store and ask the sales assistant to select lamps of the same configuration. Never buy at random, you can easily make a mistake
Security measures
Changing a light bulb in a spotlight in a suspended ceiling will be easy even for a novice electrician. However, when performing this work, one should not forget about the rules of personal safety, as well as measures to maintain the integrity and performance of the product.
Basic safety measures:
- It is recommended to carry out work with the power supply turned off. In this case, you not only need to press the switch button, but also turn off the power to the entire apartment. Such actions will allow you to unscrew the old light bulb without risking life and health.
- To replace the lamp you need to use a stepladder. It will allow easy access to the light source and simplify the work of dismantling it.
- The socket and body of a lamp that burned out a few minutes ago can be heated to high temperatures. This must be taken into account so as not to accidentally touch the product and get burned.
- When replacing halogen light bulbs, you need to use gloves - greasy marks may remain on the protective housing, which will shorten the life of the product.
- You need to remove a non-working light source as carefully as possible. In this case, you should not apply much force, since a careless movement can damage the stretch ceiling.
Basic mistakes
Some people, when dismantling spotlights, cut the tension fabric around them. This cannot be done for the following reasons:
- damaged polyvinyl chloride fabric cannot be restored;
- there is a risk of damaging the electrical cable;
- The old lamp cannot be installed in this place; you will have to buy a new one with a larger diameter;
- After cutting the tension fabric yourself, the manufacturer’s warranty for the service life becomes invalid.
Therefore, it is necessary to work with tension structures carefully, otherwise when replacing LED bulbs or lighting equipment, you will also have to change the ceiling itself. And this is a significant blow to the family budget.
Details
Replacing a Euro lamp in a suspended ceiling
The reality is that bathrooms, kitchens and living rooms are increasingly using efficient and more economical LED, halogen or fluorescent light bulbs. They are usually selected to complete spot or linear lighting fixtures. In any case, they all burn out, and therefore almost all owners of modern interior designs will have to face the problem of how to change a light bulb in a suspended ceiling.
Options for contacts and cartridges. Modern light sources are connected to electrical wiring, which is hidden behind a suspended ceiling, using several methods:
By means of a standard screw type chuck E10, E14 and E27.- A socket with contacts and a spring-loaded latch.
- Individual connection of contact-type electrical wiring chips to each lamp terminal.
The easiest way is with screw-type cartridges, just remove the lock and unscrew the bulb, you can do it even with one hand. If the lamp is mounted in a socket with a central spring-loaded contact, then before removing the spotlight from the suspended ceiling, you need to turn or move and unscrew the lamp bulb without removing it from the socket. Often, the side-type contact of such lamps simply comes off or begins to oxidize. For two-pin LED, or more often halogen lamps, the contacts are fixed with screws. This is more reliable, and you don’t have to try to unscrew the lamp from the socket. But if it burns out, you will need to disassemble half of the lamp pendant mount to replace it.
Replacing the LED lamp
For plastic and polyvinyl chloride suspended ceilings, lamps with reduced power are used, maximum 35 W. Usually these are compact two-pin cans with a matrix of light diodes, with dozens of emitters, sealed inside a glass bulb. After turning on the contacts from the power supply, the lighting device will be inserted into the reflector and attached to the housing of the lighting device. Before replacing an LED lamp in a suspended ceiling, you need to remove the wire ring spring, release and pull out the reflective housing. The entire structure will be hanging on the wire. To release the lamp, you need to unscrew a couple of screws on the contact chips, insert a new bulb, tighten the mount and return the entire assembly to its place. All that remains is to mount the decorative rim and spring.
Helpful advice! Before starting work, it is advisable to put all the necessary tools, including a lamp, in a belt bag or pocket.
With one hand you can hold the wiring, and with the other you can unscrew the contacts without dropping the old bulb. It is very inconvenient to run for a spare lamp or tools, which is why electricians do not like to unscrew and replace two-pin lamps. For simple sconces and chandeliers, LED lamps with an E27 screw base are used. In this case, the replacement will look noticeably better.
The socket itself with wiring is attached to the lamp body and is firmly held by the suspended ceiling panel. To turn out a pear-shaped flask made of matte polycarbonate, just remove the cover on the clips and remove the burnt-out device. Often it is not enough to simply unscrew an LED lamp; its service life is quite long, from 10,000 to 30,000 hours. For this reason, after opening the lamp body, it is recommended to check the condition of the contacts, the operation of the regulators and the dimmer, and only then mount the parts on the suspended ceiling.
How to unscrew and not break a lamp (halogen)
One of the best home lighting designs is the halogen lamp. If you ask experts in ergonomics and design of household lighting, you will definitely hear many flattering reviews:
Such a lamp produces an extremely powerful luminous flux with a continuous emitted spectrum, which is much more pleasant and beneficial for the eyes than “bluish” fluorescent type lamps and super-bright diodes.- The use of halogen lamps on a suspended ceiling is limited only to polymer materials, but otherwise the device works even better than strip-type LED emitters.
- Unscrewing and replacing a halogen light bulb is no more difficult than a simple bulb with an incandescent filament.
The design and structure of a halogen lamp is very similar to a standard bulb lamp with a screw-type base. For suspended panels, modifications with a miniature E14 base are used. Unlike other types, halogen lamps do not have a diffuser attachment, and therefore you can unscrew it from the socket in a couple of movements. The only limitation will be to ensure that the glass flask is completely clean.
Before removing a light bulb from a suspended ceiling, the glass on the new part must be wiped with a cloth moistened with alcohol. In some cases, it is necessary to unscrew an old halogen lamp with cracks on the working surface. In the most difficult case, a burnt halogen “bulb” cannot be unscrewed from the socket even with a loop. In this case, the damage is sealed with double-sided tape, and only then will it be possible to remove the device from the cartridge. Knowing the technology for replacing halogen lamps, you can easily figure out how to replace a fiber optic lamp on suspended ceilings. The diffuser reduces the heat load on the glass surface, and therefore you can work with the bulb in the same way as with a simple lamp.
Replacing a broken lamp
One of the most unpleasant cases is that associated with replacing a burst or broken lamp. If a glass bulb with cracks looks intact, this does not mean that it is not capable of breaking in the hands even with the slightest attempt to remove it from the cartridges. For this reason, all manipulations with cracked glass must be carried out with cotton gloves and in a de-energized state. To be able to unscrew a halogen lamp, its bulb needs to be covered with several pieces of tape. The glass of halogen-type cylinders is quite thick, and it is only necessary to glue it to avoid the leakage of gases and the appearance of sharp chips along the crack lines. The most difficult case is with fluorescent lamps, and before unscrewing the cracked housekeeper and its bulb, you need to put a bag on it, and the force should be applied only to the base of the plastic lamp. And the worst case scenario is that if the bulb has shattered into pieces, but the base remains in the socket, then there is only one option left - to release the ceiling panel and disassemble the plastic socket.