Opel Astra TURBO RESTYLING › Logbook › Replacement of interior lighting lamps!
Hello to all readers of my logbook!))) It’s immediately clear that the yellow light in the car is nothing... I decided to replace the standard lamps with LEDs!
They were replaced a long time ago, but I just couldn’t get it together, choose the time and create a BZ...))) I bought 5 baseless LEDs for the lampshades, 4 LEDs for illuminating the sun visors
Then I took the lights apart. Disassembling the lights is simple, all fastenings are snapped, carefully pry and remove...
I didn’t install a central LED, because I don’t need light when opening the door, and in the future the lights for the legs and doors will be connected to this connector, but more on that in the next blog…)))
Then we put everything together and here is the result:
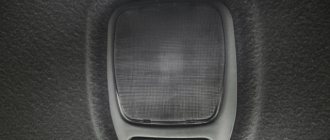
The central section does not light up, only the outer sections light up. There is plenty of light...
Then we move on to the rear courtesy lamp. Everything is sorted out and changed in exactly the same way...
Then we move on to illuminating the glove compartment. The yellow light in it doesn’t inspire me either... So I took out the flashlight, pulled out the old lamp and inserted a new diode... To pull out the flashlight you need to pry it off with a flat screwdriver, as if from the inside...
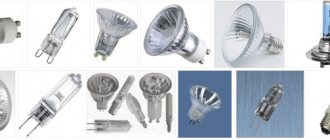
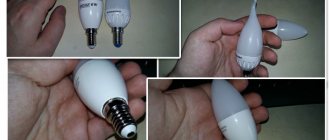
The only thing left to do is to replace the lamps in the sun visors... As with all lampshades, it is extremely simple... The glass is removed, the lamp is taken out and the diode is installed... But there were some problems, the diodes were larger than the original lamps, so they had to be filed a little))) Unfortunately there are no photos of the finalization...
I immediately thought that the diodes would produce less light, but it turned out to be the opposite... Overall, I’m very pleased with the result, white light is much nicer!))) Don’t forget to comment and like!))) If you like it, of course!))) Thank you all for your attention! )))
Price: 500 ₽ Mileage: 1,000 km
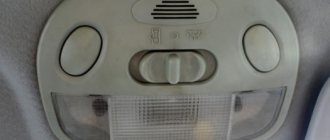
Removing and installing the lampshade
First of all, we open the upper compartment, the so-called eyeglass case, and under it you need to unscrew the two fastening screws:
After that, using a flat-head screwdriver, pry off the cover - a decorative trim, under which there is a rear-view mirror mount.
And also unscrew the two fastening screws, as shown in the photo below:
Next, carefully move the lampshade to the side, but without sudden movements, since there are several more wires going to it.
And now you can disconnect the power wires by squeezing or pressing the clamps, depending on the type of their fastening:
Replacing the lampshade or temperature sensor, as well as backlight bulbs, occurs without any problems. After all the manipulations, you can install the lampshade in its place. The entire repair will not take more than 10 minutes. The price of a new lamp is about 1,500 rubles for the whole assembly with sensors, etc. For one element no more than 500 rubles.
Opel Astra 2012, 140 l. With. — styling
Cars for sale
Opel Astra, 2013
Opel Astra, 2013
Opel Astra, 2011
Opel Astra, 2013
see also
Comments 22
They shine well, but after a year they have become dark, that is, they either blink like a Christmas tree, or the light does not go out at all even when I set the alarm. Now I'm looking for original yellow lamps
Your red interior lighting is awesome...
Good evening gentlemen. Looks like I fit my mom's type of handy...
When replacing the light bulbs in the sun visors, it seems like I accidentally shorted the circuit...something is now not working...I already checked the fuse and everything is fine...I don’t even know what else to check.
Has anyone encountered such an oversight?
So I say “for some lampshades,” for example, for those like those for rear passengers: 08.856.50 GM 13 101 642. For my front lampshade, no modification is required. In addition, there are LED light bulbs like the ones you show in the first picture, I’m talking about them. And there are ones like here: www.ebay.com/itm/11132545…_trksid=p3984.m1423.l2649. There is no need to change their contacts, you just need to insert them correctly into the socket; polarity matters.
Some lampshades are made in such a way that a simple change in the LED contacts is necessary. Look how it looks on the original light bulbs, do the same and you will be happy.
Yes, they have been working for me for 2 years now and there are no problems.)))
sadness... Have you tried installing other diodes?
I’m lucky, but my rear lamps give interference and when turned off they shine slightly dimly
But I was only able to change one... When I install any second one, not a single light bulb in the cabin works)
tough... What's the reason? I never thought that this could happen...
They say that it’s useless to install without tricks (although everything works on your computer the same way), but because... I had 4 light bulbs lying around the house and decided to try it. At first, when I put everything in, I thought maybe the fuse had blown, I changed it, nothing. Then she stood there overnight, realized that she was wrong and everything started to burn, and then turned off again. In short, I left one in the main lighting and that's all
Opel Astra N. Replacing interior lampshades
To replace the front interior lamp, perform the following steps. You will need: TORX T 20 wrench, flat-blade screwdriver, pliers with thin jaws. 1. Disconnect the wire from the negative terminal of the battery.
2. Use a screwdriver to pry up the edge of the front decorative trim...
3….and remove the cover, overcoming the elastic resistance of its clamps.
4. Use a screwdriver to pry up the edge of the rear decorative trim...
5….and remove the cover, overcoming the elastic resistance of its clamps.
6. Use a screwdriver to pry off the edge of the volume sensor block of the anti-theft alarm system...
Note. Volume sensors for the anti-theft alarm system are installed upon request. If they are absent, a decorative plug is installed in place of the block.
7….and disconnect the block from the lamp housing, overcoming the elastic resistance of the block clamps.
8. Use a screwdriver to pry off the edge of the lamp diffuser...
9….and remove the diffuser, overcoming the elastic resistance of its clamps.
10. Remove the two bolts securing the lamp housing to the body.
11. Disconnect the connector of the flexible wire bus to the rear interior lamp.
12. Use a screwdriver to press out the two latches of the lamp housing...
13….and remove the lamp from its slot in the headliner.
14. Squeeze the clamps of the wiring harness block...
15….and disconnect the block from the lampshade.
16. Squeeze the antennae of the wiring harness block holder...
17....disconnect the block from the lamp housing and remove the lamp. 18. Install the front interior lamp and all removed parts in the reverse order of removal.
To replace the rear interior lamp, perform the following operations. You will need a screwdriver with a thin flat blade. 1. Disconnect the wire from the negative terminal of the battery.
2. Use a screwdriver to pry off the edge of the lampshade...
3….and remove the lamp from its slot in the headliner.
4. Remove the reflector, overcoming the elastic resistance of its holders.
How to remove the interior lamp yourself?
This question usually arises only for beginners who have recently started driving; car owners with extensive experience are usually familiar with all the tricks, unless, of course, they prefer a personal driver. However, before answering this question, let’s ask another – why is this necessary? After all, different situations require different actions. If you want to change a light bulb, the operation scheme will be standard; if the lens has burst and requires replacement, you will not have to remove the lampshade at all.
But let's return to the action plan and consider it step by step, and only then decide for what purposes this knowledge can be used. Before removing the interior lamp or changing a light bulb, which is much easier, you need to separate the diffuser from the base
. Usually it is held by spring clips or on fasteners-flags; in the first case, it is enough to pull the cap, in the second, you need to carefully pick it up with a “minus” screwdriver.
Sometimes the lampshade and diffuser are removed in one movement, since they form one whole.
And here in front of you is the lighting filling itself, you can change the light bulb. Determine the light source, depending on the type you will have to remove it from the socket by pressing the spring clip if it is an incandescent lamp, or disconnect the wires from the contacts of a fluorescent lamp. The second option involves first removing the casing that protects the power terminals by unscrewing a pair of screws. The lampshade itself is usually held in place by 2-4 screws, by unscrewing which you can easily remove the housing from the hole in the casing. Next, all that remains is to disconnect the wire connector.
Opel Astra N. Replacing interior lampshades
To replace the front interior lamp, perform the following steps. You will need: TORX T 20 wrench, flat-blade screwdriver, pliers with thin jaws. 1. Disconnect the wire from the negative terminal of the battery.
2. Use a screwdriver to pry up the edge of the front decorative trim...
3….and remove the cover, overcoming the elastic resistance of its clamps.
4. Use a screwdriver to pry up the edge of the rear decorative trim...
5….and remove the cover, overcoming the elastic resistance of its clamps.
6. Use a screwdriver to pry off the edge of the volume sensor block of the anti-theft alarm system...
Note. Volume sensors for the anti-theft alarm system are installed upon request. If they are absent, a decorative plug is installed in place of the block.
7….and disconnect the block from the lamp housing, overcoming the elastic resistance of the block clamps.
8. Use a screwdriver to pry off the edge of the lamp diffuser...
9….and remove the diffuser, overcoming the elastic resistance of its clamps.
10. Remove the two bolts securing the lamp housing to the body.
11. Disconnect the connector of the flexible wire bus to the rear interior lamp.
12. Use a screwdriver to press out the two latches of the lamp housing...
13….and remove the lamp from its slot in the headliner.
14. Squeeze the clamps of the wiring harness block...
15….and disconnect the block from the lampshade.
16. Squeeze the antennae of the wiring harness block holder...
17....disconnect the block from the lamp housing and remove the lamp. 18. Install the front interior lamp and all removed parts in the reverse order of removal.
To replace the rear interior lamp, perform the following operations. You will need a screwdriver with a thin flat blade. 1. Disconnect the wire from the negative terminal of the battery.
2. Use a screwdriver to pry off the edge of the lampshade...
3….and remove the lamp from its slot in the headliner.
4. Remove the reflector, overcoming the elastic resistance of its holders.
5. Use a screwdriver to press the clamp of the wire bus block...
6….disconnect the block and remove the lampshade. 7. Install the rear interior lamp in the reverse order of removal.
Connecting the interior lamp of the Priora
I would like to share with you my experience of installing rear passenger lighting. Installed due to lack of light from the driver's lamp. I often had to use a flashlight to find a bag or packages left in the back seat. I’ll make a reservation that the lampshade from the Priora Luxury is not too bright, so I’ll be finalizing it later and will definitely share my experience. But for now about the installation itself.
You need to purchase: - a lamp frame (130 rubles as of January 2017) - a lamp for illuminating the rear passengers (400-450 rubles) - 3 meters of wire (a thick wire is unnecessary here, since the power consumption of both lamps does not exceed 1A) - 3 pin connector (I didn’t find a native one for sale, so I used a computer 4 Pin (I’ll specify which one later) - 3 pin connector for connecting to the lampshade
And since I replaced the “standard” front lamp with a “luxury” one, I need two 3-pin blocks. I bought one in flames for 100 rubles (wow! for what?!). Then I looked in the bins and found a suitable 3 pin connector from the computer. This header connects to the motherboard and powers the Power LED on the case.
This block was under-equipped with a central contact, which is not surprising, because where it is used it is not needed. I took the missing block from a similar block, but 2 pin. Thus, I saved 100 rubles. But why did I write this? So you know where you can get the pads you need. If there are other options, write them in x, they will come in handy.
First, I cut off the connection block for the original lamp, because... I didn't find the answer to it.
How to replace interior lamps on a Chevrolet Lacetti
In the standard interior lamps of the Chevrolet Lacetti, conventional incandescent lamps C10W 12v and a lamp W7.5W 12v are installed from the factory. The light from them is not bright enough, as a result of which many owners of Lacetti sedans and hatchbacks install LED lamps in the lampshades instead of conventional ones. The light from them is brighter and whiter. In this manual, we will tell you how to replace lamps yourself and which lamps are best to choose.
Required Tools
Considering the fact that on some car models the ceiling lamps are secured with spring clips, removal will require a thin slotted screwdriver.
If you have regular plastic clips, just grab the lampshade with your fingers and pull it down.
Dismantling the interior lamps of a Ford Focus 2 is simple and only takes a few minutes. It is worth recalling that the fastening grooves are quite fragile, so the operation should be carried out carefully.
Which lamps to choose for lighting
If you decide to install conventional incandescent lamps, you can choose from a wide range of manufacturers' offers, from budget ones to lamps from philips, osram or koito.
For the central lamp
- Beacon C10W 12v price from 15 rub.
- Osram C10W 35mm O-6461 from 40 RUR pcs
- NARVA C10W 38mm N-17316 from 25 RUR pcs
- PHILIPS C10W 35mm P-12854 from 35 RUR pcs
- BOSCH C10W Pure Light 1987302228 from 35 RUR pcs
For the front lamp of individual lighting
In this lampshade, 12v W7.5W lamps from Toshiba or Korean companies are installed, which are not quite ordinary in power. The lamp base is exactly the same as the W5W, the only difference is in the power of the lamps. If you can’t find a W7.5W lamp, you can install W5W lamps or LED analogues.
- PHILIPS 12V/W5W 78143 from 30 rub. piece
- PHILIPS 12V/W5W LONGLIFE ECO VISION P-12961LLECOCP from 45 RUR pcs (extended resource)
- BOSCH 12V/W5W Pure Light 1987302206 from 30 RUR pcs
- OSRAM 12V/W5W 2825 from 25 RUR
LED analogues
- PHILIPS W5W white 5500K 127916000KB2 price from 400 rubles per set
- Beacon 12T10-W5SMD from 90 rubles per piece
- Beacon 12T10-W/6SMD from 95 RUR pcs
- Xenite 12V 5 bessok. 9 SMD diodes white 5000K +50% from 350 RUR set
Instead of conventional incandescent lamps, we recommend installing LED lamps in the individual lighting ceiling. Their service life is much longer than usual, they heat up less and shine brighter. When choosing diodes, pay attention to quality; it is better to overpay and get more expensive than to save and buy low-quality ones.
In this article you will learn how to replace lamps in a Renault Duster PTF. Detailed manual with photos.
Instructions for replacing lamps
Using a flat-head screwdriver, carefully pry and remove the diffuser from the central lampshade
We put it aside and take out the old lamp. A C10W lamp is installed here, we change it to a new incandescent or LED lamp.
When installing an LED lamp, you must pay attention to the polarity. Install the lamp; if it does not light, turn it over in its socket.
Install the diffuser until it clicks and enjoy the bright light.
Why remove the car's dome light?
In fact, there are many reasons for removing the ceiling light in a car; each person finds certain problems or they find it. The process of removing the lampshade is quite simple - it does not involve installing an LED strip in the headlight, which, by the way, can be useful to many car enthusiasts. So, there are the following reasons:
- Replace the lamp with a more powerful one or it has burned out.
- Replacement of the diffuser, which can be easily damaged.
- Checking all contacts in the car when installing the backlight.
- A simple replacement for another lamp if you want to install different lighting in your salon.
As a rule, people try to change such lamps only if they are too bright or dim. You can also install multi-colored lighting, it will always look beautiful. For example, you have a blue LED backlight installed, you can install such a lamp without any problems.
Replacing lamps in an individual lampshade
Also use a screwdriver to pry up and remove the diffuser.
Carefully remove the W7.5W lamp from the base (it’s most convenient to do this with tweezers or thin pliers)
Then we install a new incandescent or LED lamp.
When installing LED lamps, also pay attention to the polarity.
What kind of lamps are installed in the interior lamp?
The lamp itself consists of 3 sections - a central one and two side ones for the driver and passenger. C5W lamp (AC12-5-1) is installed in the center . On the sides there is a T4W lamp (A12-4-1) with a power of 4V.
Instead of conventional incandescent lamps, you can install LED lamps with exactly the same bases. In addition to the usual lamp, you can install universal interior lighting in the center; we will talk about it below.
There should be no problems with the c5w lamp; there are a lot of LED analogues, which one you choose depends only on you. If you suddenly find yourself in a professional car lighting store, it is better to buy lamps with 5730 diodes, they will shine brighter than others.
In addition to a regular lamp, you can install universal interior lighting in the central lamp. It comes in different sizes, so you can choose it according to the size of the lampshade. The kit includes 3 different adapters for lamps: c5w, w5w and t4w.
or simple lamps with c5w socket
LED lamps have polarity, so when installing, pay attention to the + contact. If the lamp does not work during installation, simply turn it over.
The side lighting lamps have a different polarity. When installing LED lamps, they will not work and you will not be able to turn the lamp over. Therefore, you will have to remove the lampshade and rearrange the wires directly on the lampshade itself. Swap + and – places. Everything should work.
When choosing t4w LED lamps, pay attention to their size; the width of the lamp may not fit into some lampshades.
Replacing lighting bulbs
Technical offers in Kazan such type of services as replacement of lighting lamps. All work is carried out by qualified auto electricians with extensive experience and appropriate approvals. During the replacement, the design features of automotive lighting equipment of a certain make and model of car are taken into account.
Relevance of service provision
Automotive lighting technology ensures safe and comfortable operation of the vehicle at night and in poor visibility conditions. In some cases, it is also used in anti-theft systems and security systems.
Without working lighting devices, operating passenger vehicles in the evening, at night, in foggy and/or rainy weather is difficult and unsafe for all road users. Plus, lighting technology is necessary to indicate the dimensions of the car and warn about intended maneuvers (turning, reversing). There are various malfunctions, electrical equipment may fail due to wear and tear of the wiring, but the main one is burnout of lamps.
Pinout of the interior lamp of the Priora
Interior lighting plays an important role in the dark: it creates comfortable conditions for the driver, makes it possible to better see the instruments, gear shift knob, etc. The interior lighting of the Priora does not always satisfy car enthusiasts. The article discusses types of lighting and provides instructions on how to install lampshades.
Features of interior lighting on VAZ cars
In the simplest configuration of the Lada Priora, there is only one interior lighting fixture. It is located on the ceiling at the front. They are equipped with C10W bulbs, which emit a soft but faint yellow light. Priora owners are not satisfied with such light, so they install an improved unit from the “Lux” version model.
Two lighting fixtures are fully equipped in Priora and Kalina. One is located near the driver. The second is located in the ceiling above the rear seats. Although an LED lamp is used, it shines no worse than light sources installed near the driver.
Instructions for installing new lampshades
To replace lighting fixtures in both the Priora and Kalina interiors, no special knowledge is required, since the procedure is simple.
To replace the light bulb, follow these steps:
- First you need to remove the protective cover. This can be done by prying it with a screwdriver from the mounting side and lightly pressing the clip. Now the cover can be easily removed from the ceiling.
- Next you need to disconnect the power wires.
- Having disconnected the old lamp, a new element is installed in its place.
- Assembly is carried out in reverse order.
Installing an additional “Lux” lighting fixture will require care and time. First of all, you need to purchase a new block, which will be placed above the rear sofa.
The installation procedure consists of the following steps:
- First, you need to apply markings to the ceiling, deciding on the place where the rear lamp will be located.
- Then, according to the markings, a hole is cut in the ceiling covering.
- Next, you need to stretch the power wire from the front light between the roof and the ceiling covering.
- At the next stage, the unit to be installed is connected.
- To ensure that the lid fits tightly to the ceiling, you can cut a frame from some kind of rubber seal.
In the Priora “Norma” configuration, it is recommended to change the front unit installed from the factory. Replacing it is easy, since the characteristics of the devices are the same.
The replacement scheme is similar to replacing a light bulb: a new element will be installed instead of the old light source. When installing LEDs, keep in mind that they differ in brightness color. For the rear light, it is better to make the LED backlight brighter, and put medium-brightness LEDs in front (the author of the video is Repair and Tuning).
After replacing the lighting unit of the Priora Norma configuration with a higher-quality luxury one, the driver becomes more comfortable in the cabin.
Simplicity of installation and low time costs make it possible to replace the standard lighting unit with a more powerful one, or equip the cabin with an additional light source. At the same time, you do not need to have in-depth knowledge of electrical engineering; even a novice driver can perform the replacement.
Price issue
The block (diode) costs 460 rubles. The front Lux package costs 535 rubles.
There are two options to improve lighting by replacing it with LED:
- Replacing a conventional lamp with an LED one. Price 50 rub.
- Replacing a lighting lamp with an LED module - 350 rubles.
Colored electrical diagrams VAZ 2170-71-72 LADA Priora
Engine Control DiagramCar Front Wiring Harness Connection DiagramDashboard Harness Connection
Car Rear Wiring Harness Connection
- Colored electrical diagrams VAZ 2170 LADA Priora
- Electronic engine control diagram Wiring harness connection diagrams for the front and rear of the car
- doors, trunk lid
Source: https://l2rv.ru/info/raspinovka-plafona-osveshhenija-salona-priora/